“Mom, can we make the cookies that look like they’re crawling?” My seven-year-old asked this last October while flipping through a stack of my old recipe clippings. She’d found a photo from 2015, edges yellowed, chocolate smudged in the corner. I’d completely forgotten about those spider cookies. But the look on her face—that mix of excitement and a little bit of “eww, gross”—was impossible to say no to. So we pulled out the butter, dug for the cocoa powder in the back of the pantry, and got to work recreating what turned out to be the easiest Halloween treat I’ve ever made. These spider cookies with chocolate cookie leg halves are honestly more fun to make than they have any right to be.
The thing about Halloween baking is that it often looks complicated. You see those elaborate cakes or those cookies with perfect royal icing spiders and think, “Nope, not happening.” But these? They come together with a basic chocolate cookie dough, some store-bought cookies for the legs, and a few candy eyes. That’s it. No piping bags, no food coloring, no stress. The first batch my daughter and I made looked a little lopsided—some legs were longer than others, a few eyes ended up crooked. And you know what? Those were the ones we fought over. Something about the imperfection made them feel more like real little critters, you know?
I’ve made these for Halloween parties, classroom treats, and even a spooky movie night where we watched Hocus Pocus for the hundredth time. They always disappear first. And honestly, that’s my favorite part—watching someone bite into one and realizing it’s just a really good chocolate cookie with a fun twist. No tricks, just treats.
Why You’ll Love This Recipe
Let me tell you why these spider cookies have become my go-to Halloween recipe year after year. I’ve tested this dough more times than I can count, tweaking the flour ratio and the chill time until the cookies held their shape perfectly without spreading into flat blobs. Because nothing ruins a spider cookie like legs that won’t stay attached, right?
- Quick & Easy: From start to finish, you’re looking at about 30 minutes of active work. The dough comes together in one bowl, and the assembly is so simple a kid can do it—which is exactly the point.
- Simple Ingredients: You probably have most of these in your kitchen right now. Butter, sugar, eggs, flour, cocoa powder. The only “special” items are the chocolate wafer cookies for the legs and candy eyes, both of which you can find at any grocery store.
- Perfect for Halloween Parties: Whether you’re hosting a costume party, sending treats to school, or just want something fun for a spooky movie night, these cookies fit the bill. They’re also fantastic for game day gatherings if you want to lean into a creepy-crawly theme.
- Crowd-Pleaser: Kids go wild for them. Adults pretend to be grossed out while reaching for a second one. I’ve seen grown men squeal (in a good way) over these little chocolate spiders.
- Unbelievably Delicious: Here’s the thing—beneath the fun exterior, these are genuinely fantastic chocolate cookies. They’re soft in the middle, slightly crisp at the edges, and deeply chocolatey. The cookie legs add a satisfying crunch that contrasts beautifully with the tender cookie base.
What makes these different from other spider cookies you might see online is the method. Most recipes have you press the legs into the dough before baking, which often results in them sliding off or burning. I figured out that inserting the legs after baking, while the cookies are still warm, creates a much stronger bond. It’s a small tweak, but it makes a world of difference. Plus, using chocolate cookie halves instead of pretzel sticks means the legs look thicker and more spider-like, and the flavor stays consistent throughout.
What Ingredients You Will Need
This recipe uses simple, everyday ingredients to create something that looks way more impressive than it actually is. The magic is all in the assembly, I promise.
- Unsalted butter, softened (1 cup / 226g) – Make sure it’s truly softened, not melted. You want it at room temperature so it creams properly with the sugar. I usually leave mine out for about an hour before starting.
- Granulated sugar (1 cup / 200g) – Regular white sugar works perfectly here. It gives the cookies a nice structure and helps them spread just the right amount.
- Large egg (1, room temperature) – Cold eggs can seize up the butter mixture, so let yours sit out for a bit alongside the butter.
- Vanilla extract (1 teaspoon) – Pure vanilla is best, but imitation works in a pinch. It rounds out the chocolate flavor beautifully.
- All-purpose flour (1 ¾ cups / 220g) – I use unbleached AP flour for these. Spoon and level it into your measuring cup rather than scooping directly, which packs the flour and leads to dry cookies.
- Unsweetened cocoa powder (½ cup / 50g) – I really like Hershey’s Special Dark for these, but any unsweetened cocoa works. The darker the cocoa, the more dramatic the spider look.
- Baking soda (1 teaspoon) – Helps the cookies spread and gives them a slightly chewy texture.
- Salt (½ teaspoon) – Don’t skip this. Salt makes chocolate taste more chocolatey.
- Chocolate wafer cookies (about 40 cookies, such as Nabisco Famous Chocolate Wafers) – These are the legs. You’ll break each cookie in half to create two leg pieces. If you can’t find chocolate wafers, chocolate graham crackers work as a substitute, though they’re a bit thicker.
- Candy eyes (about 60 small or medium eyes) – You can find these at craft stores or in the baking aisle around Halloween. I like the ones that are mostly white with a small black pupil.
- Chocolate frosting or melted chocolate (¼ cup / about 60ml) – This acts as the “glue” for the eyes. Store-bought frosting is fine, or you can melt a few chocolate chips with a teaspoon of coconut oil.
A quick note on the cookie legs: I’ve tried using pretzel sticks, and while they look fine, they don’t match the chocolate flavor. The chocolate wafer cookies keep everything cohesive. Plus, they’re easier to break into consistent halves than you’d think—just press down firmly at the center of each cookie with your thumb.
Equipment Needed
You don’t need any fancy equipment for these spider cookies, which is part of why I love them. Here’s what you’ll need:
- Large mixing bowl – For creaming the butter and sugar and mixing the dough.
- Electric hand mixer or stand mixer – You can do this by hand with a wooden spoon, but it takes some elbow grease. A mixer makes it effortless.
- Measuring cups and spoons – For accurate ingredient measurements. Trust me, baking is a science here.
- Baking sheets – Two large sheets work best so you can rotate them in the oven.
- Parchment paper or silicone baking mats – Parchment is my preference because the cookies slide off easily and cleanup is a breeze.
- Cooling rack – Essential for letting the cookies cool properly before adding the legs and eyes.
- Small offset spatula or butter knife – For spreading the chocolate frosting on the cookies.
- Tweezers – This sounds silly, but tweezers make placing the candy eyes so much easier, especially if you’re doing these with kids. Steady hands work too!
If you don’t have a cooling rack, you can use a clean kitchen towel laid flat on the counter. Just make sure the cookies have space between them so they cool evenly.
Preparation Method
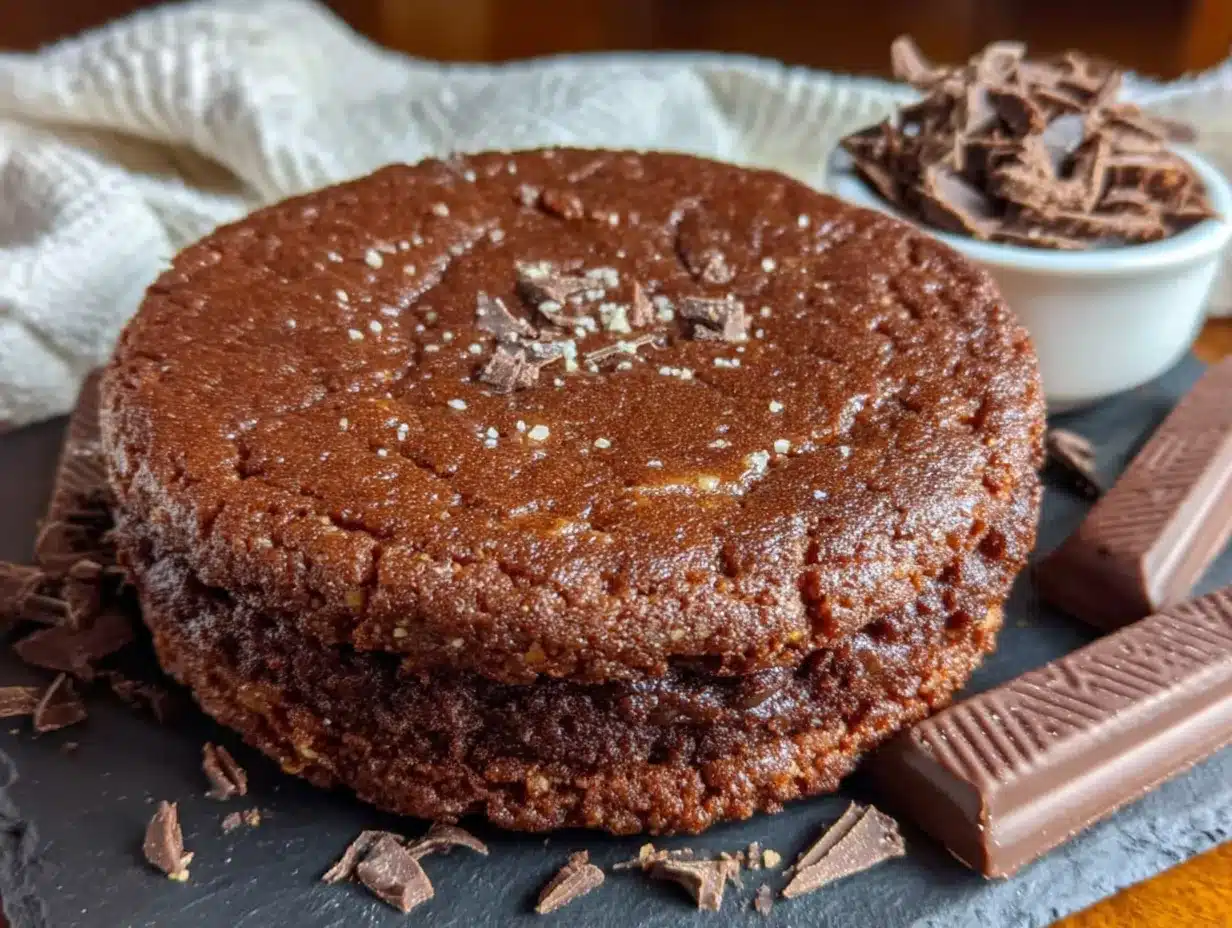
Alright, let’s make some spiders! This process is broken down into simple steps so you can follow along without any confusion.
- Cream the butter and sugar. In your large mixing bowl, beat the softened butter and granulated sugar together until light and fluffy, about 2-3 minutes with a hand mixer on medium speed. You’ll see the mixture turn pale and increase in volume. Scrape down the sides of the bowl once during this process.
- Add the egg and vanilla. Crack in the room-temperature egg and add the vanilla extract. Beat on medium speed until fully combined, about 30 seconds. The mixture might look slightly curdled at this point—that’s totally normal, don’t worry.
- Mix the dry ingredients separately. In a small bowl, whisk together the all-purpose flour, unsweetened cocoa powder, baking soda, and salt. This ensures the leavening agents are evenly distributed throughout the flour.
- Combine wet and dry. Gradually add the dry ingredients to the wet mixture, mixing on low speed or stirring with a wooden spoon. Mix just until no streaks of flour remain. Overmixing at this stage will make the cookies tough. The dough will be quite soft and a little sticky—that’s what we want.
- Chill the dough. Cover the bowl with plastic wrap and refrigerate for at least 30 minutes. This step is crucial. Chilling prevents the cookies from spreading too much in the oven, which keeps them round and thick enough to hold the legs. I’ve skipped this step before, and the cookies turned into flat, sad disks. Don’t be like me.
- Preheat the oven. About 10 minutes before you’re ready to bake, preheat your oven to 350°F (175°C). Line two baking sheets with parchment paper.
- Scoop and shape the dough. Using a 1.5-tablespoon cookie scoop (about the size of a walnut), scoop the chilled dough and roll it into smooth balls. Place them on the prepared baking sheets about 2 inches apart. You should get about 24 cookies from this batch.
- Bake the cookies. Bake one sheet at a time for 8-10 minutes. The cookies should look puffed and slightly cracked on top, with the edges just set. They’ll look underdone in the center—that’s perfect. Overbaking leads to dry cookies that are hard to work with.
- Cool the cookies. Let the cookies rest on the baking sheet for 5 minutes. This allows them to firm up slightly so they don’t fall apart when you move them. Then transfer them to a cooling rack to cool completely, about 20 minutes.
- Break the cookie legs. While the cookies cool, prepare the legs. Take each chocolate wafer cookie and press firmly at the center with your thumb. The cookie should snap cleanly into two halves. You’ll need 8 halves per spider cookie—so 4 whole wafers per cookie. For 24 cookies, that’s 96 wafer halves, or 48 whole wafers. Break a few extra just in case some crumble.
- Attach the legs. Once the cookies are completely cool, flip them over so the flat bottom is facing up. This gives you a stable surface for attaching the legs. Take a small amount of chocolate frosting or melted chocolate and dab it onto the bottom of the cookie where you want each leg to go. Press two wafer halves into each side of the cookie, angling them slightly outward to look like spider legs. You want four legs on each side, spaced evenly. Hold each leg in place for about 10 seconds to let the frosting set.
- Add the eyes. Flip the spider cookie right-side up. Using a tiny dab of chocolate frosting, attach two candy eyes to the front of the cookie, close together. I like to place them just above the center line of the cookie. Use tweezers for precision if you have them.
- Let everything set. Place the finished spider cookies on a tray and let them sit for about 15 minutes so the frosting hardens. This keeps the legs and eyes from falling off when you move them.
A sensory cue to watch for: when you pull the cookies out of the oven, they should smell deeply chocolatey and look slightly matte on top. If they’re shiny, they might need another minute. The edges should be firm but the centers should still feel soft when you gently press them.
Cooking Tips & Techniques
Over the years, I’ve made every mistake you can imagine with these cookies. Here’s what I’ve learned so you don’t have to repeat my failures.
Don’t skip the chill time. I know, I know—you’re impatient, I get it. But warm dough spreads like crazy. I once tried to rush these for a last-minute Halloween party, and the cookies turned into amorphous blobs that looked more like chocolate puddles than spiders. The legs wouldn’t stay on, and the whole thing was a mess. Chilling for 30 minutes is non-negotiable.
Use a cookie scoop for uniform size. When all your cookies are the same size, they bake evenly. This matters because you want each spider to look consistent. If some cookies are smaller, they’ll overbake and become too brittle to hold the legs. If some are larger, they’ll be too soft and the legs will sink in.
Break the wafer cookies carefully. Not all chocolate wafers break the same way. Some snap cleanly, others crumble. If you get a crumbly break, just use that piece for a different cookie or snack on it yourself (chef’s privilege). The key is to press firmly and quickly at the center—hesitation leads to jagged breaks.
Work in an assembly line. Once the cookies are cool, set up a little assembly station. Have your broken wafer halves in one bowl, your candy eyes in another, and your chocolate frosting ready. This makes the process much faster and more fun, especially if you’re making these with kids.
Store them properly. These cookies are best enjoyed within 2 days of making them. The wafer legs can soften over time, absorbing moisture from the cookie. If you’re making them ahead, store the baked cookies (without legs) in an airtight container, then assemble them the day you plan to serve them. This keeps the legs crunchy.
Variations & Adaptations
One of the best things about this recipe is how easy it is to customize. Here are some variations I’ve tried and loved.
Gluten-Free Version: Swap the all-purpose flour with a 1:1 gluten-free baking flour blend. I’ve used Bob’s Red Mill with great results. Just make sure your chocolate wafer cookies are also gluten-free—some brands offer them, or you can use gluten-free chocolate graham crackers instead.
Peanut Butter Spider Cookies: Replace ¼ cup of the butter with creamy peanut butter. The peanut butter adds a savory richness that pairs beautifully with the chocolate. These are always a hit at parties. If you love peanut butter and chocolate together, you might also enjoy these peanut butter football rice krispie treats for another fun themed treat.
White Chocolate Spiders: Instead of using chocolate wafer cookies for the legs, use white chocolate-covered pretzel sticks. The contrast of white legs against the dark chocolate cookie body is striking and looks almost like a ghost spider. You’ll need to adjust the frosting to white chocolate or vanilla frosting to match.
Spicy Chocolate Spiders: Add ½ teaspoon of cayenne pepper and ¼ teaspoon of cinnamon to the dry ingredients. The subtle heat adds an unexpected kick that adults love. I made these for a Halloween cocktail party once, and they were gone within minutes.
Vegan Adaptation: Use vegan butter and a flax egg (1 tablespoon ground flaxseed mixed with 3 tablespoons water, let sit for 5 minutes) instead of the regular egg. Most chocolate wafer cookies are accidentally vegan, but check the label. Use dairy-free chocolate frosting for the glue.
Serving & Storage Suggestions
These spider cookies are best served at room temperature, arranged on a platter where everyone can see their creepy little faces. I like to place them on a black or orange platter for Halloween—the contrast really makes the chocolate pop.
For a Halloween party, arrange them on a tray with some candy corn bark and other spooky treats. They also look fantastic sitting on a cake stand at different heights, almost like they’re climbing over each other. My daughter likes to arrange them in a circle with their legs touching, creating a “spider circle” that’s both adorable and slightly unsettling.
For storage, place the assembled cookies in a single layer in an airtight container. Don’t stack them—the legs will break off. If you need to stack them, place a layer of parchment paper between each layer. They’ll keep at room temperature for up to 3 days, though the legs will start to soften after day one.
You can freeze the unassembled cookies for up to 3 months. Bake and cool the cookies completely, then freeze them in a single layer on a baking sheet. Once frozen, transfer them to a freezer bag. When you’re ready to serve, thaw them at room temperature, then attach the legs and eyes fresh. The legs stay much crunchier this way.
For reheating, these cookies are actually delicious slightly warm. Pop one in the microwave for 10 seconds, and the chocolate gets all melty and gooey. Just be careful—the legs might get a little soft from the heat.
Nutritional Information & Benefits
Let’s be real—these are a treat, not a health food. But here’s the approximate nutritional breakdown per spider cookie (based on 24 cookies):
- Calories: 185
- Total Fat: 9g
- Saturated Fat: 5g
- Carbohydrates: 25g
- Sugar: 14g
- Protein: 2g
- Fiber: 1g
The cocoa powder in these cookies is actually a surprising source of antioxidants. Dark chocolate in any form contains flavonoids that can help reduce inflammation. Plus, the butter provides a small amount of vitamin A. Look, I’m not saying these are good for you—but they’re not the worst thing you could eat, either.
These cookies are vegetarian but not vegan (unless you make the adaptations above). They contain gluten, dairy, and eggs, so they’re not suitable for those with allergies to those ingredients. The candy eyes are typically made from sugar and cornstarch, but check the packaging if you have concerns about specific allergens.
From a wellness perspective, I think it’s important to enjoy treats like this in moderation. Halloween comes once a year. Having a couple of these with a glass of milk or a warm cup of coffee is a lovely way to celebrate the season without going overboard.
Conclusion
These spider cookies with chocolate cookie leg halves are honestly one of my favorite Halloween traditions now. They’re not fancy, they’re not complicated, and they don’t require any special skills. But they bring so much joy. Every time I make them, I watch people’s faces light up—kids giggle, adults smile, and everyone reaches for one before I can even arrange them on the platter.
What I love most is how adaptable they are. You can make them spooky or cute, simple or dressed up. You can involve the kids or whip them up solo while watching a horror movie. They’re forgiving, they’re delicious, and they’re just plain fun. If you’ve never made themed cookies before, these are the perfect place to start.
I’d love to hear how yours turn out! Did you add any fun variations? Did your kids help with the assembly? Drop a comment below and let me know. And if you’re looking for more easy Halloween treats, check out this no-bake pumpkin pie with gingersnap crust for another simple seasonal dessert. Happy baking, and may your spiders be just the right amount of creepy!
Frequently Asked Questions
Can I make these spider cookies ahead of time?
Yes! Bake the cookies up to 3 days in advance and store them in an airtight container. Assemble the legs and eyes on the day you plan to serve them for the best texture. The wafer legs stay much crunchier when added fresh.
What can I use instead of chocolate wafer cookies for the legs?
Chocolate graham crackers work well, though they’re thicker and might look slightly different. You can also use pretzel sticks for a salty-sweet contrast, or even thin chocolate-covered cookie sticks if you can find them.
My cookies spread too much in the oven. What went wrong?
This usually happens for one of two reasons: the dough wasn’t chilled long enough, or the butter was too soft when you started. Make sure your butter is softened but not melted, and don’t skip the 30-minute chill time. If your kitchen is warm, chill the dough for a full hour.
How do I keep the candy eyes from falling off?
Use a generous dab of chocolate frosting or melted chocolate as glue. Let the cookies sit for at least 15 minutes after adding the eyes so the frosting hardens. If you’re in a hurry, pop them in the fridge for 5 minutes to speed up the setting process.
Can I freeze these spider cookies?
You can freeze the baked cookies (without legs or eyes) for up to 3 months. Thaw them at room temperature before assembling. I don’t recommend freezing the fully assembled cookies because the legs and eyes can fall off during thawing.
Pin This Recipe!

Easy Spider Cookies with Chocolate Leg Halves

These spider cookies with chocolate cookie leg halves are a fun and easy Halloween treat. Made with a basic chocolate cookie dough, store-bought cookies for legs, and candy eyes, they come together quickly and are perfect for parties or spooky movie nights.
- Prep Time: 30 minutes
- Cook Time: 10 minutes
- Total Time: 1 hour 15 minutes (includes chilling and cooling)
- Yield: 24 servings 1x
- Category: Dessert
- Cuisine: American
Ingredients
- 1 cup (226g) unsalted butter, softened
- 1 cup (200g) granulated sugar
- 1 large egg, room temperature
- 1 teaspoon vanilla extract
- 1 ¾ cups (220g) all-purpose flour
- ½ cup (50g) unsweetened cocoa powder
- 1 teaspoon baking soda
- ½ teaspoon salt
- About 40 chocolate wafer cookies (e.g., Nabisco Famous Chocolate Wafers), broken in half
- About 60 small or medium candy eyes
- ¼ cup (about 60ml) chocolate frosting or melted chocolate
Instructions
- Cream the butter and sugar: In a large mixing bowl, beat the softened butter and granulated sugar together until light and fluffy, about 2-3 minutes with a hand mixer on medium speed. Scrape down the sides once.
- Add the egg and vanilla: Crack in the room-temperature egg and add the vanilla extract. Beat on medium speed until fully combined, about 30 seconds.
- Mix the dry ingredients separately: In a small bowl, whisk together the all-purpose flour, unsweetened cocoa powder, baking soda, and salt.
- Combine wet and dry: Gradually add the dry ingredients to the wet mixture, mixing on low speed or stirring with a wooden spoon until just combined. Do not overmix.
- Chill the dough: Cover the bowl with plastic wrap and refrigerate for at least 30 minutes.
- Preheat the oven: About 10 minutes before baking, preheat oven to 350°F (175°C). Line two baking sheets with parchment paper.
- Scoop and shape the dough: Using a 1.5-tablespoon cookie scoop, scoop the chilled dough and roll into smooth balls. Place on prepared baking sheets about 2 inches apart. You should get about 24 cookies.
- Bake the cookies: Bake one sheet at a time for 8-10 minutes. Cookies should look puffed and slightly cracked on top, with edges just set.
- Cool the cookies: Let cookies rest on the baking sheet for 5 minutes, then transfer to a cooling rack to cool completely, about 20 minutes.
- Break the cookie legs: While cookies cool, press firmly at the center of each chocolate wafer cookie with your thumb to snap into two halves. You need 8 halves per spider (4 whole wafers per cookie).
- Attach the legs: Once cookies are completely cool, flip them over. Dab a small amount of chocolate frosting or melted chocolate onto the bottom where each leg will go. Press two wafer halves into each side, angling slightly outward. Hold each leg in place for about 10 seconds.
- Add the eyes: Flip the spider cookie right-side up. Using a tiny dab of chocolate frosting, attach two candy eyes to the front, close together, just above the center line.
- Let everything set: Place finished spider cookies on a tray and let sit for about 15 minutes so the frosting hardens.
Notes
Don’t skip the chill time—it prevents spreading. Insert legs after baking while cookies are still warm for a stronger bond. Store assembled cookies in a single layer in an airtight container for up to 3 days. For best texture, assemble legs and eyes on the day of serving.
Nutrition
- Serving Size: 1 spider cookie
- Calories: 185
- Sugar: 14
- Sodium: 120
- Fat: 9
- Saturated Fat: 5
- Carbohydrates: 25
- Fiber: 1
- Protein: 2
Keywords: spider cookies, Halloween cookies, chocolate cookies, easy Halloween treat, spider cookies with chocolate legs


