The PTA bake sale was in twelve hours and I had completely forgotten. Not just a little forgotten — the kind of forgotten where you’re scrolling through your phone at 10 PM and suddenly sit bolt upright in bed because you remember that you signed up to bring a dessert for forty people. Everyone else would be bringing those gorgeous layered cakes with perfect buttercream rosettes, or those fancy French pastries that look like they belong in a bakery window. I had a half-empty jar of peanut butter, a package of Oreos that were probably a little stale, and some cream cheese that was about to expire. Honestly, I almost just gave up and brought store-bought cookies. But then I remembered this no-bake peanut butter Oreo pie I’d thrown together for my kids’ birthday party last year, and I figured — what’s the worst that could happen?
Let me tell you, I was in full panic mode. I mean, I was that person digging through the pantry at 10:15 PM, muttering to myself, with flour dust on my pajama pants. My husband came downstairs and asked if I was okay. I just grunted and kept mixing. The kitchen was a disaster — peanut butter on the counter, Oreo crumbs everywhere, and I may have accidentally knocked over the salt shaker into the sink. But here’s the thing about this pie: it doesn’t care about your messy kitchen or your lack of planning. It just works. I threw it together, stuck it in the fridge, and went to bed hoping for the best.
The next day, I walked into that bake sale feeling like I was bringing a peanut butter sandwich to a Michelin-starred dinner. But you know that feeling when something completely unexpected happens? That pie was gone in twenty minutes. People were asking for the recipe. Someone’s grandma said it reminded her of a pie her mother used to make. And I just stood there, sheepish and grinning, thinking about how I’d nearly given up. That’s the thing about this no-bake peanut butter Oreo pie — it doesn’t try to be fancy. It just tastes like the best kind of childhood memory. And honestly, that’s why I keep making it, bake sale or not.
Why You’ll Love This Recipe
This kid-approved no-bake peanut butter Oreo pie is the kind of dessert that makes everyone happy without making you crazy. It’s the recipe you’ll turn to again and again, whether you’re feeding your own family or bringing something to a school event. Here’s why it’s become my go-to:
- Quick & Easy: This comes together in about 15 minutes of active time. No oven, no complicated steps, no waiting for butter to soften. You just mix, press, and chill.
- Simple Ingredients: You probably have most of these in your kitchen right now. Peanut butter, cream cheese, powdered sugar, Oreos, and a little butter. That’s it. No fancy grocery trips required.
- Perfect for Family Meals: This pie is a lifesaver for busy weeknights, birthday parties, potlucks, and bake sales. It pleases kids and adults alike, and it travels well too.
- Crowd-Pleaser: I’ve made this for picky eaters, peanut butter fanatics, and even people who claim they don’t like sweets. It always gets rave reviews. The combination of creamy peanut butter filling and crunchy Oreo crust is just irresistible.
- Unbelievably Delicious: The texture is what really sets this apart. It’s rich and creamy, with that perfect crunch from the Oreo crust. It’s comfort food at its finest, and it feels special without being fussy.
What makes this recipe different from all the other no-bake pies out there? It’s the balance. The peanut butter filling is perfectly sweetened without being cloying, and the Oreo crust adds just the right amount of chocolate and crunch. I’ve tried versions with graham cracker crusts and chocolate pudding fillings, but nothing hits quite like this combination. It’s the kind of dessert that makes you close your eyes after the first bite. It’s comfort food reimagined — simple, fast, but with the same soul-soothing satisfaction that makes you feel like everything is okay.
What Ingredients You Will Need
This recipe uses simple, pantry-friendly ingredients to deliver that rich, creamy, and crunchy texture everyone loves. The beauty of this no-bake peanut butter Oreo pie is that it doesn’t require any special or hard-to-find items. Here’s what you’ll need:
For the Oreo Crust
- 24 Oreo cookies (regular, not double-stuffed) — You’ll crush these into fine crumbs. The filling in the cookies helps bind the crust together, so don’t scrape it out!
- 5 tablespoons unsalted butter, melted — This helps the crust hold its shape. I prefer unsalted to control the salt level, but salted butter works in a pinch.
For the Peanut Butter Filling
- 8 ounces cream cheese, softened — Full-fat cream cheese gives the best texture and flavor. Let it sit on the counter for about 30 minutes before you start so it blends smoothly.
- 1 cup creamy peanut butter — I recommend Jif or Skippy for the best texture. Natural peanut butter that separates can make the filling grainy, so stick with the processed stuff here. Trust me on this one.
- 1 cup powdered sugar — This sweetens the filling and helps it set up nicely. Sift it if you have lumps, but honestly, I rarely bother and it turns out fine.
- 1 teaspoon vanilla extract — Pure vanilla is best, but imitation works too. It just adds that warm, cozy flavor.
- 1 ½ cups heavy whipping cream — You’ll whip this into stiff peaks and fold it into the peanut butter mixture. This is what makes the filling light and mousse-like instead of dense and heavy.
For the Topping (Optional but Recommended)
- ¼ cup hot fudge sauce — Store-bought is fine. I like Hershey’s or Ghirardelli for a rich chocolate flavor.
- ¼ cup crushed Oreos — For that extra crunch on top.
- Whipped cream — For serving. Homemade is lovely, but canned works too.
Ingredient Tips: For the cream cheese, make sure it’s truly softened — cold cream cheese will leave lumps in your filling. If you’re in a hurry, you can microwave it for about 10-15 seconds, but watch it carefully. For the peanut butter, don’t use the natural kind that separates. I learned this the hard way when I made a grainy, oily pie that nobody wanted to eat. The processed stuff really does work better here because it has stabilizers that help the filling set properly.
Equipment Needed
You don’t need a lot of fancy equipment for this recipe, which is part of what makes it so great. Here’s what you’ll need:
- 9-inch pie dish — A standard glass or ceramic pie plate works perfectly. A metal one will work too, but glass helps you see when the crust is set.
- Food processor or zip-top bag and rolling pin — For crushing the Oreos. The food processor gives you a finer, more even crumb, but the bag-and-rolling-pin method works in a pinch. I’ve used both and honestly, the bag method is more satisfying if you need to vent some frustration.
- Electric hand mixer or stand mixer — For whipping the cream and beating the filling. A hand mixer is fine, but a stand mixer makes it even easier. You can do it by hand with a whisk, but your arm will get tired.
- Large mixing bowls — You’ll need at least two: one for the crust mixture and one for the filling.
- Rubber spatula — For folding the whipped cream into the peanut butter mixture. A spatula helps you get every last bit of that delicious filling into the pie dish.
- Measuring cups and spoons — For accuracy. I’m usually a “guesstimate” kind of cook, but for this pie, precise measurements matter.
Budget-Friendly Tip: If you don’t have a food processor, don’t worry. The zip-top bag method works great. Just put the Oreos in a sturdy bag, seal it, and go to town with a rolling pin or even a heavy skillet. It’s a great way to let out some stress, honestly.
Preparation Method
Let’s make this no-bake peanut butter Oreo pie. I’ll walk you through every step so you can’t mess it up. Trust me, if I can make this at 10 PM in a panic, you can make it anytime.
- Make the Oreo crust. Place the 24 Oreo cookies in a food processor and pulse until they become fine crumbs. If you’re using the bag method, put them in a zip-top bag and crush them with a rolling pin until they’re as fine as you can get them. You want a uniform crumb, not big chunks. Transfer the crumbs to a medium bowl. Pour the melted butter over the crumbs and stir with a fork until everything is evenly moistened. It should look like wet sand.
- Press the crust into the pie dish. Dump the crumb mixture into your 9-inch pie dish. Use the bottom of a measuring cup or a glass to press the crumbs firmly and evenly into the bottom and up the sides of the dish. Don’t skimp on the pressing — a tight crust holds together better. Pop it in the fridge while you make the filling. This gives it time to set.
- Whip the cream. In a large mixing bowl, pour the 1 ½ cups of heavy whipping cream. Using an electric hand mixer or stand mixer with the whisk attachment, beat the cream on medium-high speed until stiff peaks form. This usually takes about 3-4 minutes. You’ll know it’s ready when you lift the beaters and the cream stands up in peaks without drooping. Be careful not to over-whip, or you’ll end up with butter. Set this aside in the fridge.
- Make the peanut butter filling. In another large bowl, beat the softened cream cheese with an electric mixer until it’s smooth and creamy, about 1 minute. Add the peanut butter and beat until combined. It might look a little thick at this point — that’s normal. Add the powdered sugar and vanilla extract and beat until everything is smooth and fluffy, about 2 minutes. Scrape down the sides of the bowl with a spatula to make sure everything is incorporated.
- Fold in the whipped cream. Take the whipped cream out of the fridge. Add about one-third of it to the peanut butter mixture and gently fold it in with a rubber spatula. This lightens the mixture and makes it easier to fold in the rest. Then add the remaining whipped cream and fold gently until no white streaks remain. Be patient here — you want to keep the air in the whipped cream so the filling stays light and mousse-like.
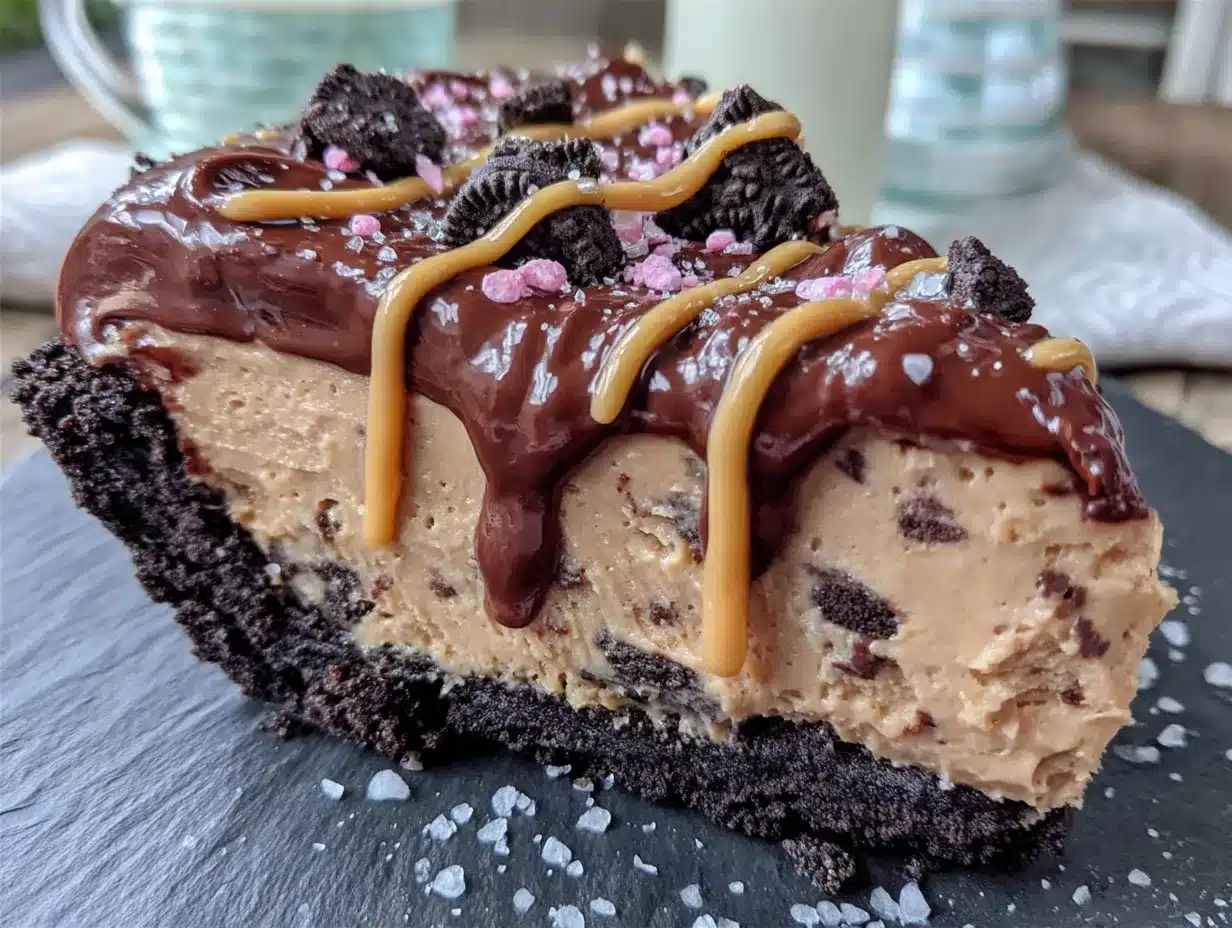
- Assemble the pie. Take the crust out of the fridge. Spoon the peanut butter filling into the crust and spread it evenly with a spatula. Smooth the top as best you can. If you’re adding the hot fudge topping, drizzle it over the top now and use a knife to swirl it gently. Sprinkle the crushed Oreos on top if you’re using them.
- Chill the pie. Cover the pie loosely with plastic wrap or aluminum foil and refrigerate for at least 4 hours, but overnight is better. This gives the filling time to set up properly. The longer it chills, the cleaner your slices will be. I know it’s hard to wait, but trust me — it’s worth it.
- Serve. When you’re ready to serve, take the pie out of the fridge. Let it sit at room temperature for about 5-10 minutes to soften slightly, which makes it easier to slice. Use a sharp knife dipped in hot water and wiped dry for clean cuts. Serve with a dollop of whipped cream if you like.
Sensory Cues: When you’re folding the whipped cream into the peanut butter mixture, you’ll notice the color lighten from a dark tan to a pale, creamy beige. The texture will go from dense and sticky to light and airy. When you press the crust, it should feel compact and slightly greasy from the butter. The finished pie should be firm to the touch when you press the center, but still give slightly — like a firm pillow.
Cooking Tips & Techniques
I’ve made this no-bake peanut butter Oreo pie more times than I can count, and I’ve learned a few things along the way. Here are my best tips to make sure yours turns out perfect every time:
Don’t skip softening the cream cheese. I know, I know — you’re in a hurry. But cold cream cheese will leave lumps in your filling that no amount of beating will fix. Let it sit on the counter for 30 minutes, or microwave it in 10-second bursts until it’s soft to the touch. This one step makes a huge difference.
Use processed peanut butter. I mentioned this before, but it’s worth repeating. Natural peanut butter that separates will make your filling grainy and oily. The processed stuff with added sugar and stabilizers creates a smooth, creamy filling that sets up perfectly. This is not the time to be a health food snob. Save the natural stuff for your morning toast.
Whip the cream to stiff peaks. Under-whipped cream will make your filling runny and it won’t set properly. You want the cream to be thick enough that it holds its shape when you lift the beaters. If you’re not sure, stop and check frequently after the 3-minute mark. Over-whipped cream turns into butter, so don’t walk away from it.
Fold gently. When you’re combining the whipped cream with the peanut butter mixture, use a gentle folding motion. Don’t stir or beat it. You want to keep as much air in the cream as possible so the filling stays light and fluffy. I usually do about 15-20 folds, scraping the bottom and sides of the bowl as I go.
Chill overnight for best results. Four hours is the minimum, but overnight is better. The filling needs time to firm up so you can cut clean slices. I’ve made the mistake of rushing this step and ended up with a messy, spoonable pie that looked more like pudding. Still delicious, but not as pretty.
One mistake I made: The first time I made this, I tried to use reduced-fat cream cheese to save a few calories. Big mistake. The filling never set properly and it had a weird, rubbery texture. Full-fat cream cheese is non-negotiable here. If you want to lighten it up, use less of the pie — don’t mess with the ingredients.
Variations & Adaptations
This recipe is super versatile, and I’ve tried quite a few variations over the years. Here are some of my favorites:
Chocolate Peanut Butter Swirl Pie: Before chilling, drizzle about ¼ cup of melted chocolate or hot fudge over the filling and use a knife to swirl it through. It creates beautiful marbled slices and adds an extra layer of chocolate flavor. My kids go crazy for this version.
Gluten-Free Version: Use gluten-free chocolate sandwich cookies for the crust. Most brands work well, just make sure they’re certified gluten-free if that’s a concern. The filling is naturally gluten-free, so you just need to swap the crust.
Dairy-Free Adaptation: Use dairy-free cream cheese (like Kite Hill or Tofutti) and coconut cream instead of heavy whipping cream. Whip the coconut cream until stiff, just like regular cream. The texture will be slightly different — a little less firm — but it’s still delicious. I’ve made this for a friend with dairy allergies and it was a hit.
Extra Crunchy Version: Add ½ cup of chopped peanuts to the filling before folding in the whipped cream. It adds a nice crunch and makes the pie even more satisfying. I do this when I want something a little more substantial.
Mini Pie Version: Use a muffin tin lined with cupcake liners to make individual mini pies. Press the crust into the liners, fill with the peanut butter mixture, and chill. These are perfect for parties or lunchbox surprises. Just reduce the chilling time to about 2 hours since they’re smaller.
Personal Variation: One time, I added a layer of sliced bananas on top of the crust before adding the filling. It gave the pie a banana cream pie vibe that was absolutely amazing. If you try this, eat it within 24 hours because the bananas will start to brown. Trust me, it won’t last that long anyway.
Serving & Storage Suggestions
This no-bake peanut butter Oreo pie is best served cold, straight from the fridge. Here’s how to make the most of it:
Serving Temperature: Take the pie out of the fridge about 5-10 minutes before serving. This softens it just enough to make slicing easy without making it too soft. If it’s too cold, the filling will be firm and might crack when you cut into it. If it’s too warm, it’ll be messy. That sweet spot is key.
Presentation: I like to serve this pie on a simple white plate to let the chocolate and peanut butter colors pop. A dollop of whipped cream on each slice and a sprinkle of crushed Oreos makes it look extra special. If you’re feeling fancy, drizzle a little chocolate sauce on the plate before placing the slice.
Complementary Dishes: This pie is rich, so it pairs well with something light. A cup of coffee or a glass of cold milk is perfect. If you’re serving it as part of a meal, keep the main course simple — grilled chicken and a salad work well. You don’t want to compete with the pie.
Storage: Cover the pie tightly with plastic wrap or aluminum foil and store it in the refrigerator for up to 5 days. The crust might soften slightly over time, but the flavor actually gets better as it sits. I honestly think day 2 is the sweet spot.
Freezing: This pie freezes beautifully. Wrap it tightly in plastic wrap, then in aluminum foil, and freeze for up to 3 months. To serve, thaw it in the refrigerator overnight. The texture will be slightly different — a little denser — but it’s still delicious. I’ve made this weeks ahead for holidays and it always works out.
Reheating: Don’t. This is a cold pie. If you want it warm, you’re better off making a different dessert. That said, if you’ve frozen it, let it thaw in the fridge — never at room temperature or in the microwave.
Nutritional Information & Benefits
Let’s be real — this is a treat, not a health food. But here’s what you should know:
Estimated Nutritional Values (per slice, assuming 8 slices):
- Calories: 520
- Fat: 38g
- Carbohydrates: 38g
- Protein: 10g
- Sugar: 28g
Health Benefits: Peanut butter is a good source of protein and healthy fats, which can help keep you full and satisfied. It also contains vitamin E, magnesium, and potassium. The cream cheese adds calcium and a little protein too. So while this isn’t a salad, it’s not completely devoid of nutritional value either.
Dietary Considerations: This recipe is naturally vegetarian. For gluten-free, use gluten-free cookies. For dairy-free, use the adaptations I mentioned above. It’s not suitable for vegan diets as written, but you can experiment with plant-based alternatives.
Potential Allergens: This pie contains peanuts, dairy, and gluten (from the Oreos). If you’re serving it to a crowd, make sure to label it clearly. I always put a little sign next to mine at potlucks just to be safe.
My Wellness Perspective: I believe in balance. This pie is a special occasion dessert, not an everyday thing. But when you do have it, enjoy every single bite without guilt. Food is about joy and connection, and this pie delivers both.
Conclusion
This kid-approved no-bake peanut butter Oreo pie is everything I want in a dessert: easy, delicious, and guaranteed to make people smile. It’s the recipe I turn to when I need something reliable, whether it’s for a bake sale, a birthday party, or just a Tuesday night when everyone needs a little pick-me-up.
I love that it doesn’t require any fancy techniques or hard-to-find ingredients. It’s just good, honest food that tastes like childhood. The creamy peanut butter filling, the crunchy Oreo crust, the way it all comes together in about 15 minutes — honestly, what’s not to love?
I’d love for you to try this recipe and make it your own. Add your favorite toppings, experiment with different cookies, or just keep it simple like I do. However you make it, I hope it brings you and your family the same joy it’s brought mine. If you try it, leave a comment below and let me know how it turned out. And if you have your own twist on this classic, I’d love to hear about that too. Happy cooking, friends!
Frequently Asked Questions
Can I use natural peanut butter in this recipe?
I don’t recommend it. Natural peanut butter that separates can make the filling grainy and oily. The processed stuff with added stabilizers creates a much smoother, creamier texture that sets up properly. Save the natural peanut butter for your morning toast.
How long does this pie need to chill?
At least 4 hours, but overnight is best. The filling needs time to firm up so you can cut clean slices. If you’re in a hurry, you can pop it in the freezer for about 2 hours, but watch it carefully so it doesn’t freeze solid.
Can I freeze this pie?
Yes! Wrap it tightly in plastic wrap and then aluminum foil, and freeze for up to 3 months. Thaw it in the refrigerator overnight before serving. The texture will be slightly denser, but it’s still delicious.
What if I don’t have a food processor for the crust?
No problem! Put the Oreos in a sturdy zip-top bag and crush them with a rolling pin or a heavy skillet. It takes a little more elbow grease, but it works just as well. Plus, it’s a great way to vent some frustration.
Can I make this pie dairy-free?
Yes, with some modifications. Use dairy-free cream cheese and coconut cream instead of heavy whipping cream. The texture will be slightly different — a little less firm — but it’s still delicious. Just make sure to whip the coconut cream until stiff peaks form.
Pin This Recipe!
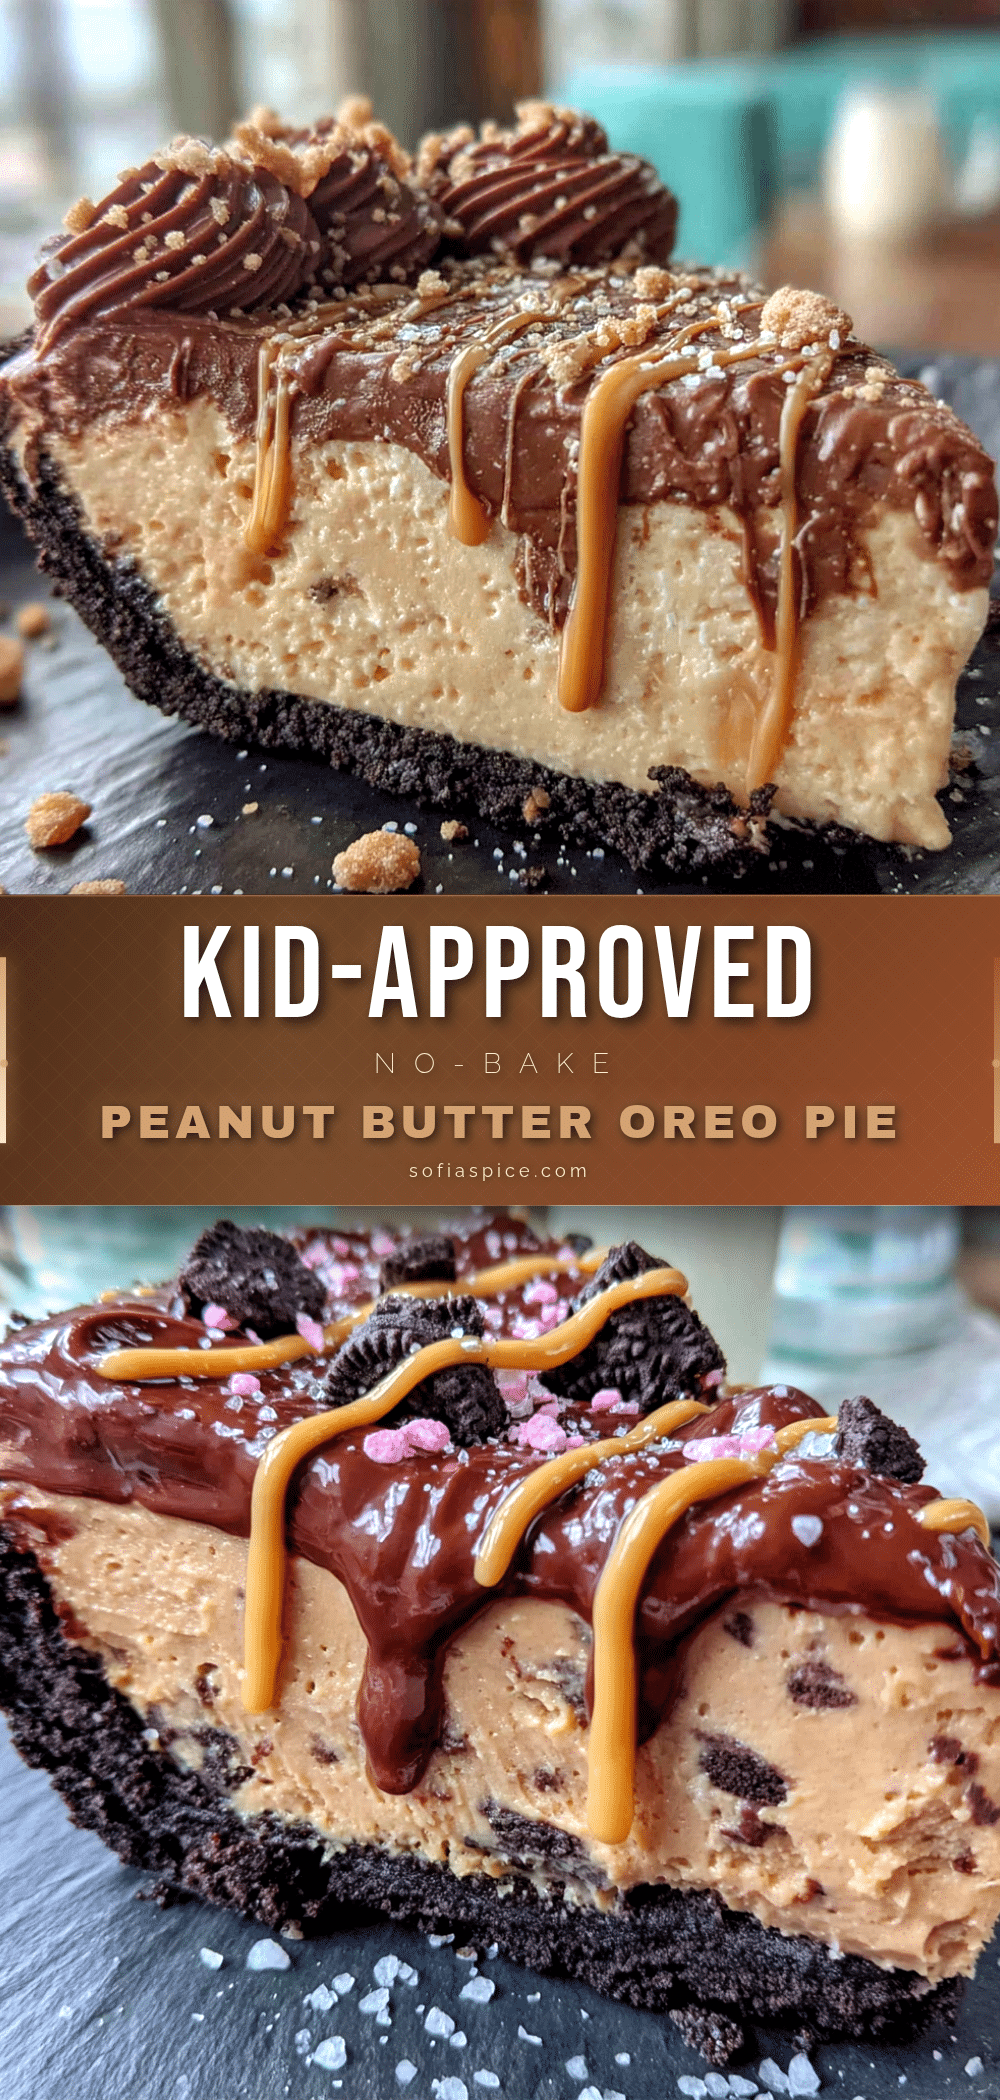
Kid-Approved No-Bake Peanut Butter Oreo Pie

A quick and easy no-bake dessert with a crunchy Oreo crust and creamy peanut butter filling, perfect for bake sales, parties, or any family gathering.
- Prep Time: 15 minutes
- Cook Time: 0 minutes
- Total Time: 4 hours 15 minutes (includes chilling)
- Yield: 8 servings 1x
- Category: Dessert
- Cuisine: American
Ingredients
- 24 Oreo cookies (regular, not double-stuffed)
- 5 tablespoons unsalted butter, melted
- 8 ounces cream cheese, softened
- 1 cup creamy peanut butter (e.g., Jif or Skippy)
- 1 cup powdered sugar
- 1 teaspoon vanilla extract
- 1 ½ cups heavy whipping cream
- ¼ cup hot fudge sauce (optional, for topping)
- ¼ cup crushed Oreos (optional, for topping)
- Whipped cream (optional, for serving)
Instructions
- Make the Oreo crust: Place the 24 Oreo cookies in a food processor and pulse until fine crumbs. Transfer to a medium bowl, add melted butter, and stir with a fork until evenly moistened.
- Press the crust into a 9-inch pie dish using the bottom of a measuring cup or glass. Press firmly and evenly into the bottom and up the sides. Refrigerate while making the filling.
- Whip the cream: In a large bowl, beat the heavy whipping cream with an electric mixer on medium-high speed until stiff peaks form, about 3-4 minutes. Set aside in the fridge.
- Make the peanut butter filling: In another large bowl, beat the softened cream cheese until smooth, about 1 minute. Add peanut butter and beat until combined. Add powdered sugar and vanilla extract, beat until smooth and fluffy, about 2 minutes. Scrape down the sides.
- Fold in the whipped cream: Add one-third of the whipped cream to the peanut butter mixture and gently fold with a rubber spatula. Add the remaining whipped cream and fold until no white streaks remain.
- Assemble the pie: Remove crust from fridge. Spoon the filling into the crust and spread evenly. If using, drizzle hot fudge sauce on top and swirl gently. Sprinkle crushed Oreos on top.
- Chill the pie: Cover loosely with plastic wrap or foil and refrigerate for at least 4 hours, preferably overnight.
- Serve: Let the pie sit at room temperature for 5-10 minutes before slicing. Use a sharp knife dipped in hot water and wiped dry for clean cuts. Serve with whipped cream if desired.
Notes
For best results, use full-fat cream cheese and processed peanut butter (not natural). Chill overnight for cleaner slices. The pie can be frozen for up to 3 months.
Nutrition
- Serving Size: 1 slice (1/8 of pie)
- Calories: 520
- Sugar: 28
- Sodium: 320
- Fat: 38
- Saturated Fat: 16
- Carbohydrates: 38
- Fiber: 2
- Protein: 10
Keywords: no-bake pie, peanut butter pie, Oreo pie, kid-friendly dessert, easy dessert, bake sale recipe