I need a snack that’s got crunch, a serious peanut butter punch, and doesn’t require me to miss a single play. That’s the whole thought process behind these Game Day Peanut Butter Football Rice Krispie Treats. You know how it is—you’re settled in, the pre-game show is on, and the last thing you want is to be stuck in the kitchen while everyone else is yelling at the screen.
These aren’t your average, run-of-the-mill Rice Krispie treats. We’re talking about a thick, fudgy peanut butter base that’s studded with chocolate, then shaped into little footballs. Honestly, they’re the kind of snack that disappears before halftime, and I’ve learned the hard way to make a double batch. There’s something about the combination of salty peanut butter and sweet marshmallow that just hits different when the game is on the line.
The first time I made these, I was frantically trying to shape them while the quarterback was in the huddle. Total disaster. But I figured out a trick that makes it so much easier, and I’m sharing all of it here. This is the snack you bring to a watch party when you want to be the hero without breaking a sweat.
Why You’ll Love These Game Day Peanut Butter Football Rice Krispie Treats
I’ve tested this recipe more times than I care to admit, tweaking the peanut butter-to-marshmallow ratio until it was absolutely perfect. This isn’t just another dessert. It’s a game-day essential that checks all the boxes.
- Quick & Easy: From start to finish, you’re looking at about 30 minutes. That’s less time than it takes to finish a single quarter of football.
- Simple Ingredients: You probably have everything in your pantry right now. No fancy grocery store trips are required for this win.
- Perfect for Game Day: These are portable, they don’t get soggy, and they’re the ultimate finger food for any watch party or tailgate.
- Crowd-Pleaser: Kids and adults go absolutely crazy for them. The peanut butter and chocolate combo is a guaranteed touchdown.
- Unbelievably Delicious: The texture is next-level. You get that classic crispy crunch from the cereal, but it’s all wrapped up in a rich, creamy, and slightly chewy peanut butter blanket.
What really sets these apart is the technique. Instead of just melting everything together, I use a specific method that keeps the treats from turning into a rock-hard brick. They stay soft, chewy, and perfectly sliceable. This isn’t just another version of a Rice Krispie treat—it’s the best version I’ve ever made. It’s the kind of snack that makes you close your eyes after the first bite, even if the game is on.
What Ingredients You Will Need
This recipe relies on a handful of humble ingredients to create something truly special. Each one plays a crucial role in building that signature flavor and texture.
- Unsalted Butter (6 tablespoons): We use unsalted to control the salt level. The butter adds richness and helps the marshmallows melt into a silky sauce. I personally prefer using a good quality butter like Kerrygold for the best flavor.
- Marshmallows (1 standard 10-ounce bag, plus 2 cups mini marshmallows): This is my secret to the perfect texture. The bag of large marshmallows gives you that classic gooey base, while the extra mini marshmallows create little pockets of marshmallow heaven throughout the treat. Don’t skip the extra mini ones.
- Creamy Peanut Butter (1/2 cup): This is the star of the show. Use a standard creamy peanut butter like Jif or Skippy. Natural peanut butter that separates can make the treats greasy and less stable. You want the processed stuff here for the best structure.
- Vanilla Extract (1 teaspoon): A little vanilla goes a long way in rounding out the flavors and making the peanut butter taste even more pronounced.
- Salt (1/4 teaspoon): Don’t skip this. A little salt is essential to cut through the sweetness and make the peanut butter flavor pop.
- Crispy Rice Cereal (6 cups): The classic base. Make sure you’re using the original, unsweetened kind. Store-brand works perfectly fine here.
- Chocolate Chips (1 cup, semi-sweet or milk): These get folded into the mixture. They melt slightly from the heat, creating little pockets of chocolate that pair beautifully with the peanut butter.
- For the Decoration (Optional): You’ll need a few more chocolate chips (melted) and a piping bag or a small zip-top bag to draw the football laces. A little bit of melted white chocolate or white candy melts is great for the stripes, but totally optional.
For ingredient selection, I always recommend looking for fresh marshmallows. Stale or hard marshmallows won’t melt as smoothly. If you’re in a pinch, you can substitute the chocolate chips with chopped up chocolate bars or even peanut butter chips for an extra peanut butter punch. For a gluten-free option, just double-check that your crispy rice cereal is certified gluten-free, as some brands contain malt flavoring.
Equipment Needed
You don’t need a pro-level kitchen to pull these off. A few basic tools will do the trick.
- Large Pot or Dutch Oven: You need a big pot to give yourself room to stir everything together without making a mess. I use my 5-quart Dutch oven.
- Wooden Spoon or Silicone Spatula: A sturdy spoon is essential for mixing the hot marshmallow mixture with the cereal. A silicone spatula is great for scraping every last bit out of the pot.
- 9×13-inch Baking Pan: This is the standard size for a good batch of treats. You can also use an 8×8 pan for thicker treats, just adjust the baking time slightly.
- Parchment Paper: This is non-negotiable. Line your pan with parchment paper, leaving some overhang on the sides. This makes lifting the entire block of treats out of the pan a breeze.
- Sharp Knife or Pizza Cutter: A pizza cutter makes cutting the treats into perfect football shapes much easier than a knife.
- Football-Shaped Cookie Cutter (Optional): If you want perfectly uniform footballs, this is your best friend. Otherwise, a sharp knife works great.
- Piping Bag or Small Zip-Top Bag: For decorating the laces. A toothpick can also work in a pinch for drawing lines.
I’ve used a cheap baking pan before, and the treats stuck to the sides like glue. Trust me on the parchment paper. It’s the best investment you can make for this recipe. If you don’t have a football cookie cutter, don’t stress. Just cut the treats into squares or rectangles and use a knife to round the ends. They’ll still look like footballs.
Preparation Method
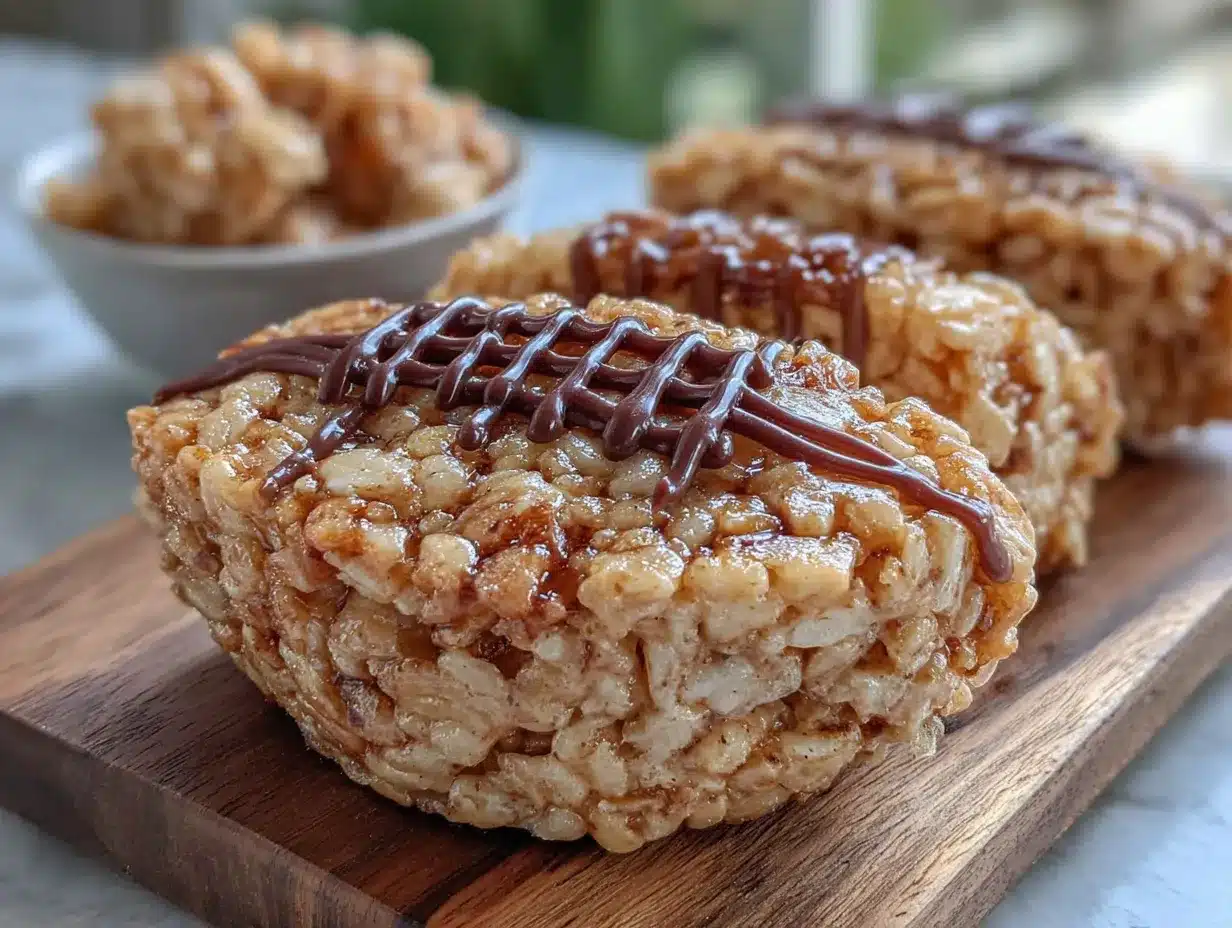
Alright, let’s get to the fun part. Follow these steps, and you’ll have a platter of game-day gold in no time.
- Prep Your Pan: Line a 9×13-inch baking pan with parchment paper, leaving a couple of inches of overhang on the long sides. Lightly grease the parchment paper with a little butter or non-stick spray. This is your insurance policy against sticking.
- Melt the Butter: In your large pot, melt the 6 tablespoons of unsalted butter over medium-low heat. Don’t rush this. You want it fully melted but not browning. Once it’s melted, add the entire 10-ounce bag of large marshmallows.
- Melt the Marshmallows: Stir the marshmallows into the melted butter constantly. They will start to melt and get puffy. Keep stirring until the mixture is completely smooth and has a glossy sheen. This should take about 3-4 minutes. Don’t walk away, or you’ll end up with a burnt mess.
- Add the Peanut Butter: Remove the pot from the heat immediately. This is important. Add the 1/2 cup of creamy peanut butter, 1 teaspoon of vanilla extract, and 1/4 teaspoon of salt. Stir vigorously until the peanut butter is fully incorporated and the mixture is smooth and creamy.
- Fold in the Cereal and Chocolate: Add the 6 cups of crispy rice cereal and 1 cup of chocolate chips to the pot. Using a wooden spoon or silicone spatula, fold everything together gently but thoroughly. You want every piece of cereal to be coated in that glorious peanut butter marshmallow sauce. The chocolate chips will start to melt from the residual heat, creating beautiful streaks.
- Add the Extra Marshmallows: Now, dump in the extra 2 cups of mini marshmallows. Fold them in gently. You want them to stay mostly whole—they’ll create those soft, gooey pockets we talked about. Don’t overmix at this stage.
- Press into the Pan: Transfer the mixture to your prepared pan. Here’s the trick: don’t press it down with your hands. The heat will make the mixture stick to your fingers. Instead, lightly grease a piece of parchment paper or a spatula and use that to gently press the mixture into an even layer. You want it compact, but not rock hard. Pressing too hard will make the treats dense and tough.
- Cool Completely: Let the treats cool in the pan at room temperature for at least 30 minutes. For the cleanest cuts, you can even pop the pan in the refrigerator for 15-20 minutes. This firms everything up perfectly.
- Cut and Shape: Once cooled, lift the entire block of treats out of the pan using the parchment paper overhang. Place it on a cutting board. Use a sharp knife or a pizza cutter to cut the block into rectangles. Then, use a football-shaped cookie cutter to punch out your footballs. If you don’t have a cutter, simply cut each rectangle into a rough football shape by rounding the two short ends.
- Decorate: Melt a small handful of chocolate chips in a microwave-safe bowl in 15-second intervals, stirring in between, until smooth. Transfer the melted chocolate to a small piping bag or a zip-top bag with the tiniest corner snipped off. Pipe a few lines onto the top of each football to resemble laces. For an extra touch, you can also pipe a couple of white stripes on the ends using melted white chocolate.
A Note on Timing: The whole process from start to finish takes about 20 minutes of active work. The cooling time is the only thing that takes a while, but you can use that time to set up your game-day spread. The mixture will be very hot, so be careful, especially around kids.
Sensory Cues: When you’re folding in the cereal, you’ll hear a satisfying crackle. The mixture should look glossy and slightly sticky. When you press it into the pan, it should feel soft and pliable, not stiff. If it feels too stiff, you might have overcooked the marshmallows a bit.
Cooking Tips & Techniques
I’ve made these treats more times than I can count, and I’ve learned a few things the hard way. Here are my best tips to ensure your success.
- The Low and Slow Method: Always melt your marshmallows over medium-low heat. High heat will scorch the sugar, leaving you with a bitter, brown mess. Patience is key here.
- Don’t Overmix: Once you add the cereal, you want to fold it in just until it’s combined. Overmixing can crush the cereal, making the treats dense and hard. You want that light, airy texture.
- The Butter Trick: If you find the mixture is too sticky to handle, grease your hands or your spatula with a little bit of butter. It works like magic.
- My Biggest Failure: The first time I made these, I tried to use natural peanut butter. The oil separated, and the treats were a greasy, crumbly disaster. Stick with the processed stuff for this recipe. It’s the only way to guarantee a stable, delicious result.
- Timing is Everything: Have all your ingredients measured and ready to go before you start. The process moves fast, and you don’t want to be scrambling for a measuring cup while your marshmallows are burning.
For the best consistency, make sure your marshmallows are fresh. Old marshmallows can be hard and won’t melt as smoothly. If your treats are turning out too hard, you’re probably pressing them into the pan too firmly. A gentle hand makes all the difference.
Variations & Adaptations
One of the best things about this recipe is how easy it is to customize. Don’t be afraid to make it your own.
- Chocolate Lover’s Version: Swap the semi-sweet chocolate chips for dark chocolate chips or even chopped up peanut butter cups. You can also drizzle the finished treats with melted chocolate for an extra decadent touch.
- Nut-Free Option: If you have a nut allergy, you can substitute the peanut butter with a seed butter like sunflower seed butter or WowButter. Just be aware that the flavor will change slightly, and the texture might be a little different.
- Crunchy Twist: For an extra crunch, fold in 1/2 cup of chopped peanuts or pretzel pieces along with the cereal. The salty crunch is incredible.
- Flavor Variations: Add a pinch of cinnamon or a splash of maple extract to the marshmallow mixture for a fun twist. You could also swap the vanilla extract for almond extract for a different flavor profile.
- My Personal Favorite: I once made a batch where I used half peanut butter chips and half chocolate chips. The peanut butter flavor was so intense, it was almost too much—in the best possible way. I also added a sprinkle of flaky sea salt on top right after pressing them into the pan. The salty-sweet combo is absolutely addictive.
Serving & Storage Suggestions
These treats are best enjoyed at room temperature, which makes them perfect for a party. They’re soft, chewy, and the chocolate is perfectly set.
- Serving Temperature: Serve them at room temperature. If you’ve refrigerated them, let them sit out for about 10 minutes before serving so they soften up a bit.
- Presentation: Arrange the football-shaped treats on a platter lined with a green napkin to look like a football field. It’s a fun, visual touch that everyone will love.
- Complementary Dishes: These treats pair perfectly with other game-day snacks. They go great alongside a batch of spooky mummy hot dogs for a fun theme, or with some no-bake almond butter protein balls for a slightly healthier option. For a sweet and savory combo, serve them with some honey garlic glazed salmon sliders.
- Storage: Store the treats in an airtight container at room temperature for up to 3 days. They will stay soft and chewy. Do not refrigerate them, as the cold will make them hard and dry.
- Freezing: You can freeze these treats for up to 2 months. Wrap them individually in plastic wrap, then place them in a freezer-safe bag. Thaw at room temperature for about 30 minutes before serving. The flavor actually develops nicely after freezing.
- Flavor Development: Honestly, these treats taste even better the next day. The flavors meld together, and the texture becomes perfectly chewy. They’re still great on day one, but day two is where the magic happens.
Nutritional Information & Benefits
Let’s be real—these are a treat, not a health food. But that doesn’t mean they can’t fit into a balanced lifestyle.
- Estimated Nutritional Values (per serving, based on 24 servings): Calories: 210, Fat: 10g, Saturated Fat: 4g, Cholesterol: 10mg, Sodium: 180mg, Carbohydrates: 30g, Fiber: 1g, Sugar: 18g, Protein: 4g.
- Health Benefits: The peanut butter provides a good source of protein and healthy fats, which can help keep you feeling full and satisfied. The crispy rice cereal offers a small amount of iron and B vitamins. The chocolate contains antioxidants, though in small amounts.
- Dietary Considerations: This recipe is naturally vegetarian. To make it gluten-free, use certified gluten-free crispy rice cereal. To make it vegan, use vegan marshmallows, vegan butter, and dairy-free chocolate chips.
- Potential Allergens: This recipe contains peanuts, dairy (butter, chocolate), and gluten (cereal). It may also contain traces of soy and tree nuts depending on the brands you use.
I’m a big believer in balance. You can enjoy a couple of these after a healthy meal, like a savory Korean-style bulgogi rice bowl, and still feel great. It’s all about moderation and enjoying the foods you love.
Conclusion
These Game Day Peanut Butter Football Rice Krispie Treats are more than just a snack. They’re a touchdown for your taste buds and the star of any watch party. They’re quick, easy, and guaranteed to disappear faster than the halftime show.
I love this recipe because it’s so forgiving. You can mess up the shaping, you can use a different chocolate, and they’ll still taste incredible. It’s the kind of recipe that builds confidence in the kitchen. Don’t be afraid to customize them based on what you have on hand or what your family loves. Maybe you add some crushed pretzels for crunch, or maybe you drizzle them with caramel. The possibilities are endless.
So, what are you waiting for? Grab your ingredients, put on your team jersey, and get ready to make the best snack of the season. I’d love to hear how they turn out. Drop a comment below and let me know if you made any fun variations, or share a photo of your football-shaped treats. And if you’re looking for another easy, crowd-pleasing dessert, don’t miss my recipe for graveyard dirt pudding cups—it’s another fun one. Happy snacking, and go team!
Frequently Asked Questions
Can I use natural peanut butter in this recipe?
I don’t recommend it. Natural peanut butter has a higher oil content that can separate, making the treats greasy and unstable. Standard processed peanut butter like Jif or Skippy works best for the perfect texture and structure.
How do I keep the treats from getting too hard?
The key is not to over-press them into the pan. Use a gentle hand when spreading the mixture. Also, make sure you don’t overcook the marshmallows. Melt them over low heat and remove them from the stove as soon as they’re smooth.
Can I make these ahead of time?
Absolutely! These treats actually taste even better the next day. You can make them up to 2 days in advance and store them in an airtight container at room temperature. For longer storage, you can freeze them for up to 2 months.
How do I get clean football shapes?
Using a football-shaped cookie cutter is the easiest way to get perfect shapes. If you don’t have one, you can cut the treats into rectangles with a sharp knife and then round the ends with the knife to create a football shape. Chilling the treats in the fridge for 15 minutes before cutting makes the process much cleaner.
Can I make these treats vegan or dairy-free?
Yes! To make them vegan, use vegan marshmallows (like Dandies), vegan butter, and dairy-free chocolate chips. For a gluten-free version, just ensure your crispy rice cereal is certified gluten-free, as some brands contain malt flavoring.
Pin This Recipe!
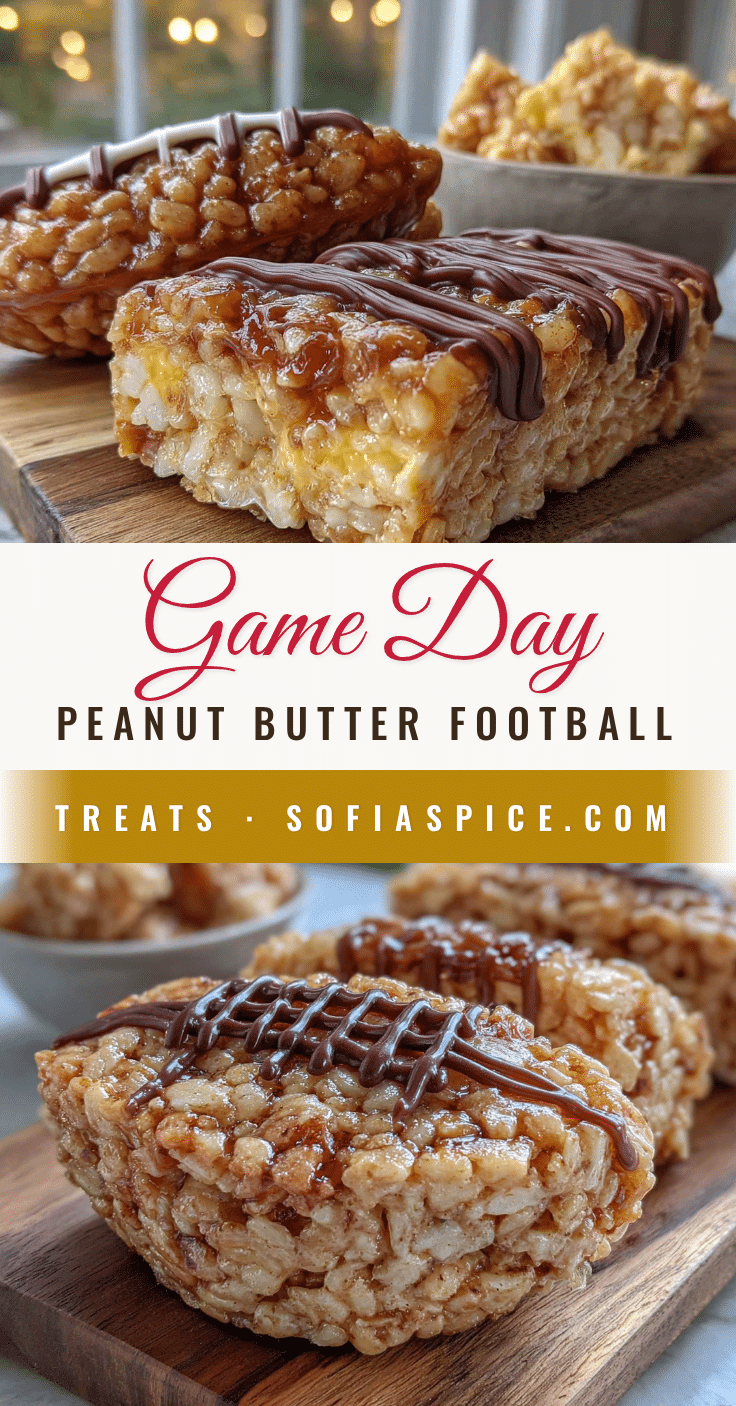
Game Day Peanut Butter Football Rice Krispie Treats
These Game Day Peanut Butter Football Rice Krispie Treats are a quick and easy 30-minute snack with a thick, fudgy peanut butter base studded with chocolate, shaped into footballs. Perfect for watch parties and tailgates, they’re a crowd-pleasing, portable treat that disappears before halftime.
- Prep Time: 10 minutes
- Cook Time: 10 minutes
- Total Time: 30 minutes
- Yield: 24 servings 1x
- Category: Dessert
- Cuisine: American
Ingredients
- 6 tablespoons unsalted butter
- 1 (10-ounce) bag large marshmallows
- 2 cups mini marshmallows
- 1/2 cup creamy peanut butter (e.g., Jif or Skippy)
- 1 teaspoon vanilla extract
- 1/4 teaspoon salt
- 6 cups crispy rice cereal
- 1 cup semi-sweet or milk chocolate chips
- For decoration (optional): additional chocolate chips (melted), white chocolate or white candy melts (melted)
Instructions
- Line a 9×13-inch baking pan with parchment paper, leaving overhang on the long sides. Lightly grease the parchment with butter or non-stick spray.
- In a large pot, melt 6 tablespoons unsalted butter over medium-low heat. Add the entire 10-ounce bag of large marshmallows and stir constantly until completely smooth and glossy, about 3-4 minutes.
- Remove the pot from heat immediately. Stir in 1/2 cup creamy peanut butter, 1 teaspoon vanilla extract, and 1/4 teaspoon salt until smooth and creamy.
- Add 6 cups crispy rice cereal and 1 cup chocolate chips. Fold gently until every piece of cereal is coated. The chocolate chips will start to melt, creating streaks.
- Fold in the extra 2 cups mini marshmallows gently, keeping them mostly whole.
- Transfer the mixture to the prepared pan. Using a lightly greased piece of parchment paper or spatula, gently press the mixture into an even layer. Do not press too hard.
- Let the treats cool at room temperature for at least 30 minutes, or refrigerate for 15-20 minutes for cleaner cuts.
- Once cooled, lift the block out using the parchment overhang. Place on a cutting board. Cut into rectangles, then use a football-shaped cookie cutter to punch out footballs, or round the ends of each rectangle with a knife.
- Melt a small handful of chocolate chips in a microwave-safe bowl in 15-second intervals, stirring between each, until smooth. Transfer to a piping bag or zip-top bag with a tiny corner snipped off. Pipe lines onto each football to resemble laces. Optionally, pipe white stripes on the ends using melted white chocolate.
Notes
Use standard processed peanut butter (like Jif or Skippy) for best structure; natural peanut butter can make treats greasy. Do not overmix or press too firmly to keep treats soft and chewy. For gluten-free, use certified gluten-free crispy rice cereal. For vegan, use vegan marshmallows, vegan butter, and dairy-free chocolate chips. Treats taste even better the next day.
Nutrition
- Serving Size: 1 football treat
- Calories: 210
- Sugar: 18
- Sodium: 180
- Fat: 10
- Saturated Fat: 4
- Carbohydrates: 30
- Fiber: 1
- Protein: 4
Keywords: peanut butter rice krispie treats, football rice krispie treats, game day snacks, easy dessert, no-bake dessert, peanut butter marshmallow treats


