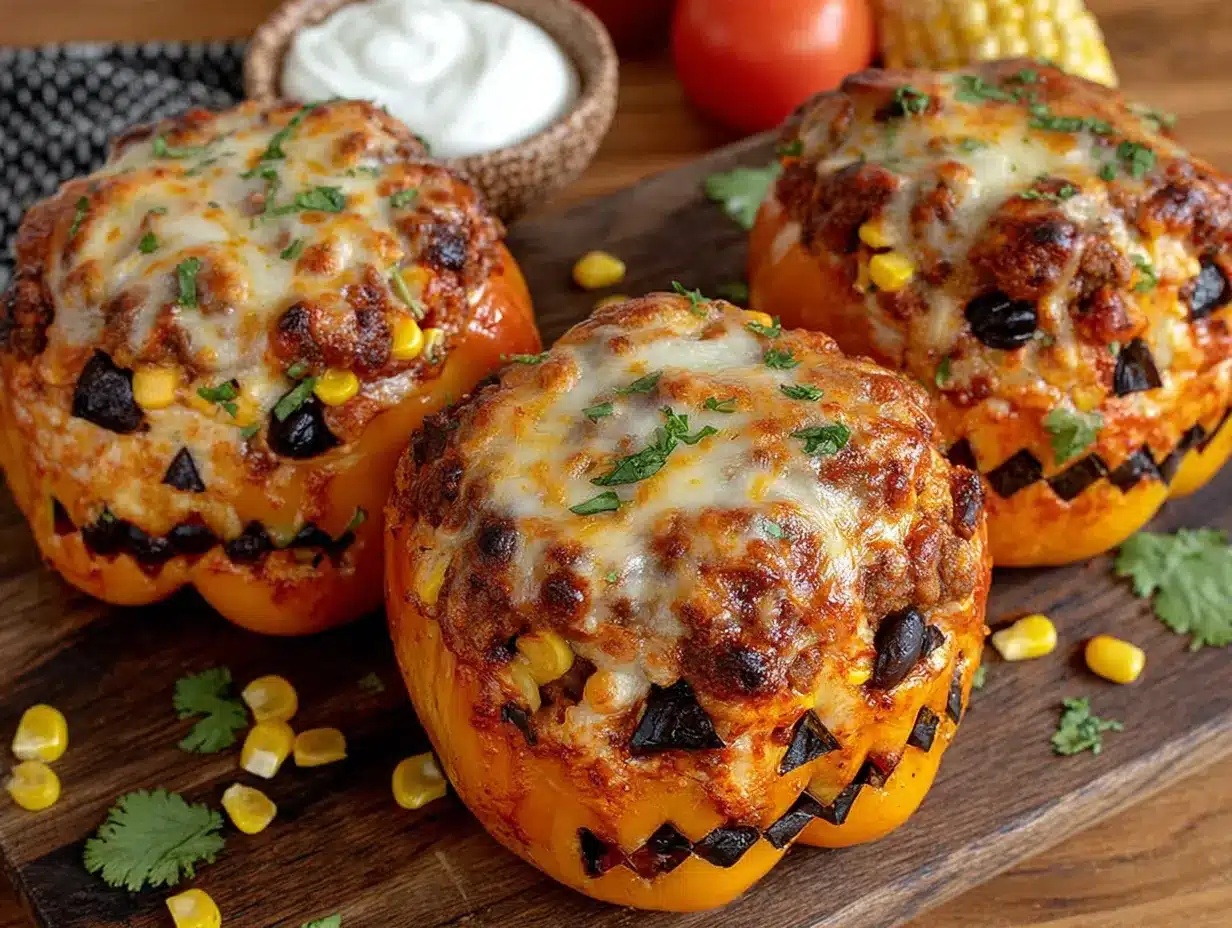
The little carved faces staring up from the dinner plates, that’s what gets me every single time. Not the taste first, not even the smell of roasting peppers filling the kitchen—it’s those silly, happy, slightly crooked jack-o-lantern grins cut into orange bell peppers. I made these for the first time on a whim, trying to get my youngest to eat something green (well, orange) before the candy haul commenced. And honestly? It worked. Something about food looking back at you makes it impossible to resist, even for the pickiest eaters.
I remember standing over the cutting board, knife in hand, realizing I had no idea how to carve a pepper without it turning into a mushy mess. The first one looked more like a sad, lopsided ghost than a pumpkin. But that’s the thing about cooking for people you love—the imperfect ones always end up being the favorites. This Perfect Jack-o-Lantern Stuffed Bell Peppers recipe became an instant Halloween tradition in our house, not because it’s fancy, but because it’s fun. It turns dinner into a little moment of surprise, and let’s face it, we could all use more of that around the holiday season.
These aren’t just any stuffed peppers. They’re a complete meal hiding inside a vegetable that’s been carved into something cheerful. The filling is savory, cheesy, and hearty enough to satisfy even the hungriest little monsters. And the best part? You get to eat the face off your dinner before you even touch the rice. There’s a certain joy in that, a small rebellion that makes weeknight cooking feel like a celebration. I think that’s why this recipe stuck—it turned a regular Tuesday into something worth remembering, one carved pepper at a time.
Why You’ll Love This Recipe
Look, I’ve tested a lot of stuffed pepper recipes over the years, and most of them are good, but they’re not this. This version is different because it’s built around the experience as much as the taste. After about four rounds of trial and error (and one pepper that collapsed into a sad heap in the oven), I landed on a method that holds its shape, stays tender, and actually looks like a tiny jack-o-lantern when it comes out of the oven. I’ve got the technique down so you don’t have to learn the hard way.
- Fun for the Whole Family: Kids love helping carve the faces, and adults love how cute (and delicious) the finished dish looks on the table. It’s interactive dinner theater.
- Simple Ingredients: Ground beef, rice, cheese, tomatoes, and spices—all pantry staples. No trips to a specialty store required.
- Perfect for Halloween Night: Serve these before the candy comes out, and everyone gets a warm, satisfying meal that still fits the spooky theme. It pairs beautifully with our Easy Mummy Hot Dog Bites for a full Halloween spread.
- Crowd-Pleaser Approved: I’ve served these at a small Halloween get-together, and they disappeared faster than the candy bowl. Even my cousin who “doesn’t like peppers” went back for seconds.
- Make-Ahead Friendly: You can prep the filling and carve the peppers a day ahead. Just stuff and bake when you’re ready. This is a lifesaver on busy Halloween evenings.
What really sets this recipe apart from the standard stuffed pepper is the attention to prep. I learned that blanching the carved peppers for just two minutes before stuffing them keeps them sturdy enough to hold their shape without turning into mush. It’s a small step, but it makes all the difference. And the filling? It’s seasoned just like a really good taco meat—smoky, a little spicy, and perfectly balanced with melted cheese on top. This isn’t just another version of stuffed peppers; it’s the one you’ll actually want to make year after year.
What Ingredients You Will Need
This recipe uses simple, wholesome ingredients that come together to create a filling that’s savory, satisfying, and just a little bit festive. Most of these are probably already in your kitchen, which makes this a great last-minute Halloween dinner idea.
- Orange Bell Peppers (4 large): Look for peppers that are squat, wide, and have a flat bottom so they stand up straight on the baking dish. The color is key for that pumpkin look. I prefer organic peppers when I can find them—they tend to have thicker walls and hold up better during carving.
- Ground Beef (1 lb / 450g): I use 85/15 lean ground beef for the best flavor without being too greasy. You can also use ground turkey or plant-based crumbles for a lighter option.
- Cooked Rice (1 cup / 180g): White rice works great, but brown rice or even quinoa adds extra texture and fiber. Leftover rice from the night before is perfect here.
- Diced Tomatoes (1 can, 14.5 oz / 411g): Fire-roasted diced tomatoes add a smoky depth that complements the beef beautifully. Don’t drain them—the liquid helps keep the filling moist.
- Shredded Cheddar Cheese (1 cup / 120g): Sharp cheddar melts beautifully and adds a tangy kick. You can also use Monterey Jack or a Mexican blend for a milder flavor.
- Yellow Onion (1 medium, diced): Onion adds sweetness and aroma to the filling. Sauté it until it’s translucent and just starting to brown.
- Garlic (3 cloves, minced): Fresh garlic is non-negotiable here. It adds that savory backbone that makes the filling taste like it’s been simmering for hours.
- Chili Powder (1 tablespoon): This gives the filling a warm, earthy heat. Use a good quality chili powder—I like McCormick or a local spice blend.
- Cumin (1 teaspoon): Cumin adds that slightly nutty, smoky flavor that makes taco-seasoned meat so addictive.
- Smoked Paprika (1 teaspoon): This is my secret ingredient. It adds a subtle smokiness that makes the filling taste like it came from a grill.
- Salt and Black Pepper (to taste): Don’t be shy with the salt—it brings all the flavors together.
- Fresh Parsley or Cilantro (for garnish): A sprinkle of fresh herbs on top adds color and a fresh finish. I prefer cilantro, but parsley works if you’re feeding cilantro-haters.
For the carving, you’ll also need a small, sharp paring knife and a spoon. That’s it. Nothing fancy, just a steady hand and a little patience.
Equipment Needed
You don’t need a lot of fancy gear for this recipe, which is part of its charm. Here’s what you’ll need:
- Large Baking Dish (9×13 inch): A glass or ceramic dish works best. It needs to be big enough to hold four stuffed peppers without them touching too much.
- Sharp Paring Knife: This is essential for carving the faces. A small, sharp blade gives you more control than a chef’s knife. I use a 3.5-inch Wusthof, and it’s perfect for this job.
- Large Skillet: For browning the beef and sautéing the onions and garlic. A 12-inch skillet gives you plenty of room.
- Large Pot: For blanching the carved peppers. You’ll need enough water to submerge them completely.
- Mixing Bowl: For combining the filling ingredients.
- Spoon or Spatula: For stirring and stuffing. A wooden spoon works great.
- Cutting Board: A sturdy board for carving the peppers. I recommend using a separate board for raw meat to avoid cross-contamination.
- Aluminum Foil: For covering the dish during the first part of baking. This helps the peppers steam and soften without drying out.
If you don’t have a large pot for blanching, you can microwave the carved peppers for 2-3 minutes in a bowl of water. It’s not quite the same, but it works in a pinch. And if you’re short on time, you can skip the blanching step entirely—just know the peppers will be a bit firmer and may need an extra 10 minutes in the oven.
Preparation Method
- Preheat the Oven: Set your oven to 375°F (190°C). This gives it time to come to temperature while you prep the peppers.
- Cook the Rice: If you don’t have leftover rice, cook 1/2 cup of dry rice according to package directions. This should yield about 1 cup of cooked rice. Set it aside to cool slightly.
- Prep the Peppers: Wash the bell peppers and pat them dry. Using a sharp paring knife, cut a circle around the stem at the top of each pepper, about 1.5 inches in diameter. Gently pull out the stem and seed cluster. Use a spoon to scrape out any remaining seeds and white membranes from the inside. Be careful not to tear the pepper walls.
- Carve the Faces: This is the fun part. Using the tip of your paring knife, cut out two small triangles for eyes and a slightly larger triangle or curved smile for the mouth. You can get creative here—some of mine have zigzag smiles, others have surprised expressions. Just make sure the cuts are clean and go all the way through the pepper wall. Save the little cut-out pieces; you can roast them alongside the peppers or snack on them raw.
- Blanch the Peppers: Bring a large pot of salted water to a boil. Carefully lower the carved peppers into the boiling water using a slotted spoon. Let them blanch for exactly 2 minutes. This softens them slightly and helps them hold their shape during baking. Remove them with the slotted spoon and place them upside down on a clean kitchen towel to drain and cool.
- Brown the Beef: While the peppers are cooling, heat a large skillet over medium-high heat. Add the ground beef and cook, breaking it up with a spoon, until it’s browned and no longer pink, about 5-7 minutes. Use a slotted spoon to transfer the cooked beef to a plate, leaving about 1 tablespoon of drippings in the pan.
- Sauté the Aromatics: Reduce the heat to medium. Add the diced onion to the skillet and cook, stirring occasionally, until it’s softened and translucent, about 4 minutes. Add the minced garlic and cook for another 30 seconds until fragrant.
- Combine the Filling: Return the browned beef to the skillet. Add the can of diced tomatoes (with their juices), cooked rice, chili powder, cumin, smoked paprika, 1 teaspoon of salt, and 1/2 teaspoon of black pepper. Stir everything together until well combined. Let the mixture simmer for 3-4 minutes, allowing the flavors to meld and the liquid to reduce slightly. Remove from heat and stir in 1/2 cup of the shredded cheddar cheese.
- Stuff the Peppers: Place the blanched, carved peppers upright in the baking dish. If they wobble, you can trim a tiny sliver off the bottom to help them stand flat—just don’t cut into the cavity. Using a spoon, carefully fill each pepper with the beef and rice mixture, packing it gently but firmly. Don’t overstuff, or the filling might spill out during baking. Top each pepper with the remaining shredded cheddar cheese.
- Bake: Cover the baking dish loosely with aluminum foil. Bake for 25 minutes. Then, remove the foil and bake for another 10-15 minutes, until the cheese is melted and bubbly and the peppers are tender when pierced with a fork.
- Rest and Serve: Let the stuffed peppers rest in the dish for 5 minutes before serving. This allows the filling to set slightly and makes them easier to handle. Garnish with fresh parsley or cilantro, and watch the smiles appear around the table.
Cooking Tips & Techniques
I learned a few things the hard way so you don’t have to. The first time I made these, I skipped the blanching step, and the peppers came out of the oven with their faces completely collapsed—more like sad jack-o-lanterns that had been left out in the rain. The blanching is non-negotiable if you want those cute faces to survive the oven.
Another thing I’ve figured out: don’t overfill the peppers. It’s tempting to pack as much filling as possible, but that causes the pepper walls to bulge and distort the carved faces. Fill them about three-quarters full, and use your fingers to gently press the filling down so it settles evenly.
If you’re worried about the peppers tipping over in the dish, here’s a trick: create a little “nest” for each pepper by spooning a thin layer of the leftover tomato sauce or even just a splash of water into the bottom of the baking dish. This not only helps stabilize them but also creates a bit of steam that keeps the peppers moist.
One mistake I made early on was using pre-shredded cheese from a bag. It melts okay, but it doesn’t get that beautiful, gooey, golden-brown top that freshly shredded cheese gives you. Take the extra two minutes to shred your own block of cheddar. Trust me on this one.
And here’s a timing tip: you can prep the filling and carve the peppers up to 24 hours in advance. Store them separately in the fridge, then stuff and bake when you’re ready. This makes Halloween night so much less stressful. You can even assemble the whole dish and keep it covered in the fridge for up to 8 hours before baking—just add 10 minutes to the covered baking time.
Variations & Adaptations
One of the best things about this recipe is how easy it is to tweak. Here are a few variations I’ve tried and loved:
- Vegetarian Version: Swap the ground beef for a can of black beans (rinsed and drained) and a cup of corn kernels. The beans add protein and texture, and the corn adds a little sweetness that works beautifully with the spices. You can also use crumbled tofu or tempeh if you want a more meat-like texture.
- Spicy Kick: Add 1/2 teaspoon of cayenne pepper or a diced jalapeño to the filling. For an extra layer of heat, mix some pepper jack cheese into the filling instead of cheddar. My husband loves this version—he says it makes the jack-o-lanterns “angry.”
- Low-Carb Option: Skip the rice entirely and replace it with riced cauliflower. Sauté the cauliflower in the skillet with the onions and garlic before adding the beef. It soaks up all the flavor without the extra carbs. This version is surprisingly satisfying.
- Cheese Lover’s Dream: Add a layer of cream cheese or ricotta to the bottom of each pepper before stuffing. It creates a creamy, decadent surprise when you cut into the pepper. I did this for a friend’s Halloween party, and people lost their minds.
- Seasonal Twist: In the summer, I sometimes swap the diced tomatoes for fresh, chopped tomatoes and add a handful of chopped zucchini to the filling. It makes the dish feel lighter and more garden-fresh. In the fall, I add a pinch of cinnamon and nutmeg to the filling for a cozy, pumpkin-pie-adjacent vibe.
I’ve also made these with yellow and red bell peppers, and they work just as well. The red ones look a little less like pumpkins, but they’re sweeter and add a nice contrast to the savory filling. If you’re feeling extra festive, you can use a mix of colors and carve different expressions on each one—a little pepper family!
Serving & Storage Suggestions
These stuffed peppers are best served warm, straight from the oven. The cheese should be melted and bubbly, and the peppers should be tender but still hold their shape. I like to serve them on a plate with a small side salad or a spoonful of sour cream on the side for dipping. The cool, creamy sour cream is a perfect counterpoint to the warm, spicy filling.
For a full Halloween dinner spread, pair these peppers with our Easy Mummy Hot Dog Bites and a bowl of Creamy Tomato Basil Soup with Crispy Grilled Cheese Croutons. It’s a meal that feels both festive and comforting, and it’s surprisingly easy to pull together.
If you have leftovers (which is rare in my house, but it happens), store them in an airtight container in the refrigerator for up to 4 days. The flavors actually meld and deepen overnight, so leftovers taste even better the next day. To reheat, place the peppers in a baking dish, cover with foil, and warm them in a 350°F (175°C) oven for about 15 minutes. You can also microwave them on high for 2-3 minutes, but the peppers will be softer and less structured.
These peppers also freeze beautifully. Let them cool completely, then wrap each pepper individually in plastic wrap and place them in a freezer-safe bag. They’ll keep for up to 3 months. To reheat from frozen, unwrap the peppers, place them in a baking dish, cover with foil, and bake at 350°F (175°C) for 35-40 minutes, until heated through. It’s a fantastic make-ahead meal for busy fall evenings.
One note: the carved faces can get a little soft after reheating, so don’t expect them to look as crisp as they did fresh out of the oven. But the taste? Still absolutely worth it.
Nutritional Information & Benefits
Here’s a rough estimate of the nutritional breakdown per serving (one stuffed pepper, using lean ground beef and white rice):
- Calories: Approximately 420-450
- Protein: 28g
- Fat: 22g
- Carbohydrates: 28g
- Fiber: 5g
- Sugar: 8g
Bell peppers are a fantastic source of vitamin C—in fact, one orange bell pepper contains more vitamin C than an orange. They’re also rich in vitamin A, which is great for eye health, and they provide a good amount of fiber, which aids digestion. The ground beef adds high-quality protein and iron, while the cheese provides calcium and a little bit of comfort.
If you’re watching your sodium intake, you can use low-sodium diced tomatoes and reduce the added salt. The chili powder and cumin add so much flavor that you honestly won’t miss the extra salt. And if you’re looking for a dairy-free option, you can skip the cheese or use a plant-based alternative—just know that the texture and melt will be a bit different.
This recipe is naturally gluten-free as written, which makes it a great option for guests with celiac disease or gluten sensitivity. Just double-check that your chili powder and cumin are certified gluten-free, as some spice blends can contain trace amounts.
Conclusion
These Perfect Jack-o-Lantern Stuffed Bell Peppers are more than just a Halloween dinner—they’re a little moment of joy on a plate. They’re fun to make, fun to serve, and even more fun to eat. Whether you’re feeding a houseful of excited kids or just want to treat yourself to something whimsical, this recipe delivers every single time.
I love that this dish brings people together. There’s something about carving those little faces that makes everyone smile, and the first bite always comes with a laugh. It’s comfort food with a sense of humor, and honestly, that’s the kind of cooking I live for. Don’t be afraid to get creative with your carving—every pepper has its own personality, and the imperfect ones are always the most charming.
I’d love to hear how your jack-o-lantern peppers turn out! Leave a comment below and tell me what faces you carved, or share a photo on social media and tag me. And if you come up with a fun variation, definitely let me know—I’m always looking for new ideas. Until next time, happy cooking, and may your peppers always have the best smiles!
Frequently Asked Questions
Can I use pre-cooked rice from the freezer?
Absolutely! Frozen pre-cooked rice is a huge time-saver here. Just thaw it in the microwave or run it under warm water in a colander before adding it to the filling. Make sure to squeeze out any excess water so the filling doesn’t get soggy.
Why did my pepper faces collapse during baking?
This usually happens for two reasons: either you didn’t blanch the peppers long enough, or you carved the faces too large. The blanching step is crucial because it softens the pepper walls just enough to prevent cracking. Also, try to keep your carved shapes simple—small triangles and a smile work better than elaborate designs with thin, delicate lines.
Can I make these in an air fryer?
Yes, you can! Preheat your air fryer to 350°F (175°C). Place the stuffed peppers in the air fryer basket, making sure they’re not touching. Cook for 15-18 minutes, checking at the 12-minute mark. The cheese will get extra crispy on top, which is actually pretty delicious. Just note that the peppers might be slightly firmer than oven-baked ones.
How do I keep the peppers from tipping over in the baking dish?
If your peppers are wobbly, you can trim a thin slice off the bottom to create a flat surface. Just be careful not to cut into the cavity. Another trick is to create a small “nest” of extra filling or tomato sauce in the bottom of the dish to help stabilize them. You can also use a muffin tin to hold each pepper upright individually.
Can I use green bell peppers instead of orange?
You can, but they won’t look as much like little pumpkins. Green peppers have a more bitter, grassy flavor compared to the sweetness of orange or red peppers. If you do use green peppers, add a pinch of sugar to the filling to balance out the bitterness. They’ll still taste great—they just won’t have that classic jack-o-lantern look.
Pin This Recipe!
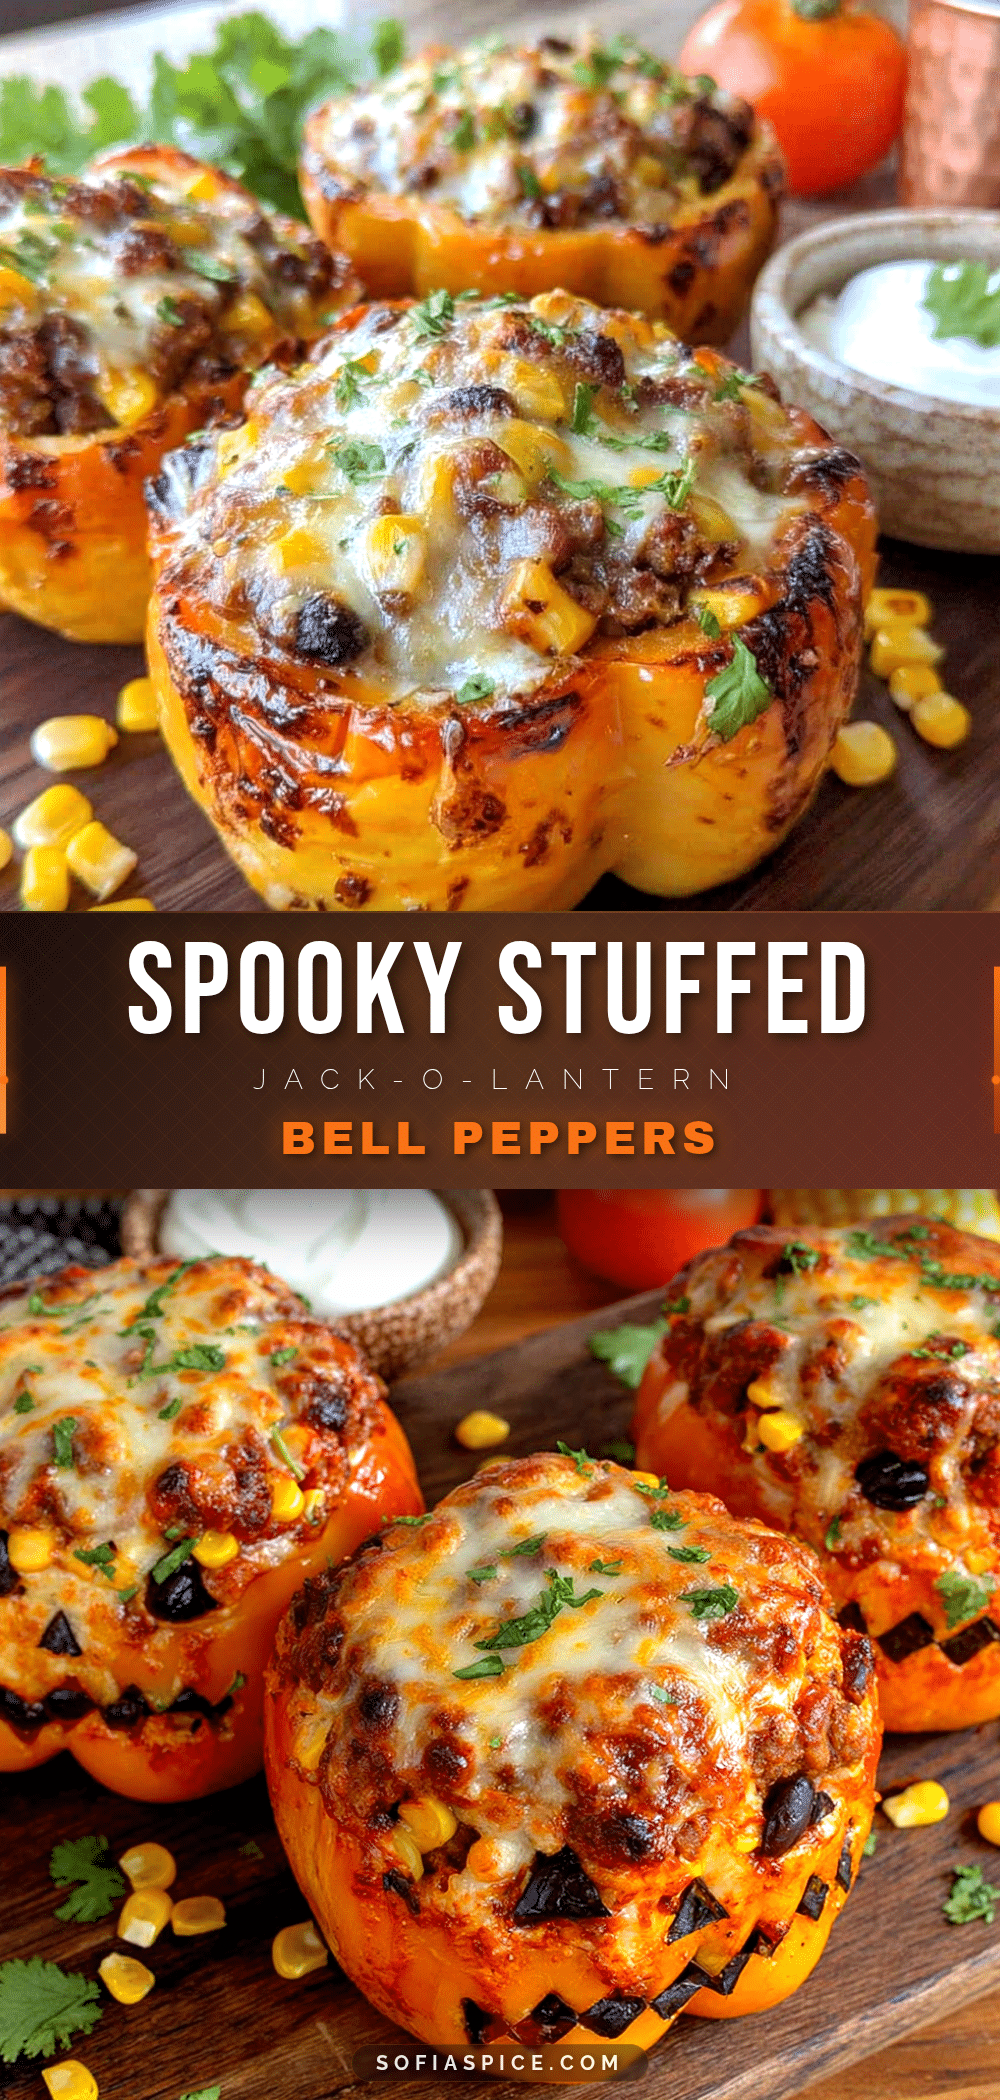
Perfect Jack-o-Lantern Stuffed Bell Peppers Easy Halloween Dinner

These adorable jack-o-lantern stuffed bell peppers are a fun and festive Halloween dinner. Filled with a savory beef and rice mixture, they’re a complete meal that’s sure to bring smiles to the table.
- Prep Time: 20 minutes
- Cook Time: 40 minutes
- Total Time: 1 hour
- Yield: 4 servings 1x
- Category: Main Course
- Cuisine: American
Ingredients
- 4 large orange bell peppers
- 1 lb (450g) ground beef (85/15 lean)
- 1 cup (180g) cooked rice (white or brown)
- 1 can (14.5 oz / 411g) fire-roasted diced tomatoes (undrained)
- 1 cup (120g) shredded sharp cheddar cheese
- 1 medium yellow onion, diced
- 3 cloves garlic, minced
- 1 tablespoon chili powder
- 1 teaspoon ground cumin
- 1 teaspoon smoked paprika
- Salt and black pepper to taste
- Fresh parsley or cilantro for garnish
Instructions
- Preheat the oven to 375°F (190°C).
- If you don’t have leftover rice, cook 1/2 cup of dry rice according to package directions to yield about 1 cup cooked rice. Set aside to cool slightly.
- Wash and dry the bell peppers. Using a sharp paring knife, cut a circle around the stem at the top of each pepper, about 1.5 inches in diameter. Gently remove the stem and seed cluster. Use a spoon to scrape out remaining seeds and white membranes, being careful not to tear the pepper walls.
- Carve faces into the peppers: cut two small triangles for eyes and a slightly larger triangle or curved smile for the mouth. Make clean cuts that go all the way through the pepper wall. Save the cut-out pieces for roasting or snacking.
- Bring a large pot of salted water to a boil. Carefully lower the carved peppers into the boiling water using a slotted spoon. Blanch for exactly 2 minutes. Remove with the slotted spoon and place upside down on a clean kitchen towel to drain and cool.
- While the peppers cool, heat a large skillet over medium-high heat. Add the ground beef and cook, breaking it up with a spoon, until browned and no longer pink, about 5-7 minutes. Use a slotted spoon to transfer the beef to a plate, leaving about 1 tablespoon of drippings in the pan.
- Reduce heat to medium. Add the diced onion to the skillet and cook, stirring occasionally, until softened and translucent, about 4 minutes. Add the minced garlic and cook for another 30 seconds until fragrant.
- Return the browned beef to the skillet. Add the undrained diced tomatoes, cooked rice, chili powder, cumin, smoked paprika, 1 teaspoon salt, and 1/2 teaspoon black pepper. Stir to combine. Let the mixture simmer for 3-4 minutes. Remove from heat and stir in 1/2 cup of the shredded cheddar cheese.
- Place the blanched, carved peppers upright in a 9×13-inch baking dish. If they wobble, trim a thin sliver off the bottom to help them stand flat. Carefully fill each pepper with the beef and rice mixture, packing gently but firmly. Do not overstuff. Top each pepper with the remaining shredded cheddar cheese.
- Cover the baking dish loosely with aluminum foil. Bake for 25 minutes. Remove the foil and bake for another 10-15 minutes, until the cheese is melted and bubbly and the peppers are tender when pierced with a fork.
- Let the stuffed peppers rest in the dish for 5 minutes before serving. Garnish with fresh parsley or cilantro.
Notes
Blanching the carved peppers for 2 minutes is crucial to help them hold their shape during baking. Do not overfill the peppers to prevent the faces from distorting. For best results, shred cheese from a block rather than using pre-shredded cheese. The filling and carved peppers can be prepped up to 24 hours in advance and stored separately in the fridge.
Nutrition
- Serving Size: 1 stuffed pepper
- Calories: 435
- Sugar: 8
- Sodium: 680
- Fat: 22
- Saturated Fat: 9
- Carbohydrates: 28
- Fiber: 5
- Protein: 28
Keywords: stuffed bell peppers, jack-o-lantern peppers, Halloween dinner, stuffed peppers, Halloween recipe, fun dinner for kids


