My son came home from school last October clutching a crumpled flyer for the annual Halloween party. “Mom, I need to bring something creepy but good,” he said, dropping his backpack by the door. I nodded, already mentally scanning the pantry. We had hot dogs. We had crescent rolls. And somewhere in the back of the drawer, a forgotten jar of mustard. That was it. That was the moment these easy mummy hot dog bites were born.
For a while, I just accepted that Halloween snacks meant either spending an hour piping frosting onto cookies or buying a bag of pre-packaged candy. Neither felt right for a classroom full of hungry kids who wanted something fun, fast, and actually filling. These little guys changed everything.
They are not fancy. They are not complicated. But honestly, they are the first thing to disappear at every Halloween gathering I bring them to. The kids love the mummy wrapping. The adults love that they are done in twenty minutes. And I love that I don’t have to scrub a dozen pans afterward.
There is a quiet satisfaction in finding a recipe that just works. No fuss. No stress. Just a plate of silly, spooky, snackable mummies that make everyone smile. And that is exactly what these are.
Why You’ll Love This Recipe
I have tested these mummy hot dog bites at birthday parties, school events, and even a grown-up Halloween potluck. They hold up. They travel well. And they always, always get eaten first.
Here is what makes them a keeper:
- Quick & Easy : From start to finish, these take about 20 minutes. Perfect for last-minute Halloween plans or when the kids are already bouncing off the walls.
- Simple Ingredients : You only need hot dogs, crescent roll dough, and a little mustard or ketchup for the eyes. No specialty stores required.
- Perfect for Parties : Whether it is a classroom celebration, a trunk-or-treat event, or a cozy family movie night, these fit right in.
- Crowd-Pleaser : Kids love the mummy look. Adults love the buttery, flaky crust. Everyone wins.
- Unbelievably Delicious : The crescent roll gets golden and crispy while the hot dog stays juicy inside. It is simple comfort food at its best.
What makes these different from other Halloween snacks? It is the wrapping technique. I learned the hard way that leaving small gaps between the dough strips makes the mummy look more authentic. Too tight and it looks like a sad bread log. Too loose and it falls apart. That sweet spot is where the magic happens.
These mummy hot dog bites are the kind of snack that makes you feel like a Halloween hero without actually working for it. And honestly, that is the best kind of recipe to have in your back pocket.
What Ingredients You Will Need
This recipe uses simple, everyday ingredients to create something that looks way more impressive than it actually is. That is the beauty of it.
- Hot dogs (1 package, about 8 hot dogs) — Use your favorite brand. I prefer all-beef hot dogs for better flavor, but any kind works. You can also use turkey or chicken hot dogs for a lighter option.
- Crescent roll dough (1 can, 8 ounces) — Pillsbury is my go-to. The dough is soft, buttery, and easy to work with. You can also use puff pastry sheets if you want extra flakiness, but crescent rolls are easier.
- Mustard or ketchup (for the eyes) — A little dab goes a long way. I like using yellow mustard for that classic mummy vibe, but ketchup works too. You can also use sriracha for spicy mummies.
- Cooking spray or butter (for the baking sheet) — Helps the bottoms get golden and prevents sticking. Parchment paper works too.
Optional additions:
- Sesame seeds — Sprinkle a few on top for texture. It adds a nice crunch.
- Everything bagel seasoning — A little sprinkle makes these feel fancy. Trust me on this one.
- Cheese — Slice a thin strip of cheddar and wrap it with the dough for a cheesy surprise inside.
Ingredient tips: If you are using frozen hot dogs, thaw them completely first. Cold hot dogs will make the dough cook unevenly. Also, let the crescent roll dough sit at room temperature for about 5 minutes before unrolling. Cold dough cracks and tears easily.
Substitution guidance: For a gluten-free version, use gluten-free crescent roll dough or gluten-free puff pastry. For a dairy-free option, check that your crescent rolls are dairy-free (some brands use butter). Most hot dogs are naturally dairy-free, but always check the label.
Equipment Needed
You do not need much for this recipe. That is part of the charm.
- Baking sheet — A standard half-sheet pan works perfectly. Line it with parchment paper for easy cleanup.
- Sharp knife or pizza cutter — For cutting the crescent roll dough into thin strips. A pizza cutter makes the job faster and cleaner.
- Small bowl — For holding the mustard or ketchup for the eyes. A toothpick or the tip of a knife works for dabbing.
- Pastry brush (optional) — For brushing butter or egg wash on top. Not necessary, but it gives a nicer golden color.
- Toothpicks (optional) — For securing the dough strips if they seem loose. I rarely need them, but they are good to have on hand.
If you do not have a pizza cutter, a sharp paring knife works just fine. I have used both and honestly, the knife gives me more control over the strip width. The key is making the strips thin enough to look like mummy wrappings but thick enough to hold together.
Preparation Method
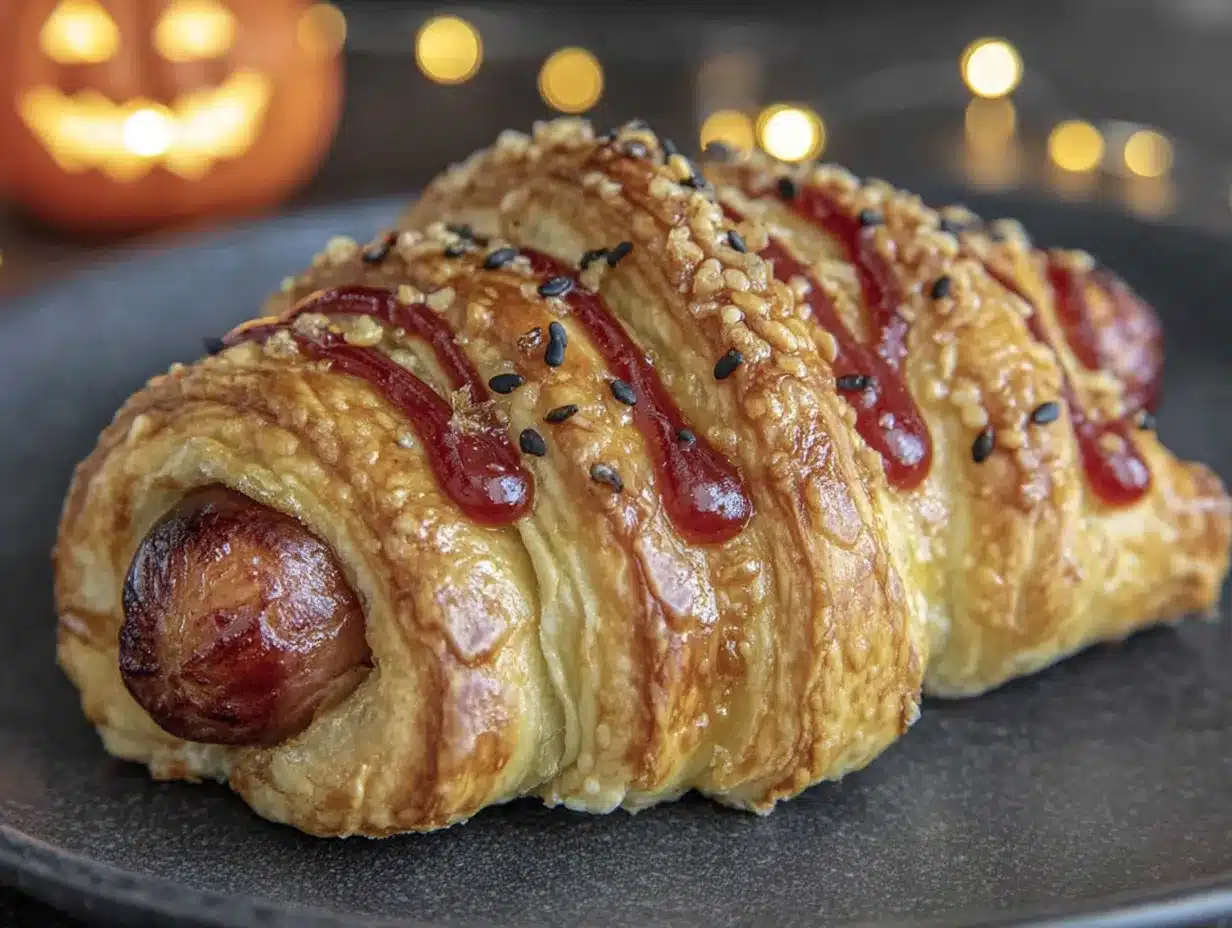
These easy mummy hot dog bites come together fast. Here is exactly how to do it.
- Preheat your oven to 375°F (190°C). Line a baking sheet with parchment paper or lightly spray it with cooking spray. This prevents sticking and makes cleanup a breeze.
- Cut the hot dogs in half. If you want smaller bites, cut each hot dog into thirds. For standard mummies, halving them works perfectly. You should end up with 16 pieces if using a standard 8-pack of hot dogs.
- Unroll the crescent roll dough. Separate the dough along the perforated lines to get 8 triangles. Lay them flat on a clean cutting board.
- Cut each triangle into thin strips. Using a sharp knife or pizza cutter, slice each triangle lengthwise into 3 to 4 thin strips. The strips should be about 1/4 inch wide. Do not worry if they are not perfectly even — mummy wrappings are supposed to look a little messy.
- Wrap the hot dog pieces. Take one hot dog piece and start wrapping a dough strip around it. Leave a small gap at the top for the face. Overlap the strips slightly as you go. Do not wrap too tightly or the dough will tear. Leave the ends of the hot dog exposed slightly so it looks like a mummy peeking out.
- Place the wrapped mummies on the baking sheet. Space them about 1 inch apart. They will puff up a little but not too much.
- Bake for 10 to 12 minutes. The dough should be golden brown and flaky. The hot dogs will be heated through. Keep an eye on them after 10 minutes — ovens vary.
- Let them cool for 2 minutes. This is important. The dough is hot and the hot dog is steamy inside. Give them a minute to settle.
- Add the eyes. Using a toothpick or the tip of a knife, dab a small amount of mustard or ketchup onto the exposed hot dog end. Two dots make the eyes. A little goes a long way.
- Serve warm. These are best eaten fresh out of the oven. The dough is crispy, the hot dog is juicy, and the mustard eyes add a tiny tangy pop.
Sensory cues: When the dough is ready, it will smell buttery and toasty. The edges will be golden brown. If you tap the top, it should feel firm and flaky. The hot dog will be hot all the way through — you can test one by cutting it open if you are unsure.
Preparation note: If you are making these ahead of time, stop after step 6 and refrigerate the assembled mummies for up to 2 hours. Bake them just before serving. They lose their crispiness if stored after baking.
Cooking Tips & Techniques
I have made these easy mummy hot dog bites more times than I can count. Here is what I have learned along the way.
Do not overwork the dough. Crescent roll dough is delicate. If you handle it too much, it gets tough. Gently lift the strips and wrap them loosely around the hot dog. The dough will puff up in the oven and fill in any gaps.
Keep the strips thin. Thick strips look more like bandages than mummy wrappings. Aim for about 1/4 inch wide. If the strips are too wide, the mummy looks bulky and the hot dog gets lost inside.
Leave the face exposed. This is the most common mistake I made early on. I wrapped the dough all the way to the top and then there was no room for the eyes. Leave about 1/2 inch of hot dog exposed at the top. It looks cuter and gives you space for the mustard dots.
Use a light hand with the mustard. A tiny dab is all you need. Too much and it runs down the hot dog and makes a mess. I use the tip of a toothpick and just touch it to the hot dog. That is enough.
Bake on the middle rack. The bottom rack can burn the dough before the top is golden. The top rack might leave the bottoms pale. Middle rack gives you even cooking every time.
My biggest failure: I once tried to make these with refrigerated pizza dough. Do not do it. The pizza dough is too dense and chewy. It does not get flaky like crescent roll dough. Stick with the crescent rolls. They are the secret to the perfect texture.
Timing strategy: If you are making these for a party, assemble them the night before and keep them covered in the fridge. Pop them in the oven when guests arrive. They bake fast enough that you can have a fresh batch ready in under 15 minutes.
Variations & Adaptations
These mummy hot dog bites are endlessly customizable. Here are some of my favorite twists.
Cheesy Mummies: Before wrapping the hot dog, place a thin strip of cheddar or mozzarella cheese on top. Wrap the dough around both the hot dog and the cheese. The cheese melts inside and gets all gooey. It is incredible.
Spicy Mummies: Use spicy Italian sausages instead of hot dogs. Add a dab of sriracha or hot sauce to the mustard eyes. These are great for adults who want a little heat with their Halloween snack.
Veggie Mummies: Swap the hot dogs for vegetarian sausages or even cooked carrot sticks. The carrot version is surprisingly good — the natural sweetness pairs nicely with the buttery dough.
Breakfast Mummies: Use breakfast sausages instead of hot dogs. Serve them with a side of maple syrup for dipping. These are perfect for Halloween morning before school.
Mini Mummies: Cut the hot dogs into thirds instead of halves. Use smaller strips of dough. These bite-sized mummies are great for toddlers or for serving as appetizers at a party.
My personal favorite variation: I tried wrapping the hot dogs in a combination of crescent roll dough and a thin slice of prosciutto. The saltiness of the prosciutto with the buttery dough is unreal. It feels fancy but takes zero extra effort.
Serving & Storage Suggestions
These mummy hot dog bites are best served warm, right after the mustard eyes go on. The contrast between the warm, flaky dough and the cool mustard is part of the magic.
Serving ideas: Arrange them on a platter with a bowl of ketchup or ranch dressing for dipping. You can also serve them alongside a creamy crack dip for a full Halloween snack spread. For a fun presentation, place them on a black platter with fake spider webs underneath.
What to serve with them: These pair well with crispy air fryer buffalo cauliflower bites for a savory contrast. A bowl of pumpkin spice lattes on the side makes it a full Halloween experience.
Storage: If you have leftovers (unlikely, but possible), store them in an airtight container in the refrigerator for up to 3 days. The dough will soften, so they won’t be as crispy as fresh ones.
Reheating: The best way to reheat them is in the oven at 350°F (175°C) for 5 minutes. The microwave works in a pinch, but the dough gets chewy. An air fryer at 350°F for 3 minutes also does a great job of restoring crispiness.
Freezer instructions: You can freeze the assembled, unbaked mummies. Place them on a baking sheet and freeze until solid, then transfer to a freezer bag. Bake from frozen at 375°F (190°C) for 14 to 16 minutes. Add the eyes after baking.
Flavor development: These are honestly best fresh. The dough loses its flakiness over time. If you are making them for a party, bake them right before serving. Your guests will thank you.
Nutritional Information & Benefits
These mummy hot dog bites are a treat, not a health food. But they are not as bad as you might think.
Estimated nutrition per serving (2 mummy bites):
- Calories: 220
- Protein: 8g
- Fat: 14g
- Carbohydrates: 16g
- Fiber: 0g
- Sugar: 3g
- Sodium: 580mg
Health benefits: Hot dogs provide a decent amount of protein, which helps keep kids full during a long night of trick-or-treating. The crescent roll dough offers quick energy from carbohydrates. If you use turkey or chicken hot dogs, you cut the fat and calories significantly.
Dietary considerations: This recipe is not gluten-free unless you use gluten-free dough. It contains dairy if you use butter or certain crescent roll brands. For a lower-sodium option, look for low-sodium hot dogs.
Potential allergens: Hot dogs can contain soy and nitrates. Crescent roll dough typically contains wheat, milk, and soy. Always check labels if you are cooking for someone with allergies.
My perspective: Halloween is one night a year. I do not stress about nutrition on Halloween. These mummy hot dog bites are fun, festive, and made with real ingredients. That is good enough for me.
Conclusion
These easy mummy hot dog bites are the Halloween snack you did not know you needed. They are fast, fun, and foolproof. The kids love making them almost as much as they love eating them.
I love that this recipe lets me be creative without spending hours in the kitchen. The mummy wrapping is forgiving. The mustard eyes are silly. And the whole thing comes together in under 30 minutes. That is a win in my book.
Do not be afraid to customize these. Add cheese. Use different sausages. Make them spicy or mild. The recipe is a starting point, not a rulebook. Make it your own.
I would love to hear how yours turn out. Drop a comment below and tell me about your Halloween snack spread. Share a photo if you made these with your kids. And if you loved them, share the recipe with a friend who needs a last-minute party idea.
Happy Halloween, friend. Go make some mummies.
Frequently Asked Questions
Can I make these mummy hot dog bites ahead of time?
Yes. Assemble them up to 2 hours ahead and keep them covered in the fridge. Bake just before serving for the best texture. You can also freeze the unbaked mummies for up to 3 months.
What can I use instead of crescent roll dough?
Puff pastry works well but gives a flakier, less tender result. You can also use refrigerated biscuit dough rolled thin. Avoid pizza dough — it is too dense and chewy for this recipe.
How do I keep the dough from tearing when wrapping?
Let the dough sit at room temperature for 5 minutes before cutting. Cold dough is brittle and tears easily. Also, wrap the strips loosely. Tight wrapping puts stress on the dough and causes it to snap.
Can I use something other than mustard for the eyes?
Absolutely. Ketchup works great. You can also use sriracha, sambal, or even a tiny dot of barbecue sauce. For a milder option, use cream cheese or sour cream. The eyes are purely decorative, so use whatever you have on hand.
Are these suitable for a classroom Halloween party?
Yes, with a few caveats. Check for allergen policies first. Hot dogs and crescent rolls contain common allergens. You can make a batch with gluten-free dough and turkey hot dogs to accommodate dietary restrictions. They travel well and are easy for kids to eat standing up.
Pin This Recipe!
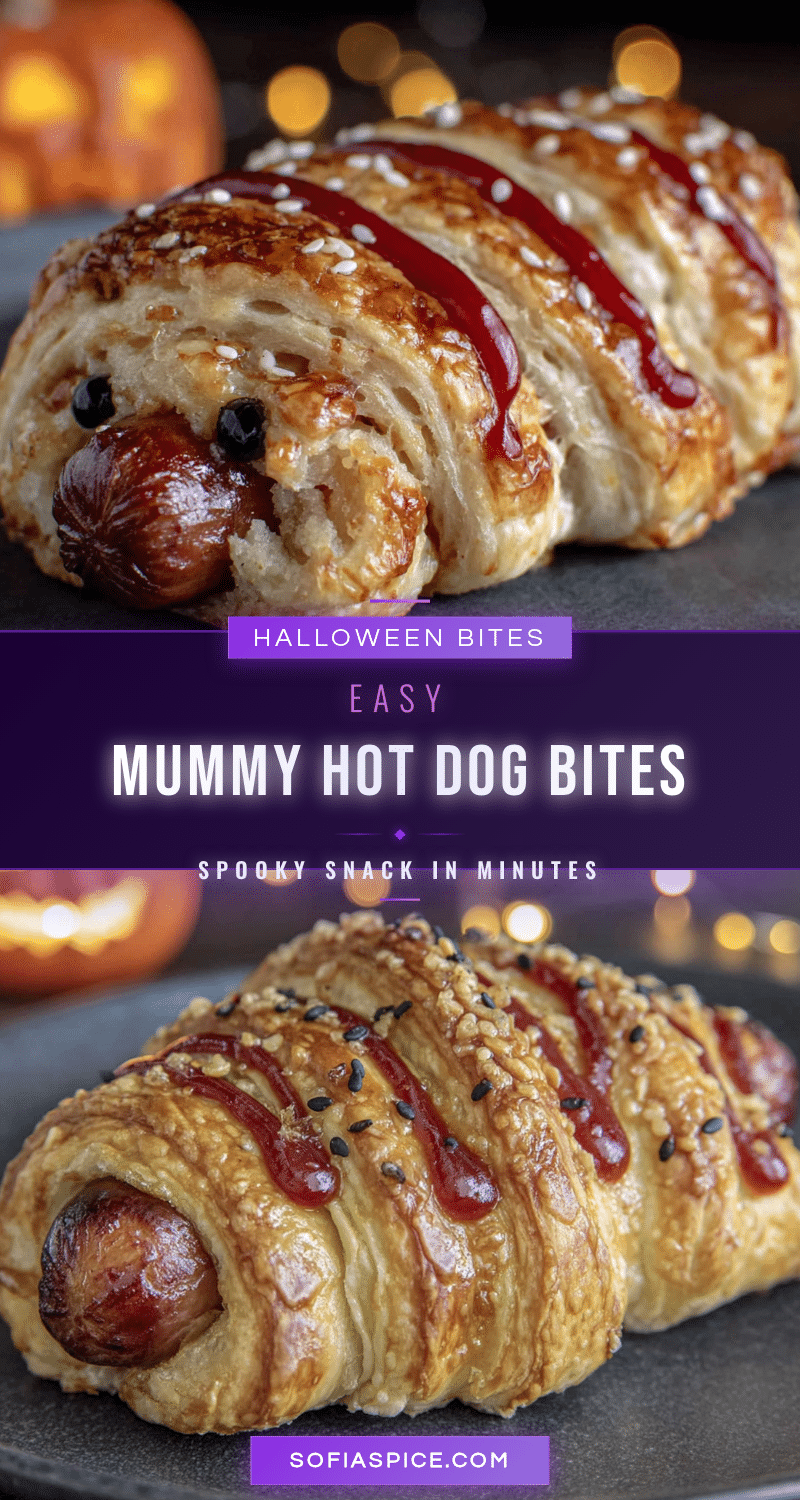
Easy Mummy Hot Dog Bites: Best Halloween Snack
These easy mummy hot dog bites are a quick, fun, and foolproof Halloween snack made with hot dogs and crescent roll dough. Ready in 20 minutes, they’re the perfect crowd-pleaser for parties, school events, or a cozy family movie night.
- Prep Time: 10 minutes
- Cook Time: 12 minutes
- Total Time: 22 minutes
- Yield: 8 servings (2 mummy bites per serving) 1x
- Category: Appetizer
- Cuisine: American
Ingredients
- 1 package hot dogs (about 8 hot dogs)
- 1 can crescent roll dough (8 ounces)
- Mustard or ketchup (for the eyes)
- Cooking spray or butter (for the baking sheet)
- Optional: sesame seeds, everything bagel seasoning, cheese
Instructions
- Preheat your oven to 375°F (190°C). Line a baking sheet with parchment paper or lightly spray it with cooking spray.
- Cut the hot dogs in half. For smaller bites, cut each hot dog into thirds. You should end up with 16 pieces if using a standard 8-pack of hot dogs.
- Unroll the crescent roll dough. Separate the dough along the perforated lines to get 8 triangles. Lay them flat on a clean cutting board.
- Cut each triangle into thin strips. Using a sharp knife or pizza cutter, slice each triangle lengthwise into 3 to 4 thin strips, about 1/4 inch wide.
- Wrap the hot dog pieces. Take one hot dog piece and start wrapping a dough strip around it. Leave a small gap at the top for the face. Overlap the strips slightly as you go. Do not wrap too tightly.
- Place the wrapped mummies on the baking sheet, spacing them about 1 inch apart.
- Bake for 10 to 12 minutes, until the dough is golden brown and flaky.
- Let them cool for 2 minutes.
- Add the eyes. Using a toothpick or the tip of a knife, dab a small amount of mustard or ketchup onto the exposed hot dog end to make two dots.
- Serve warm.
Notes
For best results, let crescent roll dough sit at room temperature for 5 minutes before cutting to prevent tearing. Leave about 1/2 inch of hot dog exposed at the top for the eyes. Assemble up to 2 hours ahead and refrigerate; bake just before serving. Freeze unbaked mummies for up to 3 months; bake from frozen at 375°F for 14-16 minutes.
Nutrition
- Serving Size: 2 mummy bites
- Calories: 220
- Sugar: 3
- Sodium: 580
- Fat: 14
- Saturated Fat: 4
- Carbohydrates: 16
- Protein: 8
Keywords: mummy hot dog bites, Halloween snack, easy Halloween recipe, hot dog mummies, crescent roll hot dogs, spooky snacks, party appetizer


