My neighbor, Mrs. Kowalski, watched me fumbling with a piping bag one October afternoon. I was trying to get the perfect ghost shape for a Halloween party, and honestly, it was a mess. She didn’t say anything at first. Then she just chuckled, handed me a bag of chocolate sandwich cookies, and said, “Forget the fancy stuff. Make the dirt.”
That was three years ago, and I haven’t looked back. I mean, who knew that a few crushed cookies and some instant pudding could become the most requested Halloween dessert in my entire repertoire? The power went out halfway through my first attempt at making these, and I finished them by flashlight. Let me tell you, there is something deeply satisfying about crumbling cookies by candlelight. It felt less like baking and more like casting a little kitchen spell.
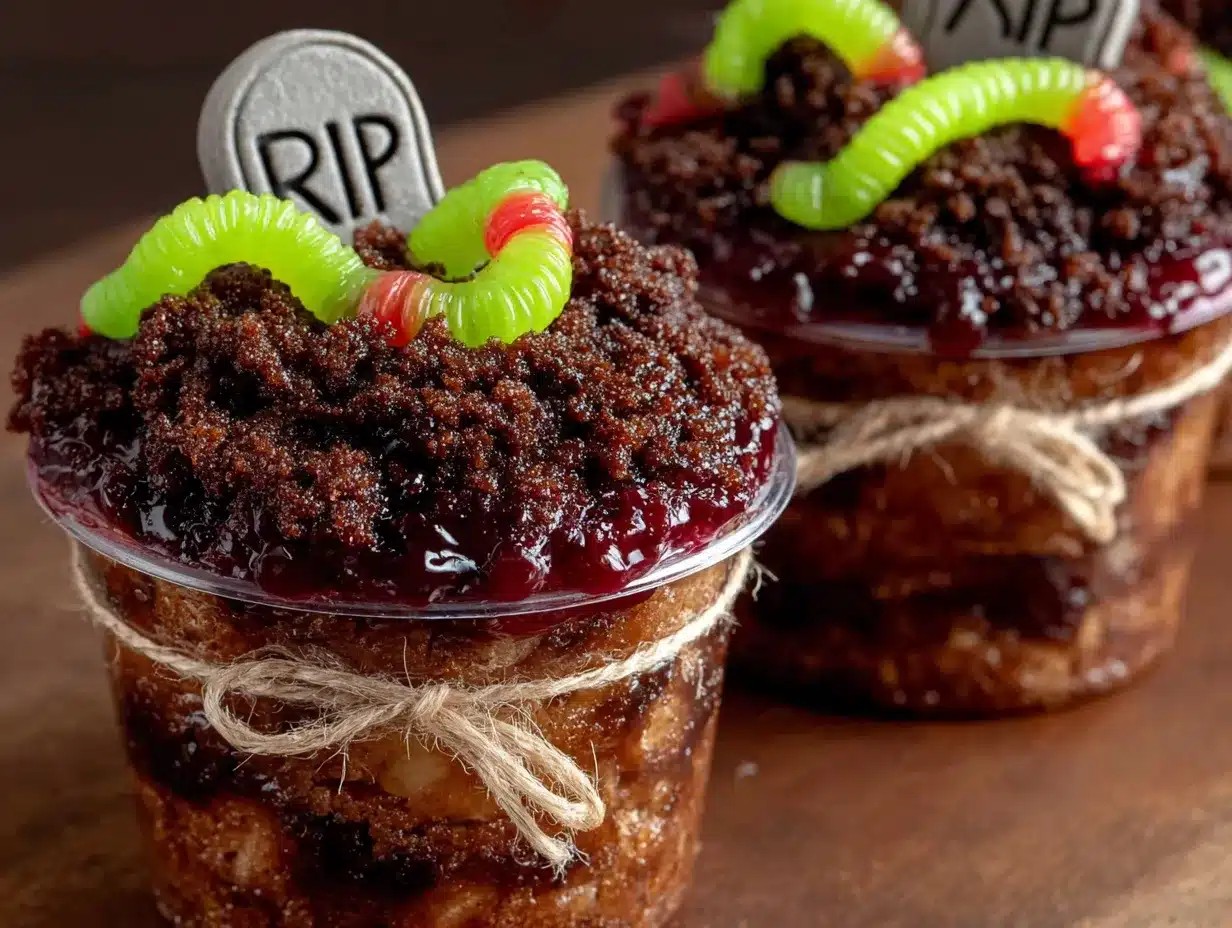
These spooky easy graveyard dirt cake cups are the perfect Halloween dessert. They are ridiculously simple to throw together, which is great when you have a million other party prep tasks. But they also look incredibly impressive—like a tiny, edible cemetery scene that everyone will want to snap a picture of. Maybe you’ve been there, staring at a complicated recipe with a mile-long ingredient list. This is the opposite of that. It’s pure, unadulterated fun in a cup. This recipe stayed with me because it’s not about perfection. It’s about the joy of creating something silly and delicious with your own hands. It’s the kind of treat that makes adults giggle and kids squeal. And honestly, that’s the best kind of recipe there is.
Why You’ll Love This Recipe
I have tested this recipe at least a dozen times, tweaking the pudding consistency and the cookie crumb texture. I’ve brought it to school bake sales, office potlucks, and family Halloween parties. It has never let me down. This isn’t just another Halloween dessert; it’s the one that disappears first.
- Quick & Easy : Comes together in under 20 minutes of active prep time. The hardest part is waiting for the pudding to set in the fridge.
- Simple Ingredients : You likely have everything you need in your pantry right now. No fancy grocery trips for obscure ingredients.
- Perfect for Halloween Parties : Great for spooky movie nights, classroom celebrations, or any October gathering. It’s the ultimate crowd-pleaser.
- Crowd-Pleaser : Kids and adults go wild for the creamy, crunchy texture. It’s nostalgic comfort food at its finest.
- Unbelievably Delicious : The combination of rich chocolate pudding, buttery cookie crumbs, and creamy whipped topping is pure magic. It tastes way more complicated than it is.
What makes this recipe different from all the other dirt cake recipes out there? It’s all about the texture. I’ve perfected the ratio of cookie crumbs to pudding so you get that perfect “dirt” consistency that isn’t too soggy or too dry. Plus, I use a little trick with the cream cheese to give the pudding layer a tangy, cheesecake-like richness that takes it to the next level. It’s not just chocolate pudding in a cup; it’s a decadent, layered dessert that tastes like you spent hours on it.
This recipe isn’t just good—it is the kind that makes you close your eyes after the first bite. It’s comfort food reimagined: faster, simpler, but with the same soul-soothing satisfaction. Perfect for impressing guests without stress, or turning a simple October evening into something memorable.
What Ingredients You Will Need
This recipe uses simple, everyday ingredients to deliver a rich, creamy, and spookily delicious dessert. The magic is in how they come together. You probably have most of these items in your pantry already, which makes this perfect for last-minute Halloween cravings.
For the “Dirt” Layer
- 1 (14.3-ounce) package chocolate sandwich cookies (like Oreos), finely crushed (about 2 cups of crumbs). I recommend using the regular, not double-stuffed, for the best “dirt” texture. You can crush them in a food processor or put them in a zip-top bag and smash them with a rolling pin—which is oddly therapeutic.
- 4 tablespoons unsalted butter, melted (adds richness and helps the “dirt” hold together slightly). For a dairy-free option, use melted coconut oil.
For the Creamy Pudding Layer
- 1 (8-ounce) package cream cheese, softened (this is my secret ingredient for a tangy, cheesecake-like flavor). Let it sit on the counter for 30 minutes to soften properly.
- 1/2 cup granulated sugar (to sweeten the cream cheese). You can use powdered sugar for a smoother texture.
- 1 (3.9-ounce) package instant chocolate pudding mix (I prefer Jell-O brand for the best consistency). Do not use cook-and-serve pudding; it won’t set properly.
- 2 cups cold whole milk (for the pudding). Whole milk gives the richest, creamiest texture. You can use 2% or a non-dairy milk like oat milk, but the pudding may be slightly less firm.
- 1 (8-ounce) container frozen whipped topping, thawed (like Cool Whip). This makes the filling light and fluffy. For a homemade version, you can whip 1 1/2 cups of heavy cream with 2 tablespoons of powdered sugar until stiff peaks form.
For the Graveyard Decorations
- Assorted gummy worms (for crawling out of the dirt). I like the sour ones for an extra zing.
- Chocolate cookie “tombstones” (you can use Milano cookies, chocolate wafers, or even rectangular graham crackers). I usually write “R.I.P.” on them with white icing in a piping pen.
- Halloween-themed sprinkles or candy eyes (for extra spooky fun).
- Small plastic skeletons or spider rings (optional, but they make the cups truly memorable).
Equipment Needed
You don’t need any fancy tools for this recipe, which is part of its charm. Here is what you will need:
- 6 to 8 small clear plastic cups or glass jars (clear cups are best for showing off the layers). I use 8-ounce cups for a perfect single serving.
- Large mixing bowls (one for the cookie crumbs and one for the pudding mixture).
- Electric hand mixer or stand mixer (for beating the cream cheese and sugar until smooth). A whisk will work, but your arm will get a workout.
- Food processor or zip-top bag and rolling pin (for crushing the cookies). I have used both methods; the rolling pin is more fun and great for stress relief.
- Spatula (for folding the whipped topping into the pudding).
- Measuring cups and spoons.
Preparation Method
Follow these steps carefully, and you will have the spookiest, most delicious graveyard dirt cake cups in no time. This recipe is incredibly forgiving, so don’t stress.
- Prepare the “Dirt” (5 minutes): Place the chocolate sandwich cookies in a food processor and pulse until they become fine crumbs. Alternatively, place them in a large zip-top bag, seal it, and crush them with a rolling pin. You want a mix of fine crumbs and slightly larger pieces for texture. Transfer the crumbs to a medium bowl and pour the melted butter over them. Stir with a fork until all the crumbs are evenly moistened. Set aside.
- Make the Creamy Filling (10 minutes): In a large bowl, beat the softened cream cheese and granulated sugar together with an electric hand mixer on medium speed until light, fluffy, and completely smooth. This usually takes about 2-3 minutes. Make sure there are no lumps. In a separate bowl, whisk the instant chocolate pudding mix with the 2 cups of cold milk for about 2 minutes, until it starts to thicken. It will be quite runny at first, but it will set in the fridge.
- Combine the Layers (5 minutes): Pour the prepared pudding into the bowl with the cream cheese mixture. Gently fold them together with a spatula until just combined. Be careful not to overmix. Then, add the thawed whipped topping and fold it in gently until the mixture is uniform, smooth, and a light chocolate color. It should be thick and creamy.
- Assemble the Cups (10 minutes): Now for the fun part! Grab your clear cups. Start with a generous spoonful of the chocolate cookie “dirt” at the bottom of each cup. Press it down lightly with the back of the spoon. Next, spoon or pipe the creamy pudding mixture on top of the dirt layer. Fill each cup about three-quarters full. Finally, top with another generous layer of the cookie crumbs, completely covering the pudding. This is your “graveyard dirt.”
- Chill and Set (2 hours minimum): This is the most important step. Place the assembled cups in the refrigerator for at least 2 hours, or up to overnight. This allows the pudding to fully set and the flavors to meld together. The longer they sit, the better they taste. The texture will be perfectly creamy and scoopable.
- Decorate (10 minutes): Just before serving, it’s time to create your graveyard scene. Gently press a chocolate cookie “tombstone” into the dirt layer of each cup. Poke a few gummy worms so they look like they are crawling out of the dirt. Sprinkle with Halloween sprinkles or add a few candy eyes for a spooky touch. If you have them, nestle a plastic skeleton or spider ring into the dirt. Get creative!
Sensory Cue: When you press the gummy worms into the dirt, you should feel a slight resistance from the chilled pudding layer. The cookie crumbs should feel like, well, dirt—crumbly and dry to the touch. The final dessert should look like a tiny, edible graveyard scene.
Cooking Tips & Techniques
I have made these cups more times than I can count, and I have learned a few things the hard way. Here are my best tips for graveyard dirt cake cup success.
Don’t Skip the Cream Cheese: I once tried making these without the cream cheese to save time. Big mistake. The filling was just sweet pudding, and it lacked that wonderful tangy depth. The cream cheese is what makes this taste like a gourmet dessert. Make sure it is fully softened to avoid lumps.
Use Cold Milk for the Pudding: This seems obvious, but it is crucial. The instant pudding mix needs cold milk to activate the thickening agents. If your milk is even slightly warm, the pudding will not set properly, and you will end up with a soupy mess. Trust me, I learned this on a hot summer day when I left the milk out too long.
Crush the Cookies Just Right: You don’t want all your crumbs to be powder-fine. A few slightly larger pieces add a wonderful crunch and a more realistic “dirt” texture. If you use a food processor, just pulse it a few times and check the consistency. If you use a rolling pin, leave a few chunks intact on purpose.
Layer Strategically: When you add the first layer of dirt to the bottom of the cup, press it down firmly. This creates a solid base and prevents the pudding from seeping to the bottom and making everything soggy. It also gives you a nice, distinct layer when you look at the side of the cup.
Chill Overnight for Best Results: While 2 hours is the minimum, these cups are truly magical after an overnight chill. The cookie crumbs soften slightly, the pudding sets to a perfect mousse-like consistency, and all the flavors meld together beautifully. It is a dessert that gets better with time.
Timing Strategy: Make the filling and assemble the cups the day before your party. Then, just before guests arrive, crush the remaining cookies for the top layer and add the decorations. This keeps the top layer of dirt perfectly crunchy and the decorations looking fresh.
Variations & Adaptations
This recipe is a fantastic canvas for your creativity. Here are a few ways to make it your own.
Peanut Butter Dirt Cake Cups: Add 1/2 cup of creamy peanut butter to the cream cheese and sugar mixture. Beat it in until smooth before adding the pudding. The peanut butter and chocolate combination is absolutely divine. I tried this for a friend who loves Reese’s cups, and it was a huge hit.
Pumpkin Spice Dirt Cake Cups: For a fall twist, replace the chocolate pudding with vanilla or butterscotch pudding. Add 1/2 cup of pumpkin puree and 1 teaspoon of pumpkin pie spice to the cream cheese mixture. Use crushed gingersnap cookies for the “dirt” instead of chocolate ones. It tastes like autumn in a cup.
Gluten-Free Version: This is incredibly easy to adapt. Simply use gluten-free chocolate sandwich cookies (like Glutino or Kinnikinnick brands) for the dirt. Make sure your pudding mix and whipped topping are certified gluten-free. Everything else is naturally gluten-free.
Vegan Dirt Cake Cups: Use a dairy-free cream cheese (like Tofutti or Kite Hill), a vegan instant pudding mix, and a plant-based milk like oat or almond milk. Use a coconut-based whipped topping. For the dirt, use vegan chocolate sandwich cookies. This version is just as creamy and delicious.
Extra Spooky “Worms in Dirt”: Make a batch of homemade gummy worms using a silicone mold and flavored gelatin. It is a fun project, but honestly, store-bought gummy worms work perfectly. For a truly creepy effect, use sour gummy worms—the bright colors look amazing against the dark dirt.
Serving & Storage Suggestions
These graveyard dirt cake cups are best served cold, straight from the refrigerator. The contrast between the cold, creamy filling and the crunchy cookie dirt is what makes them so satisfying.
Serving Temperature: Serve them chilled. I usually take them out of the fridge about 5 minutes before serving, just to take the edge off the cold. This allows the flavors to open up a bit.
Presentation: Arrange the cups on a large platter or serving tray. You can scatter a few extra gummy worms and candy eyes around the base for a spooky effect. If you are serving them at a party, consider placing a small sign that says “Enter the Graveyard” or “Eat at Your Own Risk.”
Complementary Dishes: These cups pair perfectly with other Halloween treats. Serve them alongside a plate of spider web dip with pretzels, some mummy hot dogs, or a bowl of pumpkin punch. They also go great with a hot cup of apple cider.
Storage: Store any leftover cups in the refrigerator, tightly covered with plastic wrap or with a lid on the cup. They will keep for up to 3 days. The texture will change slightly over time as the cookie crumbs soften, but they will still be delicious.
Reheating: Do not reheat these! They are meant to be served cold. If you want to bring them to room temperature, just let them sit out for 10-15 minutes.
How Flavors Develop: The flavors actually improve after a day in the fridge. The cream cheese and pudding meld together, creating a richer, more cohesive taste. The cookie crumbs also soften and become more cake-like. It is a dessert that rewards patience.
Nutritional Information & Benefits
While these graveyard dirt cake cups are a treat, they do have some redeeming qualities. Here is a general estimate of the nutritional content per serving (based on 8 servings).
| Nutrient | Amount Per Serving |
|---|---|
| Calories | 420 |
| Total Fat | 24g |
| Saturated Fat | 14g |
| Cholesterol | 45mg |
| Sodium | 380mg |
| Total Carbohydrates | 50g |
| Dietary Fiber | 2g |
| Sugars | 38g |
| Protein | 6g |
Health Benefits of Key Ingredients: The cream cheese provides a good amount of calcium and protein. The cocoa in the chocolate cookies contains antioxidants called flavonoids. Of course, these benefits are balanced by the sugar and fat content, so enjoy these cups in moderation as a special treat.
Dietary Considerations: This recipe is not gluten-free, low-carb, or vegan in its standard form. However, as noted in the variations section, it is very easy to adapt. It contains dairy, gluten, and soy (in the cookies). Always check your ingredient labels if you have allergies.
Personal Wellness Perspective: I believe in balance. These cups are a celebration dessert, not an everyday snack. They are meant to be enjoyed with friends and family on a special occasion. Don’t stress about the numbers. Just savor the moment and the deliciousness.
Conclusion
These spooky easy graveyard dirt cake cups are more than just a Halloween dessert. They are a memory in the making. They are the treat that kids will beg you to make year after year. They are the conversation starter at your Halloween party. And they are proof that the simplest recipes are often the best.
I encourage you to make this recipe your own. Swap out the gummy worms for candy corn. Use different colored sprinkles. Write funny names on the tombstones. The beauty of this dessert is that it is endlessly customizable. It’s a canvas for your Halloween creativity.
Personally, I love this recipe because it brings people together. There is something so joyful about seeing a room full of people, young and old, grinning over a cup of “dirt.” It reminds us not to take ourselves too seriously. It reminds us to have fun.
So go ahead. Get your hands dirty. Crush some cookies. Poke some worms into the ground. And then enjoy every single bite. If you make these, please come back and leave a comment below. I would love to see your graveyard creations! Share your photos with us on social media, and tag a friend who needs a little Halloween magic in their life. Happy haunting!
Frequently Asked Questions
Can I make these graveyard dirt cake cups ahead of time?
Absolutely! In fact, I recommend it. You can assemble the cups completely (minus the decorations) up to 24 hours in advance. Store them covered in the refrigerator. Add the gummy worms, tombstones, and other decorations just before serving to keep them looking fresh.
Can I use homemade whipped cream instead of Cool Whip?
Yes, you can. Whip 1 1/2 cups of heavy cream with 2 tablespoons of powdered sugar until stiff peaks form. Fold it into the pudding mixture as directed. The texture will be slightly lighter and less stable than with Cool Whip, but it is delicious.
My pudding mixture is too runny. What did I do wrong?
This usually happens if the milk was not cold enough or if the pudding was not whisked for the full 2 minutes. Make sure your milk is very cold. Also, be patient and whisk vigorously. The pudding will thicken significantly as it chills in the fridge. If it is still runny after 30 minutes, you can add a little more instant pudding mix to help it set.
Can I use a different type of cookie for the “dirt”?
Definitely! Chocolate wafer cookies, graham crackers, or even crushed pretzels can be used. For a fall twist, try crushed gingersnaps or speculoos cookies. Each will give a slightly different flavor and texture to the dirt layer.
How do I prevent the cookie crumbs from getting soggy?
To keep the top layer of cookie crumbs crunchy, do not mix them into the pudding. Only add them as a final topping just before serving. Also, make sure the pudding layer is fully set (chilled for at least 2 hours) before adding the final dirt layer. This creates a barrier that prevents the crumbs from absorbing too much moisture.
Pin This Recipe!
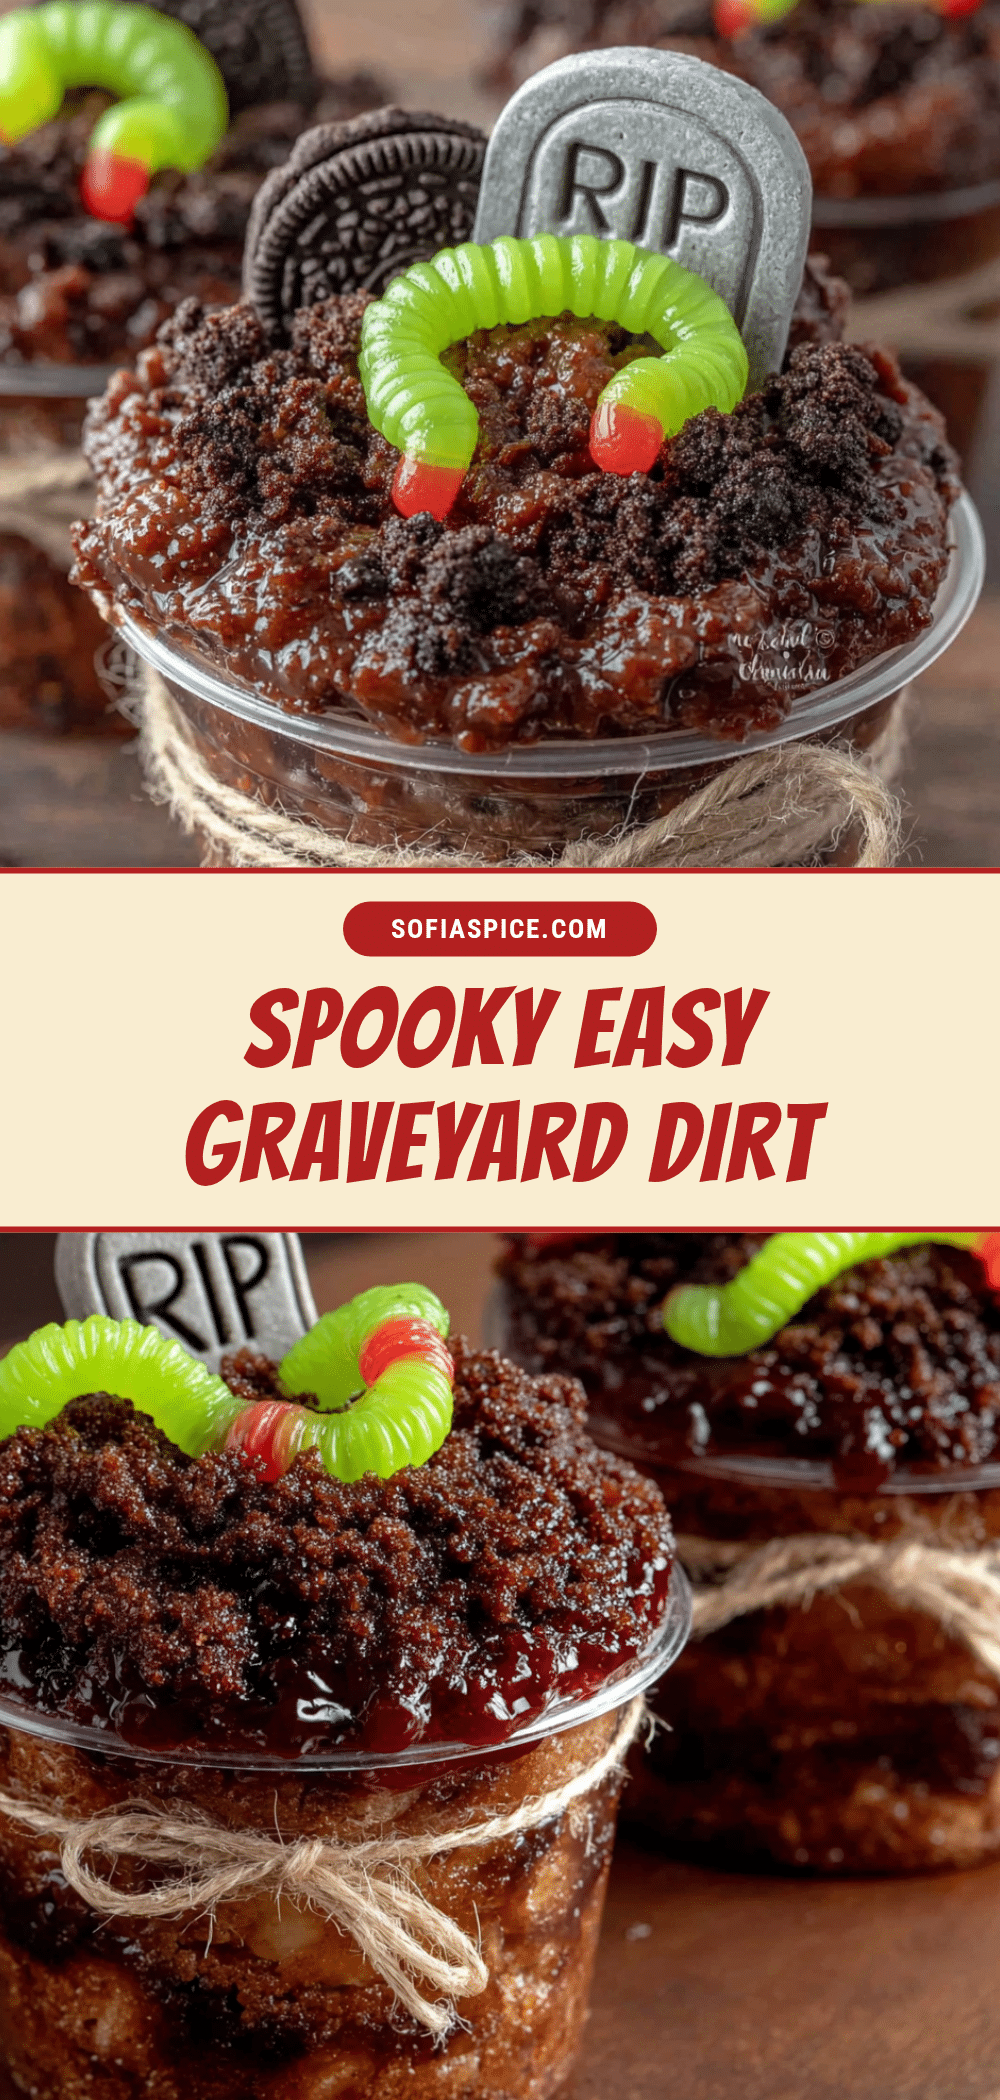
Easy Graveyard Dirt Cake Cups: Best Spooky Halloween Dessert

These spooky easy graveyard dirt cake cups are the perfect Halloween dessert. They are ridiculously simple to throw together, but they look incredibly impressive—like a tiny, edible cemetery scene that everyone will want to snap a picture of.
- Prep Time: 20 minutes
- Cook Time: 0 minutes
- Total Time: 2 hours 20 minutes (includes chilling)
- Yield: 8 servings 1x
- Category: Dessert
- Cuisine: American
Ingredients
- 1 (14.3-ounce) package chocolate sandwich cookies (like Oreos), finely crushed (about 2 cups of crumbs)
- 4 tablespoons unsalted butter, melted
- 1 (8-ounce) package cream cheese, softened
- 1/2 cup granulated sugar
- 1 (3.9-ounce) package instant chocolate pudding mix
- 2 cups cold whole milk
- 1 (8-ounce) container frozen whipped topping, thawed
- Assorted gummy worms
- Chocolate cookie “tombstones” (Milano cookies, chocolate wafers, or rectangular graham crackers)
- Halloween-themed sprinkles or candy eyes
- Small plastic skeletons or spider rings (optional)
Instructions
- Prepare the “Dirt” (5 minutes): Place the chocolate sandwich cookies in a food processor and pulse until they become fine crumbs. Alternatively, place them in a large zip-top bag, seal it, and crush them with a rolling pin. You want a mix of fine crumbs and slightly larger pieces for texture. Transfer the crumbs to a medium bowl and pour the melted butter over them. Stir with a fork until all the crumbs are evenly moistened. Set aside.
- Make the Creamy Filling (10 minutes): In a large bowl, beat the softened cream cheese and granulated sugar together with an electric hand mixer on medium speed until light, fluffy, and completely smooth. This usually takes about 2-3 minutes. Make sure there are no lumps. In a separate bowl, whisk the instant chocolate pudding mix with the 2 cups of cold milk for about 2 minutes, until it starts to thicken. It will be quite runny at first, but it will set in the fridge.
- Combine the Layers (5 minutes): Pour the prepared pudding into the bowl with the cream cheese mixture. Gently fold them together with a spatula until just combined. Be careful not to overmix. Then, add the thawed whipped topping and fold it in gently until the mixture is uniform, smooth, and a light chocolate color. It should be thick and creamy.
- Assemble the Cups (10 minutes): Now for the fun part! Grab your clear cups. Start with a generous spoonful of the chocolate cookie “dirt” at the bottom of each cup. Press it down lightly with the back of the spoon. Next, spoon or pipe the creamy pudding mixture on top of the dirt layer. Fill each cup about three-quarters full. Finally, top with another generous layer of the cookie crumbs, completely covering the pudding. This is your “graveyard dirt.”
- Chill and Set (2 hours minimum): This is the most important step. Place the assembled cups in the refrigerator for at least 2 hours, or up to overnight. This allows the pudding to fully set and the flavors to meld together. The longer they sit, the better they taste. The texture will be perfectly creamy and scoopable.
- Decorate (10 minutes): Just before serving, it’s time to create your graveyard scene. Gently press a chocolate cookie “tombstone” into the dirt layer of each cup. Poke a few gummy worms so they look like they are crawling out of the dirt. Sprinkle with Halloween sprinkles or add a few candy eyes for a spooky touch. If you have them, nestle a plastic skeleton or spider ring into the dirt. Get creative!
Notes
For best results, chill overnight. The cream cheese adds a tangy, cheesecake-like richness. Use cold milk for the pudding to ensure it sets properly. Crush cookies to a mix of fine crumbs and slightly larger pieces for texture. Press the first layer of dirt firmly to prevent sogginess. Add decorations just before serving to keep them fresh.
Nutrition
- Serving Size: 1 cup
- Calories: 420
- Sugar: 38
- Sodium: 380
- Fat: 24
- Saturated Fat: 14
- Carbohydrates: 50
- Fiber: 2
- Protein: 6
Keywords: Halloween dessert, dirt cake, graveyard cake, no-bake dessert, chocolate pudding, easy dessert, spooky dessert