The cheese pull. That’s what got me. I was standing over the skillet, fork in hand, not even bothering with a plate, and the mozzarella stretched from the spoon to my mouth like it had somewhere to be. I hadn’t planned on eating dinner standing up, but honestly, that’s how this recipe works. It tricks you. You stir in the rice, you sprinkle the cheese, you tell yourself you’ll just taste it for seasoning, and then suddenly you’re three bites in and the pan is half empty.
This Easy Cheesy Taco Rice Skillet wasn’t supposed to be a recipe at all. It was a fridge-clean-out Tuesday. I had leftover ground beef from taco night, half a bag of shredded cheddar, and a box of white rice that had been sitting in the pantry since before I moved apartments. I was this close to ordering takeout. But I didn’t want to wait thirty minutes, and I didn’t want to spend fifteen dollars on something I could probably make in less time. So I grabbed the skillet, turned the heat to medium, and just started throwing things in. One thing led to another, and by the time the rice was tender and the cheese had melted into every single crevice, I knew I wasn’t ordering anything.
It’s not fancy. It’s not complicated. But it’s the kind of dinner that makes you forget you were tired. The kind that feels like comfort without any effort. And the best part? It all happens in one pan, start to finish. No rice cooker, no separate pot, no extra dishes hiding in the sink. Just you, a skillet, and a really good stretchy cheese moment waiting to happen.
Why You’ll Love This Recipe
Let me tell you why this one-pan wonder has earned a permanent spot in my weekly rotation. I’ve tested this recipe about six times now, tweaking the liquid ratio, swapping the cheese blend, even trying it with different types of rice. And every single time, it delivers the same thing: a warm, satisfying, no-stress dinner that feels like a hug in a skillet.
- One-Pan Magic: Everything cooks in a single skillet. That means less cleanup, fewer dishes, and more time doing literally anything else.
- Ready in 20 Minutes: From the moment you turn on the stove to the moment you’re eating, it’s about twenty minutes. Perfect for those nights when you’re hangry and impatient.
- Simple Ingredients: You probably already have most of this in your kitchen. Ground beef, rice, canned tomatoes, cheese, and taco seasoning. No fancy grocery store trips required.
- Crowd-Pleaser: I’ve served this to picky kids, hungry adults, and friends who showed up unannounced. Everyone goes back for seconds.
- Budget-Friendly: This whole meal costs about the same as two fast-food burritos, but it feeds four people and tastes way better.
- Comfort Food, Faster: It has all the cozy, cheesy, taco-flavored goodness you crave, but it comes together in the time it takes to watch one episode of a sitcom.
What makes this different from every other taco rice recipe out there is the texture. Most versions end up mushy or dry. But I figured out the exact liquid-to-rice ratio and the right moment to add the cheese so it melts into the rice without turning it into a gluey mess. It’s fluffy, it’s saucy, and every single grain of rice is coated in that seasoned, cheesy goodness. This isn’t just another weeknight dinner. It’s the one you’ll actually look forward to.
Ingredients You Will Need
This recipe uses straightforward, pantry-friendly ingredients that come together to create something way bigger than the sum of their parts. Here’s what you’ll need and why each one matters.
- 1 lb ground beef (85/20 or 90/10): The fat content matters here. 85/20 gives you enough richness to flavor the rice without making the dish greasy. If you use leaner meat, you might need a splash of oil to keep things from sticking.
- 1 small yellow onion, diced: About half a cup. Onion adds a subtle sweetness that balances the taco seasoning. I like yellow onion here, but white onion works fine too.
- 2 cloves garlic, minced: Fresh garlic is non-negotiable in my kitchen. The jarred stuff works in a pinch, but freshly minced garlic gives you that punchy aroma that makes the whole skillet smell incredible.
- 1 packet taco seasoning (or 3 tablespoons homemade): I usually use store-bought for convenience, but if you have my habanero mango hot sauce lying around, a few dashes of that plus cumin, chili powder, and smoked paprika make a killer homemade blend.
- 1 can (14.5 oz) diced tomatoes with green chiles (like Rotel): This is the secret weapon. The tomatoes provide acidity, the chiles add a mild kick, and the liquid helps cook the rice. Don’t drain it.
- 1 cup long-grain white rice, uncooked: Long-grain rice stays separate and fluffy. Basmati or jasmine work beautifully. Do not use instant rice or brown rice without adjusting the liquid and cook time.
- 1 cup beef broth (or chicken broth): The broth adds depth. I prefer beef broth for a richer taco flavor, but chicken broth works if that’s what you have.
- 1 cup shredded cheddar cheese (or Mexican blend): Sharp cheddar gives you that bold, tangy flavor. A Mexican blend melts like a dream. I’ve also used pepper jack for extra heat, and it was fantastic.
- 1/2 cup shredded mozzarella cheese: This is optional, but I love adding it for the stretch factor. Mozzarella gives you that gooey, pull-apart texture that makes this skillet so satisfying.
- Salt and black pepper, to taste: The taco seasoning has salt, so taste before you add more.
- Optional toppings: chopped cilantro, diced avocado, sour cream, jalapeños, green onions: These aren’t just for looks. A dollop of sour cream cools the heat, and fresh cilantro adds brightness that cuts through the richness.
I recommend using a good-quality canned tomato brand like Muir Glen or fire-roasted Rotel for the best flavor. And if you’re feeling adventurous, swap the ground beef for ground turkey or chorizo. Chorizo gives this a smoky, spicy kick that’s absolutely addictive.
Equipment Needed
You don’t need a fancy kitchen to make this recipe. Here’s what you’ll need:
- Large skillet or deep sauté pan (12-inch with a lid): This is your main tool. A deep skillet with a tight-fitting lid is essential because the rice needs to steam. I use my trusty cast iron skillet, but a non-stick or stainless steel pan works just as well.
- Wooden spoon or silicone spatula: For breaking up the ground beef and stirring the rice. A metal spoon can scratch your non-stick pan, so stick with wood or silicone.
- Sharp knife and cutting board: For dicing the onion and mincing the garlic.
- Measuring cups and spoons: Accuracy matters for the liquid-to-rice ratio. I’ve learned the hard way that eyeballing it leads to crunchy rice or mushy rice.
- Cheese grater: Pre-shredded cheese has anti-caking agents that prevent it from melting smoothly. Grating your own cheese takes two extra minutes and makes a noticeable difference in texture.
- Lid or foil: If your skillet doesn’t have a lid, a sheet of aluminum foil tightly crimped around the edges works perfectly.
If you don’t have a deep skillet, you can use a Dutch oven or even a large saucepan. Just make sure it’s wide enough to fit the rice in an even layer. And honestly, if you have a lid, you’re golden.
Preparation Method
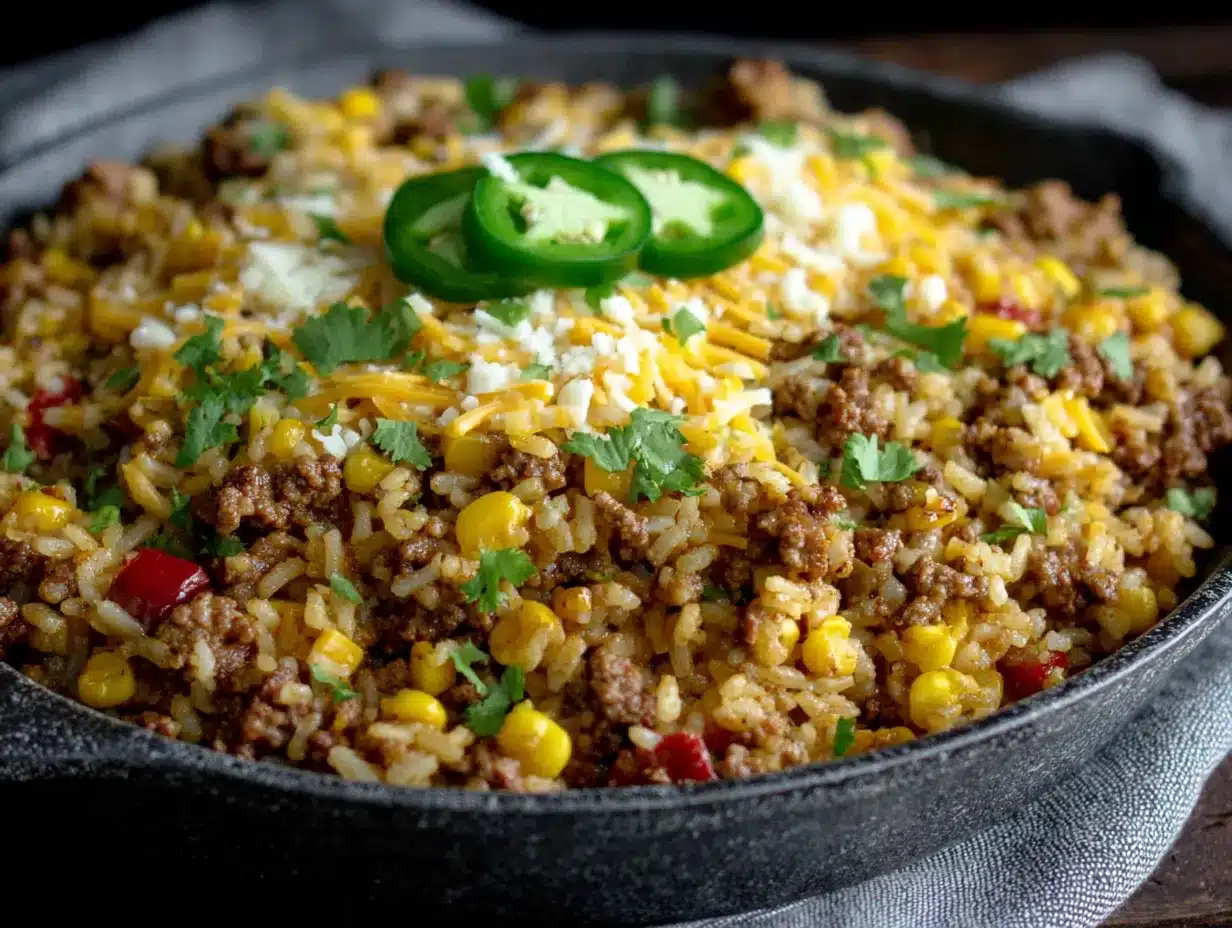
Follow these steps, and you’ll have a perfect skillet dinner every single time. I’ve included all the little details that make the difference between good and great.
- Brown the beef: Place your skillet over medium-high heat and add the ground beef. Cook for 4 to 5 minutes, breaking it apart with your wooden spoon as it browns. You want it fully cooked with some nice brown bits sticking to the pan—that’s flavor. If there’s excess fat, spoon most of it out, leaving about a tablespoon behind for cooking the onions.
- Sauté the aromatics: Reduce the heat to medium. Add the diced onion to the skillet and cook for 2 to 3 minutes, until it softens and turns translucent. Stir occasionally to scrape up those browned bits from the bottom. Add the minced garlic and cook for another 30 seconds, until fragrant. Don’t let the garlic burn—it turns bitter fast.
- Add the seasoning and tomatoes: Sprinkle the taco seasoning over the beef and onions. Stir well to coat everything evenly. Then pour in the can of diced tomatoes with green chiles, including all the liquid. Stir again, scraping the bottom of the pan to deglaze any stuck-on bits. Let it simmer for 1 minute.
- Add the rice and broth: Pour in the uncooked rice and the beef broth. Stir everything together until the rice is evenly distributed. Bring the mixture to a gentle boil—you should see small bubbles breaking the surface. This is the moment to taste the liquid and adjust salt if needed. Remember, the rice will absorb the seasoning, so it should taste slightly salty at this stage.
- Simmer and cover: Reduce the heat to low. Cover the skillet with a tight-fitting lid. Let it simmer gently for 15 to 18 minutes. Do not lift the lid during this time—the steam is what cooks the rice. If you peek, you release heat and moisture, and your rice might end up undercooked. I know it’s tempting. Resist.
- Check the rice: After 15 minutes, remove the lid carefully (steam is hot!). Fluff the rice with a fork. It should be tender and have absorbed most of the liquid. If it’s still a bit firm, add 2 to 3 tablespoons of water, re-cover, and cook for another 3 minutes. If it’s perfectly tender, move to the next step.
- Add the cheese: Sprinkle the shredded cheddar and mozzarella evenly over the top of the rice. Do not stir it in. Cover the skillet again and let it sit off the heat for 2 to 3 minutes. The residual heat will melt the cheese into a blanket of gooey goodness. If you want a slightly browned top, pop the skillet under the broiler for 1 to 2 minutes—just watch it closely so it doesn’t burn.
- Serve and garnish: Scoop the cheesy taco rice into bowls. Top with your favorite garnishes—chopped cilantro, diced avocado, a dollop of sour cream, sliced jalapeños, or a squeeze of lime. The freshness of the toppings balances the richness of the cheese and beef.
One thing I learned the hard way: don’t rush the simmer. Low and slow is the key. If you boil it too hard, the liquid evaporates before the rice is cooked, and you end up with crunchy rice and a burnt bottom. Trust the process, and keep that lid on.
Cooking Tips & Techniques
I’ve made this recipe at least a dozen times, and I’ve made every mistake in the book so you don’t have to. Here are the tips that actually matter.
Don’t lift the lid too early. This is the number one mistake people make. Every time you lift the lid, steam escapes, and the cooking time gets thrown off. Set a timer, walk away, and let the rice do its thing. Fifteen minutes feels like forever when you’re hungry, but it’s worth the wait.
Use the right rice. Long-grain white rice is your best friend here. It absorbs liquid evenly and stays separate. Brown rice takes twice as long and needs more liquid. If you want to use brown rice, increase the broth to 1.5 cups and simmer for 30 to 35 minutes. Jasmine rice works beautifully and adds a slight floral aroma. Basmati is great too, but rinse it first to remove excess starch.
Grate your own cheese. I know it’s tempting to buy the pre-shredded bags. I’ve done it. But the anti-caking agents in those bags (usually potato starch or cellulose) prevent the cheese from melting smoothly. You end up with a grainy, clumpy topping instead of that silky, stretchy blanket. A block of cheddar and a box grater take two minutes. Your taste buds will thank you.
Toast the rice for extra flavor. If you have an extra minute, try this: after you sauté the onions and garlic, add the dry rice to the skillet and stir it around for 1 to 2 minutes until it smells nutty and starts to turn golden. This step adds a layer of toasty flavor that makes the dish taste more complex. I do this about half the time, depending on how much patience I have.
Season in layers. Don’t just dump all the taco seasoning in at once. Add half when you cook the beef, and the other half when you add the tomatoes. This builds flavor at different stages and prevents the seasoning from tasting flat. I learned this from a chef friend, and it changed the way I cook everything.
Control the heat. If your stovetop runs hot, keep the heat on low once you cover the skillet. A gentle simmer is all you need. If the liquid is bubbling aggressively, the rice on the bottom will burn before the top is cooked. When in doubt, go lower.
Variations & Adaptations
This recipe is incredibly flexible. Here are some of my favorite ways to change it up depending on what I’m craving or what’s in my fridge.
Make it vegetarian: Swap the ground beef for a can of black beans (drained and rinsed) or a plant-based ground meat substitute. Add the beans at the same time as the tomatoes. The texture is a little different, but the flavor is still fantastic. I’ve also used crumbled tofu seasoned with taco spices, and it worked surprisingly well.
Add more veggies: Diced bell peppers, corn kernels, or zucchini are all great additions. Sauté them with the onions so they soften before the rice goes in. I love adding a cup of frozen corn at the end—it adds sweetness and a pop of color. If you’re looking for a side dish to round out the meal, try this creamy dill cucumber salad for a cool, refreshing contrast.
Spice it up: If you like heat, use pepper jack cheese instead of cheddar, or add a diced jalapeño with the onions. A few dashes of your favorite hot sauce stirred in before serving also works. I’ve even added a spoonful of chipotle peppers in adobo for a smoky, spicy kick. Just go easy—those little peppers pack a punch.
Go low-carb: Swap the rice for cauliflower rice. The cooking time changes significantly—cauliflower rice only needs about 5 to 7 minutes to cook. Add it after the beef and tomatoes have simmered, stir well, and cover until tender. The cheese still melts beautifully, and you get all the taco flavor without the carbs.
Make it a one-pan burrito bowl: Serve the cheesy taco rice in a bowl and top it with shredded lettuce, diced tomatoes, black olives, and a big scoop of guacamole. It turns into a loaded burrito bowl without needing to roll anything. I’ve done this for meal prep, and it holds up well in the fridge for three days.
Serving & Storage Suggestions
This skillet is best served fresh, right when the cheese is still stretchy and the rice is fluffy. But leftovers are pretty great too.
Serving temperature: Serve hot, straight from the skillet. The cheese should be melted and gooey. If you’re serving a crowd, keep the skillet on a trivet at the table so everyone can scoop their own portions. It’s a casual, family-style meal that feels cozy and communal.
What to serve with it: A simple side salad with lime vinaigrette cuts through the richness. Tortilla chips and salsa are always welcome. If you want a heartier spread, these loaded tailgate nachos would be a fun addition to the table. For drinks, an ice-cold Mexican lager or a margarita pairs perfectly with the taco flavors.
Storage: Let the skillet cool completely, then transfer leftovers to an airtight container. Store in the refrigerator for up to 4 days. The rice will absorb more liquid as it sits, so the texture will be a bit softer the next day. It’s still delicious, just less fluffy.
Reheating: The best way to reheat is in a skillet over medium-low heat with a splash of water or broth. Stir occasionally until warmed through. You can also microwave individual portions in 30-second bursts, stirring in between. If the rice seems dry, add a teaspoon of water before microwaving. The cheese will re-melt, though it won’t be as stretchy as the first time.
Freezer instructions: This recipe freezes well for up to 3 months. Portion it into freezer-safe containers, leaving a little room for expansion. Thaw overnight in the refrigerator and reheat in a skillet. The texture of the rice changes slightly after freezing—it becomes a bit softer—but the flavor stays intact. I’ve packed this for quick lunches, and it’s a lifesaver on busy days.
Flavor development: Honestly, the flavors meld together even more after a day in the fridge. The taco seasoning deepens, and the rice absorbs all the tomato goodness. Some people prefer it as leftovers because it tastes even more cohesive. I’m one of those people.
Nutritional Information & Benefits
Here’s a rough estimate of the nutritional breakdown per serving (based on 4 servings, using 85/20 ground beef and cheddar cheese).
| Nutrient | Amount Per Serving |
|---|---|
| Calories | 510 |
| Protein | 32g |
| Carbohydrates | 42g |
| Fiber | 3g |
| Sugar | 4g |
| Fat | 22g |
| Saturated Fat | 10g |
| Sodium | 980mg |
This dish is a solid source of protein from the beef and cheese, which helps keep you full and satisfied. The rice provides quick energy, and the tomatoes add a dose of vitamin C and antioxidants like lycopene. If you’re watching your sodium, use low-sodium broth and a reduced-sodium taco seasoning packet. You can also cut the cheese in half to reduce the saturated fat without losing too much of the flavor.
For a lighter version, swap the ground beef for ground turkey and use reduced-fat cheese. The protein stays high, but the fat and calories drop significantly. I’ve made it both ways, and honestly, the turkey version is still really good. Just add a little olive oil to the pan so it doesn’t dry out.
Conclusion
This Easy Cheesy Taco Rice Skillet is the kind of recipe that becomes a habit. You make it once, and suddenly it’s in your rotation every other week. It’s fast enough for a Tuesday night, satisfying enough to impress guests, and simple enough that you don’t need to think too hard. The cheese pull, the seasoned rice, the one-pan cleanup—it all adds up to a dinner that feels like a win.
I encourage you to make it your own. Throw in whatever vegetables you have, swap the protein, pile on your favorite toppings. The base is forgiving, and the possibilities are endless. If you try it, I’d love to hear how it turned out. Drop a comment below, share a photo, or tell me what twist you added. And if you’re looking for another easy one-pan meal to round out your week, this cheesy beef and rice skillet is a close cousin that deserves a spot on your table too.
Now go grab your skillet. Dinner’s waiting.
Frequently Asked Questions
Can I use instant rice for this recipe?
I don’t recommend it. Instant rice is pre-cooked and dehydrated, so it absorbs liquid much faster and can turn mushy. The texture won’t be the same. Stick with long-grain white rice for the best results.
Can I make this in a slow cooker or Instant Pot?
You can adapt it for an Instant Pot by using the sauté function for the beef and onions, then adding the rice, broth, and tomatoes and cooking on high pressure for 4 minutes with a natural release. For a slow cooker, brown the beef first, then add everything except the rice and cheese. Cook on low for 4 hours, then stir in cooked rice and cheese at the end.
How do I prevent the rice from sticking to the pan?
Make sure you use enough liquid and keep the heat low once you cover the skillet. If your pan tends to stick, use a non-stick skillet or add a little extra broth. Letting the rice rest off the heat for a few minutes after cooking also helps release it from the pan.
Can I double this recipe?
Absolutely. Use a larger skillet or Dutch oven and keep the liquid-to-rice ratio the same. You may need to increase the simmer time by a few minutes since there’s more volume. Just check the rice for doneness before adding the cheese.
What’s the best cheese for the stretchiest melt?
Mozzarella is the star for stretch. Combine it with cheddar for flavor, and you get the best of both worlds. If you want extra gooeyness, try adding a handful of Monterey Jack or provolone.
Pin This Recipe!
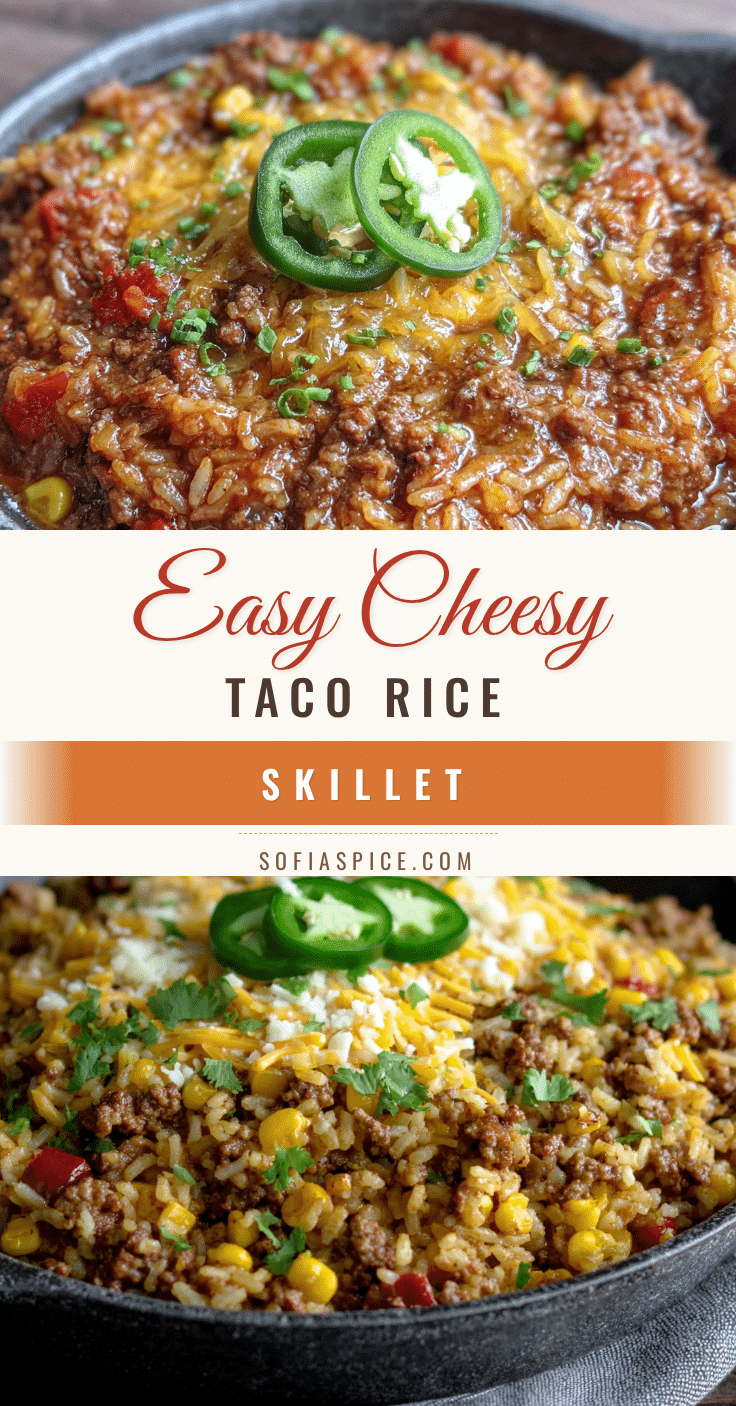
Easy Cheesy Taco Rice Skillet (One-Pan, 20-Min Meal)

A quick and easy one-pan meal featuring seasoned ground beef, fluffy rice, and melted cheese. Ready in just 20 minutes, this budget-friendly comfort food is perfect for busy weeknights.
- Prep Time: 5 minutes
- Cook Time: 15 minutes
- Total Time: 20 minutes
- Yield: 4 servings 1x
- Category: Main Course
- Cuisine: Mexican-American
Ingredients
- 1 lb ground beef (85/20 or 90/10)
- 1 small yellow onion, diced
- 2 cloves garlic, minced
- 1 packet taco seasoning (or 3 tablespoons homemade)
- 1 can (14.5 oz) diced tomatoes with green chiles (like Rotel), undrained
- 1 cup long-grain white rice, uncooked
- 1 cup beef broth (or chicken broth)
- 1 cup shredded cheddar cheese (or Mexican blend)
- 1/2 cup shredded mozzarella cheese
- Salt and black pepper, to taste
- Optional toppings: chopped cilantro, diced avocado, sour cream, jalapeños, green onions
Instructions
- Brown the beef: Place your skillet over medium-high heat and add the ground beef. Cook for 4 to 5 minutes, breaking it apart with a wooden spoon as it browns. Spoon out excess fat, leaving about a tablespoon behind.
- Sauté the aromatics: Reduce heat to medium. Add diced onion and cook for 2 to 3 minutes until softened. Add minced garlic and cook for 30 seconds until fragrant.
- Add the seasoning and tomatoes: Sprinkle taco seasoning over the beef and onions. Stir well. Pour in the undrained diced tomatoes with green chiles. Stir and scrape the bottom of the pan. Let simmer for 1 minute.
- Add the rice and broth: Pour in uncooked rice and beef broth. Stir until evenly distributed. Bring to a gentle boil. Taste and adjust salt if needed.
- Simmer and cover: Reduce heat to low. Cover with a tight-fitting lid. Simmer gently for 15 to 18 minutes. Do not lift the lid during this time.
- Check the rice: Remove lid carefully. Fluff rice with a fork. If still firm, add 2-3 tablespoons water, re-cover, and cook for 3 more minutes.
- Add the cheese: Sprinkle cheddar and mozzarella evenly over the top. Do not stir. Cover and let sit off heat for 2 to 3 minutes until melted. Optionally broil for 1-2 minutes for a browned top.
- Serve and garnish: Scoop into bowls and top with desired garnishes like cilantro, avocado, sour cream, jalapeños, or lime.
Notes
Don’t lift the lid during simmering to ensure proper rice cooking. Grate your own cheese for best melting. For extra flavor, toast the dry rice in the skillet for 1-2 minutes before adding liquid. Leftovers keep in the refrigerator for up to 4 days and freeze well for up to 3 months.
Nutrition
- Serving Size: 1 serving (about 1.5
- Calories: 510
- Sugar: 4
- Sodium: 980
- Fat: 22
- Saturated Fat: 10
- Carbohydrates: 42
- Fiber: 3
- Protein: 32
Keywords: taco rice skillet, one-pan meal, easy dinner, cheesy rice, ground beef recipe, 20-minute meal, weeknight dinner