The first Saturday of November, and my hands are full of grocery bags while the parking lot hums with the distant thud of a bassline from someone’s tailgate three rows over. The air smells like charcoal, cold beer, and that particular kind of anticipation that only game day brings. I wasn’t heading to the stadium, though. I was heading to my driveway, where a mismatched crew of friends was already setting up folding chairs and arguing about the spread. And honestly, I was tired of the same old burgers and brats. I wanted something that felt like a party in a single pan, something people could stand around and build themselves, something that didn’t require forks or plates or any kind of formality.
That’s how this Easy Loaded Tailgate Nacho Bar with Ground Beef was born. Not in a test kitchen or from a family recipe, but from a very real moment of standing in the grocery aisle, staring at a bag of tortilla chips, and thinking, “Why do we make this so complicated?” The answer is, we don’t have to. This recipe is the result of that lazy, brilliant, slightly chaotic afternoon. It’s the kind of meal that lets you actually hang out with your people instead of standing over a grill. And I think that’s the whole point of tailgating, isn’t it?
Why You’ll Love This Recipe
Let’s be real for a second. I’ve made a lot of nachos in my day. Some were tragic—soggy chips, uneven cheese, that sad layer of cold beans. Others were decent. But this? This is the one I keep coming back to. Here is why this Easy Loaded Tailgate Nacho Bar with Ground Beef is different from everything else you’ve tried.
- Completely Customizable: Everyone builds their own plate. No more picking onions off or wishing there was more jalapeño. This is nacho democracy at its finest.
- Perfect for a Crowd: This recipe scales up beautifully. Whether you are feeding four people or fourteen, it all comes together on one sheet pan (or a few) without breaking a sweat.
- 30 Minutes, Start to Finish: The ground beef cooks up in under 15 minutes, and everything else is just assembly. You can literally make this during the pre-game show.
- No Fancy Equipment Needed: One skillet, a sheet pan, and your oven. That’s it. No slow cookers, no deep fryers, no nonsense.
- Always a Crowd-Pleaser: I have yet to meet someone who turns down loaded nachos. Kids, adults, picky eaters—everyone hovers around the pan like it’s a campfire.
What makes this recipe stand out is the ground beef. I season it with a blend of smoked paprika, cumin, and a tiny pinch of cinnamon (trust me on this one). It gives the meat a deep, savory warmth that you don’t get from a standard taco seasoning packet. Plus, I layer the chips with cheese before and after the toppings go on, so every single chip gets that melty, stretchy goodness. No dry chips allowed here.
This is the kind of recipe that makes you the hero of the tailgate without actually working for it. And honestly, that is exactly how I like my game day food.
What Ingredients You Will Need
This recipe uses simple, mostly pantry-staple ingredients to build something that tastes far more complex than the sum of its parts. The key is in the layering and the quality of a few key items. Here is everything you need for the best Easy Loaded Tailgate Nacho Bar with Ground Beef.
For the Seasoned Ground Beef
- 1 lb ground beef (80/20 is ideal—enough fat for flavor, not so much that it gets greasy)
- 1 tbsp olive oil (for browning)
- 1 small yellow onion, finely diced (about ½ cup)
- 3 cloves garlic, minced (fresh is non-negotiable here)
- 1 tbsp chili powder
- 1 tsp smoked paprika (adds that subtle campfire flavor)
- 1 tsp ground cumin
- ¼ tsp ground cinnamon (I know, I know—it sounds weird, but it rounds out the heat beautifully)
- ½ tsp salt
- ¼ tsp black pepper
- ⅓ cup beef broth or water (helps the seasoning meld into the meat)
For the Nacho Base
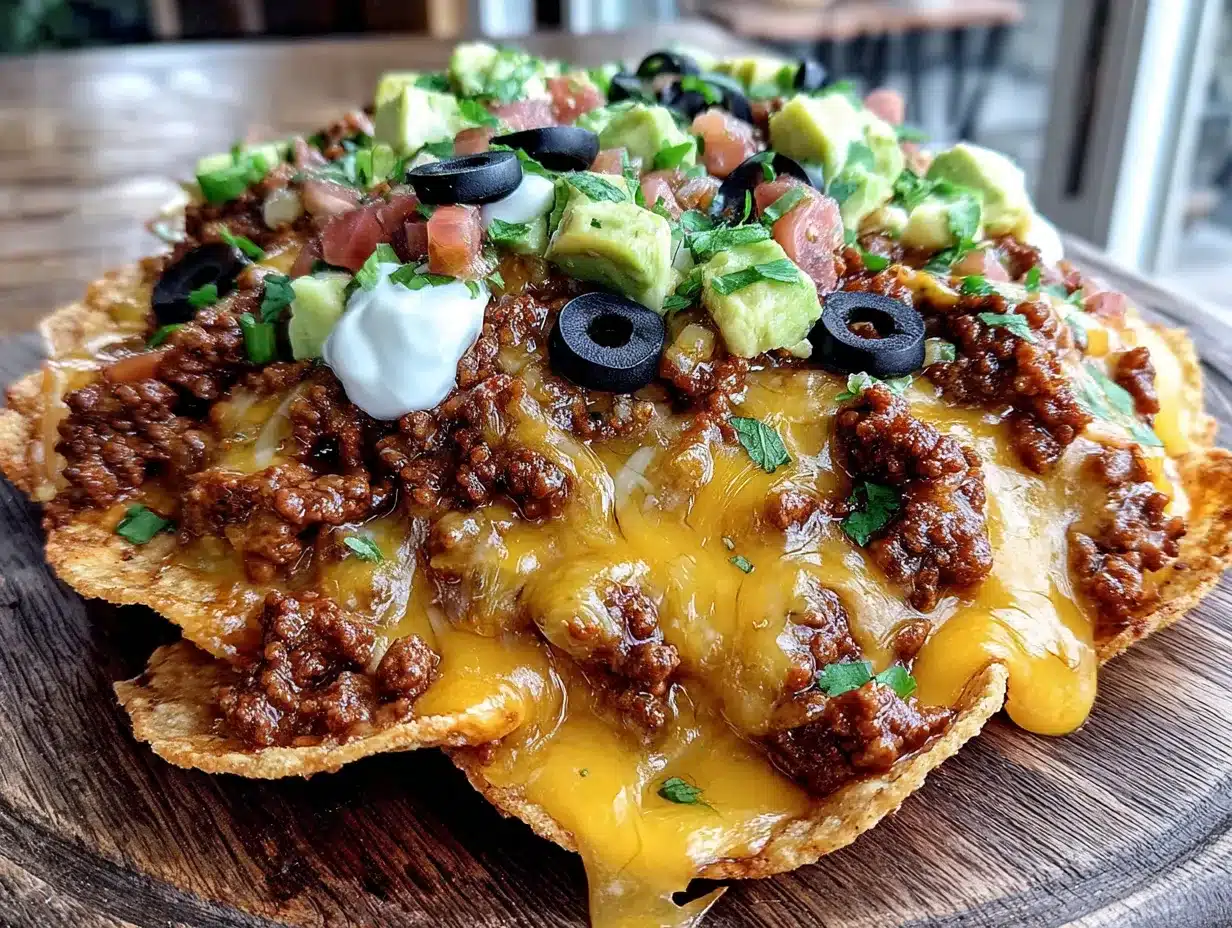
- 1 large bag (13-16 oz) restaurant-style tortilla chips (get the sturdy ones—thin chips will break under the weight)
- 3 cups shredded Mexican blend cheese (or a mix of sharp cheddar and Monterey Jack)
- 1 can (15 oz) black beans, drained and rinsed
- 1 can (4 oz) diced green chiles (mild or hot, your call)
For the Toppings Bar
- 1 cup sour cream
- 1 cup fresh pico de gallo or salsa
- 1 large avocado, diced (or guacamole if you’re feeling fancy)
- ½ cup pickled jalapeños (drained)
- ½ cup sliced black olives (optional, but my kids love them)
- ¼ cup fresh cilantro, chopped
- 2 green onions, sliced thin
- 1 lime, cut into wedges
Ingredient Notes: For the best texture, I recommend using a block of cheese and shredding it yourself. Pre-shredded cheese has anti-caking agents that prevent it from melting as smoothly. I buy Tillamook or Cabot when I can. If you want to go lighter, you can use ground turkey instead of beef, but add a tablespoon of oil to keep it from drying out. For a vegetarian version, swap the beef for a second can of black beans and some sautéed bell peppers.
Equipment Needed
You do not need a fully stocked kitchen for this recipe. That is kind of the beauty of it. Here is what you will need:
- Large skillet or frying pan (12-inch is ideal for browning the beef evenly)
- Half-sheet pan (13×18 inches) (or two smaller baking sheets if that is what you have)
- Cutting board and sharp knife
- Wooden spoon or spatula (for breaking up the beef)
- Measuring spoons
- Small bowls (for setting up the toppings bar—I use ramekins for the small stuff)
- Aluminum foil or parchment paper (for easy cleanup—trust me on this)
If you don’t have a half-sheet pan, a 9×13 baking dish works, but you will get fewer crispy edge chips. For a true tailgate setup, I actually prefer using disposable aluminum foil pans. They are lightweight, you can toss them after, and they conduct heat surprisingly well. I learned that trick after one too many road trips where I forgot my good baking sheet at home.
Preparation Method
Alright, let’s get into the nitty-gritty. This Easy Loaded Tailgate Nacho Bar with Ground Beef comes together in about 30 minutes, and most of that is hands-off oven time. Here is exactly how to do it.
Step 1: Preheat and Prep
Preheat your oven to 400°F (200°C). Line your sheet pan with aluminum foil or parchment paper. This is not just about easy cleanup—it also prevents the chips from sticking to the pan. While the oven heats, dice your onion, mince the garlic, and drain the black beans.
Step 2: Cook the Ground Beef
Heat the olive oil in your large skillet over medium-high heat. Add the diced onion and cook for 2-3 minutes until it starts to soften and turn translucent. Add the ground beef, breaking it up with your wooden spoon as it browns. Cook for 5-7 minutes, until no pink remains. Drain off any excess fat if necessary (I usually leave about a tablespoon for flavor).
Reduce the heat to medium. Add the minced garlic, chili powder, smoked paprika, cumin, cinnamon, salt, and pepper. Stir everything together and cook for another minute until the spices are fragrant. Pour in the beef broth (or water) and let it simmer for 2-3 minutes, scraping up any browned bits from the bottom of the pan. The liquid should mostly evaporate, leaving you with beautifully seasoned, juicy crumbles. Set the beef aside.
Step 3: Layer the Nachos
Spread the tortilla chips in an even layer on your prepared sheet pan. You want them mostly in a single layer, with a little bit of overlap—this ensures every chip gets some topping. Sprinkle half of the shredded cheese evenly over the chips. Then scatter the cooked ground beef, black beans, and diced green chiles over the cheese layer. Top with the remaining shredded cheese. This double-cheese method is the secret to nachos that don’t have a single dry chip.
Step 4: Bake to Perfection
Place the sheet pan in the preheated oven and bake for 8-10 minutes, or until the cheese is fully melted and bubbly. Keep an eye on the edges—the chips should be lightly golden, not burnt. If you like your nachos with a little extra crunch, switch the oven to broil for the last 1-2 minutes. Watch it closely, because broiling can go from perfect to charred in about 10 seconds.
Step 5: Set Up the Toppings Bar
While the nachos bake, arrange your toppings in small bowls. I use a big cutting board or a separate tray to hold the sour cream, pico de gallo, diced avocado, pickled jalapeños, olives, cilantro, and green onions. This is where the “bar” part of the nacho bar comes in. Let people build their own plates.
Step 6: Serve Immediately
Pull the sheet pan out of the oven and let it rest for 2 minutes (the cheese needs a second to set so it doesn’t slide off). Squeeze a few lime wedges over the top, then set the pan in the middle of your table or tailgate. Let everyone grab a plate and pile on their favorite toppings. Serve hot, and expect silence for the first five minutes.
Cooking Tips & Techniques
I have made this Easy Loaded Tailgate Nacho Bar with Ground Beef more times than I can count, and I have definitely made my share of mistakes. Here are the things I wish I knew from the start.
Don’t Overcrowd the Pan. If you are feeding a big crowd, it is tempting to pile everything onto one giant sheet pan. Resist the urge. Two smaller pans will give you better cheese coverage and crispier chips than one overcrowded one. I learned this the hard way after serving a tray of soggy, sad nachos at a Super Bowl party.
Season in Layers. The ground beef is seasoned, yes. But do not forget to season the beans, too. I toss the drained black beans with a pinch of cumin and salt before adding them to the pan. It makes a surprising difference.
Shred Your Own Cheese. I know I said this already, but it bears repeating. Pre-shredded cheese has a coating that stops it from melting into that gooey, cohesive blanket you want. Spend the two extra minutes shredding a block of cheddar. Your taste buds will thank you.
Watch the Broiler. If you decide to broil the nachos for extra crunch, do not walk away. I once got distracted by a touchdown and came back to a pan of charcoal chips. Set a timer for 90 seconds and check it.
Timing is Everything. The ground beef can be cooked up to two days ahead and stored in the fridge. On game day, just reheat it in the skillet while the oven preheats. This makes the whole process feel almost too easy.
Variations & Adaptations
One of the best things about this recipe is how easily it bends to your mood or dietary needs. Here are a few ways I have adapted it over the years.
Vegetarian Version: Swap the ground beef for two cans of black beans (or pinto beans) and a bag of frozen corn. Sauté the onion and garlic, then add the beans, corn, and the same spice blend. It is hearty, filling, and honestly, my vegetarian friends fight over the leftovers.
Spicy Lover’s Nachos: Add ½ teaspoon of cayenne pepper to the beef seasoning, use hot diced green chiles, and top with fresh sliced serrano peppers along with the pickled jalapeños. I made this version for a group of heat-seekers, and they practically licked the pan clean.
Breakfast Nachos: This is a weird one, but trust me. Use the same base, but swap the ground beef for seasoned breakfast sausage or chorizo. Top with a fried egg and some pickled red onions. I made this for a late-morning tailgate once, and it was a revelation.
Gluten-Free: Most tortilla chips are naturally gluten-free, but double-check the label. Everything else in this recipe is gluten-free as written, so no changes needed. It is one of those rare crowd-pleasers that accommodates dietary restrictions without anyone feeling like they are missing out.
Smokey Chipotle Twist: Add 1-2 minced chipotle peppers in adobo sauce to the ground beef while it simmers. The smoky heat pairs beautifully with the cinnamon and cumin. I tried this on a whim one rainy Sunday, and it has become my go-to for fall tailgates.
Serving & Storage Suggestions
This Easy Loaded Tailgate Nacho Bar with Ground Beef is best served straight out of the oven, while the cheese is still stretchy and the chips have that perfect crunch-to-softness ratio. I set the sheet pan on a cooling rack or a folded kitchen towel in the middle of the table. Let people serve themselves with a spatula or large spoon.
For the toppings bar, I arrange everything in small bowls around the main pan. A squeeze of fresh lime right before serving brightens all the flavors. If you are serving this at an actual tailgate, I recommend covering the sheet pan loosely with foil during transport and then popping it in a friend’s oven (or a portable camping oven) for 5 minutes to re-crisp the chips.
Storage: Nachos are really best eaten fresh, but if you have leftovers (unlikely, but possible), store the chips and toppings separately. The baked nachos can be kept in an airtight container in the fridge for up to 2 days, but they will lose their crunch. To reheat, spread them on a sheet pan and bake at 350°F for 5-7 minutes. The ground beef alone can be stored in the fridge for up to 4 days and used for tacos, burrito bowls, or even a quick Korean-style bulgogi ground beef rice bowl.
I find the flavors actually deepen overnight. The spices meld together in a way that makes the beef even more flavorful the next day. It is perfect for a lazy lunch nacho plate or folded into a quesadilla.
Nutritional Information & Benefits
Let’s be honest—this is not a health food. But it is real food, made from whole ingredients, and that counts for something. Here is an approximate nutritional breakdown per serving (based on 6 servings, without optional toppings):
- Calories: 520
- Protein: 28g
- Fat: 32g
- Carbohydrates: 34g
- Fiber: 6g
- Sugar: 4g
- Sodium: 890mg
The ground beef provides a solid dose of iron and B12, while the black beans add fiber and plant-based protein. The avocado (if you use it) brings healthy monounsaturated fats. This recipe is naturally gluten-free and can be made dairy-free by using a plant-based shredded cheese alternative.
If you are watching your sodium, use low-sodium broth for the beef and rinse the black beans thoroughly. You can also cut back on the salt in the spice mix and rely more on the cumin and smoked paprika for flavor.
For a lighter option, you can pair these nachos with a side of fresh veggies or a simple green salad. I sometimes make a batch of rainbow veggie lunch boxes for the kids and let them dip the veggies into the leftover toppings. It is a sneaky way to get some crunch without the chips.
Conclusion
This Easy Loaded Tailgate Nacho Bar with Ground Beef is the kind of recipe that makes you look like you put in way more effort than you actually did. It is forgiving, flexible, and undeniably delicious. Whether you are hosting a watch party, feeding a hungry family on a Friday night, or just craving something that feels like a celebration, this is the dish I keep coming back to.
I love how it brings people together. There is something about standing around a pan of nachos, everyone reaching for the same chips, that feels like community. No fancy plating, no stiff dinner conversation—just good food and good company.
So go ahead and make this your own. Swap the toppings, double the beef, add extra jalapeños if you are brave. And when you do, I would love to hear about it. Drop a comment below and tell me how your tailgate went, or share your own twist on the recipe. Until next time, happy eating.
Frequently Asked Questions
Can I make this nacho bar ahead of time?
You can cook the ground beef up to 2 days in advance and prep all your toppings. Assemble the nachos right before baking for the best texture. If you bake them ahead, the chips will get soft.
What if I don’t have a sheet pan?
A 9×13 baking dish works perfectly, though you will have slightly fewer chips on the bottom layer. You can also use a cast-iron skillet for a smaller, personal-sized version.
Can I use ground turkey instead of beef?
Absolutely. Just add a tablespoon of olive oil to the pan when browning the turkey, since it is leaner than beef. The seasoning blend works beautifully with turkey.
How do I keep the chips from getting soggy?
Use sturdy restaurant-style chips, layer the cheese directly on the chips (this creates a barrier), and do not overload the pan with wet toppings like salsa or sour cream before baking. Add those after baking.
Can I freeze the leftover ground beef?
Yes! The seasoned ground beef freezes beautifully for up to 3 months. Store it in an airtight container or freezer bag. Thaw in the fridge overnight and reheat in a skillet. It is perfect for a quick taco night or a meal prep bowl during the week.
Pin This Recipe!
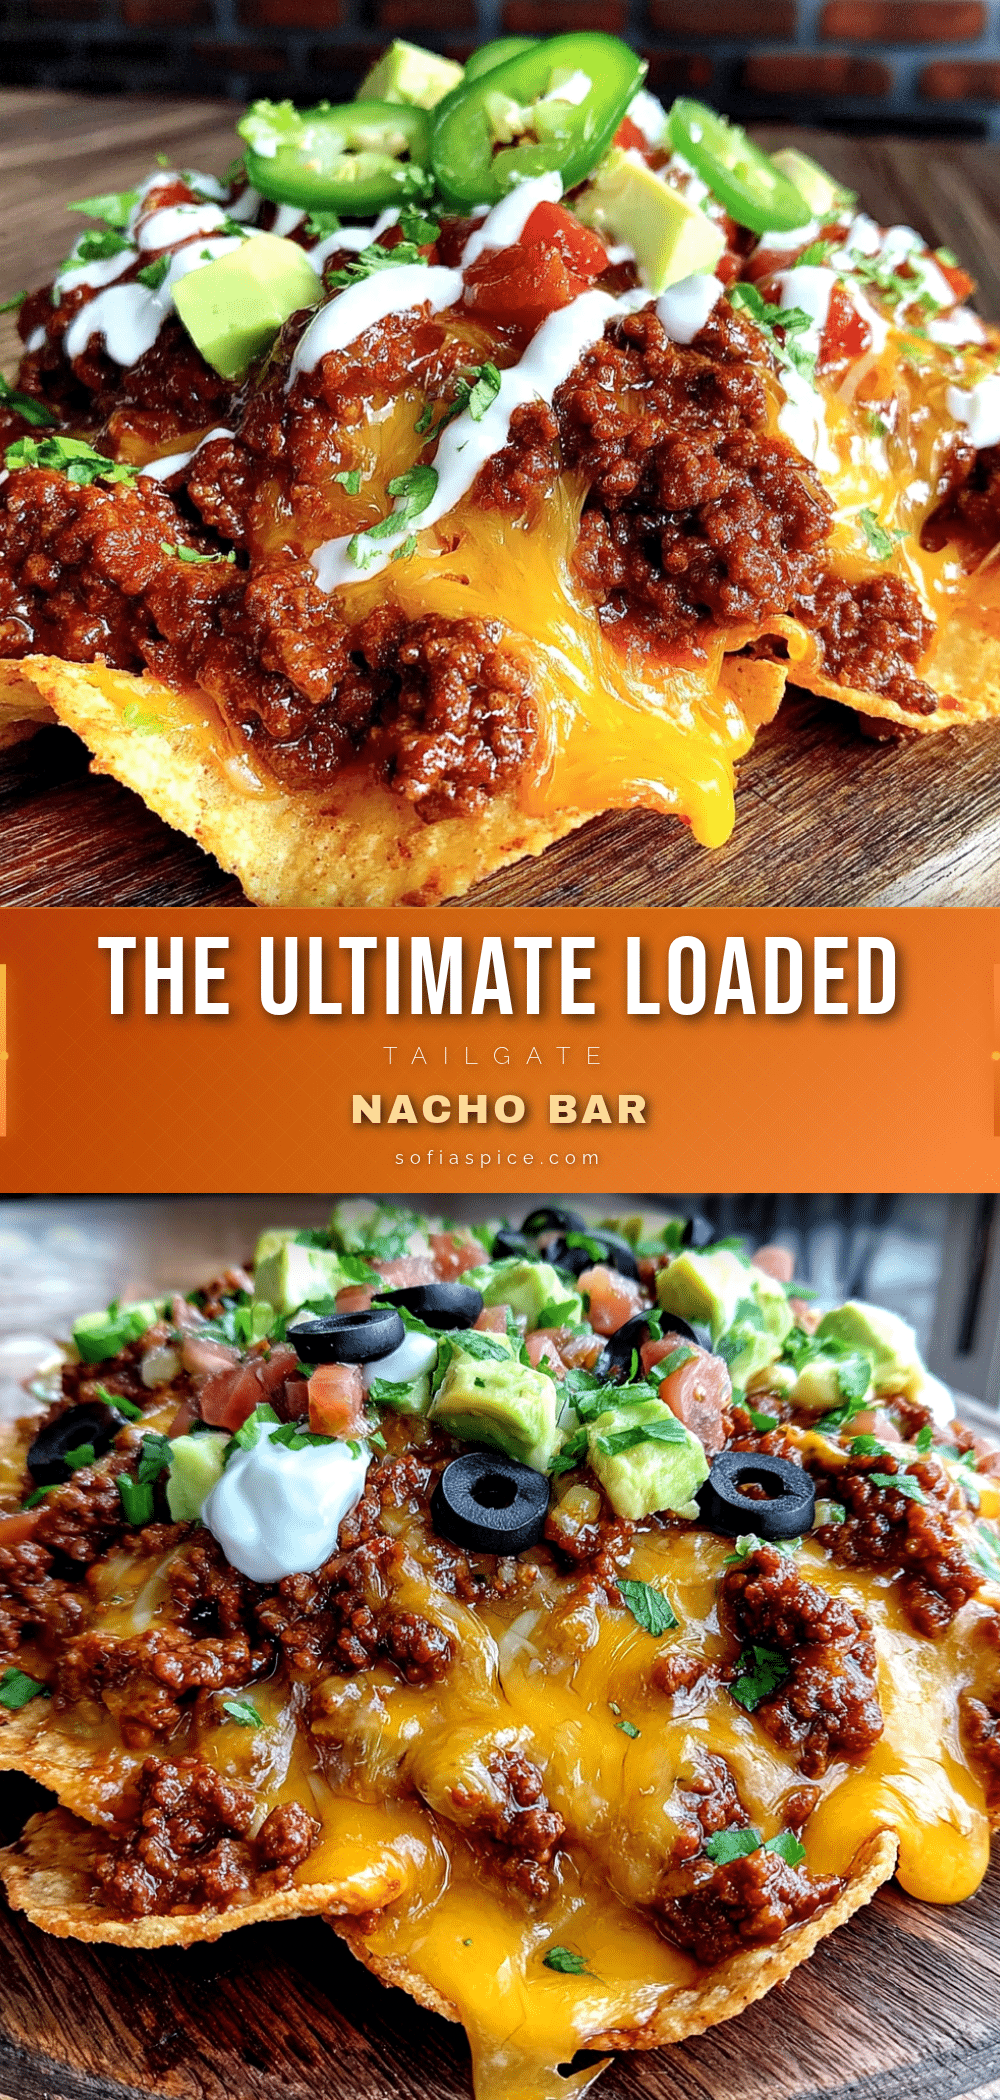
Easy Loaded Tailgate Nacho Bar: Best Ground Beef Recipe
This Easy Loaded Tailgate Nacho Bar with Ground Beef is the ultimate crowd-pleaser, featuring seasoned beef, melted cheese, and a customizable toppings bar. Ready in 30 minutes, it’s perfect for game day or any gathering.
- Prep Time: 15 minutes
- Cook Time: 15 minutes
- Total Time: 30 minutes
- Yield: 6 servings 1x
- Category: Main Course
- Cuisine: Mexican-American
Ingredients
- 1 lb ground beef (80/20)
- 1 tbsp olive oil
- 1 small yellow onion, finely diced (about ½ cup)
- 3 cloves garlic, minced
- 1 tbsp chili powder
- 1 tsp smoked paprika
- 1 tsp ground cumin
- ¼ tsp ground cinnamon
- ½ tsp salt
- ¼ tsp black pepper
- ⅓ cup beef broth or water
- 1 large bag (13–16 oz) restaurant-style tortilla chips
- 3 cups shredded Mexican blend cheese (or sharp cheddar and Monterey Jack)
- 1 can (15 oz) black beans, drained and rinsed
- 1 can (4 oz) diced green chiles (mild or hot)
- 1 cup sour cream
- 1 cup fresh pico de gallo or salsa
- 1 large avocado, diced (or guacamole)
- ½ cup pickled jalapeños, drained
- ½ cup sliced black olives (optional)
- ¼ cup fresh cilantro, chopped
- 2 green onions, sliced thin
- 1 lime, cut into wedges
Instructions
- Preheat oven to 400°F (200°C). Line a half-sheet pan with aluminum foil or parchment paper.
- Heat olive oil in a large skillet over medium-high heat. Add diced onion and cook for 2-3 minutes until softened.
- Add ground beef, breaking it up with a spoon. Cook for 5-7 minutes until no pink remains. Drain excess fat if needed, leaving about 1 tablespoon.
- Reduce heat to medium. Add minced garlic, chili powder, smoked paprika, cumin, cinnamon, salt, and pepper. Cook for 1 minute until fragrant.
- Pour in beef broth or water and simmer for 2-3 minutes, scraping up browned bits, until liquid mostly evaporates. Set aside.
- Spread tortilla chips in an even layer on the prepared sheet pan, with slight overlap.
- Sprinkle half of the shredded cheese over the chips. Scatter cooked ground beef, black beans, and diced green chiles on top. Add remaining cheese.
- Bake for 8-10 minutes until cheese is melted and bubbly. For extra crunch, broil for 1-2 minutes, watching closely.
- While nachos bake, arrange toppings (sour cream, pico de gallo, avocado, jalapeños, olives, cilantro, green onions) in small bowls for the toppings bar.
- Remove from oven, let rest for 2 minutes, squeeze lime wedges over top, and serve immediately with toppings bar.
Notes
For best results, shred cheese from a block instead of using pre-shredded. Use sturdy restaurant-style chips to prevent sogginess. Cook ground beef up to 2 days ahead for quicker assembly. For vegetarian version, swap beef for 2 cans black beans and frozen corn. Store leftovers separately; reheat nachos at 350°F for 5-7 minutes.
Nutrition
- Serving Size: 1 serving (about 1/6
- Calories: 520
- Sugar: 4
- Sodium: 890
- Fat: 32
- Saturated Fat: 12
- Carbohydrates: 34
- Fiber: 6
- Protein: 28
Keywords: tailgate nachos, ground beef nachos, loaded nachos, game day food, easy nacho bar, sheet pan nachos


