Third time this week I’ve made these chicken breasts, and this time I finally figured out the trick. The first batch came out with a topping that slid right off in one sad, greasy sheet. The second was better—crispier, stickier—but the garlic flavor had all but vanished into the heat. This third attempt? The coating stayed put, the cheese turned a deep, freckled gold, and the garlic actually tasted like garlic. I sat there at the counter, pulling off little shards of the crust with my fingers (don’t judge), and realized I’d been overthinking it. The secret wasn’t more cheese or a higher temperature. It was patience and a light hand with the breadcrumbs. This crispy garlic parmesan baked chicken breast is the one I’ll be making from now on.
I didn’t grow up eating anything like this, honestly. Chicken breast in my house meant either a sad, dry cutlet or something drowned in jarred sauce. But a few years back, I started messing around with a baked chicken recipe my neighbor swore by, and I just couldn’t leave it alone. I kept tweaking the parmesan ratio, swapping panko for regular breadcrumbs, adding garlic powder, then fresh garlic, then both. Some versions were too salty, some too bready, and one memorable disaster turned into a cheesy, burnt mess that I scraped into the trash while muttering things I won’t repeat here.
What finally clicked was treating the coating like a crust, not a blanket. You want it to cling to the chicken, not sit on top of it. And you want the oven to do the work—no flipping, no basting, just a solid sear from high heat and a little patience. This isn’t a recipe that needs fussing over. It just needs you to trust the process. And once you pull that sheet pan out of the oven and see those golden, craggy edges, you’ll understand why I kept coming back to it.
Why You’ll Love This Recipe
Let me tell you why this particular version of crispy garlic parmesan baked chicken breast has earned a permanent spot in my weekly rotation. I’ve tested it on picky eaters, dinner guests, and my own skeptical self, and it delivers every single time.
- Quick & Easy: From start to finish, you’re looking at about 30 minutes. No marinating overnight, no complicated steps. Just mix, coat, and bake.
- Simple Ingredients: You probably have most of these in your kitchen right now. Breadcrumbs, parmesan, garlic, chicken breast—nothing exotic or hard to find.
- Perfect for Busy Weeknights: This is the kind of dinner you can throw together after a long day when you want something satisfying without a ton of cleanup.
- Crowd-Pleaser: I’ve served this to kids who usually push chicken around their plate and watched them ask for seconds. The crunchy exterior wins everyone over.
- Unbelievably Delicious: The contrast between the crispy, cheesy crust and the juicy, tender meat is honestly addictive. It’s comfort food that feels a little special without being fussy.
What makes this recipe different from every other baked chicken breast out there is the technique. Most recipes either use too much oil, which makes the coating soggy, or they skip the step that helps the crust actually stick. I use a light coating of mayonnaise (trust me on this) to help the breadcrumb mixture adhere, and I bake the chicken on a wire rack set inside the sheet pan. That little trick lets hot air circulate underneath, so the bottom gets crispy too. No flipping required.
This isn’t just another chicken recipe. It’s the one that makes you close your eyes after the first bite because the garlic hits just right and the parmesan has melted into these little crispy edges that taste like the best part of any casserole. It’s perfect for impressing guests without breaking a sweat, or turning a simple Tuesday dinner into something you actually look forward to.
What Ingredients You Will Need
This recipe uses simple, everyday ingredients to create something that tastes way more complex than it is. Here’s what you’ll need and a few notes on each one.
- Boneless, skinless chicken breasts (2 large or 3 medium): Look for breasts that are roughly the same thickness so they cook evenly. If they’re really thick, you can butterfly them or pound them to an even thickness. I usually buy the large ones and cut them in half horizontally.
- Mayonnaise (2 tablespoons): I know this sounds weird, but stick with me. Mayonnaise acts as the perfect binder for the breadcrumb coating. It keeps the chicken moist and helps the crust stick better than egg or milk. Use full-fat for best results. I prefer Hellmann’s or Duke’s.
- Panko breadcrumbs (1/2 cup): Panko gives you that light, shattery crunch that regular breadcrumbs just can’t match. They’re flakier and stay crispier after baking. You can find them in the Asian foods aisle or near the regular breadcrumbs.
- Grated Parmesan cheese (1/3 cup, plus more for serving): Buy the good stuff in a wedge and grate it yourself. The pre-shredded stuff in the green can has anti-caking agents that prevent it from melting properly. Freshly grated parmesan melts into the panko and creates those golden, crispy bits.
- Garlic powder (1 teaspoon): I use garlic powder instead of fresh garlic here because it distributes evenly through the coating and doesn’t burn under high heat. Fresh garlic can turn bitter in the oven, but garlic powder stays sweet and aromatic.
- Onion powder (1/2 teaspoon): This adds a subtle savory depth that rounds out the garlic flavor. Don’t skip it—it makes a difference.
- Dried Italian seasoning (1 teaspoon): A blend of oregano, basil, rosemary, and thyme adds that herby, aromatic quality. You can use dried oregano alone if that’s what you have.
- Salt and black pepper (to taste): Season the chicken directly, not just the breadcrumb mixture. This ensures every bite is flavorful.
- Olive oil spray or cooking spray: A light mist over the top of the coated chicken helps the panko brown and crisp up in the oven. Don’t use too much or the coating will get greasy.
- Fresh parsley (for garnish, optional): A sprinkle of chopped parsley right before serving adds a pop of color and freshness. Totally optional but nice.
Substitution Notes: If you don’t have panko, you can use regular breadcrumbs, but the texture will be denser and less crispy. For a gluten-free version, use gluten-free panko or crushed pork rinds. You can substitute the mayonnaise with Greek yogurt or a dairy-free alternative, but the coating won’t be quite as crispy. If you’re avoiding dairy, use nutritional yeast in place of the parmesan—it won’t melt the same way, but it adds a cheesy, savory flavor.
Equipment Needed
You don’t need a lot of fancy equipment for this recipe, which is part of why I love it. Here’s what you’ll need:
- Baking sheet: A standard half-sheet pan works perfectly. Line it with parchment paper or foil for easy cleanup.
- Wire rack: This is the secret to getting the bottom of the chicken crispy. A wire rack set inside the baking sheet lets air circulate underneath so the coating doesn’t get soggy. If you don’t have one, you can bake the chicken directly on the sheet, but you’ll need to flip it halfway through.
- Mixing bowls: One shallow bowl for the mayonnaise mixture and another for the breadcrumb mixture. You can also use a plate for the breadcrumbs.
- Tongs or a fork: For handling the chicken without getting your hands too messy.
- Meat thermometer: This is non-negotiable for perfectly cooked chicken. The difference between juicy chicken and dry, overcooked chicken is just a few degrees. I use an instant-read thermometer and it’s saved countless dinners.
- Chef’s knife and cutting board: For trimming any excess fat or butterflying thick breasts.
If you don’t have a wire rack, you can use a broiler pan or even a cooling rack that’s oven-safe. Just make sure it’s stable and fits inside your baking sheet. I’ve also used a cast iron skillet in a pinch—the chicken gets a nice sear on the bottom, but you lose some of the all-around crispiness.
Preparation Method
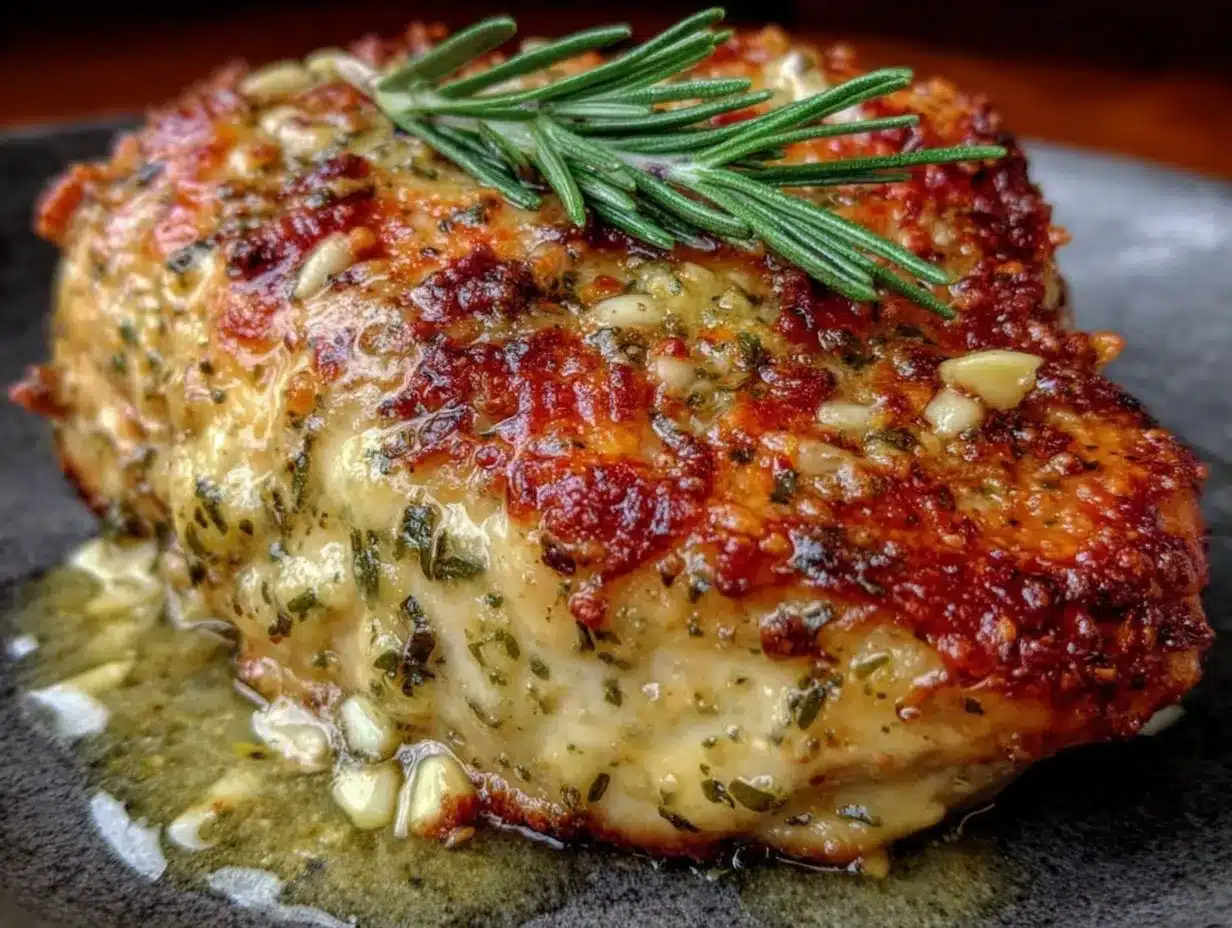
Let me walk you through this step by step. It’s simpler than you think, and I’ll include all the little details I’ve learned from making this crispy garlic parmesan baked chicken breast more times than I can count.
- Preheat your oven to 425°F (220°C). Place a wire rack inside a baking sheet and set it aside. Getting the oven hot is crucial—this high temperature is what creates that crispy crust without drying out the meat.
- Prep the chicken. Pat the chicken breasts dry with paper towels. This removes excess moisture, which helps the coating stick. If your breasts are uneven in thickness, place them between two sheets of plastic wrap and gently pound them to an even 1-inch thickness using a rolling pin or the bottom of a heavy skillet. Season both sides generously with salt and pepper.
- Make the coating mixture. In a shallow bowl, combine the panko breadcrumbs, grated parmesan, garlic powder, onion powder, and Italian seasoning. Stir everything together with a fork so the seasonings are evenly distributed. Taste a tiny pinch—it should be savory and garlicky.
- Apply the binder. In a separate small bowl, place the mayonnaise. Using a brush or your fingers (I use my fingers—it’s faster), spread a thin, even layer of mayonnaise over all sides of each chicken breast. Don’t use too much; you just want a light coating to help the breadcrumbs stick. Think of it like glue, not a thick spread.
- Coat the chicken. One piece at a time, place the mayonnaise-coated chicken into the breadcrumb mixture. Press firmly so the crumbs adhere to all sides. Flip and press again. Don’t be shy—really pack that coating on. You want a nice, even layer covering every bit of the chicken. Shake off any excess crumbs.
- Place on the wire rack. Transfer the coated chicken breasts to the prepared wire rack, leaving a little space between each piece for air to circulate. Lightly spray the tops with olive oil spray. This helps the panko brown and get extra crispy.
- Bake for 18-22 minutes. The exact time depends on the thickness of your chicken. I start checking at 18 minutes. The coating should be deep golden brown and the chicken should feel firm but give slightly when pressed. The internal temperature should read 165°F (74°C) when inserted into the thickest part of the breast.
- Rest before serving. Remove the baking sheet from the oven and let the chicken rest on the wire rack for 5 minutes. This is important! Resting allows the juices to redistribute throughout the meat. If you cut into it right away, all those juices will run out onto the cutting board, leaving you with dry chicken.
- Garnish and serve. Sprinkle with fresh chopped parsley and a little extra grated parmesan if you’re feeling fancy. Serve immediately while the coating is still crispy.
Troubleshooting tip: If your coating isn’t getting as brown as you’d like, you can switch the oven to broil for the last 1-2 minutes. Watch it closely—it can go from golden to burnt in seconds. I’ve learned this the hard way more than once.
Cooking Tips & Techniques
After making this recipe more times than I care to admit, I’ve picked up a few tricks that make a real difference. Here are the things I wish someone had told me the first time.
Don’t skip the wire rack. I know it’s an extra thing to wash, but it’s the single most important factor for getting a crispy bottom. Without it, the chicken sits in its own juices and the coating turns soggy. If you don’t have a wire rack, flip the chicken halfway through baking to crisp both sides.
Use a meat thermometer. This is the biggest mistake I see people make with chicken breast. They rely on visual cues or cooking times, but every oven runs differently and chicken thickness varies. An instant-read thermometer takes the guesswork out. Pull the chicken at 165°F and it will be perfectly juicy every time.
Let the mayonnaise sit at room temperature. Cold mayonnaise straight from the fridge is harder to spread. Let it sit out for 10 minutes before you start, or run the jar under warm water for a few seconds. A thin, even layer is what you’re after.
Toast the panko first (optional but amazing). If you have an extra 5 minutes, toast the panko in a dry skillet over medium heat until lightly golden before mixing it with the parmesan. This gives you an even crunchier crust because the breadcrumbs are already partially dehydrated. I do this when I’m feeling extra ambitious.
Don’t overcrowd the rack. Leave at least an inch between each piece of chicken. If they’re too close together, they’ll steam instead of bake, and you’ll lose that crispiness. If you’re making a double batch, use two racks and rotate them halfway through.
Season the chicken directly. I see recipes that only season the breadcrumb mixture, but that leaves the meat itself bland. Always salt and pepper the chicken breasts before you add the mayonnaise. It makes a world of difference.
Variations & Adaptations
This recipe is incredibly versatile, and I’ve tried several variations over the years. Here are a few of my favorites.
Spicy version: Add 1/2 teaspoon of cayenne pepper or red pepper flakes to the breadcrumb mixture. The heat pairs beautifully with the garlic and parmesan. I also like to add a drizzle of hot honey over the finished chicken for a sweet-spicy kick.
Herb-crusted version: Mix in 1 tablespoon of finely chopped fresh herbs like rosemary, thyme, or oregano. Fresh herbs add a brighter, more aromatic flavor than dried. Just chop them finely so they distribute evenly through the coating.
Lemon garlic version: Add the zest of one lemon to the breadcrumb mixture and squeeze a little fresh lemon juice over the chicken before serving. The citrus cuts through the richness and makes it feel lighter. This is my go-to for spring dinners.
Gluten-free adaptation: Substitute the panko with gluten-free panko or crushed pork rinds. Pork rinds give an incredibly crispy, almost fried texture that’s surprisingly good. I’ve also used almond flour mixed with parmesan, but it doesn’t get quite as crunchy.
Dairy-free adaptation: Use nutritional yeast in place of the parmesan cheese. Nutritional yeast has a cheesy, nutty flavor that works well here. You can also find dairy-free parmesan alternatives at most grocery stores now.
Air fryer method: This works beautifully in an air fryer. Preheat to 400°F (200°C). Place the coated chicken breasts in the basket in a single layer. Cook for 12-15 minutes, flipping halfway through, until the internal temperature reaches 165°F. The air fryer gives an even crispier crust with less oil.
Serving & Storage Suggestions
This crispy garlic parmesan baked chicken breast is best served hot and fresh, but it’s also pretty great in other ways. Here’s how to make the most of it.
Serving temperature and presentation: Serve the chicken right after it’s rested, while the coating is still shatteringly crisp. I like to place it on a platter with a sprinkle of fresh parsley and a little extra grated parmesan. Lemon wedges on the side are nice for squeezing over the top.
What to serve with it: This chicken pairs beautifully with a simple side salad, roasted vegetables, or mashed potatoes. I also love it with a side of creamy tomato basil soup for dipping—the combination is honestly incredible. For a lighter meal, serve it over a bed of mixed greens with a lemon vinaigrette. It’s also fantastic sliced and served on top of a hearty pasta or alongside no-knead sourdough discard focaccia bread for soaking up any juices.
Storage instructions: Store leftover chicken in an airtight container in the refrigerator for up to 4 days. The coating will soften over time, but it’s still delicious. To reheat, place the chicken on a wire rack set over a baking sheet and warm it in a 350°F (175°C) oven for 10 minutes. This helps restore some of the crispiness. Avoid the microwave—it will turn the coating rubbery.
Freezing instructions: You can freeze the baked chicken for up to 3 months. Let it cool completely, then wrap each piece individually in plastic wrap and place them in a freezer bag. To reheat, thaw overnight in the refrigerator and then warm in the oven as directed above. The coating won’t be as crispy as fresh, but it’s still a great option for meal prep.
How flavors develop: Honestly, the chicken is best the day it’s made, but I’ve found that the flavors meld together nicely after a day in the fridge. The garlic and parmesan become more pronounced. I’ve even sliced cold leftovers and added them to salads for lunch the next day.
Nutritional Information & Benefits
Here’s an approximate nutritional breakdown for one serving (based on 4 servings from 2 large chicken breasts):
- Calories: 380
- Protein: 42g
- Fat: 18g
- Carbohydrates: 12g
- Fiber: 1g
- Sugar: 1g
Health benefits: Chicken breast is an excellent source of lean protein, which is essential for muscle repair and keeping you full. Parmesan cheese adds calcium and a little protein too. Garlic is known for its immune-supporting properties, and olive oil provides healthy fats. This recipe is naturally low in carbs and can easily be made gluten-free or dairy-free with simple substitutions.
Dietary considerations: This recipe is low-carb and keto-friendly if you use almond flour or pork rinds instead of panko. It’s also nut-free (as written) and can be made egg-free since we’re using mayonnaise instead of eggs. If you’re watching your sodium, use low-sodium parmesan and go easy on the added salt.
Potential allergens: This recipe contains dairy (parmesan) and eggs (in the mayonnaise). It can be made gluten-free with the right breadcrumb substitution.
I’m not a nutritionist, but I feel good about serving this to my family. It’s a balanced meal that doesn’t feel like a sacrifice. Pair it with a big green salad or roasted vegetables and you’ve got a dinner that’s both satisfying and nourishing.
Conclusion
This crispy garlic parmesan baked chicken breast has become my go-to for those nights when I want something that feels special but doesn’t require a lot of effort. It’s the kind of recipe that looks impressive on the plate but comes together with pantry staples and a little bit of technique. The crunchy, cheesy coating gives way to tender, juicy meat, and that garlic flavor lingers in the best possible way.
I love how customizable this recipe is. You can make it spicy, herby, or lemony. You can serve it with pasta, salad, or soup. It works for a quick weeknight dinner or a casual dinner party. And honestly, it’s hard to mess up once you know the basic steps.
If you try this recipe, I’d love to hear how it turns out. Leave a comment below and let me know if you added your own twist—I’m always looking for new ideas. And if you’re in the mood for another comforting meal, check out this slow cooker butternut squash apple soup or these one-bowl pumpkin muffins with maple glaze for a complete fall-inspired menu. Happy cooking, friends!
Frequently Asked Questions
Can I use chicken thighs instead of chicken breasts?
Absolutely! Boneless, skinless chicken thighs work great with this recipe. They’re a little more forgiving because they have more fat, so they’re harder to overcook. The baking time will be about the same, but check for an internal temperature of 175°F (80°C) for thighs—they’re best when cooked a little higher than breasts.
Why did my coating fall off?
This usually happens for one of two reasons: the chicken was too wet when you applied the coating, or you didn’t press the breadcrumbs firmly enough. Make sure to pat the chicken completely dry with paper towels before adding the mayonnaise. And really press that breadcrumb mixture into the mayonnaise—it needs to adhere firmly.
Can I make this recipe ahead of time?
You can coat the chicken up to 4 hours ahead and keep it in the refrigerator on the wire rack. Just don’t spray it with oil until right before baking. The coating might absorb a little moisture from the fridge, but it will still crisp up nicely in the oven.
How do I reheat leftovers without losing the crunch?
The best way is to reheat the chicken in a 350°F (175°C) oven on a wire rack for about 10 minutes. An air fryer works even better—just 3-4 minutes at 375°F (190°C) will bring back most of the crispiness. Avoid the microwave at all costs; it will turn the coating into a soggy mess.
Can I use fresh garlic instead of garlic powder?
You can, but I don’t recommend it for this recipe. Fresh garlic burns easily at high temperatures and can turn bitter. Garlic powder distributes evenly through the coating and stays sweet and aromatic during baking. If you really want fresh garlic flavor, add a little minced garlic to the mayonnaise before spreading it on the chicken.
Pin This Recipe!
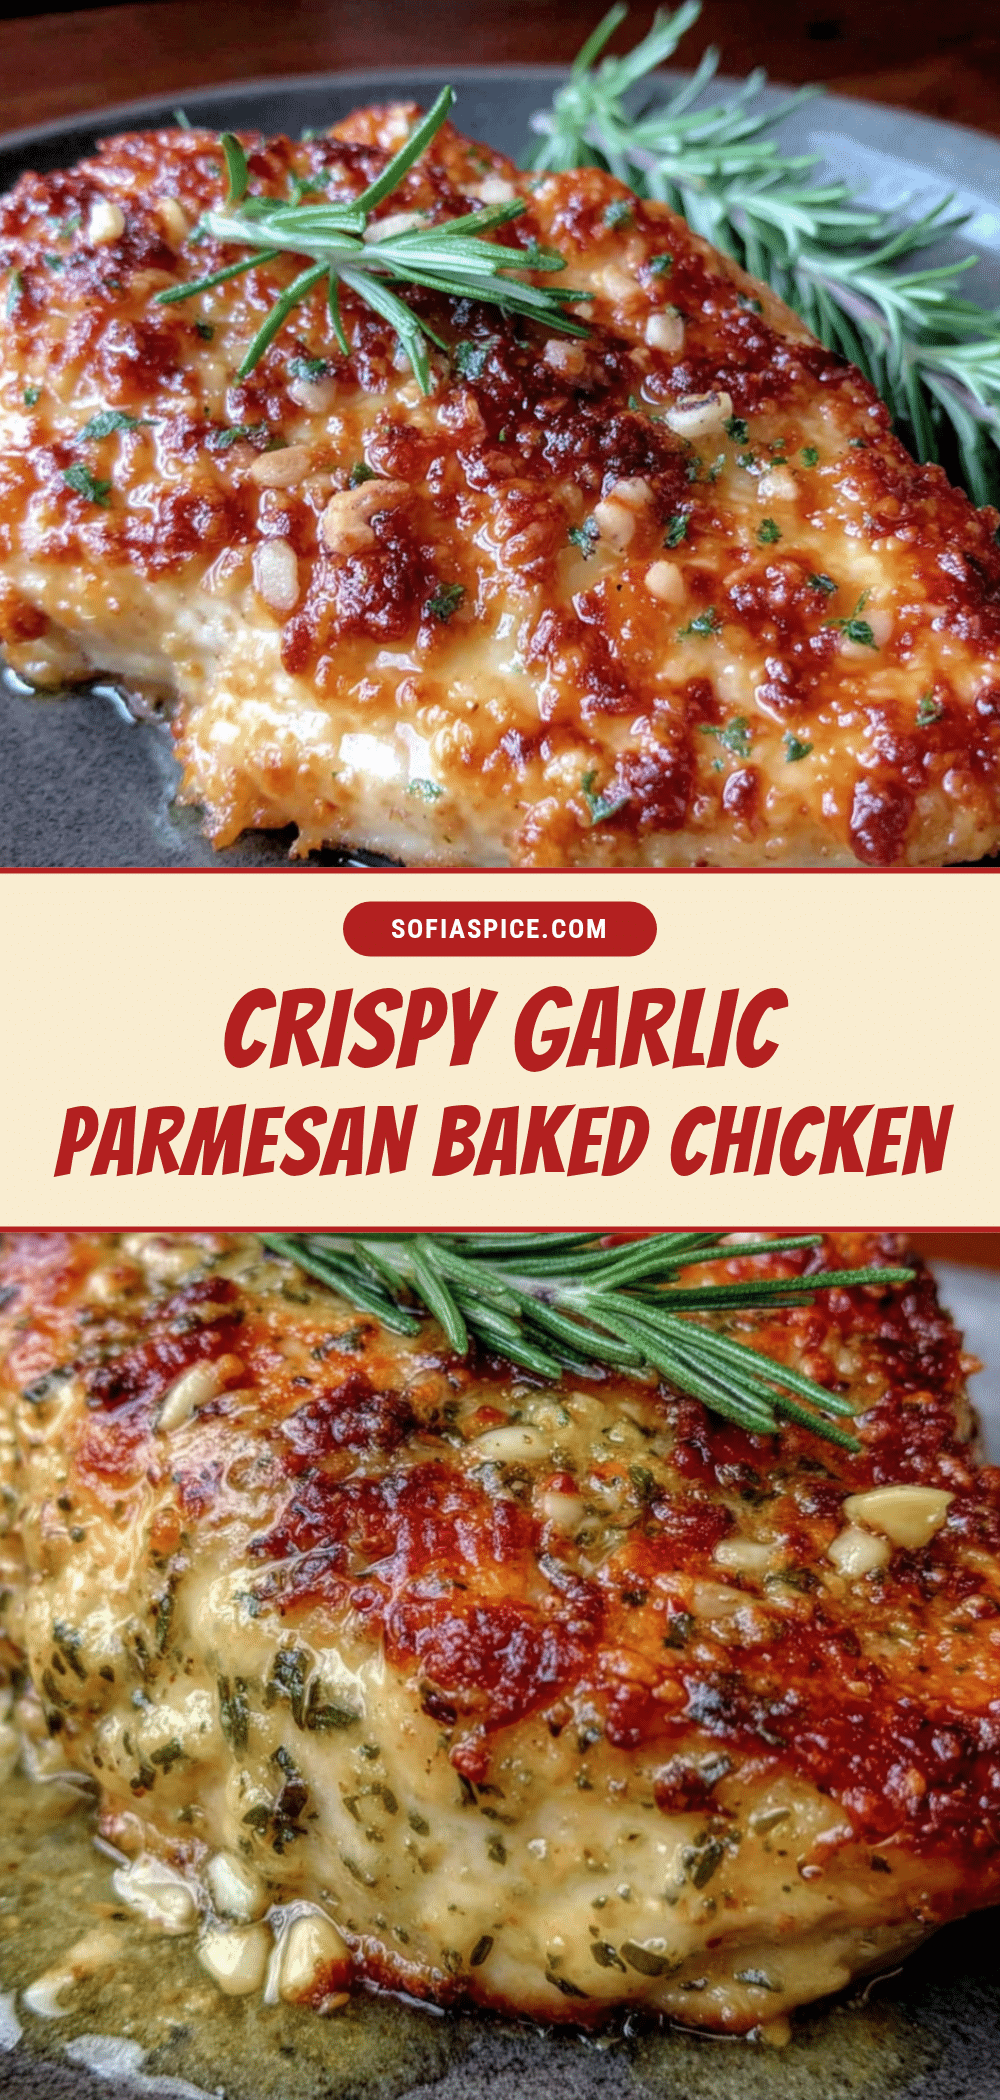
Crispy Garlic Parmesan Baked Chicken Breast – Easy & Best Recipe
This crispy garlic parmesan baked chicken breast features a crunchy, cheesy crust and tender, juicy meat. It’s a quick and easy weeknight dinner that comes together in about 30 minutes with simple ingredients.
- Prep Time: 10 minutes
- Cook Time: 20 minutes
- Total Time: 30 minutes
- Yield: 4 servings 1x
- Category: Main Course
- Cuisine: American
Ingredients
- 2 large or 3 medium boneless, skinless chicken breasts
- 2 tablespoons mayonnaise
- 1/2 cup panko breadcrumbs
- 1/3 cup grated Parmesan cheese, plus more for serving
- 1 teaspoon garlic powder
- 1/2 teaspoon onion powder
- 1 teaspoon dried Italian seasoning
- Salt and black pepper to taste
- Olive oil spray or cooking spray
- Fresh parsley for garnish (optional)
Instructions
- Preheat your oven to 425°F (220°C). Place a wire rack inside a baking sheet and set aside.
- Pat the chicken breasts dry with paper towels. If uneven in thickness, pound to an even 1-inch thickness. Season both sides generously with salt and pepper.
- In a shallow bowl, combine panko breadcrumbs, grated Parmesan, garlic powder, onion powder, and Italian seasoning. Stir to distribute evenly.
- In a separate small bowl, place the mayonnaise. Spread a thin, even layer of mayonnaise over all sides of each chicken breast.
- One piece at a time, place the mayonnaise-coated chicken into the breadcrumb mixture. Press firmly so the crumbs adhere to all sides. Shake off any excess.
- Transfer the coated chicken breasts to the prepared wire rack, leaving space between each piece. Lightly spray the tops with olive oil spray.
- Bake for 18-22 minutes, until the coating is deep golden brown and the internal temperature reaches 165°F (74°C).
- Remove from the oven and let the chicken rest on the wire rack for 5 minutes.
- Garnish with fresh chopped parsley and extra grated Parmesan if desired. Serve immediately.
Notes
For extra crispiness, toast the panko in a dry skillet before mixing. Use a meat thermometer to ensure chicken reaches 165°F. Let the chicken rest for 5 minutes before serving to keep it juicy.
Nutrition
- Serving Size: 1 chicken breast
- Calories: 380
- Sugar: 1
- Sodium: 580
- Fat: 18
- Saturated Fat: 5
- Carbohydrates: 12
- Fiber: 1
- Protein: 42
Keywords: crispy garlic parmesan chicken, baked chicken breast, easy chicken recipe, weeknight dinner, parmesan crusted chicken


