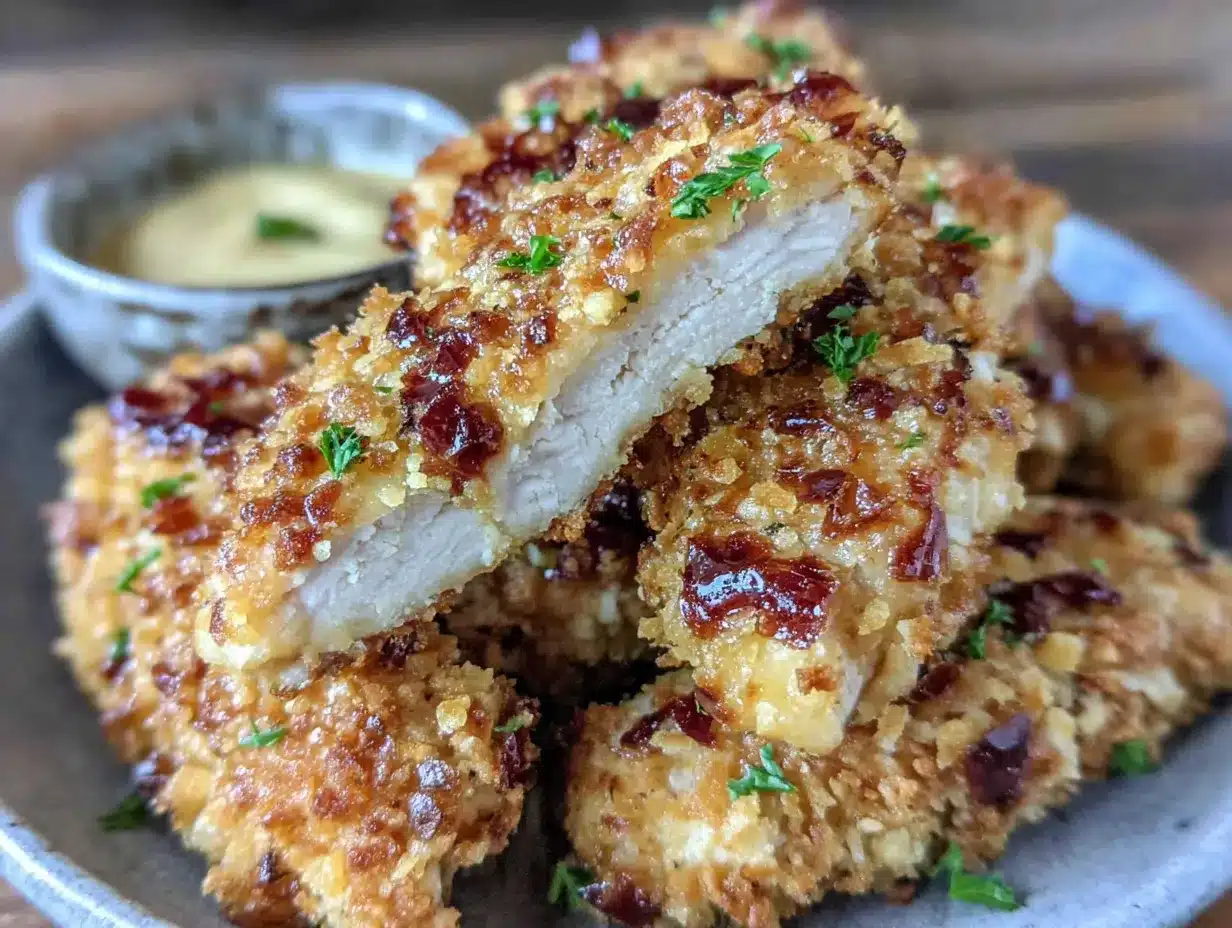
My husband took one bite, looked at me with this weirdly serious expression, and said, “Don’t ever buy the frozen ones again.” That was it. No dramatic backstory, no childhood memory of my grandmother’s kitchen. Just a grown man, standing over a baking sheet, holding a crispy baked parmesan chicken tender like he’d just discovered fire. I honestly wasn’t expecting that reaction. I had thrown these together on a whim, hoping to have something decent for the game that afternoon. We had friends coming over, and I needed a snack that felt special but didn’t chain me to the stove. These tenders came out of the oven looking so golden and craggy I almost didn’t believe they were baked. The crunch was real—like, real enough to make me question why I ever bothered with deep frying. And the best part? I didn’t have to babysit a pot of hot oil while trying to catch the pre-game commentary. These crispy baked parmesan chicken tenders for game day became an instant staple in our house, and honestly, I don’t see that changing anytime soon.
Why You’ll Love This Recipe
Let’s be real for a second. Game day snacks are serious business. You need something that satisfies that deep, primal craving for crunch without leaving you feeling like you just ate a bucket of grease. These tenders hit that sweet spot perfectly. They are the kind of snack that disappears from the platter before halftime, and you’ll find yourself making a second batch before you know it.
- Oven-Baked, Not Fried: You get all the crunch of fried chicken without the mess, the splatter, or the lingering smell of oil in your kitchen for three days. The oven does all the heavy lifting here.
- Simple Pantry Ingredients: You probably have most of these things in your kitchen right now. Panko breadcrumbs, parmesan cheese, a few spices, and some chicken tenders. No fancy trips to a specialty store required.
- Perfect for Crowds: This recipe scales up beautifully. You can easily double or triple it for a big party without any extra fuss. They stay crispy for a surprisingly long time, too, which is a game-changer for parties.
- Crowd-Pleaser Guaranteed: Kids love them, adults love them, and even your friend who claims they “don’t really like chicken” will be caught sneaking a third one. They are just that good.
- Unbelievably Crispy: The secret is in the combination of panko and parmesan, baked at a high temperature. The cheese melts and creates these incredible crispy, golden bits that are absolutely addictive. It is next-level comfort food.
What makes these different from every other baked chicken tender recipe out there? It is the technique. We aren’t just coating chicken in breadcrumbs and hoping for the best. We are building a crust that gets deeply golden and shatteringly crisp, thanks to a simple trick with the oven rack and a hot baking sheet. Every bite has that satisfying crunch that makes you close your eyes for a second. It is game day food that feels like a treat, not a compromise.
What Ingredients You Will Need
This recipe uses simple, straightforward ingredients to build layers of flavor and that signature crunch. You don’t need a long list of obscure items, just a few good-quality staples that work together beautifully.
- Chicken Tenders (1.5 lbs): Look for fresh chicken tenders, or you can buy boneless, skinless chicken breasts and cut them into strips yourself. Try to get pieces that are similar in size so they cook evenly. If you are using breasts, cut them against the grain into strips about an inch wide.
- Panko Breadcrumbs (1.5 cups): Panko is non-negotiable here for the best crunch. They are larger and flakier than regular breadcrumbs, which creates that light, airy, super-crispy texture. I prefer the brand Kikkoman for consistent results.
- Grated Parmesan Cheese (1 cup): Please, for the love of all things crispy, buy a block of parmesan and grate it yourself. The pre-shredded stuff in the bag has anti-caking agents that prevent it from melting and browning properly. Freshly grated parmesan melts into the panko and creates those irresistible golden, crispy bits.
- All-Purpose Flour (1/2 cup): This is the first layer of our coating. It helps the egg wash stick to the chicken and creates a dry surface for the breadcrumbs to cling to.
- Eggs (2 large): The egg wash acts as the glue between the flour and the panko-parmesan mixture. It ensures the coating adheres well and doesn’t fall off during baking.
- Milk (2 tablespoons): A splash of milk whisked into the eggs makes the wash a little thinner and easier to work with. You can use any kind of milk you have on hand, even dairy-free options.
- Garlic Powder (1 teaspoon): This adds a subtle, savory depth that complements the parmesan beautifully. Don’t use garlic salt, or you will end up with overly salty tenders.
- Onion Powder (1 teaspoon): Similar to garlic powder, onion powder adds a gentle, savory sweetness that rounds out the flavor profile.
- Paprika (1 teaspoon): I use sweet paprika for color and a mild, earthy sweetness. You can use smoked paprika for a deeper, more robust flavor if you prefer.
- Dried Oregano (1/2 teaspoon): A tiny bit of oregano adds an Italian-inspired note that pairs perfectly with the parmesan. It is subtle but makes a difference.
- Salt and Black Pepper (to taste): Season every layer. Add salt and pepper to the flour mixture and the panko mixture. Don’t be shy—it makes a big difference.
- Olive Oil Cooking Spray: This is crucial for getting that golden-brown, crispy exterior. A light spray of oil on top of the breaded tenders helps them brown and crisp up in the oven without deep frying.
Substitution Guidance: If you need a gluten-free option, you can use gluten-free panko breadcrumbs and a gluten-free all-purpose flour blend. The texture will be slightly different, but they will still be delicious. For a dairy-free version, use a dairy-free parmesan alternative or nutritional yeast for that cheesy flavor. It won’t be exactly the same, but it is a solid workaround.
Equipment Needed
You don’t need a lot of fancy equipment to make these tenders. Just a few basic kitchen tools that you probably already own.
- Baking Sheet: A standard half-sheet pan works perfectly. I recommend using a light-colored, non-stick baking sheet for even browning. Darker sheets can cause the bottoms to burn before the tops are golden.
- Wire Rack: This is my secret weapon. Placing a wire rack on top of the baking sheet allows hot air to circulate all around the chicken tenders, ensuring they get crispy on the bottom as well as the top. No soggy bottoms here. If you don’t have one, you can flip the tenders halfway through baking.
- Three Shallow Bowls: You need a dredging station. One bowl for the flour, one for the egg wash, and one for the panko-parmesan mixture. Pie plates or wide, shallow bowls work great.
- Tongs or One Hand: I use a “wet hand, dry hand” method to keep the breading from getting clumpy. Use one hand for the flour and egg, and the other hand for the breadcrumb mixture. Tongs also work well for transferring the breaded tenders to the baking sheet.
- Measuring Cups and Spoons: For accurate ingredient measurements. Precision matters, especially with the spices.
If you don’t have a wire rack, don’t worry. You can still get great results by flipping the tenders halfway through the baking time. It just takes a little more effort.
Preparation Method
Alright, let’s get cooking. This process is straightforward, but paying attention to a few key details will make all the difference between good tenders and absolutely unforgettable ones.
- Preheat and Prep: Preheat your oven to 425°F (220°C). Place a wire rack on top of a baking sheet and spray it lightly with olive oil cooking spray. This step prevents sticking and helps the bottoms crisp up.
- Set Up Your Dredging Station: Get three shallow bowls. In the first bowl, combine the all-purpose flour, 1/2 teaspoon of salt, and 1/4 teaspoon of black pepper. In the second bowl, whisk together the eggs and milk until smooth. In the third bowl, combine the panko breadcrumbs, freshly grated parmesan cheese, garlic powder, onion powder, paprika, dried oregano, and another 1/2 teaspoon of salt and 1/4 teaspoon of black pepper. Mix everything together with a fork until it is well combined.
- Prep the Chicken: Pat the chicken tenders dry with paper towels. This is important because excess moisture will steam the coating and prevent it from getting crispy. If your tenders are very large, you can cut them in half lengthwise to make them more uniform in size.
- The Dredging Process: This is where the magic happens. Take one chicken tender and coat it thoroughly in the flour mixture, shaking off any excess. Then, dip it into the egg wash, letting any excess drip off. Finally, press it firmly into the panko-parmesan mixture, making sure it is completely covered. I like to use my fingers to really press the breadcrumbs into the chicken—this helps create a thick, craggy crust. Place the breaded tender on the prepared wire rack. Repeat with the remaining chicken.
- Spray for Success: Once all the tenders are on the rack, give them a generous, even spray with olive oil cooking spray. Don’t skip this step. The oil is what helps the panko and parmesan turn that beautiful golden brown in the oven.
- Bake to Perfection: Place the baking sheet on the middle rack of your preheated oven. Bake for 15-18 minutes, or until the chicken is cooked through and the coating is deep golden brown and crispy. The internal temperature of the chicken should reach 165°F (74°C) when checked with an instant-read thermometer. No need to flip them if you are using a wire rack.
- Rest and Serve: Let the tenders rest on the wire rack for about 5 minutes after they come out of the oven. This allows the juices to redistribute and the crust to set. Don’t skip this—it makes them even crispier. Serve them hot with your favorite dipping sauces.
Troubleshooting Tip: If your breading is falling off, you might be skipping the flour step or not pressing the breadcrumbs firmly enough. The flour layer is essential for the egg wash to stick, and pressing the breadcrumbs ensures they adhere properly. Also, make sure your chicken is dry before you start.
Cooking Tips & Techniques
I have made these tenders more times than I can count, and I have learned a few things the hard way. Here are my best tips for getting perfect results every single time.
- Don’t Overcrowd the Rack: Leave a little space between each tender on the wire rack. If they are touching, they will steam instead of crisp up. You want hot air to circulate freely around each piece.
- Use a Hot Oven: 425°F is the sweet spot. It is hot enough to crisp up the panko and parmesan quickly without drying out the chicken. Resist the urge to lower the temperature.
- Flip if No Rack: If you are not using a wire rack, flip the tenders halfway through the baking time. This ensures both sides get evenly browned and crispy. Use a thin spatula to flip them gently so you don’t disturb the coating.
- Fresh Parmesan is Key: I cannot stress this enough. Pre-grated parmesan just doesn’t melt the same way. It contains cellulose and other anti-caking agents that prevent it from browning and crisping. A block of real parmesan, grated on the small holes of a box grater, is a game-changer.
- Keep Them Warm: If you are making a big batch for a party, you can keep the cooked tenders warm on a wire rack in a 200°F (95°C) oven for up to 30 minutes. They will stay crispy without drying out. Just don’t cover them with foil, or they will steam and get soggy.
I once forgot to spray the tenders with oil before baking them. They came out pale and sad, with a coating that was more chewy than crispy. It was a hard lesson, but it taught me that the oil spray is non-negotiable. It is the difference between a good tender and a great one.
Variations & Adaptations
One of the best things about this recipe is how easy it is to adapt. You can change up the flavors to suit your mood or what you have in the pantry.
- Spicy Buffalo Version: Add 1-2 teaspoons of cayenne pepper to the panko mixture and toss the baked tenders in your favorite buffalo sauce. Serve with blue cheese or ranch dressing for the ultimate game day experience. This is my personal favorite variation.
- Herb and Lemon Twist: Add 2 tablespoons of finely chopped fresh parsley, 1 tablespoon of fresh thyme leaves, and the zest of one lemon to the panko-parmesan mixture. The fresh herbs and lemon add a bright, vibrant flavor that is perfect for spring.
- Gluten-Free Adaptation: As mentioned earlier, use gluten-free panko breadcrumbs and a gluten-free all-purpose flour blend. The texture will be slightly different—a little less crunchy, but still very good. You might need to bake them for an extra minute or two.
- Air Fryer Method: Preheat your air fryer to 400°F (200°C). Place the breaded tenders in a single layer in the air fryer basket, making sure they are not touching. Spray them with oil and cook for 8-10 minutes, flipping halfway through, until golden brown and cooked through. The air fryer makes them incredibly crispy in less time.
- Change Up the Cheese: While parmesan is classic, you can experiment with other hard cheeses. Try using pecorino romano for a saltier, more pungent flavor, or a mix of parmesan and asiago for a nutty, complex taste.
I tried a version with smoked paprika and a pinch of chipotle powder once, and it was a huge hit. The smoky, slightly spicy flavor was perfect with a cold beer. Don’t be afraid to experiment and make this recipe your own.
Serving & Storage Suggestions
These tenders are incredibly versatile when it comes to serving. They are the star of the show on game day, but they work for so much more.
Serving Suggestions: Serve them hot, right off the wire rack, with a selection of dipping sauces. Ranch dressing, blue cheese dressing, honey mustard, barbecue sauce, and a simple sriracha mayo are all excellent choices. You can also serve them on a bed of mixed greens for a crispy chicken salad, or slice them up and put them on a hoagie roll with some marinara sauce and melted mozzarella for an incredible chicken parmesan sandwich. For game day, I like to arrange them on a large platter with celery and carrot sticks and a few different dipping bowls in the center. It looks impressive with almost no effort.
Storage Instructions: If you have leftovers (which is rare in my house), let them cool completely to room temperature. Store them in an airtight container in the refrigerator for up to 3 days. The coating will soften a bit in the fridge, but they will still taste great.
Reheating Methods: The best way to reheat these tenders and get the crunch back is in the oven or air fryer. Reheat them on a wire rack in a 375°F (190°C) oven for 5-7 minutes, or in the air fryer at 375°F for 3-4 minutes. I do not recommend using the microwave, as it will make the coating soggy and rubbery.
These tenders are also fantastic cold, straight from the fridge, sliced over a salad for lunch the next day. The flavors seem to meld together even more after a day in the fridge.
Nutritional Information & Benefits
While these tenders are a treat, they are a much healthier alternative to their deep-fried counterparts. Baking them significantly reduces the amount of oil and fat, making them a snack you can feel good about serving.
Estimated Nutritional Values (per serving, about 4-5 tenders):
| Nutrient | Amount |
|---|---|
| Calories | ~350-400 |
| Protein | ~35g |
| Fat | ~15g |
| Carbohydrates | ~20g |
| Fiber | ~1g |
Health Benefits of Key Ingredients: Chicken is an excellent source of lean protein, which is essential for muscle repair and keeping you feeling full and satisfied. Parmesan cheese is a good source of calcium and protein, and it adds a ton of flavor with a relatively small amount. By baking instead of frying, you are cutting out a significant amount of unhealthy fats and calories.
Dietary Considerations: This recipe is naturally low-carb and can be made gluten-free with simple substitutions. It is also a great option for those following a high-protein diet. The main allergens are dairy (parmesan cheese) and gluten (panko breadcrumbs and flour), but both can be substituted as noted above.
I love that I can serve these to my family and friends without the guilt that sometimes comes with fried foods. They get all the flavor and satisfaction, and I get to feel good about what I am putting on the table.
Conclusion
These crispy baked parmesan chicken tenders are more than just a game day snack. They are a reliable, crowd-pleasing recipe that proves you don’t need a deep fryer to get that perfect, satisfying crunch. They are easy enough for a busy weeknight dinner, but impressive enough to serve at a party. The golden, cheesy crust, the tender, juicy chicken inside—it is a combination that never gets old.
I encourage you to make this recipe your own. Play around with the spices, try different dipping sauces, or experiment with the variations I shared. Cooking should be fun and personal. This recipe is a fantastic starting point, but the best version is the one you make for the people you love.
I would love to hear how these turn out for you. Did you try a fun variation? What is your go-to dipping sauce? Drop a comment below and let me know. And if you are looking for another easy, crowd-pleasing appetizer, you have to try these spooky mummy hot dogs—they are a hit with kids and adults alike. Happy cooking, and enjoy every last crispy bite!
Frequently Asked Questions
Can I use chicken breasts instead of tenders?
Absolutely. Just cut boneless, skinless chicken breasts into strips about 1-inch wide. Try to make them as uniform in size as possible so they cook evenly. The baking time might need to be increased by a minute or two if the strips are thicker.
How do I keep the breading from falling off?
The key is the dredging process. Make sure you pat the chicken dry first, then coat it thoroughly in flour. The flour layer is essential for the egg wash to stick. Press the panko mixture firmly into the chicken, and don’t skip the oil spray—it helps the coating adhere and crisp up.
Can I make these ahead of time?
You can bread the chicken tenders up to 4 hours ahead of time. Arrange them on the wire rack on the baking sheet, cover them loosely with plastic wrap, and keep them in the refrigerator. Bake them right before serving for the best results. Do not store them unbreaded, as the chicken will release moisture.
Can I freeze these chicken tenders?
Yes, they freeze beautifully. Bake the tenders as directed, let them cool completely, then arrange them in a single layer on a baking sheet and freeze until solid. Transfer the frozen tenders to a freezer-safe bag or container. They will keep for up to 3 months. Reheat them directly from frozen in a 375°F oven or air fryer until hot and crispy.
What dipping sauces go best with these tenders?
The options are endless! Classic ranch or blue cheese dressing are always a hit. Honey mustard, barbecue sauce, and sriracha mayo are also fantastic. For an easy homemade option, mix equal parts mayonnaise and sriracha with a squeeze of lime juice. You can also serve them with marinara sauce for a chicken parmesan vibe.
Pin This Recipe!

Crispy Baked Parmesan Chicken Tenders: Best Game Day Snack

These oven-baked chicken tenders are incredibly crispy and flavorful, thanks to a panko-parmesan crust. Perfect for game day or any gathering, they are a healthier alternative to fried chicken that everyone will love.
- Prep Time: 15 minutes
- Cook Time: 18 minutes
- Total Time: 33 minutes
- Yield: 4 servings 1x
- Category: Appetizer
- Cuisine: American
Ingredients
- 1.5 lbs chicken tenders
- 1.5 cups panko breadcrumbs
- 1 cup freshly grated Parmesan cheese
- 1/2 cup all-purpose flour
- 2 large eggs
- 2 tablespoons milk
- 1 teaspoon garlic powder
- 1 teaspoon onion powder
- 1 teaspoon paprika
- 1/2 teaspoon dried oregano
- Salt and black pepper to taste
- Olive oil cooking spray
Instructions
- Preheat oven to 425°F (220°C). Place a wire rack on a baking sheet and spray lightly with olive oil cooking spray.
- Set up dredging station: In first bowl, combine flour, 1/2 tsp salt, and 1/4 tsp black pepper. In second bowl, whisk eggs and milk. In third bowl, combine panko, Parmesan, garlic powder, onion powder, paprika, oregano, 1/2 tsp salt, and 1/4 tsp black pepper.
- Pat chicken tenders dry with paper towels.
- Coat each tender in flour mixture, shaking off excess. Dip in egg wash, letting excess drip off. Press firmly into panko mixture, ensuring full coverage. Place on prepared wire rack.
- Spray breaded tenders generously with olive oil cooking spray.
- Bake for 15-18 minutes, until chicken is cooked through (internal temp 165°F/74°C) and coating is golden brown and crispy.
- Let rest on wire rack for 5 minutes before serving.
Notes
For extra crispiness, use a wire rack on the baking sheet. Freshly grated Parmesan is key for the best texture. If not using a wire rack, flip tenders halfway through baking. Leftovers can be reheated in the oven or air fryer.
Nutrition
- Serving Size: 4-5 tenders
- Calories: 375
- Sugar: 1
- Sodium: 600
- Fat: 15
- Saturated Fat: 5
- Carbohydrates: 20
- Fiber: 1
- Protein: 35
Keywords: baked chicken tenders, parmesan chicken, game day snack, crispy chicken, oven baked chicken


