That first cold spoonful of peanut butter — the kind that sticks to the roof of your mouth and forces you to pause — still takes me straight to my grandmother’s kitchen. She kept a jar of the natural stuff in her pantry, the oily kind you had to stir for what felt like forever. I’d sneak spoonfuls when she wasn’t looking, usually while she was busy mashing bananas for her famous bread. Funny how those two things never came together in her kitchen, but they’ve become inseparable in mine.
I started making these creamy peanut butter banana overnight oats about three years ago, back when my mornings were a chaotic blur of school drop-offs and forgotten coffee cups. I needed something I could grab from the fridge and eat while standing at the counter, preferably something that didn’t require me to turn on the stove. The first batch was an accident — too much peanut butter, not enough milk, a banana that was way past its prime. But that happy accident taught me something. The ratios matter, sure, but so does giving yourself permission to mess up.
These oats have become my morning anchor. They’re the thing I look forward to when my alarm goes off too early. They’re forgiving, adaptable, and honest-to-goodness satisfying in a way that cold cereal just isn’t. I’ve tweaked the recipe dozens of times, testing different milks, playing with sweeteners, and even sneaking in some chia seeds for extra texture. This version is the one I keep coming back to — the one that feels like a hug in a jar.
If you’ve never tried overnight oats because you think they’re bland or mushy, I get it. I was you. But this recipe is different. The peanut butter and banana work together to create something that’s creamy without being heavy, sweet without being cloying, and filling without sitting like a rock in your stomach. Trust me on this one.
Why You’ll Love This Recipe
I’ve tested this recipe more times than I care to count, and every single batch has taught me something new. Here’s why I think you’ll fall for it too:
- Five minutes of prep, I promise. No cooking, no blending, no dirtying a dozen dishes. Just stir, cover, and walk away. Your future self will thank you when you’re running late and breakfast is already waiting.
- Ingredients you already have. Oats, peanut butter, a banana, milk, and maybe a drizzle of honey. That’s it. No trips to specialty stores or weird ingredients you’ll use once and forget about.
- Perfect for busy mornings. Whether you’re rushing out the door or eating at your desk, these oats travel well. I’ve eaten them cold straight from the jar, and I’ve microwaved them for thirty seconds when I wanted something warmer. Both work beautifully.
- Kid-approved and adult-approved. My nephew calls them “banana pudding oats,” and honestly, he’s not wrong. The texture is that good. Adults love the balanced sweetness, and kids just love the peanut butter.
- Endlessly customizable. Want it vegan? Use plant milk and maple syrup. Need more protein? Add a scoop of your favorite powder. Craving chocolate? Toss in some cocoa powder or chocolate chips. This recipe bends without breaking.
What makes this version different from all the other overnight oat recipes out there? It’s the texture. Most recipes turn out either too watery or too thick, like eating wet sand. I spent weeks adjusting the liquid-to-oat ratio until I found the sweet spot — that perfectly creamy consistency that feels indulgent without being heavy. The secret is mashing the banana into the milk before adding the oats. It sounds simple, but it changes everything. The banana breaks down and creates this naturally creamy base that coats every oat perfectly.
This isn’t just another breakfast recipe. It’s the kind of meal that makes you look forward to mornings. And honestly, in a world that moves too fast, isn’t that worth holding onto?
What Ingredients You Will Need
This recipe relies on simple, wholesome ingredients that work together to create something genuinely special. Most of these are probably in your kitchen right now, which is exactly how I like it.
- Rolled oats — 1 cup (90g). Use old-fashioned rolled oats, not instant or steel-cut. Rolled oats absorb liquid slowly overnight, giving you that perfect creamy-but-chewy texture. Instant oats turn to mush, and steel-cut stay too crunchy. I prefer Bob’s Red Mill or Quaker Old Fashioned.
- Ripe banana — 1 large, the spotter the better. Those brown-speckled bananas that look past their prime are actually perfect here. They’re sweeter and mash more easily, which means you can use less added sweetener. If your banana is still a bit green, it won’t mash as smoothly and the oats won’t be as creamy.
- Creamy peanut butter — 3 tablespoons (48g). Natural peanut butter works great, but make sure it’s well-stirred before measuring. I’ve found that Skippy Natural or Justin’s Classic Peanut Butter give the smoothest results. Avoid the super-runny natural brands that separate completely, unless you’re okay with a thinner consistency. Crunchy peanut butter works too if you want some texture, but creamy gives you that silky finish.
- Milk of your choice — 1 cup (240ml). Whole milk makes the creamiest oats, but oat milk is my go-to for a dairy-free version. Almond milk works but gives a slightly thinner result. Coconut milk (from a carton, not a can) adds a subtle sweetness I love. Avoid anything too watery like skim milk or rice milk — they don’t provide enough body.
- Maple syrup or honey — 1-2 tablespoons (15-30ml). This is adjustable depending on how sweet your banana is. I usually use 1 tablespoon of maple syrup because I like the oats to be subtly sweet, not dessert-level. Honey gives a slightly different flavor that pairs beautifully with peanut butter.
- Chia seeds — 1 tablespoon (12g). Totally optional, but I never skip them. Chia seeds add a pudding-like thickness and a boost of fiber and omega-3s. They also help stabilize the oats so they don’t separate overnight. If you don’t have chia seeds, ground flax seeds work similarly.
- Vanilla extract — 1/2 teaspoon. Pure vanilla extract if you have it, but imitation works fine too. This tiny addition rounds out the flavors and makes everything taste more “baked” and cozy.
- Pinch of salt — Just a tiny one. Salt enhances the peanut butter flavor and balances the sweetness. Don’t skip it, even if you’re using salted peanut butter. That little pinch makes a big difference.
- Optional toppings: Sliced banana, extra peanut butter drizzle, dark chocolate chips, chopped peanuts, a sprinkle of cinnamon, or a dollop of Greek yogurt. I change my toppings based on my mood, but sliced banana and a few chocolate chips is my usual go-to.
A quick note on ingredient sourcing: I’ve tried this recipe with generic store-brand oats and fancy organic ones, and honestly, the difference is minimal. Spend your money on good peanut butter instead — it’s the star of the show, and a quality brand makes a noticeable difference in flavor and texture.
Equipment Needed
You don’t need much for this recipe, which is part of its beauty. Here’s what I use:
- A medium bowl or mason jar — I prefer a wide-mouth 16-ounce mason jar because it’s easy to mix in and store, but any bowl with a lid works. If you’re using a bowl, just cover it with plastic wrap or a reusable beeswax wrap.
- A fork or small whisk — For mashing the banana and mixing everything together. A fork works perfectly because you can mash and stir with the same tool. Less dishes, more happiness.
- A measuring cup and spoons — For accuracy, especially with the peanut butter. I’ve eyeballed it before and ended up with oats that were either too dry or too peanut-buttery. A quick measure saves you from disappointment.
- A spoon for eating — You’ll need this in the morning. I like a long-handled iced tea spoon for reaching the bottom of my jar.
If you don’t have a mason jar, any airtight container works. I’ve used repurposed pasta sauce jars, small Pyrex bowls with lids, and even a cleaned-out yogurt container. The key is a tight seal so the oats don’t dry out or absorb fridge odors. If you’re new to overnight oats, I’d recommend starting with a wide-mouth jar — it’s just easier to mix and eat from without making a mess.
Preparation Method
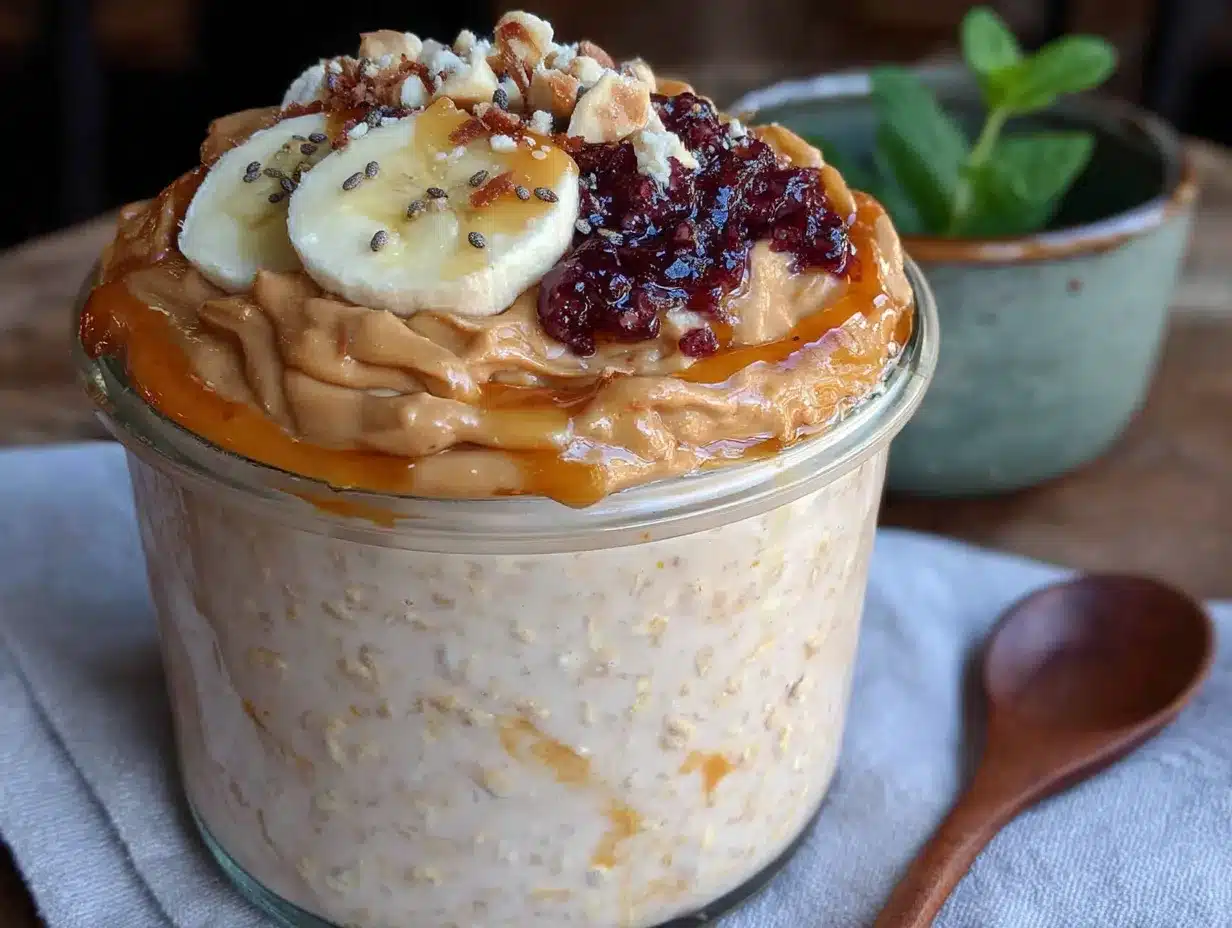
This is where the magic happens. Follow these steps, and you’ll have perfect overnight oats every time. I’ve included all my hard-learned tips so you don’t have to make the same mistakes I did.
- Mash the banana. Peel your banana and add it to your jar or bowl. Use a fork to mash it until it’s mostly smooth with just a few tiny lumps. You want it to blend into the liquid, not leave chunks that will turn brown overnight. If your banana is really ripe, this takes about 30 seconds. Don’t over-mash — a little texture is fine.
- Add the wet ingredients. Pour in the milk, peanut butter, maple syrup or honey, and vanilla extract. Whisk everything together with your fork until the peanut butter is fully incorporated. This is the most important step — if you leave peanut butter clumps, you’ll get pockets of intense flavor instead of that even, creamy distribution. Take your time here. I usually spend about a minute making sure everything is smooth and combined.
- Stir in the dry ingredients. Add the rolled oats, chia seeds (if using), and a pinch of salt. Stir well until all the oats are fully coated and submerged in the liquid. The mixture will look very liquidy at this point — that’s normal. Don’t be tempted to add more oats. They’ll absorb the liquid overnight and thicken beautifully.
- Cover and refrigerate. Seal your jar or cover your bowl tightly. Place it in the refrigerator for at least 6 hours, but overnight is best (8-12 hours). I usually make mine right after dinner so they’re ready by morning. If you’re in a rush, 4 hours will work, but the oats won’t be as soft and creamy.
- Give it a stir before eating. In the morning, take your oats out of the fridge and give them a good stir. You’ll notice they’ve thickened significantly. If they’re too thick for your liking, add a splash of milk and stir until it reaches your desired consistency. This is totally normal — different oat brands absorb liquid differently, and personal preference varies.
- Add your toppings. This is the fun part. I like to slice half a banana on top, drizzle a little extra peanut butter, and sprinkle a few dark chocolate chips. Sometimes I add a pinch of cinnamon or a dollop of Greek yogurt for extra creaminess. Get creative — this is your breakfast, after all.
- Enjoy immediately or save for later. These oats keep well in the fridge for up to 5 days, so you can absolutely make a batch on Sunday and have breakfast ready all week. Just keep the toppings separate until you’re ready to eat, or they’ll get soggy. If you’re meal-prepping, I recommend making individual jars so you can grab one and go.
A quick note on timing: if you’re making these for the first time, I recommend tasting the mixture before refrigerating. Is it sweet enough? Does it need more peanut butter? Adjust now, because you can’t fix it once it’s set. I learned this the hard way after making a batch that was way too bland. Now I always taste-test before the fridge.
Cooking Tips & Techniques
After dozens of batches, I’ve collected a few tricks that make these oats consistently perfect. Some I learned from recipe testing, others from happy accidents.
Don’t skip the mash. I know it’s tempting to just slice the banana and call it done, but mashing it into the milk is what gives these oats their signature creamy texture. The banana acts as a natural thickener and sweetener, and it distributes evenly throughout the oats instead of leaving isolated pockets of banana flavor. If you’re in a rush, you can use an immersion blender to puree the banana with the milk, but a fork works just fine.
Warm your peanut butter. Cold peanut butter is a nightmare to mix. If your peanut butter has been in the fridge, microwave it for 10-15 seconds before adding it to the bowl. It’ll incorporate much more smoothly, and you won’t end up with stubborn clumps. This is especially important for natural peanut butters that separate easily.
Watch your liquid ratio. Different oat brands absorb liquid differently. I’ve found that Bob’s Red Mill rolled oats need slightly more milk than Quaker Old Fashioned. Start with the recipe as written, and if your oats are too thick in the morning, stir in an extra tablespoon or two of milk. If they’re too thin, next time use a little less milk or add an extra tablespoon of oats. You’ll learn your preferred consistency after a batch or two.
Room temperature ingredients help. If you remember, take your milk and banana out of the fridge about 15 minutes before you start. Cold ingredients don’t blend as smoothly, and the peanut butter can seize up if it hits cold milk. This isn’t a dealbreaker, but it does make for a smoother mixing process.
Layer your toppings strategically. If you’re adding fresh fruit or crunchy toppings, wait until right before you eat to add them. Sliced bananas turn brown overnight, and granola gets soft and sad. Keep your toppings in a separate container or add them fresh each morning. The only exception is chia seeds — those can go in the night before since they need time to absorb liquid.
One mistake I still make: Forgetting to stir before eating. The oats settle overnight, and the liquid sometimes separates. A quick stir brings everything back together and ensures every spoonful has that perfect balance of oats, banana, and peanut butter. It takes five seconds and makes a huge difference.
Variations & Adaptations
This recipe is incredibly forgiving, and I’ve tried more variations than I can count. Here are some of my favorites:
- Chocolate peanut butter version: Add 1 tablespoon of unsweetened cocoa powder along with the dry ingredients. You’ll get a rich, chocolatey base that pairs perfectly with the peanut butter. I sometimes add a handful of chocolate chips on top for extra indulgence. This version tastes like dessert for breakfast, and I’m not mad about it.
- Vegan and dairy-free: Use oat milk or almond milk instead of dairy milk, and swap the honey for maple syrup. Everything else is already plant-based. I’ve made this version dozens of times for my vegan friends, and no one has ever complained. The texture is slightly different but still incredibly creamy.
- Higher protein: Stir in a scoop of vanilla or chocolate protein powder along with the dry ingredients. You might need to add an extra tablespoon or two of milk since protein powder absorbs liquid. I’ve used collagen peptides too, and they dissolve seamlessly without affecting the flavor. This is my go-to post-workout breakfast.
- Lower sugar: Use an extra-ripe banana and skip the maple syrup or honey entirely. The banana provides enough natural sweetness for most palates. You can also use unsweetened almond milk to cut even more sugar. If you miss the sweetness, add a few drops of stevia or monk fruit sweetener.
- Seasonal twist: In the fall, I add 1/2 teaspoon of pumpkin pie spice and swap half the milk for pumpkin puree. In the summer, I top the oats with fresh berries and a squeeze of lemon juice. During the winter holidays, I add a pinch of nutmeg and some chopped dates. The base recipe is so neutral that it works with almost any flavor profile.
- Nut-free option: Substitute sunflower seed butter for the peanut butter. It has a similar creamy texture and works beautifully with banana. Just note that sunflower seed butter can turn green when combined with baking soda or other alkaline ingredients, but since we’re not baking, that’s not an issue here. SunButter is my favorite brand for this swap.
I once made a batch with leftover pumpkin puree and a dash of cinnamon, and it was so good I ate it three days in a row. Don’t be afraid to experiment — the worst that happens is you learn what doesn’t work, and that’s still a win in my book.
Serving & Storage Suggestions
These oats are incredibly versatile when it comes to serving and storing. Here’s everything I’ve learned about keeping them fresh and delicious.
Serving temperature: I eat these cold straight from the fridge about 80% of the time. They’re refreshing and satisfying, especially on warm mornings. But if you prefer a warm breakfast, microwave your oats for 30-45 seconds, stir, and enjoy. They won’t be piping hot, but they’ll be pleasantly warm and even creamier. Just don’t overheat them, or the texture can become gummy.
Presentation ideas: If you’re serving these for brunch or to guests, layer them in a clear glass or jar to show off the beautiful texture. Top with sliced banana, a drizzle of peanut butter, a sprinkle of chia seeds, and maybe a few chocolate shavings. A dusting of cinnamon on top adds a professional touch. I’ve served these at casual get-togethers, and they always get compliments.
Storage instructions: Store your oats in an airtight container in the refrigerator for up to 5 days. I don’t recommend freezing them, as the texture becomes watery and unappealing after thawing. If you’re meal-prepping, make individual portions in mason jars so you can grab one each morning. Just remember to leave the toppings off until you’re ready to eat.
How flavors develop: These oats actually taste better on day two or three. The flavors meld together, the oats soften even more, and the peanut butter and banana become one cohesive flavor. I’ve had batches that were amazing on day four. If you’re making a big batch, don’t worry about eating them all immediately — they’ll keep getting better.
Reheating tips: If you’re reheating, add a splash of milk before microwaving to restore some creaminess. Stir halfway through heating to ensure even warmth. For cold oats, just give them a good stir and add your toppings. I’ve also eaten them at room temperature when I forgot to pack a spoon and had to wait until I got to work — they were still delicious.
Pairing suggestions: These oats are substantial enough to be a meal on their own, but they pair beautifully with a side of fresh fruit, a hard-boiled egg for extra protein, or a cup of hot coffee. If you’re serving them for brunch, consider adding a side of overnight cinnamon roll French toast bake for a truly indulgent spread. For a lighter option, pair them with some no-bake peanut butter oat energy bars for a complete breakfast that travels well.
Nutritional Information & Benefits
Here’s the nutritional breakdown for one serving of this recipe (using whole milk and 1 tablespoon of maple syrup):
- Calories: Approximately 450-500 calories
- Protein: 15-18 grams
- Carbohydrates: 58-65 grams
- Fiber: 10-12 grams
- Fat: 18-22 grams
- Sugar: 22-28 grams (mostly natural from banana and milk)
These numbers will vary based on your specific ingredients and portion sizes. If you’re watching your sugar intake, use an extra-ripe banana and skip the maple syrup — you’ll cut the sugar by about half. For a lower-calorie version, use unsweetened almond milk and reduce the peanut butter to 2 tablespoons.
Health benefits: Rolled oats are packed with beta-glucan, a type of soluble fiber that helps lower cholesterol and keeps you full for hours. Bananas provide potassium and vitamin B6, which support heart health and energy metabolism. Peanut butter adds healthy monounsaturated fats and protein, making this a well-balanced meal that sustains you through the morning. Chia seeds contribute omega-3 fatty acids and additional fiber, which is great for digestive health.
Dietary considerations: This recipe is naturally vegetarian and can easily be made vegan, dairy-free, and gluten-free (use certified gluten-free oats). It contains peanuts and may contain gluten depending on your oat brand. If you have allergies, check your labels carefully — some oats are processed in facilities that also handle wheat. I personally love that this recipe works for so many different dietary needs without sacrificing flavor or texture.
From a wellness perspective, I love that this breakfast feels indulgent but is actually packed with nutrients. It’s the kind of meal that satisfies your cravings while genuinely nourishing your body. That balance is hard to find, and it’s why I keep coming back to this recipe week after week.
Conclusion
This creamy peanut butter banana overnight oats recipe has become a staple in my kitchen for good reason. It takes five minutes to prep, uses ingredients I always have on hand, and delivers a breakfast that feels like a treat every single time. The texture is perfectly creamy, the flavors are balanced and satisfying, and the possibilities for customization are endless.
I love that this recipe has room for your personality. Maybe you’ll add a sprinkle of cinnamon, a handful of chocolate chips, or a dollop of Greek yogurt. Maybe you’ll make it vegan or boost the protein or turn it into a fall-inspired pumpkin version. The base is solid, but it’s meant to be played with. That’s what makes it yours.
If you give this recipe a try, I’d love to hear how it goes. Did you add something unexpected? Did you discover a new favorite topping combination? Share your experience in the comments below, and don’t forget to tag me in your photos if you post them online. Your adaptations might just inspire someone else’s next breakfast.
Here’s to mornings that start with something good — and to the simple joy of a jar of oats that tastes like a hug. Happy eating, friend.
Frequently Asked Questions
Can I use quick oats instead of rolled oats?
You can, but the texture will be significantly different. Quick oats are more processed and absorb liquid faster, which means they’ll turn mushy and soft rather than maintaining that pleasant chewy texture. If you’re in a pinch, use quick oats but reduce the milk to 3/4 cup and only refrigerate for 4-6 hours. They won’t be as creamy, but they’ll still taste good.
How long do these overnight oats last in the fridge?
These oats stay fresh for up to 5 days in an airtight container in the refrigerator. The texture actually improves after the first day as the flavors meld together. Just keep your toppings separate until you’re ready to eat, and give the oats a good stir before serving. If they seem too thick after a few days, add a splash of milk to loosen them up.
Can I make these oats without a banana?
Absolutely. If you don’t have a banana or prefer not to use one, you can substitute 1/4 cup of unsweetened applesauce or an extra 1/4 cup of milk. The texture will be slightly different — less creamy and a bit thinner — but still delicious. You might want to add an extra tablespoon of maple syrup or honey since you’re losing the banana’s natural sweetness.
Why are my overnight oats too thick or too thin?
This usually comes down to the oat-to-liquid ratio or the specific brand of oats you’re using. Different oat brands absorb liquid differently. If your oats are too thick, stir in a tablespoon or two of milk until they reach your desired consistency. If they’re too thin, add an extra tablespoon of oats and let them sit for another hour. Next time, adjust the liquid by 2-3 tablespoons based on your preference.
Can I eat these oats warm?
Yes, and I do it all the time during colder months. Simply microwave your oats for 30-45 seconds, stir, and enjoy. They won’t be piping hot, but they’ll be pleasantly warm and even creamier than the cold version. Just don’t overheat them, or the texture can become gummy. If you’re meal-prepping, I recommend reheating individual portions rather than the whole batch.
Pin This Recipe!
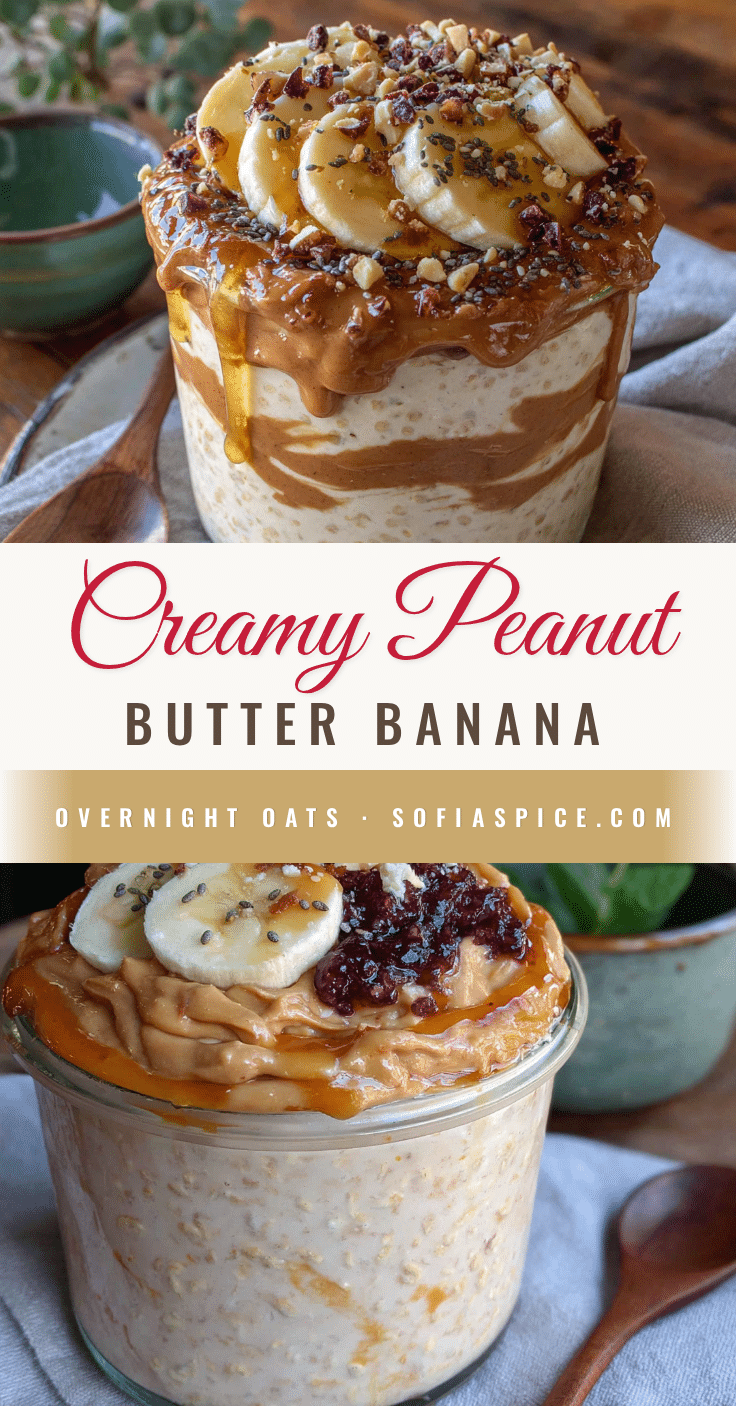
Creamy Peanut Butter Banana Overnight Oats: Easy 5-Minute Recipe
These creamy peanut butter banana overnight oats are a quick, no-cook breakfast that takes just 5 minutes to prep. With simple ingredients and endless customization options, they’re perfect for busy mornings and taste like a hug in a jar.
- Prep Time: 5 minutes
- Cook Time: 0 minutes
- Total Time: 5 minutes (plus 6-12 hours refrigeration)
- Yield: 2 servings 1x
- Category: Breakfast
- Cuisine: American
Ingredients
- 1 cup (90g) rolled oats
- 1 large ripe banana (the spottier the better)
- 3 tablespoons (48g) creamy peanut butter
- 1 cup (240ml) milk of your choice (whole milk, oat milk, or almond milk)
- 1–2 tablespoons (15-30ml) maple syrup or honey
- 1 tablespoon (12g) chia seeds (optional)
- 1/2 teaspoon vanilla extract
- Pinch of salt
- Optional toppings: sliced banana, extra peanut butter drizzle, dark chocolate chips, chopped peanuts, cinnamon, Greek yogurt
Instructions
- Mash the banana: Peel the banana and add it to your jar or bowl. Use a fork to mash until mostly smooth with a few tiny lumps.
- Add the wet ingredients: Pour in the milk, peanut butter, maple syrup or honey, and vanilla extract. Whisk together until the peanut butter is fully incorporated and smooth.
- Stir in the dry ingredients: Add the rolled oats, chia seeds (if using), and a pinch of salt. Stir until all oats are coated and submerged. The mixture will look liquidy—this is normal.
- Cover and refrigerate: Seal the jar or cover the bowl tightly. Refrigerate for at least 6 hours, but overnight (8-12 hours) is best.
- Stir before eating: In the morning, give the oats a good stir. If too thick, add a splash of milk to reach desired consistency.
- Add toppings: Top with sliced banana, extra peanut butter, chocolate chips, or other desired toppings. Enjoy immediately or store for later.
Notes
For best results, use rolled oats (not instant or steel-cut). Mash the banana into the milk for a creamy base. Warm peanut butter if cold for easier mixing. Taste the mixture before refrigerating to adjust sweetness. Oats keep in the fridge for up to 5 days; add toppings fresh before eating.
Nutrition
- Serving Size: 1 serving (about 1 c
- Calories: 450500
- Sugar: 2228
- Sodium: 150200
- Fat: 1822
- Saturated Fat: 35
- Carbohydrates: 5865
- Fiber: 1012
- Protein: 1518
Keywords: overnight oats, peanut butter banana oats, easy breakfast, no-cook breakfast, meal prep breakfast, healthy breakfast, creamy oats


