The sharp little snap of that first bite—where the white chocolate gives way just enough before the candy corn crunches—is what I made this for. Everything else is secondary. I mean, sure, it looks like someone dropped a handful of Halloween candy onto a baking sheet and called it a day, but that’s kind of the point. It’s not trying to be fancy. It’s trying to be exactly what you want to grab when you walk through the kitchen after dinner.
I first made this easy candy corn bark on a Tuesday night in late September when the air finally got that cool edge to it. I had a bag of candy corn leftover from a baking project that never happened, a block of white almond bark I’d bought on a whim, and a desperate need for something sweet that didn’t require turning on the oven. (Let’s be honest—that’s the real reason most of us make no-bake desserts, right?)
The first batch was a little messy. I didn’t spread the chocolate thin enough, so the bark was more like a slab. But the crunch? That texture was exactly what I’d been craving. So I tweaked it, spread it thinner the next time, added sprinkles because why not, and suddenly I had a three-ingredient fall dessert that disappeared faster than anything I’d baked all week.
This is one of those recipes that sticks because it’s not trying to be anything other than what it is—candy, chocolate, and a little bit of crunch. No oven required. No complicated steps. Just a few minutes of melting and spreading, and you’ve got something that feels like a treat without feeling like a project.
Why You’ll Love This Recipe
Let me tell you why this easy candy corn bark has earned a permanent spot in my fall rotation. I’ve tested it about six times now, and each batch taught me something new about getting that perfect thin, snappy texture.
- Only 3 Ingredients : Candy corn, white chocolate or almond bark, and sprinkles. That’s it. No heavy cream, no butter, no corn syrup. You probably have everything except the candy corn already.
- No Oven Required : This is a stovetop or microwave situation. Perfect for those days when you want something sweet but don’t want to heat up the whole kitchen.
- Ready in 15 Minutes : Actually, it’s more like 10 minutes of active work and then a chill time in the fridge. You could make this between school pickup and dinner prep.
- Perfect for Halloween Parties : It looks festive without being fussy. I brought a batch to a friend’s pumpkin carving night and it was gone before the first jack-o’-lantern was finished.
- Completely Customizable : Swap the sprinkles for seasonal colors, add crushed pretzels for saltiness, or drizzle dark chocolate on top. The base recipe is a blank canvas.
What makes this different from other candy bark recipes I’ve seen is the technique. Most recipes tell you to just melt and spread, but I learned the hard way that temperature matters. If your chocolate is too hot when you add the candy corn, it melts the candy coating and turns everything into a streaky mess. I’ll show you exactly how to avoid that.
Honestly, this is the kind of recipe that makes you feel like a kitchen genius with almost zero effort. It’s the fall dessert equivalent of throwing on a cozy sweater and calling it an outfit—simple, satisfying, and somehow exactly right.
What Ingredients You Will Need
This recipe uses three simple ingredients to create that signature sweet, crunchy, and colorful bark. Each one plays a specific role, so let me walk you through what to look for and why.
- White Chocolate or Almond Bark (12 ounces) : This is the backbone of your bark. I’ve tested this with both real white chocolate (the kind with cocoa butter) and vanilla almond bark (the coating wafers), and honestly, I prefer almond bark for this recipe. It melts more smoothly, sets up harder, and doesn’t seize as easily. Plus, it’s usually cheaper. If you use real white chocolate, make sure it’s good quality—I like Ghirardelli or Baker’s brand. Chop it into small, even pieces so it melts uniformly. (Pro tip: Don’t use white chocolate chips for this. They contain stabilizers that prevent smooth melting and can leave you with a grainy texture.)
- Candy Corn (1 cup) : The star of the show. You want fresh candy corn for this—stale candy corn gets hard and loses that pleasant chewy-crunchy texture. I’ve tried this with both classic Brach’s and some fancy organic brands, and Brach’s actually works best because the coating is slightly softer, which means it doesn’t shatter when you cut the bark. If you’re feeling adventurous, try using autumn mix (the one with the little pumpkins and corn) for more visual variety. Just keep in mind that the pumpkins are bigger and might need to be halved so they distribute evenly.
- Fall-Themed Sprinkles (2-3 tablespoons) : This is where you can get creative. I use a mix of orange, yellow, and brown jimmies (the long skinny sprinkles) plus some orange nonpareils (the tiny round ones). Wilton makes a great fall mix that has little leaves and pumpkins. The sprinkles aren’t just for looks—they add a tiny bit of texture contrast against the smooth chocolate. If you’re making this for a specific holiday, match your sprinkles accordingly. Halloween colors, Thanksgiving tones, or even just plain white nonpareils if you want something more subtle.
A quick note on substitutions: You can absolutely use dark or milk chocolate instead of white. The flavor profile changes completely—it becomes more like a candy bar than a sweet bark—but it’s delicious in its own way. If you go that route, I’d recommend adding a pinch of flaky sea salt on top to balance the sweetness. And if you’re dairy-free, look for vegan white chocolate chips or dairy-free almond bark. The texture will be slightly different, but it still works beautifully.
Equipment Needed
You don’t need much for this recipe, which is one of the reasons I love it. Here’s what you’ll want to have on hand:
- Microwave-Safe Bowl : A medium glass or ceramic bowl works best. I use a Pyrex measuring cup because the spout makes pouring easier, but any microwave-safe bowl will do.
- Baking Sheet : A standard half-sheet pan (13×18 inches) is ideal. Line it with parchment paper or a silicone baking mat—this is non-negotiable. Without parchment, your bark will stick and you’ll be picking chocolate shards off the pan for days.
- Spatula : An offset spatula is my favorite for spreading chocolate thin and even, but a regular rubber spatula works fine too. Just work quickly before the chocolate starts to set.
- Parchment Paper or Silicone Baking Mat : As mentioned, this saves your sanity. I prefer parchment because I can lift the whole sheet of bark off the pan easily.
- Sharp Knife : Once the bark is set, you’ll need a good chef’s knife to break it into pieces. A serrated knife can work too, but it tends to create more crumbs.
- Refrigerator Space : You’ll need about 30 minutes of chill time, so make sure you have a flat spot in your fridge.
If you don’t have a microwave, you can melt the chocolate on the stovetop using a double boiler. Just bring an inch of water to a simmer in a small pot, place your bowl of chopped chocolate on top (make sure the bottom doesn’t touch the water), and stir until smooth. It takes a few extra minutes but works perfectly.
Preparation Method
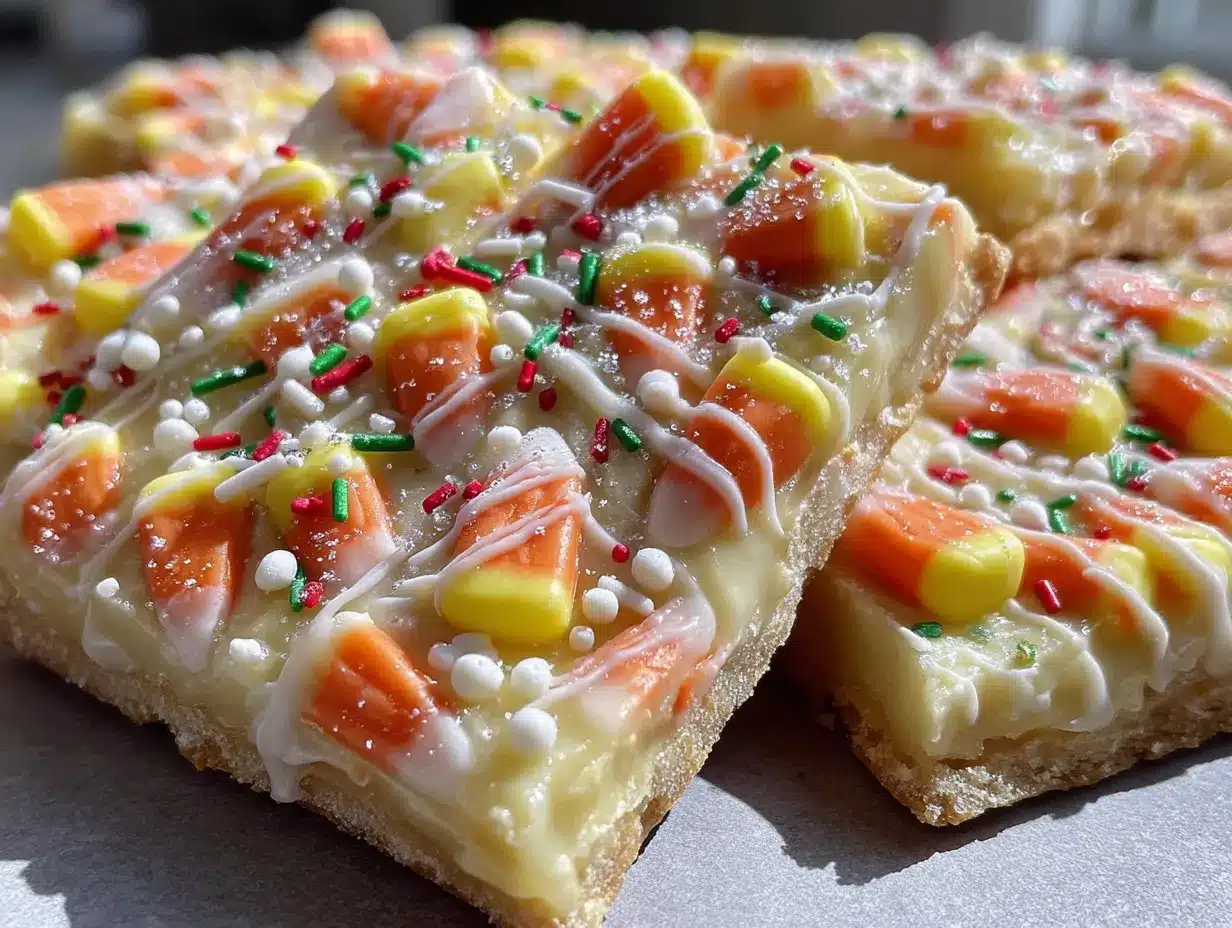
Let me walk you through this step by step. I’ve included all the little details I wish someone had told me the first time.
- Prep Your Pan : Line your baking sheet with parchment paper. Make sure the paper extends slightly over the edges—this gives you handles to lift the bark later. Set the pan aside.
- Chop Your Chocolate : If you’re using a block of almond bark or a white chocolate bar, chop it into small, uniform pieces. You want them about the size of chocolate chips. This helps them melt evenly and quickly. (I once tried to melt a whole block without chopping it—took forever and I ended up with burnt spots. Learn from my mistakes.)
- Melt the Chocolate : Place your chopped chocolate in a microwave-safe bowl. Microwave in 30-second intervals on 50% power, stirring thoroughly after each interval. This is crucial—full power can scorch white chocolate in seconds. After about 2-3 intervals, the chocolate should be mostly melted with a few small lumps. Stir until the residual heat melts the remaining lumps. If you need another 15 seconds, go for it, but be careful. The chocolate should be smooth and glossy but not hot to the touch.
- Test the Temperature : Dip a clean finger into the melted chocolate. It should feel warm but not hot. If it’s too hot, let it sit for 2-3 minutes before proceeding. Hot chocolate will melt the candy corn’s coating and create a mess.
- Add the Candy Corn : Gently fold in 3/4 cup of the candy corn. Reserve the remaining 1/4 cup for the top. Stir just until combined—overmixing can cause the candy corn colors to bleed into the white chocolate, giving you a weird orange-tinted bark.
- Spread the Mixture : Pour the chocolate-candy corn mixture onto your prepared baking sheet. Use your spatula to spread it into an even layer, about 1/4 inch thick. Don’t worry if it’s not perfectly rectangular—rustic edges are part of the charm. Work quickly here because the chocolate starts to set as it cools.
- Top with Remaining Candy Corn and Sprinkles : While the chocolate is still wet, press the remaining 1/4 cup of candy corn into the surface. Sprinkle your fall-themed sprinkles evenly over the top. Gently press everything down with your fingers or the back of a spoon so it sticks. This step is where the visual magic happens—the candy corn peeking through the chocolate looks like little autumn jewels.
- Chill Until Set : Place the baking sheet in the refrigerator for at least 30 minutes, or until the chocolate is completely firm and no longer sticky to the touch. If you’re in a hurry, you can pop it in the freezer for 15 minutes, but keep an eye on it—freezer-chilled bark can sometimes develop condensation when you bring it out.
- Break into Pieces : Once the bark is fully set, lift the parchment paper off the baking sheet. Place it on a cutting board and use a sharp knife to cut it into irregular pieces, or simply break it with your hands. I like a mix of sizes—some big shards for snacking and smaller pieces for topping ice cream or yogurt.
- Serve or Store : Arrange the pieces on a serving platter or transfer to an airtight container. The bark will keep for up to two weeks (if it lasts that long).
A few visual cues to watch for: The chocolate should be smooth and shiny when you spread it, not thick and streaky. If it starts to look grainy or separate, you’ve overheated it—next time, try lower power on your microwave. The finished bark should have a clean snap when you break it, not a bendy, soft texture. If it bends, it needs more chill time.
Cooking Tips & Techniques
After making this easy candy corn bark more times than I care to admit, I’ve picked up a few tricks that make the process smoother and the results more consistent.
The Temperature Trap : White chocolate is finicky. It burns at a lower temperature than dark or milk chocolate because of the milk solids. That’s why I always melt it at 50% power. I learned this the hard way when I made my first batch and ended up with a gritty, scorched mess that smelled like burnt sugar. If your chocolate does seize (turns thick and lumpy), you can sometimes save it by stirring in a teaspoon of vegetable oil or coconut oil, but prevention is much better.
The Spreading Technique : Don’t try to spread the chocolate too thin. A 1/4-inch thickness is ideal—it gives you a satisfying snap when you bite into it but isn’t so thick that it feels like eating a block of chocolate. If you spread it too thin, the bark becomes fragile and breaks into tiny shards instead of nice pieces. I use the back of my offset spatula to create a slight swirl pattern on the surface—it catches the light and makes the bark look more artisanal.
Timing is Everything : The window between “wet enough to add toppings” and “too set to stick” is about 2-3 minutes. Have your candy corn and sprinkles measured and ready before you start spreading. I keep them in small bowls right next to my work station so I can grab them quickly. If the chocolate starts to set before you’ve added all your toppings, don’t panic—just press a little harder to make them stick.
Multitasking Strategy : While the bark is chilling in the fridge, use that time to clean up your workspace. Melted white chocolate can be a pain to clean once it hardens, so wash your bowl and spatula as soon as you’re done spreading. Hot water and a little dish soap work wonders. If you wait until after the bark is set, you’ll be scrubbing for ages.
Consistency Secret : For the most even bark, tap the baking sheet gently on the counter after spreading. This helps the chocolate settle into an even layer and brings any air bubbles to the surface. It also helps the candy corn distribute more evenly instead of all sinking to one side.
Variations & Adaptations
This recipe is incredibly flexible. Here are some of my favorite variations I’ve tried over the years:
Dark Chocolate & Sea Salt Version : Swap the white chocolate for dark chocolate (60-70% cocoa is my sweet spot) and skip the sprinkles. After spreading, sprinkle flaky sea salt and the candy corn on top. The salt cuts through the sweetness of the candy corn beautifully. This version feels more grown-up and is great for serving at fall dinner parties. I made this for a Halloween potluck last year and got more compliments than I expected.
Crunchy Pretzel Bark : Add 1/2 cup of crushed pretzel twists along with the candy corn. The salty, crunchy pretzels contrast perfectly with the sweet chocolate and chewy candy corn. I like to use salted mini pretzels and break them into small pieces with my hands. This variation is dangerously addictive—seriously, I can’t stop eating it.
Peanut Butter Swirl : Before adding the candy corn, drop spoonfuls of creamy peanut butter onto the melted white chocolate and swirl it with a knife. Then add the candy corn and sprinkles as usual. The peanut butter adds a savory richness that balances the sweetness. If you’re a fan of peanut butter and chocolate combinations (who isn’t?), this is your version.
Vegan & Dairy-Free Option : Use dairy-free white chocolate chips or vegan almond bark. I’ve tested this with Enjoy Life brand dairy-free white chips, and while the texture is slightly softer than traditional white chocolate, it still sets up nicely. Just make sure to chill it thoroughly—at least 45 minutes—because vegan chocolate tends to be more temperamental.
Spiced Autumn Bark : Add 1/2 teaspoon of pumpkin pie spice or cinnamon to the melted chocolate before spreading. The warm spices complement the candy corn’s honey-vanilla flavor and make the bark taste even more like fall. I sprinkle a little extra cinnamon on top along with the candy corn for a pretty finish.
Mini M&M Addition : Stir in 1/2 cup of autumn-colored M&Ms along with the candy corn. The chocolate shells add another layer of crunch and the colors make the bark even more festive. This is my go-to version when I’m making bark for kids’ Halloween parties.
Serving & Storage Suggestions
This easy candy corn bark is best served at room temperature or slightly chilled. I personally prefer it straight from the fridge on a warm day—the cold chocolate gives a satisfying snap and the candy corn stays pleasantly chewy. If you’re serving it at a party, arrange the pieces on a platter or in a decorative jar. It looks beautiful layered in a clear glass container with some fall leaves or mini pumpkins around it.
For storage, place the bark in an airtight container with parchment paper between layers. It will keep at room temperature for up to 2 weeks, but I honestly can’t vouch for that because it never lasts that long in my house. If you live in a warm climate, store it in the refrigerator to prevent the chocolate from getting soft or blooming (those white streaks that happen when chocolate gets too warm).
You can freeze this bark too. Place the pieces in a freezer-safe container or zip-top bag with parchment between layers, and freeze for up to 3 months. To thaw, just transfer to the refrigerator overnight or let sit at room temperature for about 20 minutes. The texture stays surprisingly good—the candy corn doesn’t get hard or weird in the freezer.
One thing I love about this bark is how the flavors develop over time. The first day, it’s all about the fresh chocolate and crunchy candy corn. After a day or two, the flavors meld together and the bark becomes almost like a candy bar. It’s delicious either way, so don’t feel like you have to serve it immediately.
If you’re looking for other no-bake treats to serve alongside this bark, try my no-bake peanut butter oat energy bars for a slightly healthier option, or the creamy crack dip for a savory-sweet party spread. And if you’re in full fall baking mode, these pumpkin cream cheese swirl muffins are the perfect companion for a cozy autumn afternoon.
Nutritional Information & Benefits
Let’s be real—this is candy. It’s not health food, and I’m not going to pretend it is. But here’s the estimated nutritional breakdown for a standard serving (about 2 ounces or 1/8 of the recipe):
| Nutrient | Amount Per Serving |
|---|---|
| Calories | 220-250 |
| Total Fat | 12g |
| Saturated Fat | 7g |
| Carbohydrates | 32g |
| Sugar | 28g |
| Protein | 2g |
The white chocolate does contain some calcium and a tiny bit of protein, and candy corn is essentially sugar and corn syrup with some artificial colors. This is a treat, not a staple. But you know what? Treats have their place. A small piece of this bark after dinner or as a party snack is perfectly fine. The key is portion control—I find that one or two pieces is enough to satisfy my sweet tooth without overdoing it.
If you’re watching your sugar intake, you can make a lower-sugar version by using sugar-free white chocolate and skipping the sprinkles. The texture won’t be exactly the same, but it’s a decent alternative. And for anyone with nut allergies, this recipe is naturally nut-free as long as you check your chocolate labels (some white chocolate is processed on shared equipment with nuts).
Honestly, I think the biggest benefit of this recipe isn’t nutritional—it’s emotional. Making something this simple and pretty in under 15 minutes feels good. Sharing it with friends and family feels even better. And sometimes, that’s exactly what we need.
Conclusion
This easy candy corn bark is one of those recipes that proves you don’t need complicated techniques or fancy ingredients to make something truly enjoyable. Three ingredients, ten minutes of work, and you’ve got a fall dessert that looks like you spent hours on it. The white chocolate melts into a smooth, creamy base that contrasts perfectly with the chewy-crunchy candy corn, and the sprinkles add just the right amount of festive flair.
I love this recipe because it’s forgiving. If you spread the chocolate a little unevenly, it still tastes amazing. If you accidentally add too many sprinkles, well, now you have extra-sprinkly bark. There’s no pressure to make it perfect because it’s already perfect in its simplicity. It’s the kind of recipe that makes you look forward to fall even more—the kind you’ll find yourself making year after year.
I’d love to hear how your bark turns out. Did you try any of the variations? Add your own twist? Drop a comment below and let me know what worked for you. And if you’re feeling generous, share a photo of your creation on social media—I always love seeing what you all come up with. Happy fall baking, friends!
Frequently Asked Questions
Can I use candy corn that’s been sitting in my pantry for a year?
Technically yes, but I wouldn’t recommend it. Stale candy corn gets hard and loses its pleasant chewy texture. For the best results, use fresh candy corn from this season. If you’re not sure how old your candy corn is, give it a taste test—if it’s rock hard, buy a new bag.
Why did my white chocolate turn out grainy?
This usually happens when the chocolate gets too hot. White chocolate is sensitive to high temperatures because of the milk solids. Always melt it at 50% power in the microwave and stir frequently. If it does seize, you can try adding a teaspoon of vegetable oil and stirring vigorously, but sometimes it’s better to just start over.
Can I make this bark without a microwave?
Absolutely. Use a double boiler instead. Fill a small pot with about an inch of water, bring it to a simmer, and place a heatproof bowl on top (make sure the bottom doesn’t touch the water). Add your chopped chocolate and stir until melted. It takes a few extra minutes but works perfectly.
How do I cut the bark neatly without it shattering?
Use a sharp chef’s knife and cut with a gentle sawing motion. Don’t try to chop straight down through the bark—that’s what causes shattering. If you want perfectly straight edges, you can score the chocolate before it fully sets, but honestly, I prefer the rustic look of irregular pieces. They look more homemade and inviting.
Can I add other mix-ins like nuts or dried fruit?
Definitely. Chopped pecans, dried cranberries, or even a sprinkle of flaky sea salt all work beautifully. Just keep the total amount of mix-ins to about 1 to 1.5 cups so the bark doesn’t get too crowded. If you add too many mix-ins, the chocolate won’t hold together properly and you’ll end up with a crumbly mess.
Pin This Recipe!
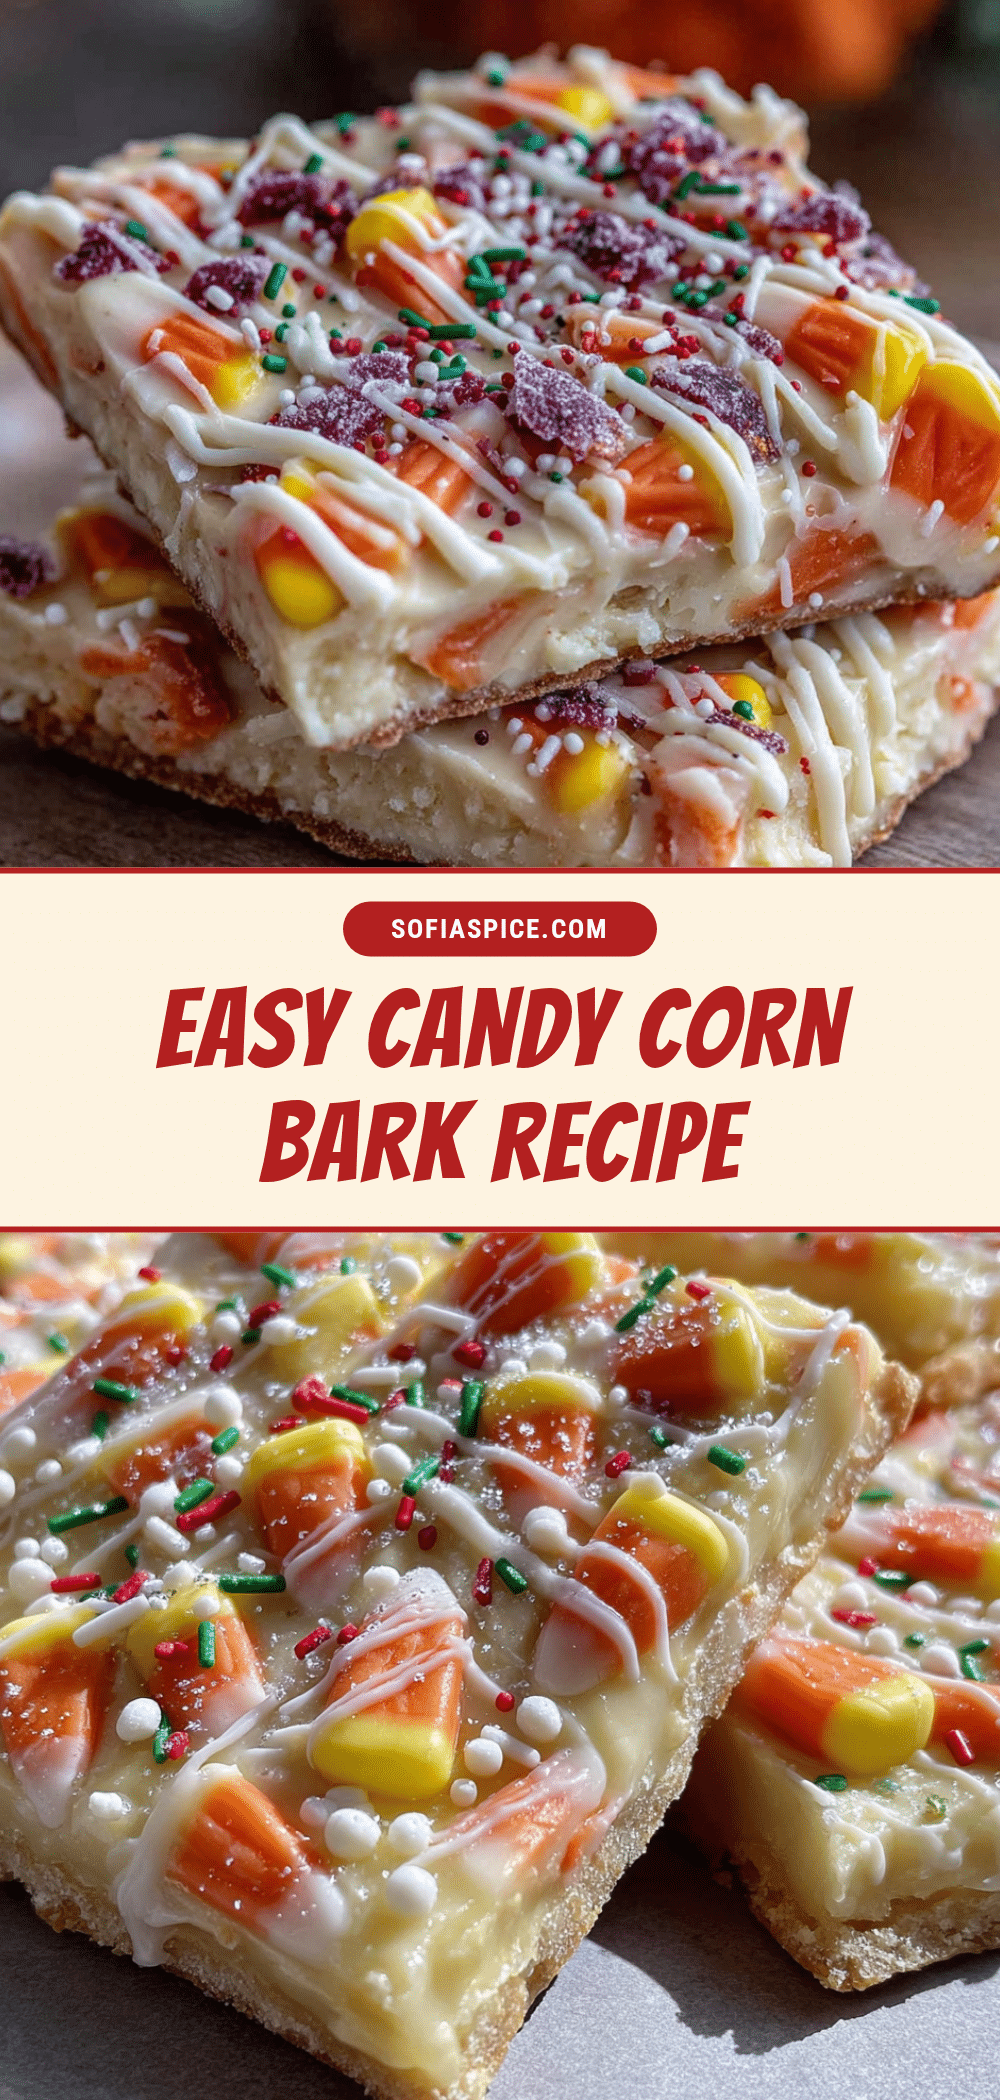
Easy Candy Corn Bark: Best 3-Ingredient Fall Dessert
This easy candy corn bark is a no-bake fall dessert made with just three ingredients: white chocolate, candy corn, and sprinkles. Ready in 15 minutes, it’s perfect for Halloween parties or a quick sweet treat.
- Prep Time: 10 minutes
- Cook Time: 0 minutes
- Total Time: 40 minutes
- Yield: 8 servings 1x
- Category: Dessert
- Cuisine: American
Ingredients
- 12 ounces white chocolate or almond bark
- 1 cup candy corn
- 2–3 tablespoons fall-themed sprinkles
Instructions
- Line a baking sheet with parchment paper, letting it extend over the edges for easy lifting.
- Chop the white chocolate or almond bark into small, uniform pieces.
- Melt the chocolate in a microwave-safe bowl in 30-second intervals at 50% power, stirring after each, until smooth and glossy but not hot.
- Test the temperature with a clean finger—it should feel warm, not hot.
- Gently fold in 3/4 cup of the candy corn, reserving 1/4 cup for the top.
- Pour the mixture onto the prepared baking sheet and spread into an even layer about 1/4 inch thick.
- While the chocolate is still wet, press the remaining 1/4 cup of candy corn and the sprinkles into the surface.
- Refrigerate for at least 30 minutes until completely firm.
- Lift the parchment paper off the baking sheet and break the bark into irregular pieces with your hands or a sharp knife.
- Serve immediately or store in an airtight container.
Notes
Use fresh candy corn for best texture. Melt white chocolate at 50% power to avoid scorching. If chocolate is too hot, let it cool before adding candy corn to prevent color bleeding. For a dairy-free version, use vegan white chocolate chips.
Nutrition
- Serving Size: 2 ounces (about 1/8
- Calories: 235
- Sugar: 28
- Sodium: 50
- Fat: 12
- Saturated Fat: 7
- Carbohydrates: 32
- Protein: 2
Keywords: candy corn bark, easy fall dessert, no-bake dessert, 3-ingredient dessert, Halloween candy bark, white chocolate bark


