I was standing in the baking aisle of our local grocery store last October, staring at a box of neon-orange sprinkles I had no intention of buying, when the smell hit me. It wasn’t Halloween candy or pumpkin spice—it was the faint, clean scent of vanilla and sugar, drifting from the sample station where a woman was handing out meringue cookies. And just like that, I was seven years old again, standing on a step stool in my Aunt Rita’s tiny kitchen, watching her beat egg whites into a glossy cloud that looked more like magic than food.
Aunt Rita wasn’t a fancy baker. She used a hand mixer that sounded like a lawnmower, and she always forgot to wipe down the counter before she started, so there were usually a few flour smudges on her apron. But her meringues? They were perfect. Light, airy, and so sweet they made your teeth ache. She’d pipe them into little ghosts every October, pressing chocolate chips into the tops for eyes, and my cousins and I would fight over who got the one with the most lopsided face. She passed away a few years ago, and I honestly haven’t made meringues since. Maybe I was scared they wouldn’t turn out the same. Maybe I just didn’t want to miss her that much.
But standing in that grocery store, I felt this sudden, almost stubborn urge to try. I grabbed a bag of chocolate chips, a carton of eggs, and a bottle of vanilla extract, and I drove home with the windows down, the October air rushing in. The first batch I made was a disaster—flat, sticky, and sad. The second batch was better. The third batch? Let me tell you, it was the one. The ghosts had little peaks on their heads, the chocolate chip eyes stared back at me with that same goofy charm I remembered, and for a moment, I could almost hear Aunt Rita humming along to the radio. If you’ve ever had a recipe haunt you (in the best way), you know exactly what I mean.
Why You’ll Love This Recipe
These Wholesome Ghost Meringue Cookies with Chocolate Chip Eyes aren’t just another Halloween treat. They’re the kind of cookie that makes you feel good about what you’re eating—and what you’re feeding your family. I’ve tested this recipe about six times now (you’re welcome), and I can honestly say it’s the best version I’ve ever made. Here’s why you’re going to love it:
- Quick & Easy: These come together in about 15 minutes of active prep time. The oven does most of the work, slowly drying them out to that perfect, melt-in-your-mouth texture.
- Simple Ingredients: You probably already have everything in your kitchen. Eggs, sugar, vanilla, chocolate chips. That’s it. No weird stabilizers or specialty flours.
- Perfect for Halloween: These are great for classroom parties, potlucks, or just a cozy night in watching spooky movies. They look impressive but take almost no effort.
- Crowd-Pleaser: Kids love the ghost shape, and adults love that they’re lighter than a traditional cookie. I’ve seen a plate of these disappear in under ten minutes.
- Unbelievably Delicious: The texture is what gets you. Crisp on the outside, airy on the inside, with little pockets of melted chocolate in every bite. It’s comfort food that doesn’t weigh you down.
What makes this recipe different from the rest? It’s the technique. I use a slightly lower oven temperature and a longer drying time than most recipes call for, which gives you a meringue that’s stable, glossy, and perfectly white—no browning or cracking. Plus, I’ve swapped out the cream of tartar for a tiny splash of lemon juice, which adds a subtle brightness without making the cookies taste like citrus. It’s a small tweak, but it makes a big difference.
Honestly, this recipe is the kind that makes you close your eyes after the first bite. It’s Halloween fun without the sugar crash, and it’s perfect for impressing guests without any stress. You’ll feel like a pastry chef, I swear.
What Ingredients You Will Need
This recipe uses simple, wholesome ingredients to deliver that light-as-air texture and just the right amount of sweetness. No fancy grocery trips needed—you likely already have everything in your kitchen. Here’s what you’ll need:
For the Meringue Cookies
- 4 large egg whites, at room temperature (this is important—cold eggs won’t whip up as high)
- 1 cup (200g) granulated sugar (I use organic cane sugar for a cleaner taste)
- 1/2 teaspoon vanilla extract (pure, not imitation, for the best flavor)
- 1/2 teaspoon lemon juice (this stabilizes the meringue and keeps it glossy)
- Pinch of salt (to balance the sweetness)
For the Ghost Faces
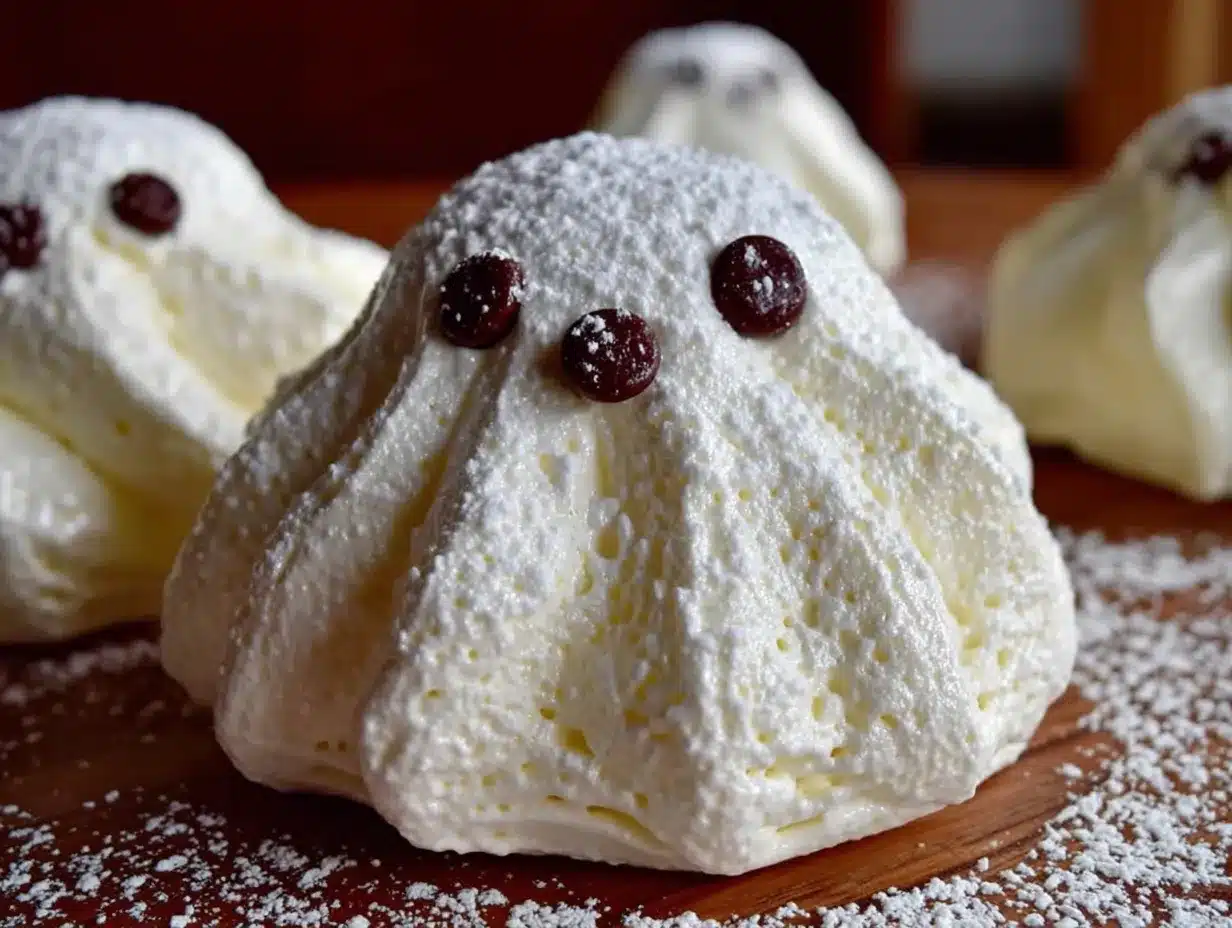
- 1/3 cup mini chocolate chips (I like Enjoy Life brand for their consistent size, but any mini chip works)
Ingredient Selection Tips: Look for eggs that are fresh and have clean shells. Older eggs actually whip up better because the whites are thinner, but I’ve had great results with fresh eggs too. If you’re using a stand mixer, you don’t need to worry about the age as much. For the sugar, avoid using powdered sugar—it contains cornstarch, which can make your meringue dense. Granulated sugar dissolves completely and gives you that crisp, airy texture.
Substitution Guidance: If you’re avoiding refined sugar, you can try using coconut sugar, but keep in mind the cookies will be darker in color and slightly less crisp. For a vegan version, you can use aquafaba (the liquid from a can of chickpeas) instead of egg whites—use 3 tablespoons of aquafaba per egg white. The texture will be a bit chewier, but the ghosts will still be adorable. And if you don’t have lemon juice, a pinch of cream of tartar works just as well.
Sourcing Note: I’ve tried this recipe with both store-brand and name-brand chocolate chips, and honestly, the mini chips work best because they’re small enough to stay put on the meringue without sinking. If you only have regular-sized chips, just chop them into smaller pieces before pressing them in.
Equipment Needed
You don’t need a lot of fancy gear for these cookies, which is part of why I love them. Here’s what you’ll need:
- Electric mixer (stand mixer or hand mixer—both work, but a stand mixer makes it easier since you have to beat the whites for a while)
- Large mixing bowl (make sure it’s completely clean and dry—any grease will ruin your meringue)
- Piping bag with a round tip (or a zip-top bag with the corner snipped off)
- Baking sheet lined with parchment paper (silicon mats work too, but parchment is easier to peel off)
- Rubber spatula (for folding in the chocolate chips)
- Kitchen scale (optional, but helpful for measuring sugar accurately)
Personal Experience: I’ve made these with both a hand mixer and a stand mixer, and while the stand mixer is definitely more convenient (you can walk away and do other things), a hand mixer works perfectly fine. Just be prepared to hold it for about 8-10 minutes. My arms were sore the first time I did it, but the cookies turned out great.
Budget-Friendly Option: If you don’t have a piping bag, don’t stress. You can use a sturdy zip-top bag—just fill it with the meringue, seal it, and snip off a tiny corner. The ghosts won’t be as perfectly shaped, but they’ll still be cute. I’ve done this more times than I’d like to admit.
Preparation Method
Alright, let’s get to the fun part. Here’s how to make these Wholesome Ghost Meringue Cookies with Chocolate Chip Eyes, step by step. Take your time with the first few steps—they’re the most important.
- Preheat your oven to 200°F (93°C). Yes, that’s low. We’re not baking these cookies—we’re drying them out. Line a baking sheet with parchment paper and set it aside.
- Separate your eggs. Make sure no yolk gets into the whites—even a tiny bit of fat will keep them from whipping up. I separate each egg into a small bowl first, then transfer the white to the mixing bowl. That way, if one breaks, you don’t ruin the whole batch.
- Start whipping the egg whites on medium speed. After about 30 seconds, they should look frothy and bubbly. Add the lemon juice and salt, then continue whipping.
- Gradually add the sugar. With the mixer still running, add the sugar one tablespoon at a time. This helps it dissolve evenly. Keep whipping on medium-high speed until the mixture is glossy and forms stiff peaks. You’ll know it’s ready when you lift the beater and the meringue stands up straight without drooping. This usually takes 8-10 minutes with a stand mixer, or 10-12 minutes with a hand mixer.
- Add the vanilla. Drizzle it in and whip for another 30 seconds until it’s fully incorporated. The mixture should look thick, white, and shiny—like marshmallow fluff.
- Fold in the chocolate chips. Gently fold them in with a rubber spatula. Be careful not to overmix, or you’ll deflate the meringue. You want the chips evenly distributed but still visible.
- Transfer the meringue to a piping bag. If you’re using a zip-top bag, fill it about halfway and snip off a 1/2-inch corner. Don’t cut too much off, or your ghosts will come out flat.
- Pipe the ghosts. Hold the bag straight up and pipe small mounds onto the parchment paper, about 1.5 inches wide and 2 inches tall. Pull the bag straight up at the end to create a little peak on top—that’s the ghost’s head. Leave about 1 inch of space between each ghost, since they don’t spread much.
- Add the eyes. While the meringue is still wet, press two mini chocolate chips into each ghost for eyes. You can also add a third chip for a mouth if you want, but I like the simple two-eye look. Press them in gently so they stick.
- Bake for 60-75 minutes. The cookies are done when they’re dry to the touch and easily lift off the parchment paper. They shouldn’t be brown at all—just pale and crisp. If they start to brown, your oven is too hot. Turn it down by 25 degrees next time.
- Cool completely on the baking sheet. Let them sit for at least 30 minutes before moving them. They’ll continue to crisp up as they cool.
Troubleshooting Tip: If your meringue is weepy or sticky after baking, it probably wasn’t dried out long enough. Pop them back in the oven (with the heat off) for another 20 minutes. They should be completely dry and crisp.
Cooking Tips & Techniques
I’ve made a lot of mistakes with meringue over the years, and I’m here to save you from the same fate. Here are my best tips:
- Room temperature eggs are non-negotiable. I know, I know—it’s tempting to use them straight from the fridge. But cold egg whites won’t whip up to their full volume, and your ghosts will be flat. Leave your eggs on the counter for 30 minutes before you start, or place them in a bowl of warm water for 5 minutes.
- Don’t overmix once you add the sugar. Once the sugar is in, keep whipping until you have stiff peaks, but stop as soon as you get there. Overwhipped meringue looks grainy and will collapse in the oven. I’ve done this twice, and it’s heartbreaking.
- Humidity is the enemy. Meringue hates moisture. If it’s a rainy or humid day, your cookies might turn out chewy instead of crisp. Save this recipe for a dry day, or run a dehumidifier in your kitchen for an hour before you start.
- Use a clean bowl. I mean spotless. Any trace of grease—even from a previous batch of cookies—will stop your egg whites from whipping. I wash my bowl with hot, soapy water and dry it with a paper towel just to be safe.
- Pipe with confidence. Your ghosts don’t have to be perfect. The charm of these cookies is that they’re all a little different. Some will be tall and skinny, others short and round. That’s okay—they all taste the same.
Personal Failure Story: The first time I made these, I forgot to add the sugar until after I’d already whipped the egg whites to stiff peaks. I tried to fold it in, but the meringue deflated almost instantly. The ghosts came out of the oven looking like sad, flat pancakes. Don’t be like me. Add the sugar gradually while you’re whipping.
Variations & Adaptations
One of the best things about this recipe is how easy it is to tweak. Here are a few variations I’ve tried and loved:
- Chocolate Ghosts: Swap 2 tablespoons of the granulated sugar for unsweetened cocoa powder. Sift it in with the sugar to avoid lumps. The ghosts will be a pale brown color, but they’ll taste like chocolate clouds. My kids went crazy for these.
- Peppermint Ghosts: Add 1/4 teaspoon of peppermint extract along with the vanilla. Crush a few candy canes and sprinkle them on top before baking. These are perfect for a Christmas-themed Halloween party (yes, that’s a thing).
- Vegan Ghosts: Use aquafaba instead of egg whites. Whip it the same way—it takes a little longer to reach stiff peaks, but it works. The texture is slightly chewier, but the ghosts are just as cute.
- Gluten-Free: These are naturally gluten-free, so no changes needed. Just make sure your vanilla extract and chocolate chips are certified gluten-free if that’s a concern.
- Spooky Swirls: Before piping, swirl in a drop of black or orange food coloring (gel works best) for a marbled effect. Don’t overmix—just a quick swirl is enough.
Personal Variation: I once made these with lavender extract instead of vanilla, and they turned out surprisingly good. The floral flavor paired beautifully with the sweet meringue. Just be careful—lavender extract is strong, so start with 1/4 teaspoon and taste the meringue before adding more.
Serving & Storage Suggestions
These cookies are best served at room temperature, straight from the baking sheet. They’re light and airy, so they practically dissolve on your tongue. Here are my favorite ways to serve them:
- Halloween Party Platter: Arrange them on a platter with other spooky treats—pumpkin-shaped cookies, candy corn, and dark chocolate bark. The white ghosts stand out beautifully against a dark tablecloth.
- With Hot Chocolate: Serve them alongside a mug of hot cocoa (or a dairy-free version for a healthier twist). The sweetness of the meringue balances the bitterness of dark chocolate perfectly.
- As a Gift: Pack them in a clear cellophane bag tied with a black ribbon. They’re fragile, so layer them with parchment paper and handle them gently.
Storage Instructions: Store these cookies in an airtight container at room temperature for up to 2 weeks. Do not refrigerate them—the moisture will make them sticky. If you live in a humid climate, add a silica gel packet to the container to keep them crisp.
Freezer Tips: You can freeze the baked cookies for up to 3 months. Place them in a single layer in a freezer-safe container, with parchment paper between each layer. Thaw at room temperature for 30 minutes before serving. They won’t be quite as crisp as fresh, but they’ll still be delicious.
Flavor Development: These cookies actually taste better the next day. The flavors meld together, and the texture becomes even more delicate. I usually make them a day before I plan to serve them.
Nutritional Information & Benefits
These Wholesome Ghost Meringue Cookies with Chocolate Chip Eyes are a lighter alternative to traditional Halloween treats. Here’s a rough breakdown per cookie (based on 24 cookies):
- Calories: 45
- Carbohydrates: 10g
- Sugar: 9g
- Protein: 1g
- Fat: 1g
- Sodium: 10mg
Health Benefits: Egg whites are a great source of lean protein and contain no fat or cholesterol. They’re also rich in selenium and B vitamins, which support thyroid function and energy metabolism. Plus, these cookies are naturally gluten-free and can be made vegan with a simple swap.
Dietary Considerations: This recipe is low in calories and fat compared to traditional cookies, making it a great option for anyone watching their sugar intake (in moderation, of course). The mini chocolate chips add a small amount of antioxidants from cocoa, which is a nice bonus.
Allergen Note: Contains eggs. The chocolate chips may contain dairy, so check the label if you’re avoiding dairy. For a nut-free version, use Enjoy Life chocolate chips, which are free from common allergens.
Personal Wellness Perspective: I love that I can offer these at a Halloween party without feeling guilty. They satisfy that sweet tooth without the heavy, greasy feeling you get from butter-based cookies. It’s a small win, but it matters.
Conclusion
These Wholesome Ghost Meringue Cookies with Chocolate Chip Eyes are more than just a Halloween treat—they’re a little piece of nostalgia that you can recreate in your own kitchen. They’re light, crisp, and just sweet enough, with that adorable ghost shape that makes everyone smile. Whether you’re making them for a party, a classroom, or just a quiet night in, I promise they’ll be a hit.
I’d love to hear how yours turn out. Did you try any of the variations? Did your ghosts come out perfect on the first try (unlike mine)? Drop a comment below and let me know—I read every single one. And if you’re looking for more wholesome treats, check out our healthy pumpkin muffins or these baked apple cider donuts for more fall flavor.
Happy Halloween, and happy baking! 🎃
Frequently Asked Questions
Can I make these cookies without a piping bag?
Absolutely. Just use a sturdy zip-top bag with the corner snipped off. You can also use a spoon to drop small mounds of meringue onto the baking sheet—they won’t look as ghost-like, but they’ll still taste great.
Why did my meringue turn out sticky?
Sticky meringue usually means it wasn’t dried out long enough. Pop the cookies back in a 200°F oven for 15-20 minutes, then let them cool completely. If they’re still sticky, your kitchen might be too humid. Try baking on a drier day.
Can I use regular chocolate chips instead of mini?
Yes, but they might sink into the meringue or look too big for the ghost faces. I recommend chopping regular chips into smaller pieces before pressing them in. Mini chips are definitely easier to work with, though.
How long do these cookies last?
Stored in an airtight container at room temperature, they’ll stay crisp for up to 2 weeks. Don’t refrigerate them—moisture will make them sticky. You can also freeze them for up to 3 months.
Can I use liquid egg whites from a carton?
I don’t recommend it. Carton egg whites often contain stabilizers that prevent them from whipping up properly. Stick with fresh eggs for the best results. Trust me on this one—I’ve tried both, and fresh eggs win every time.
Pin This Recipe!
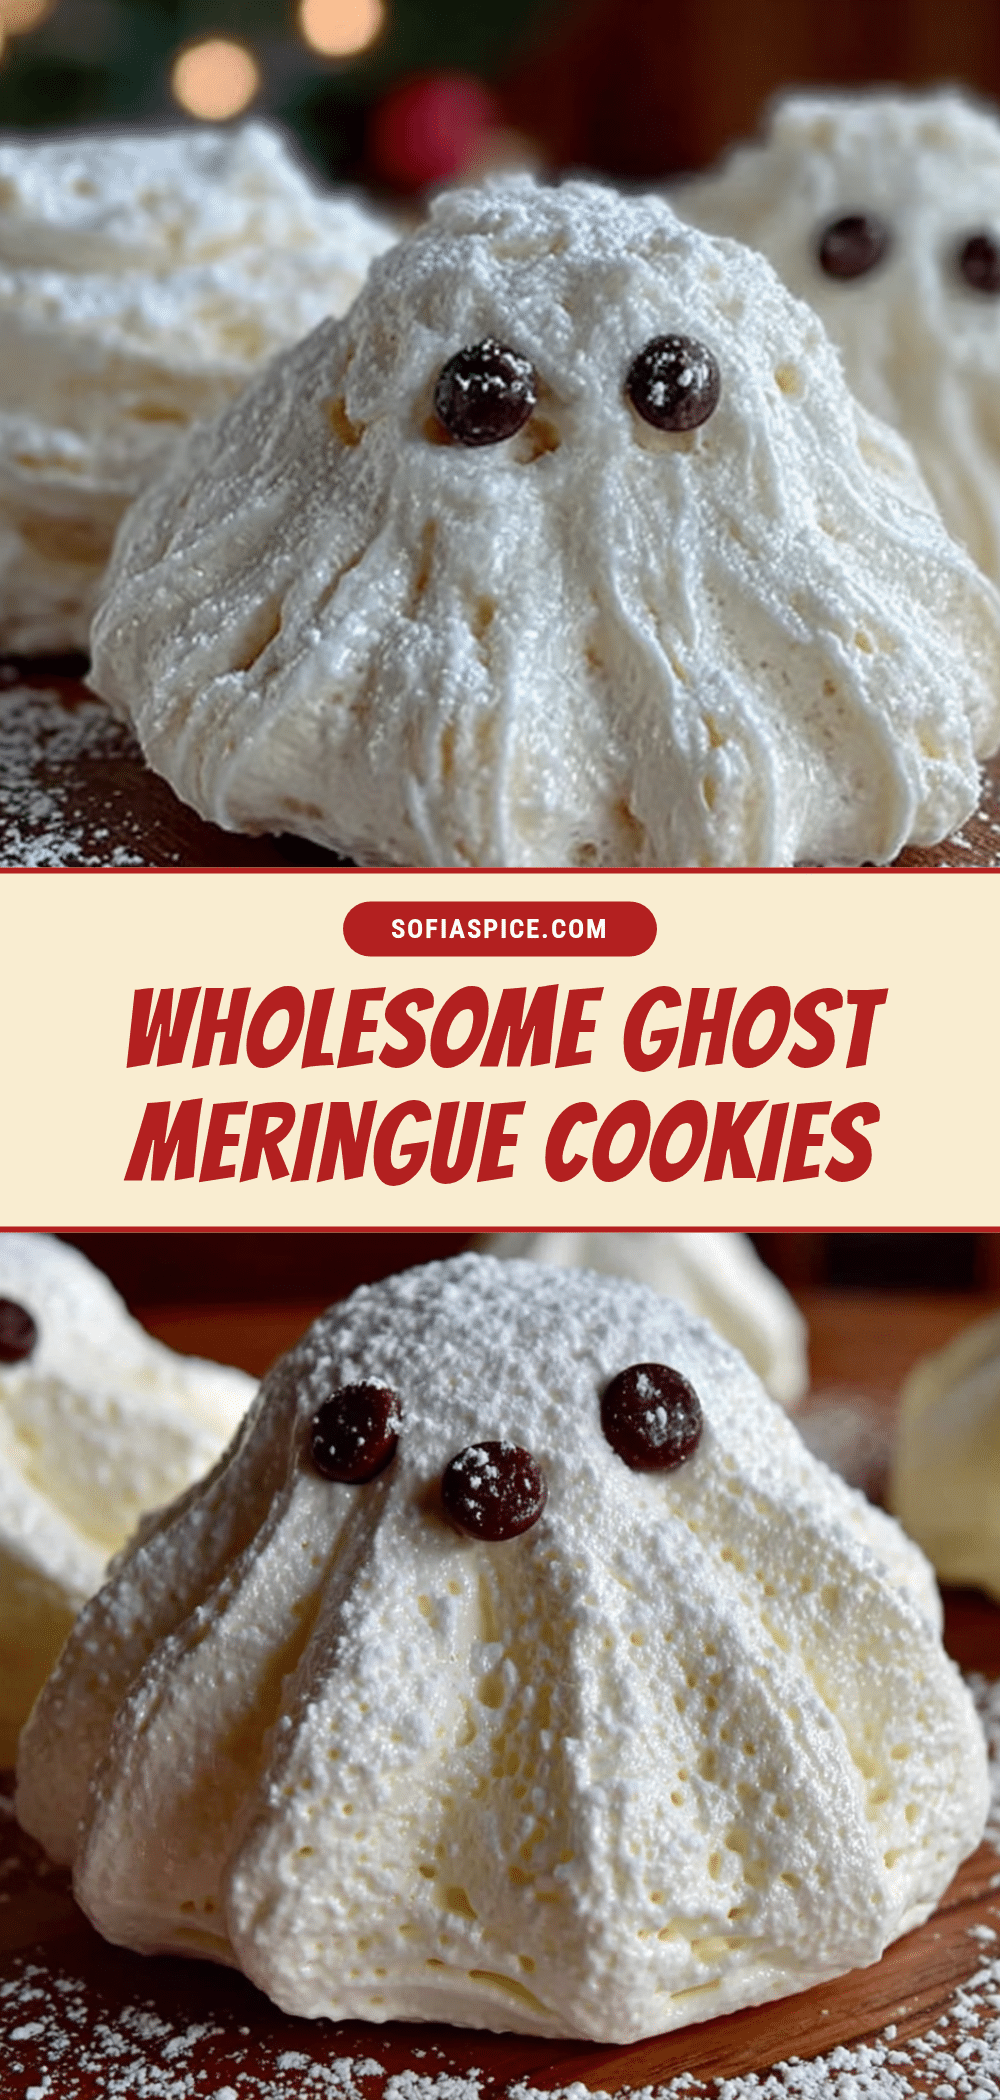
Wholesome Ghost Meringue Cookies with Chocolate Chip Eyes
Light, airy meringue cookies shaped like ghosts with chocolate chip eyes. A nostalgic Halloween treat that’s quick to make with simple ingredients and a melt-in-your-mouth texture.
- Prep Time: 15 minutes
- Cook Time: 60-75 minutes
- Total Time: 1 hour 30 minutes
- Yield: 24 cookies 1x
- Category: Dessert
- Cuisine: American
Ingredients
- 4 large egg whites, at room temperature
- 1 cup (200g) granulated sugar
- 1/2 teaspoon vanilla extract
- 1/2 teaspoon lemon juice
- Pinch of salt
- 1/3 cup mini chocolate chips
Instructions
- Preheat your oven to 200°F (93°C). Line a baking sheet with parchment paper and set it aside.
- Separate your eggs. Make sure no yolk gets into the whites. Separate each egg into a small bowl first, then transfer the white to the mixing bowl.
- Start whipping the egg whites on medium speed. After about 30 seconds, they should look frothy and bubbly. Add the lemon juice and salt, then continue whipping.
- Gradually add the sugar one tablespoon at a time with the mixer still running. Keep whipping on medium-high speed until the mixture is glossy and forms stiff peaks, about 8-10 minutes with a stand mixer or 10-12 minutes with a hand mixer.
- Add the vanilla extract and whip for another 30 seconds until fully incorporated. The mixture should look thick, white, and shiny like marshmallow fluff.
- Gently fold in the chocolate chips with a rubber spatula. Be careful not to overmix.
- Transfer the meringue to a piping bag with a round tip, or use a zip-top bag with a 1/2-inch corner snipped off.
- Pipe small mounds onto the parchment paper, about 1.5 inches wide and 2 inches tall. Pull the bag straight up at the end to create a little peak on top. Leave about 1 inch of space between each ghost.
- While the meringue is still wet, press two mini chocolate chips into each ghost for eyes. Press them in gently so they stick.
- Bake for 60-75 minutes until dry to the touch and easily lift off the parchment paper. They should not be brown at all.
- Cool completely on the baking sheet for at least 30 minutes before moving them.
Notes
Room temperature eggs are essential for proper volume. Avoid making these on humid days. If meringue is sticky after baking, return to oven (heat off) for 20 minutes. Store in airtight container at room temperature for up to 2 weeks. Do not refrigerate. Can be frozen for up to 3 months.
Nutrition
- Serving Size: 1 cookie
- Calories: 45
- Sugar: 9
- Sodium: 10
- Fat: 1
- Saturated Fat: 0.5
- Carbohydrates: 10
- Protein: 1
Keywords: Halloween cookies, meringue cookies, ghost cookies, egg white cookies, gluten-free cookies, low-fat cookies, holiday treats


