Last July, right when the heat was at its thickest—the kind where you don’t even want to look at your oven—my neighbor Maria saw me fanning myself on the porch steps. She didn’t say anything at first. She just walked back inside her house and came out a few minutes later with a glass dish covered in foil, still cold to the touch. “Try this,” she said, “it’s the only thing I bake in this weather.” Except she hadn’t baked it at all. That was my first taste of a no-bake s’mores icebox cake, and honestly, I didn’t know a dessert could taste that good without turning on a single appliance.
Maria grew up in a big family where summer desserts were all about keeping the kitchen cool. Her version used whatever chocolate cookies were on sale and a box of instant pudding she swore by. I tweaked it over the years—swapping in homemade whipped cream, toasting the marshmallows just right, and finding that perfect graham cracker that doesn’t get soggy. But the heart of it is still hers: a dessert that says summer without making you sweat for it.
Maybe you’ve been there—standing in front of your pantry on a 95-degree day, craving something sweet but refusing to turn on the oven. This cake is your answer. It layers crunchy graham crackers, rich chocolate pudding, and fluffy marshmallows into something that tastes like a campfire memory but comes together in your fridge. And let me tell you, the first time I served it at a backyard barbecue, people asked for the recipe before they even finished their slice.
Why You’ll Love This Recipe
This isn’t just another no-bake dessert. After testing this recipe at least a dozen times across different summers, I can tell you exactly why it works and why you’ll keep coming back to it.
- No Oven Required — When the temperature hits 90 degrees, the last thing you want is to heat up your kitchen. This cake comes together in about 20 minutes of active prep time. The fridge does the rest of the work while you enjoy your day.
- Simple Ingredients — You probably have most of these in your pantry right now. Graham crackers, chocolate pudding mix, marshmallows, and heavy cream. No fancy grocery store trips required for this one.
- Perfect for Summer Gatherings — Whether it’s the Fourth of July, a backyard barbecue, or just a lazy Sunday with the kids, this cake feeds a crowd and disappears fast. I’ve brought it to potlucks where it was the first dessert to run out.
- Crowd-Pleaser — Kids love the s’mores flavor, and adults appreciate how it’s not too sweet. The texture is this perfect combination of creamy, crunchy, and fluffy that somehow works in every single bite.
- Make-Ahead Friendly — You can assemble this the day before your event. In fact, it tastes better after sitting overnight. The flavors meld together, and the graham crackers soften into a cake-like texture that’s honestly addictive.
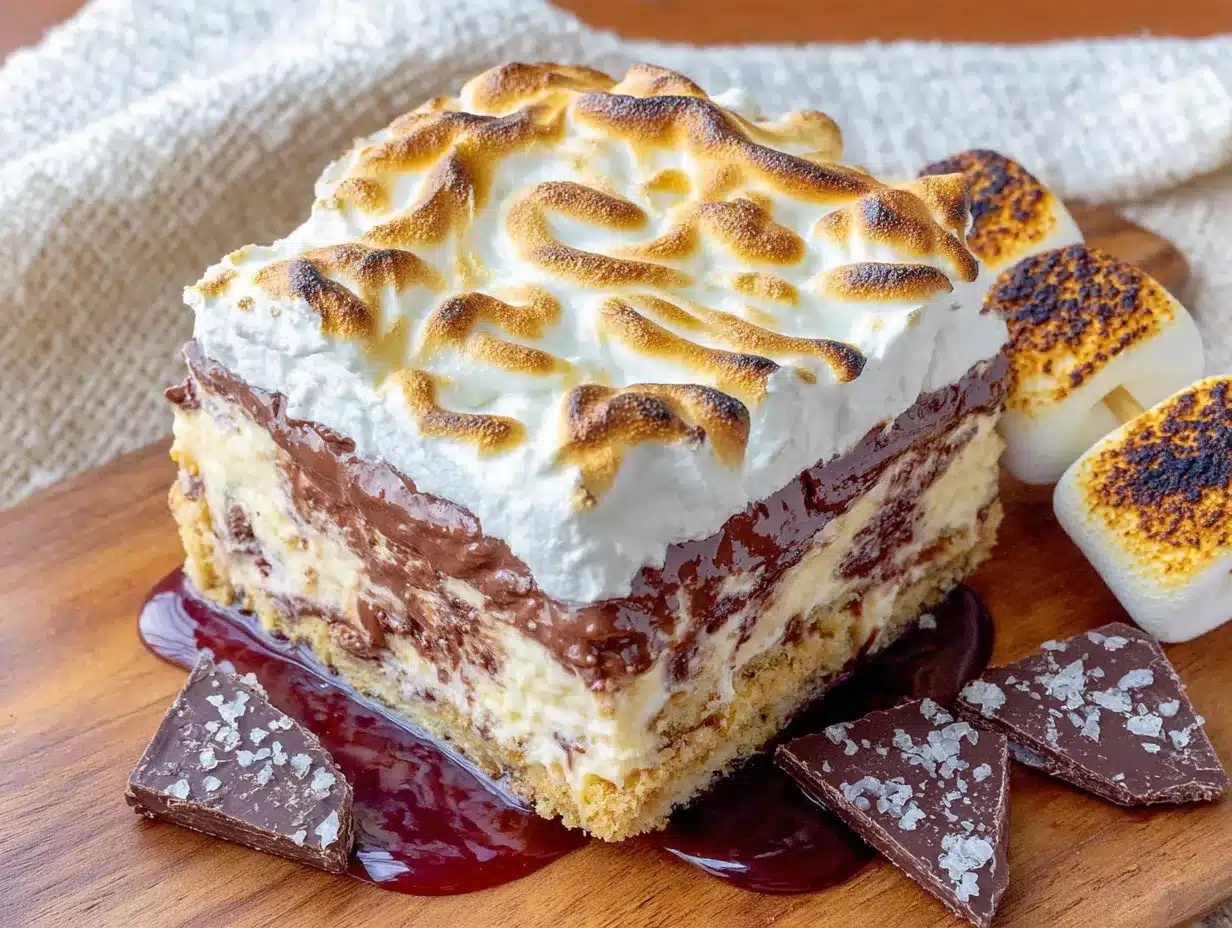
What makes this recipe different from other icebox cakes I’ve tried is the marshmallow layer. Most recipes just throw marshmallows on top and call it done. But I toast them first—just enough to get that campfire flavor without fully melting them. It adds a smoky depth that makes people ask, “Did you actually roast these over a fire?” Nope. Just a kitchen torch and thirty seconds of patience.
This is the kind of dessert that makes you close your eyes after the first bite. It’s comfort food reimagined for summer—cool, creamy, and full of that nostalgic s’mores taste without the campfire cleanup.
What Ingredients You Will Need
This recipe uses simple, wholesome ingredients to deliver that classic s’mores flavor without any complicated techniques. Most of these are pantry staples, especially if you keep a well-stocked baking cabinet during summer.
For the Chocolate Pudding Layer
- 3.4 ounces instant chocolate pudding mix (I prefer Jell-O brand for consistent texture, but store brands work fine too)
- 2 cups cold whole milk (whole milk gives the richest texture, but 2% works in a pinch. Avoid skim milk—the pudding won’t set as firmly)
- 1 cup heavy whipping cream (adds richness and helps the pudding layer hold its shape when sliced)
- 1/4 cup powdered sugar (just enough to sweeten the whipped cream without making it cloying)
- 1 teaspoon vanilla extract (pure vanilla extract makes a noticeable difference here—imitation vanilla tastes flat in this recipe)
For the Graham Cracker Layers
- 2 sleeves graham crackers (about 18 full sheets. Honey graham crackers are my go-to, but cinnamon graham crackers add a nice warmth if you want to switch it up)
- 1/4 cup melted unsalted butter (optional, but brushing a thin layer on the graham crackers before assembling helps them stay crisp longer. I skip this if I’m serving the cake the same day)
For the Marshmallow Layer
- 3 cups mini marshmallows (regular size works too, but mini marshmallows distribute more evenly between layers)
- 1 cup marshmallow fluff (this is my secret ingredient—it helps the marshmallow layer stay creamy instead of turning into a chewy mess overnight)
For the Topping
- 1 1/2 cups heavy whipping cream (for the whipped cream topping)
- 2 tablespoons powdered sugar
- 1/2 teaspoon vanilla extract
- 1/4 cup crushed graham crackers (for garnish)
- 1/2 cup mini marshmallows (for garnish, plus optional kitchen torch for toasting)
- 2 ounces dark chocolate (shaved or grated for garnish. I use 70% cacao for a nice contrast against the sweet layers)
When selecting your graham crackers, look for boxes where the crackers aren’t broken. Nothing worse than trying to create an even layer with crumbs. If you’re gluten-free, there are excellent gluten-free graham cracker options available now—I’ve tested this with Schar brand and it works beautifully.
For the chocolate pudding, I’ve tried making this from scratch with cocoa powder and cornstarch, and honestly? The boxed mix works better here. It sets more firmly, which helps the cake hold its shape when you slice it. Save the homemade pudding for a different dessert.
Equipment Needed
You don’t need fancy equipment for this recipe, which is part of why I love it so much. Here’s what you’ll need:
- 9×13-inch baking dish — Glass or ceramic works best. Metal pans can sometimes react with the pudding and give it a slight metallic taste if left overnight
- Electric hand mixer or stand mixer — You’ll be whipping cream, and doing that by hand is a workout I don’t recommend on a hot summer day
- Large mixing bowls — At least two, one for the pudding and one for the whipped cream
- Rubber spatula — For folding the whipped cream into the pudding without deflating it
- Kitchen torch — Optional but highly recommended for toasting the marshmallow topping. If you don’t have one, you can use your oven’s broiler for 30 seconds—just watch it carefully
- Plastic wrap — For covering the cake while it chills
- Sharp knife — For clean slices. A serrated knife works best for cutting through the graham cracker layers without crushing them
If you don’t have a kitchen torch, don’t let that stop you. I made this recipe for two summers before I finally bought one. The cake is still delicious without toasted marshmallows—it’s just a little extra special with them.
Preparation Method
This recipe comes together faster than you’d think. Here’s exactly how to do it, step by step.
Step 1: Make the Chocolate Pudding Layer
In a large mixing bowl, whisk together the instant chocolate pudding mix and 2 cups cold whole milk. Whisk for about 2 minutes until the mixture starts to thicken. Set it aside for 5 minutes to fully set. You’ll know it’s ready when you can drag a spoon through it and the line holds its shape.
Step 2: Whip the Cream
In a separate bowl, pour 1 cup heavy whipping cream. Add 1/4 cup powdered sugar and 1 teaspoon vanilla extract. Beat with an electric hand mixer on medium-high speed until stiff peaks form. This takes about 3-4 minutes. Be careful not to overbeat—you’ll end up with butter, and nobody wants butter in their icebox cake.
Step 3: Fold It Together
Take about one-third of the whipped cream and fold it into the chocolate pudding using a rubber spatula. This lightens the pudding and makes it easier to fold in the rest. Then gently fold in the remaining whipped cream until no white streaks remain. Go slow here—you want the mixture to stay light and airy.
Step 4: Prepare the Marshmallow Layer
In a small microwave-safe bowl, warm 1 cup marshmallow fluff for about 15 seconds. This makes it easier to spread. In a separate bowl, toss 3 cups mini marshmallows with a teaspoon of cornstarch if they’re sticking together (most fresh bags are fine without this).
Step 5: Assemble the First Layer
Line the bottom of your 9×13-inch dish with a single layer of graham crackers. You’ll need to break some crackers to fit the edges—that’s totally fine. The crackers should cover the bottom completely with minimal gaps.
Step 6: Add the Pudding Layer
Spread half of the chocolate pudding mixture evenly over the graham crackers. Use an offset spatula if you have one, but a regular spatula works too. Try to spread it gently so you don’t disturb the cracker layer underneath.
Step 7: Add the Marshmallow Layer
Drop spoonfuls of the warmed marshmallow fluff over the pudding layer. Spread it gently, then sprinkle 1 1/2 cups of the mini marshmallows on top. Press them down slightly so they stick to the fluff.
Step 8: Repeat the Layers
Add another layer of graham crackers on top of the marshmallows. Spread the remaining chocolate pudding mixture over the crackers. Add another layer of marshmallows—this time, use the remaining 1 1/2 cups mini marshmallows. Top with a final layer of graham crackers.
Step 9: Make the Whipped Cream Topping
In a clean bowl, beat 1 1/2 cups heavy whipping cream with 2 tablespoons powdered sugar and 1/2 teaspoon vanilla extract until stiff peaks form. Spread this evenly over the top layer of graham crackers. Make it look nice—this is what people will see first.
Step 10: Garnish and Chill
Sprinkle crushed graham crackers over the whipped cream. Add the remaining mini marshmallows on top. If you have a kitchen torch, toast the marshmallows now until they’re golden brown. If you’re using the broiler, place the cake under the broiler for 30-45 seconds—watch it like a hawk because marshmallows burn fast. Grate dark chocolate over everything.
Step 11: Refrigerate
Cover the dish tightly with plastic wrap and refrigerate for at least 6 hours, but overnight is best. The graham crackers need time to soften into that cake-like texture. I know it’s hard to wait, but trust me—it’s worth it.
Cooking Tips & Techniques
I’ve made this cake enough times to know where things can go wrong. Here are the lessons I learned the hard way so you don’t have to.
Don’t skip the overnight chill. The first time I made this, I was impatient and only let it sit for 3 hours. The graham crackers were still crunchy in places, and the layers didn’t hold together when I tried to slice it. Give it the full overnight rest, and you’ll get those clean, beautiful slices that make people think you spent hours on this.
Toast marshmallows after the cake chills. If you toast them before refrigerating, they’ll soften and lose that toasted texture. Always torch or broil the marshmallows right before serving. I learned this one the hard way when I made the cake the night before a party and woke up to soggy, deflated marshmallows on top.
Keep your whipped cream cold. Warm cream won’t whip properly, and nobody wants runny whipped cream on their icebox cake. Stick your bowl and beaters in the freezer for 10 minutes before you start whipping. It makes a noticeable difference in how quickly the cream comes together.
Watch your marshmallow fluff. That stuff gets sticky fast. Warm it gently—15 seconds in the microwave is plenty. Any longer and it turns into a gooey mess that’s impossible to spread. I once microwaved it for 30 seconds and ended up with a puffy cloud that stuck to everything except the cake.
Multitask wisely. While the pudding is setting, whip your cream. While the cream is whipping, prepare your marshmallows. This recipe only takes about 20 minutes of active time, but you can make it even faster by overlapping steps.
Variations & Adaptations
This recipe is forgiving, so feel free to make it your own. Here are some variations I’ve tried and loved.
Gluten-Free Version
Swap the graham crackers for gluten-free graham crackers. Schar brand works perfectly, and Kinnikinnick makes a good option too. Everything else in the recipe is naturally gluten-free. I brought this version to a friend’s gluten-free barbecue and nobody could tell the difference.
Dairy-Free Version
Use full-fat coconut milk instead of whole milk for the pudding. For the whipped cream, use coconut cream—chill a can of full-fat coconut milk overnight, scoop out the solid cream, and whip it with powdered sugar. It won’t be as stable as dairy whipped cream, so serve the cake within 24 hours of making it.
Peanut Butter S’mores Variation
Add a layer of peanut butter between the graham crackers and the chocolate pudding. Warm 1/2 cup peanut butter for 20 seconds in the microwave, then spread it thinly on the crackers before adding the pudding. The saltiness of the peanut butter cuts through the sweetness beautifully. My husband says this version is his favorite, and he’s not usually a peanut butter person.
Berry S’mores Version
Layer fresh raspberries or sliced strawberries between the pudding and marshmallow layers. The tartness of the berries balances the sweetness of the marshmallows and chocolate. This is perfect for summer when berries are at their peak. I tried this with blackberries once, and the seeds were a bit much—stick with raspberries or strawberries.
Serving & Storage Suggestions
This cake is best served cold, straight from the refrigerator. Let it sit at room temperature for about 10 minutes before slicing—this softens the layers just enough for clean cuts without making them runny.
For presentation, wipe your knife clean between each slice. The layers show up beautifully when the cuts are clean, and people love seeing the distinct stripes of chocolate, marshmallow, and graham cracker. I use a serrated knife and saw gently through the layers rather than pressing down.
This cake pairs wonderfully with a cold glass of milk, a scoop of vanilla ice cream, or even a cup of coffee if you’re serving it as an afternoon treat. For summer parties, I’ve also served it alongside fresh fruit salad—the lightness of the fruit balances the richness of the cake.
Storage: Cover the dish tightly with plastic wrap and store in the refrigerator for up to 4 days. The graham crackers will continue to soften over time, so the texture is best within the first 2 days. After that, it becomes more pudding-like, which isn’t bad—just different.
Freezing: You can freeze this cake for up to 2 months. Assemble it completely, including the whipped cream topping, but don’t add the toasted marshmallows or garnishes. Wrap the dish tightly in plastic wrap, then a layer of aluminum foil. Thaw overnight in the refrigerator before serving, then add the toasted marshmallows and garnishes right before serving.
Reheating: If you want to bring back some of that toasted marshmallow flavor after refrigeration, give the top a quick pass with your kitchen torch. Even if the marshmallows weren’t toasted initially, a quick torch session adds that campfire taste that makes this dessert special.
Nutritional Information & Benefits
Here’s the honest truth—this is a treat, not a health food. But that doesn’t mean it’s without its redeeming qualities.
| Nutrient | Per Serving (1/12 of cake) |
|---|---|
| Calories | 385 |
| Total Fat | 22g |
| Saturated Fat | 13g |
| Cholesterol | 68mg |
| Sodium | 320mg |
| Total Carbohydrates | 44g |
| Dietary Fiber | 2g |
| Sugars | 30g |
| Protein | 5g |
The dark chocolate topping provides antioxidants and a small amount of iron. The milk in the pudding offers calcium and vitamin D. And honestly? There’s something to be said for the mental health benefits of a dessert that brings back childhood memories without the campfire hassle.
For those watching their sugar intake, you can reduce the powdered sugar in the whipped cream layers or use a sugar-free pudding mix. I’ve tested this with sugar-free pudding and it works, though the texture is slightly less creamy. For a lower-fat option, use 2% milk instead of whole milk and reduce the heavy cream in the topping to 1 cup mixed with 1/2 cup Greek yogurt.
Conclusion
This no-bake s’mores icebox cake is everything I want in a summer dessert—cool, creamy, nostalgic, and completely oven-free. It’s the recipe Maria handed me on that hot July afternoon, now tweaked and tested until it’s exactly right. Every time I make it, I think of her standing on her porch, waving off my thanks like it was nothing. But it wasn’t nothing. It was a recipe that changed how I think about summer desserts.
I hope you make this cake your own. Maybe you’ll add extra chocolate, or swap in cinnamon graham crackers, or pile on so many marshmallows that the top looks like a cloud. That’s the beauty of this recipe—it’s forgiving enough for beginners and flexible enough for experienced bakers to play with.
If you make this, I’d love to hear how it turned out. Drop a comment below and tell me about your summer dessert traditions. Did you add a twist I haven’t tried? Did your kids help with the assembly? Did you serve it at a party where it disappeared in minutes? Share your story—I read every comment, and your ideas might just inspire my next recipe.
Now go make some memories. And don’t forget to save a slice for yourself before it’s gone.
Frequently Asked Questions
Can I make this recipe in a different size pan?
Absolutely. For an 8×8-inch pan, halve all the ingredients. For a 9×9-inch pan, use about two-thirds of the ingredients. The layering process stays the same—just adjust the number of graham crackers to fit your pan size.
Why did my graham crackers stay crunchy?
This usually happens when the cake hasn’t chilled long enough. The graham crackers need at least 6 hours to absorb moisture from the pudding and cream. For best results, let the cake sit overnight in the refrigerator. If you’re still having issues, make sure your pudding layer isn’t too thick—thin, even layers help the crackers soften more evenly.
Can I use homemade chocolate pudding instead of boxed mix?
You can, but I don’t recommend it for this recipe. Homemade pudding is softer and doesn’t set as firmly, which means the cake won’t hold its shape when sliced. The boxed mix has stabilizers that help the layers stay distinct. If you really want to use homemade pudding, add an extra tablespoon of cornstarch to help it set.
How do I get clean slices without the layers sliding apart?
Use a sharp serrated knife and wipe it clean between each slice. Let the cake sit at room temperature for 10 minutes before cutting. If the layers are still sliding, the cake probably needs more time to chill. Next time, make sure your pudding is fully set before assembling, and don’t skimp on the chilling time.
Can I add chocolate syrup or caramel sauce to this cake?
Sure, but add it sparingly. A drizzle of chocolate syrup between the layers can be nice, but too much liquid will make the graham crackers soggy instead of soft. If you want to add caramel sauce, use a thick, high-quality one and only add a thin layer. I’ve tried both, and I prefer the cake as written—the flavors are already balanced without extra sauce.
Pin This Recipe!
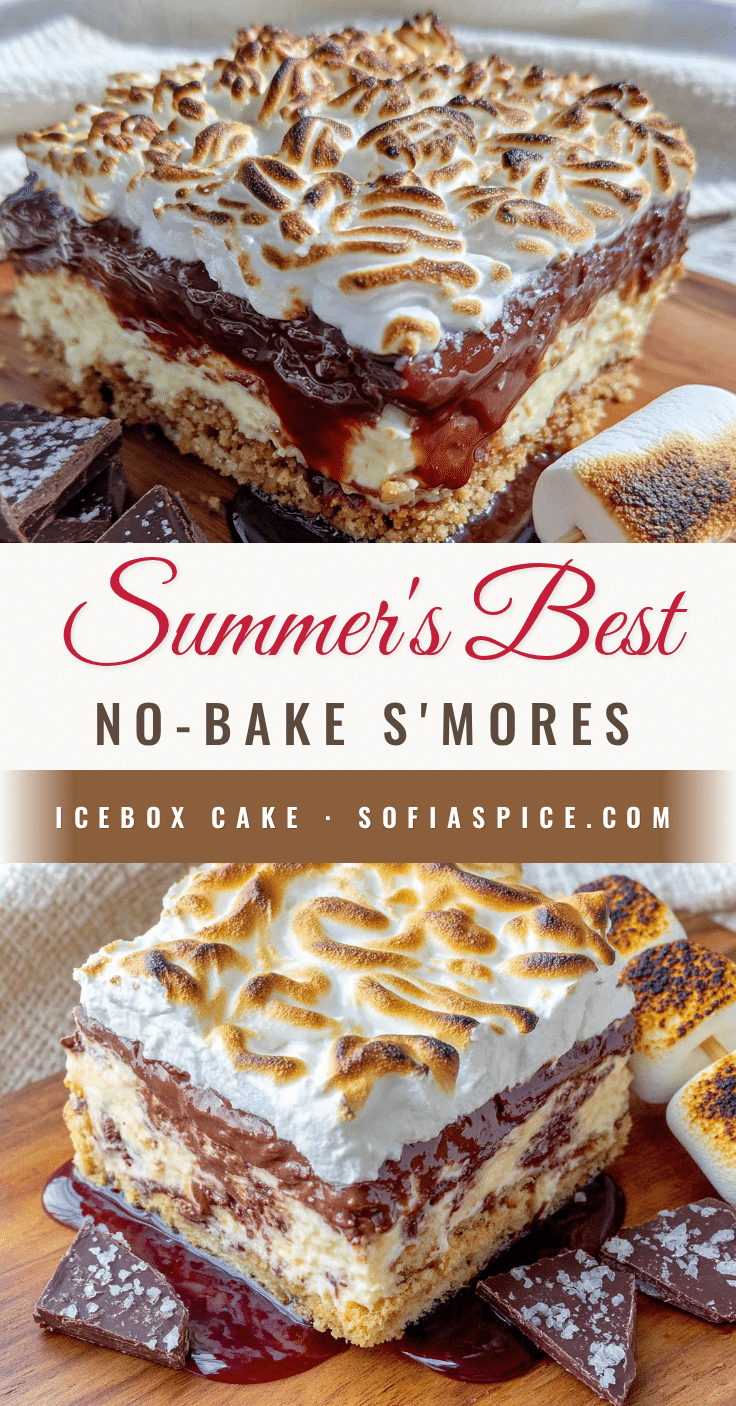
Summer’s Best No-Bake S’mores Icebox Cake
A cool, creamy, and nostalgic no-bake dessert that layers crunchy graham crackers, rich chocolate pudding, and fluffy marshmallows into a campfire memory without turning on the oven. Perfect for hot summer days.
- Prep Time: 20 minutes
- Cook Time: 0 minutes
- Total Time: 6 hours 20 minutes (includes chilling time)
- Yield: 12 servings 1x
- Category: Dessert
- Cuisine: American
Ingredients
- 3.4 ounces instant chocolate pudding mix (Jell-O brand preferred)
- 2 cups cold whole milk
- 1 cup heavy whipping cream
- 1/4 cup powdered sugar
- 1 teaspoon vanilla extract
- 2 sleeves graham crackers (about 18 full sheets, honey graham crackers preferred)
- 1/4 cup melted unsalted butter (optional)
- 3 cups mini marshmallows
- 1 cup marshmallow fluff
- 1 1/2 cups heavy whipping cream (for topping)
- 2 tablespoons powdered sugar (for topping)
- 1/2 teaspoon vanilla extract (for topping)
- 1/4 cup crushed graham crackers (for garnish)
- 1/2 cup mini marshmallows (for garnish)
- 2 ounces dark chocolate (70% cacao, shaved or grated for garnish)
Instructions
- In a large mixing bowl, whisk together the instant chocolate pudding mix and 2 cups cold whole milk for about 2 minutes until it starts to thicken. Set aside for 5 minutes to fully set.
- In a separate bowl, beat 1 cup heavy whipping cream with 1/4 cup powdered sugar and 1 teaspoon vanilla extract with an electric hand mixer on medium-high speed until stiff peaks form, about 3-4 minutes.
- Fold one-third of the whipped cream into the chocolate pudding using a rubber spatula to lighten it, then gently fold in the remaining whipped cream until no white streaks remain.
- In a small microwave-safe bowl, warm 1 cup marshmallow fluff for about 15 seconds to make it easier to spread.
- Line the bottom of a 9×13-inch baking dish with a single layer of graham crackers, breaking some to fit the edges so the bottom is completely covered with minimal gaps.
- Spread half of the chocolate pudding mixture evenly over the graham crackers.
- Drop spoonfuls of the warmed marshmallow fluff over the pudding layer and spread gently. Sprinkle 1 1/2 cups of the mini marshmallows on top and press them down slightly.
- Add another layer of graham crackers on top of the marshmallows. Spread the remaining chocolate pudding mixture over the crackers. Add another layer of marshmallows using the remaining 1 1/2 cups mini marshmallows. Top with a final layer of graham crackers.
- In a clean bowl, beat 1 1/2 cups heavy whipping cream with 2 tablespoons powdered sugar and 1/2 teaspoon vanilla extract until stiff peaks form. Spread this evenly over the top layer of graham crackers.
- Sprinkle crushed graham crackers over the whipped cream. Add the remaining mini marshmallows on top. If using a kitchen torch, toast the marshmallows until golden brown. Alternatively, place under the broiler for 30-45 seconds, watching carefully. Grate dark chocolate over everything.
- Cover the dish tightly with plastic wrap and refrigerate for at least 6 hours, but overnight is best.
Notes
For best results, chill overnight. Toast marshmallows after chilling to maintain texture. Keep whipped cream cold for best whipping. Warm marshmallow fluff gently (15 seconds in microwave) to avoid stickiness. For gluten-free, use gluten-free graham crackers. For dairy-free, use full-fat coconut milk and coconut cream.
Nutrition
- Serving Size: 1 slice (1/12 of cak
- Calories: 385
- Sugar: 30
- Sodium: 320
- Fat: 22
- Saturated Fat: 13
- Carbohydrates: 44
- Fiber: 2
- Protein: 5
Keywords: no-bake, s'mores, icebox cake, summer dessert, graham crackers, chocolate pudding, marshmallow, easy dessert, no oven


