My neighbor, Mrs. Kowalski, watched me fumbling with a broken piping bag one rainy October afternoon and didn’t say anything at first. Then she just reached into her cupboard, pulled out a box of instant pudding mix, and said, “Forget the fancy stuff. Kids just want dirt.” I laughed, thinking she meant actual garden dirt—which, knowing her, wasn’t entirely off the table. But she showed me her trick for these little cups of chocolate pudding topped with crushed Oreos, and honest to goodness, a gummy worm poking out of the “dirt” made my niece scream with joy that Halloween. I’ve made them every year since, even that one time I forgot the worms and had to use licorice strings instead. It wasn’t the same. There’s something about those wiggly little candies that makes this dessert feel like a real spooky treasure hunt. Maybe you’ve been there—staring at a Pinterest board full of elaborate Halloween treats and thinking, “I just don’t have the time or patience for that.” This is your sign to keep it simple. This spooky Halloween dirt cup pudding with gummy worms comes together in fifteen minutes flat, and honestly, it might be the most fun you’ll have in the kitchen all season.
Why You’ll Love This Recipe
Look, I’ve tested dozens of Halloween desserts over the years. Some involve melted chocolate, candy thermometers, and tears. This one involves none of those things. Here is why this spooky Halloween dirt cup pudding with gummy worms has earned a permanent spot in my October rotation:
- Quick & Easy: From start to finish, you’re looking at about 15 minutes of active time. The hardest part is waiting for the pudding to set.
- Simple Ingredients: No fancy grocery trips needed. Instant chocolate pudding, milk, Oreos, and gummy worms—that’s it.
- Perfect for Halloween Parties: These little cups are a guaranteed hit at school parties, trunk-or-treat events, or just a cozy night in watching Hocus Pocus.
- Crowd-Pleaser: Kids love digging for worms, and adults secretly love them too. I’ve seen grown men fight over the last cup.
- Unbelievably Delicious: The creamy pudding against the crunchy Oreo “dirt” is pure comfort food magic. It’s like a deconstructed chocolate pie you can eat with a spoon.
What makes this recipe different from the rest? It’s the texture game. You get the smooth, velvety pudding, the crumbly crunch of the Oreos, and the chewy, slightly sour pop of the gummy worms all in one bite. It’s a sensory experience that feels way more complex than it actually is. This isn’t just another Halloween dessert—it’s the one that makes people close their eyes and smile after that first spoonful. Perfect for impressing guests without breaking a sweat, or turning a regular Tuesday into something a little spooky.
What Ingredients You Will Need
This recipe uses simple, pantry-friendly ingredients to deliver a dessert that looks like a mini graveyard and tastes like childhood nostalgia. Most of these are probably already in your kitchen—which is exactly the point.
- Instant Chocolate Pudding Mix (3.9 oz box): I recommend Jell-O brand for the smoothest texture, but store brands work fine. Don’t use cook-and-serve pudding—it takes too long and the texture isn’t as silky for this purpose. (Instant is key here.)
- Cold Milk (2 cups): Whole milk gives the richest, creamiest pudding. But 2% works perfectly too. I’ve even used oat milk in a pinch, and honestly, it was still delicious—just a tad thinner. (Use dairy-free milk if needed.)
- Oreo Cookies (about 20 cookies): Regular Oreos are my go-to. The chocolate wafers crush into perfect “dirt.” You can use Double Stuf if that’s what you have, but the cream filling makes the crumbs a little stickier. I actually prefer the regular ones for this. (Gluten-free chocolate sandwich cookies work great too.)
- Gummy Worms (about 12-15 worms): This is non-negotiable, honestly. Get the sour ones if you want an extra tangy surprise. I like the Trolli brand because they’re extra wiggly and colorful. (Check labels for gelatin if you’re serving vegetarians—some brands use pectin instead.)
- Optional Toppings: A few candy eyeballs, chocolate sprinkles, or a spooky plastic spider on top. Totally optional, but they make the presentation next-level cute.
A quick note on sourcing: I always grab my gummy worms from the bulk bin at my local grocery store—they’re cheaper and I can get exactly as many as I need. For the Oreos, wait until they go on sale around Halloween. I’ve seen them as low as $2.50 a pack, which is a steal when you’re making a bunch of these cups for a party.
Equipment Needed
You don’t need a fancy kitchen for this one. Here’s what you’ll need:
- Mixing Bowl (medium-sized): For whisking the pudding. A glass or stainless steel bowl works best.
- Whisk: To get that pudding smooth without lumps. A fork works in a pinch, but a whisk is better.
- Measuring Cups: For the milk. A liquid measuring cup is ideal.
- Plastic or Paper Cups (6-8 oz): Clear cups are best so kids can see the layers. I like the Solo brand party cups. (You can also use small mason jars for a rustic look.)
- Ziploc Bag or Food Processor: For crushing the Oreos. A bag and a rolling pin is the budget-friendly option. A food processor gives you finer crumbs in seconds.
- Spoon or Spatula: For layering the pudding and crumbs.
- Refrigerator: You need space for the cups to chill for at least 30 minutes. (I learned this the hard way—warm pudding just slides off the Oreos.)
I’ve made these with nothing but a fork and a zip-top bag before, and they turned out just fine. Don’t overthink the equipment.
Preparation Method
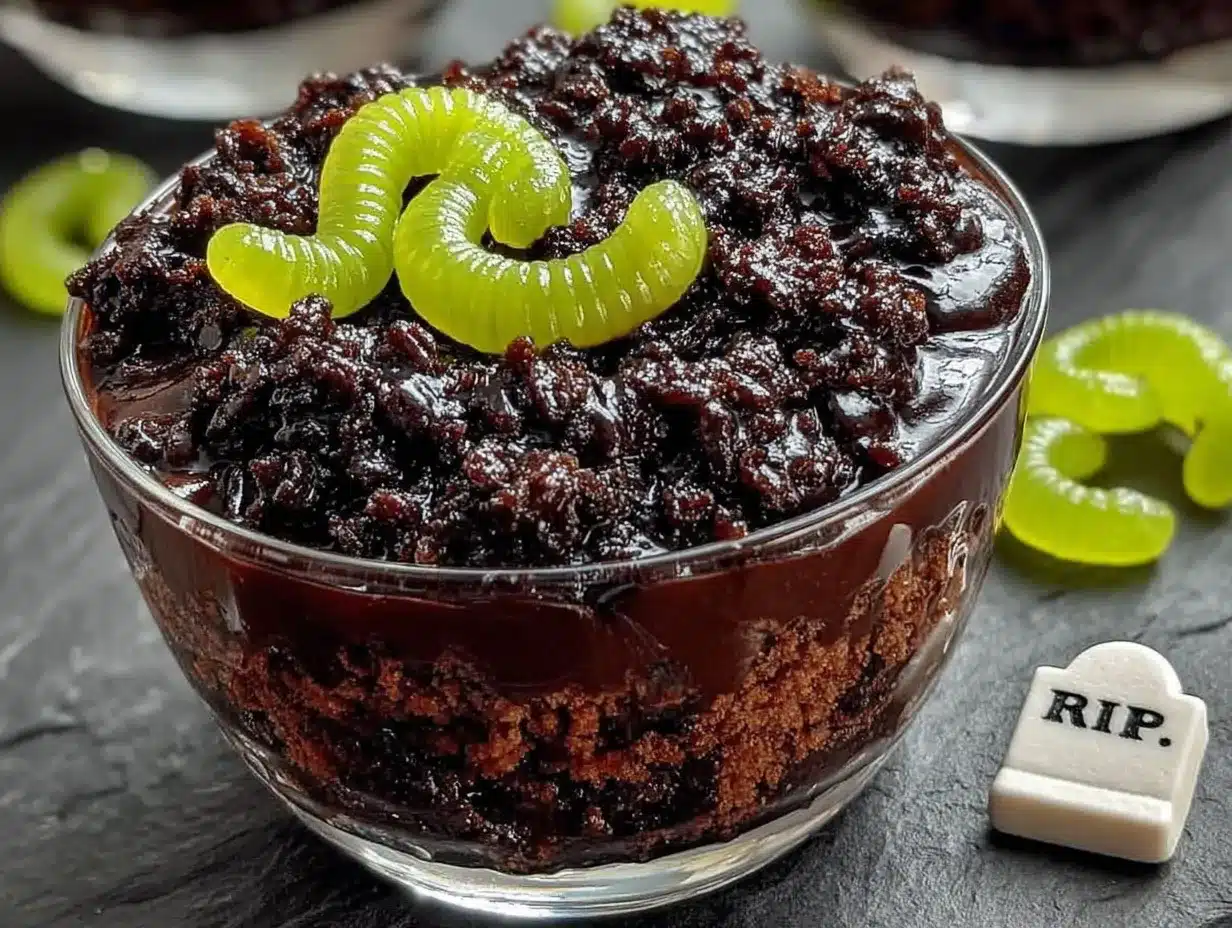
- Make the Pudding: In your medium mixing bowl, pour 2 cups of cold milk. Add the entire box of instant chocolate pudding mix. Whisk vigorously for about 2 minutes, until the mixture thickens. You’ll feel it get heavier and smoother. (Don’t over-whisk—you’ll incorporate too much air and get a foamy texture.) Let it sit for 5 minutes to fully set.
- Crush the Oreos: While the pudding sets, place about 20 Oreos in a large Ziploc bag. Seal it tight, then crush them with a rolling pin or the bottom of a heavy pan. You want a mix of fine crumbs and tiny chunks—not dust. (If you use a food processor, pulse 5-6 times. Don’t let it run or you’ll get Oreo powder.) Set aside about 1/4 cup of the crumbs for topping.
- Layer the Cups: Grab your clear cups. Start with a generous spoonful of the crushed Oreos at the bottom—about 2 tablespoons. This creates the “underground” layer. Then add a layer of chocolate pudding—about 1/4 cup per cup. Tap the cup gently on the counter to settle the pudding.
- Add the Worms: Take 2-3 gummy worms and press them gently into the pudding layer. Let a few peek out over the edge like they’re crawling out of the dirt. This is the fun part—get creative with their positioning.
- Top with “Dirt”: Sprinkle the remaining crushed Oreos over the top of each cup. You want a thick, even layer that completely covers the pudding. It should look like a little patch of soil.
- Garnish: Add one more gummy worm on top, maybe half-buried in the Oreo crumbs. If you’re using candy eyeballs or sprinkles, now’s the time. (I once added a tiny plastic spider to each cup and the kids lost their minds.)
- Chill: Place the cups in the refrigerator for at least 30 minutes. This lets the pudding firm up and the Oreo crumbs soften slightly, creating that real “dirt” texture. (If you’re in a rush, 15 minutes in the freezer works—but don’t forget them!)
Pro tip: If you’re making these for a party, assemble the cups up to 24 hours in advance. Just wait to add the gummy worms on top until right before serving, or they’ll get soft and lose their chewiness.
Cooking Tips & Techniques
After making these spooky Halloween dirt cup puddings about thirty times (I’m not exaggerating—my niece requests them year-round), I’ve picked up a few tricks that make a real difference.
Don’t overmix the pudding. I know it’s tempting to keep whisking until it’s perfectly smooth, but instant pudding sets quickly. Overmixing creates a thin, runny texture that won’t layer properly. Stop as soon as it thickens—about 2 minutes of whisking is perfect.
Crush Oreos in batches. One time I tried to crush a whole family-size pack at once, and the bag burst open. Oreo dust everywhere. I was finding crumbs in my coffee mug for days. Stick to 20 cookies per bag, and don’t overfill.
Use cold milk straight from the fridge. Warm milk won’t activate the pudding mix properly. I learned this the hard way when I made a batch with room-temperature milk and ended up with chocolate soup. Keep it cold, and your pudding will set beautifully.
Layer strategically. If you put the Oreo crumbs on top before chilling, they’ll stay crunchy. If you want them to soften into a more dirt-like texture, let them sit in the fridge for an hour or two. I prefer a mix—crunchy on top, slightly softened underneath. It’s all about personal preference.
Gummy worm placement matters. Press them in at different angles. Some fully buried, some halfway out, some completely on top. It makes each cup feel like a little discovery. My nephew once found a worm in his cup and genuinely thought it was a real one for about three seconds. Best reaction ever.
Make extra. I’m serious. These disappear fast. If you’re bringing them to a party, double the batch. You’ll thank me later.
Variations & Adaptations
This recipe is endlessly customizable. Here are some ways I’ve tweaked it over the years:
- Dairy-Free Version: Use almond milk or oat milk with a vegan instant pudding mix. For the Oreos, regular Oreos are actually dairy-free (surprise!). Top with dairy-free gummy worms—check the label for gelatin.
- Gluten-Free Adaptation: Gluten-free chocolate sandwich cookies are widely available now. Pair with gluten-free gummy worms (most are naturally gluten-free, but double-check). The rest of the ingredients are naturally gluten-free.
- Extra Spooky Twist: Add a few drops of green food coloring to the milk before mixing the pudding. The chocolate flavor hides the color, but when you dig in, the pudding has a subtle green tint. It’s a fun surprise.
- Peanut Butter Layer: Before adding the pudding, swirl a spoonful of peanut butter into the bottom Oreo layer. It adds a rich, salty contrast to the sweet chocolate.
- Mint Chocolate Version: Use chocolate mint Oreos and add a drop of peppermint extract to the pudding. It tastes like a Thin Mint in dirt form. Perfect for a Christmas-themed twist.
- Individual Trifles: Layer in small mason jars with extra pudding and crushed cookies for a fancier presentation. Great for adult Halloween parties.
My personal favorite variation? I once made these with crushed chocolate graham crackers instead of Oreos. The texture was a little coarser, but the flavor was lighter and almost honey-like. Not as “dirt-like,” but delicious in its own way.
Serving & Storage Suggestions
Serving: Serve these spooky Halloween dirt cup puddings straight from the fridge. The cold pudding against the crunchy Oreo dirt is the perfect contrast. I like to set them out on a tray with a few extra gummy worms scattered around for decoration. If you’re serving at a party, add a little sign that says “Dig In!”—it gets the kids excited.
Presentation: Clear cups are non-negotiable here. You want everyone to see the layers of dirt, pudding, and worms. Small mason jars with plastic spoons tied on with orange ribbon make adorable party favors. (I did this for my niece’s Halloween party and the moms were taking pictures.)
Complementary Dishes: These pair beautifully with other no-bake Halloween treats. I’ve served them alongside spider web dip and mummy hot dogs for a full spooky spread. A warm apple cider or pumpkin spice latte on the side rounds out the menu.
Storage: Keep the cups covered in the refrigerator for up to 3 days. The Oreo crumbs will soften over time, which some people actually prefer. If you want to keep them crunchy, store the crushed Oreos separately and add them just before serving.
Freezing: I don’t recommend freezing these. The pudding gets icy and the gummy worms turn into hard little rocks. Trust me on this one—I tried it once and ended up with a sad, freezer-burned mess.
Flavor Development: These actually taste better after a few hours in the fridge. The flavors meld together, and the Oreo crumbs absorb just a little moisture from the pudding, creating that perfect “dirt” texture. If you can wait overnight, do it.
Nutritional Information & Benefits
Let’s be real—this is a treat, not a health food. But here’s the breakdown per serving (one cup, using whole milk and regular Oreos):
- Calories: Approximately 320-350 calories per cup
- Fat: 14g (mostly from the Oreos and milk)
- Carbohydrates: 48g
- Protein: 5g
- Sugar: 32g
Health Benefits: Okay, so there aren’t many. But the milk provides calcium and vitamin D, and the dark cocoa in the pudding has a tiny amount of antioxidants. The gummy worms? Zero nutritional value. But sometimes you need a little joy in your day, and that counts for something.
Dietary Considerations: This recipe is nut-free (check your Oreo label to be safe). For a lower-sugar version, use sugar-free pudding mix and reduced-fat Oreos. I’ve tried it—it’s not as good, but it works.
Allergens: Contains milk and wheat (from the Oreos). Soy may be present in some pudding mixes. Always check labels if you’re serving someone with allergies.
My personal take? I don’t make these every day. But for Halloween, I let myself enjoy the full experience. Life’s too short to skip the gummy worms.
Conclusion
This spooky Halloween dirt cup pudding with gummy worms is the kind of recipe that proves you don’t need to be a professional baker to create something magical. It’s simple, it’s fun, and it tastes like childhood in a cup. I love that I can make it with my niece in under fifteen minutes, and she feels like a real chef layering the Oreo dirt and hiding the worms. That memory alone is worth more than any fancy dessert.
I encourage you to make this your own. Add extra worms. Use different colored cups. Throw in some candy corn if that’s your thing. The beauty of this recipe is that it’s forgiving—you can’t really mess it up. And if you do? Well, it’s still chocolate pudding with cookies on top. That’s never a bad thing.
I’d love to hear how yours turn out. Drop a comment below with your favorite variation, or tag me in your photos if you make these for your Halloween party. Don’t forget to share this recipe with a friend who needs a quick Halloween win. Happy haunting, and happy eating!
Frequently Asked Questions
Can I make these dirt cups ahead of time?
Absolutely. Assemble the cups up to 24 hours in advance and keep them covered in the refrigerator. Just wait to add the gummy worms on top until right before serving, or they’ll lose their chewy texture.
Can I use homemade chocolate pudding instead of instant?
You can, but it changes the texture significantly. Homemade pudding is thinner and won’t hold its layers as well. If you go that route, use a bit more cornstarch to thicken it, and chill it for at least 2 hours before layering.
What can I use instead of Oreos?
Chocolate graham crackers, crushed chocolate wafer cookies, or even crushed chocolate cereal work well. The key is something dark and crumbly that looks like dirt. Vanilla wafers won’t give you the same visual effect.
How do I keep the gummy worms from getting soggy?
Add them right before serving if possible. If you’re making these ahead, press the worms into the pudding layer (not the Oreo top), and they’ll stay firmer. The Oreo crumbs on top actually help absorb moisture and keep the worms dry.
Can I use sugar-free pudding for a lower-calorie version?
Yes, sugar-free instant pudding works perfectly. Just follow the same instructions. The taste is slightly different—a bit more artificial—but it’s a good option if you’re watching your sugar intake. I’ve used it before and nobody noticed.
Pin This Recipe!
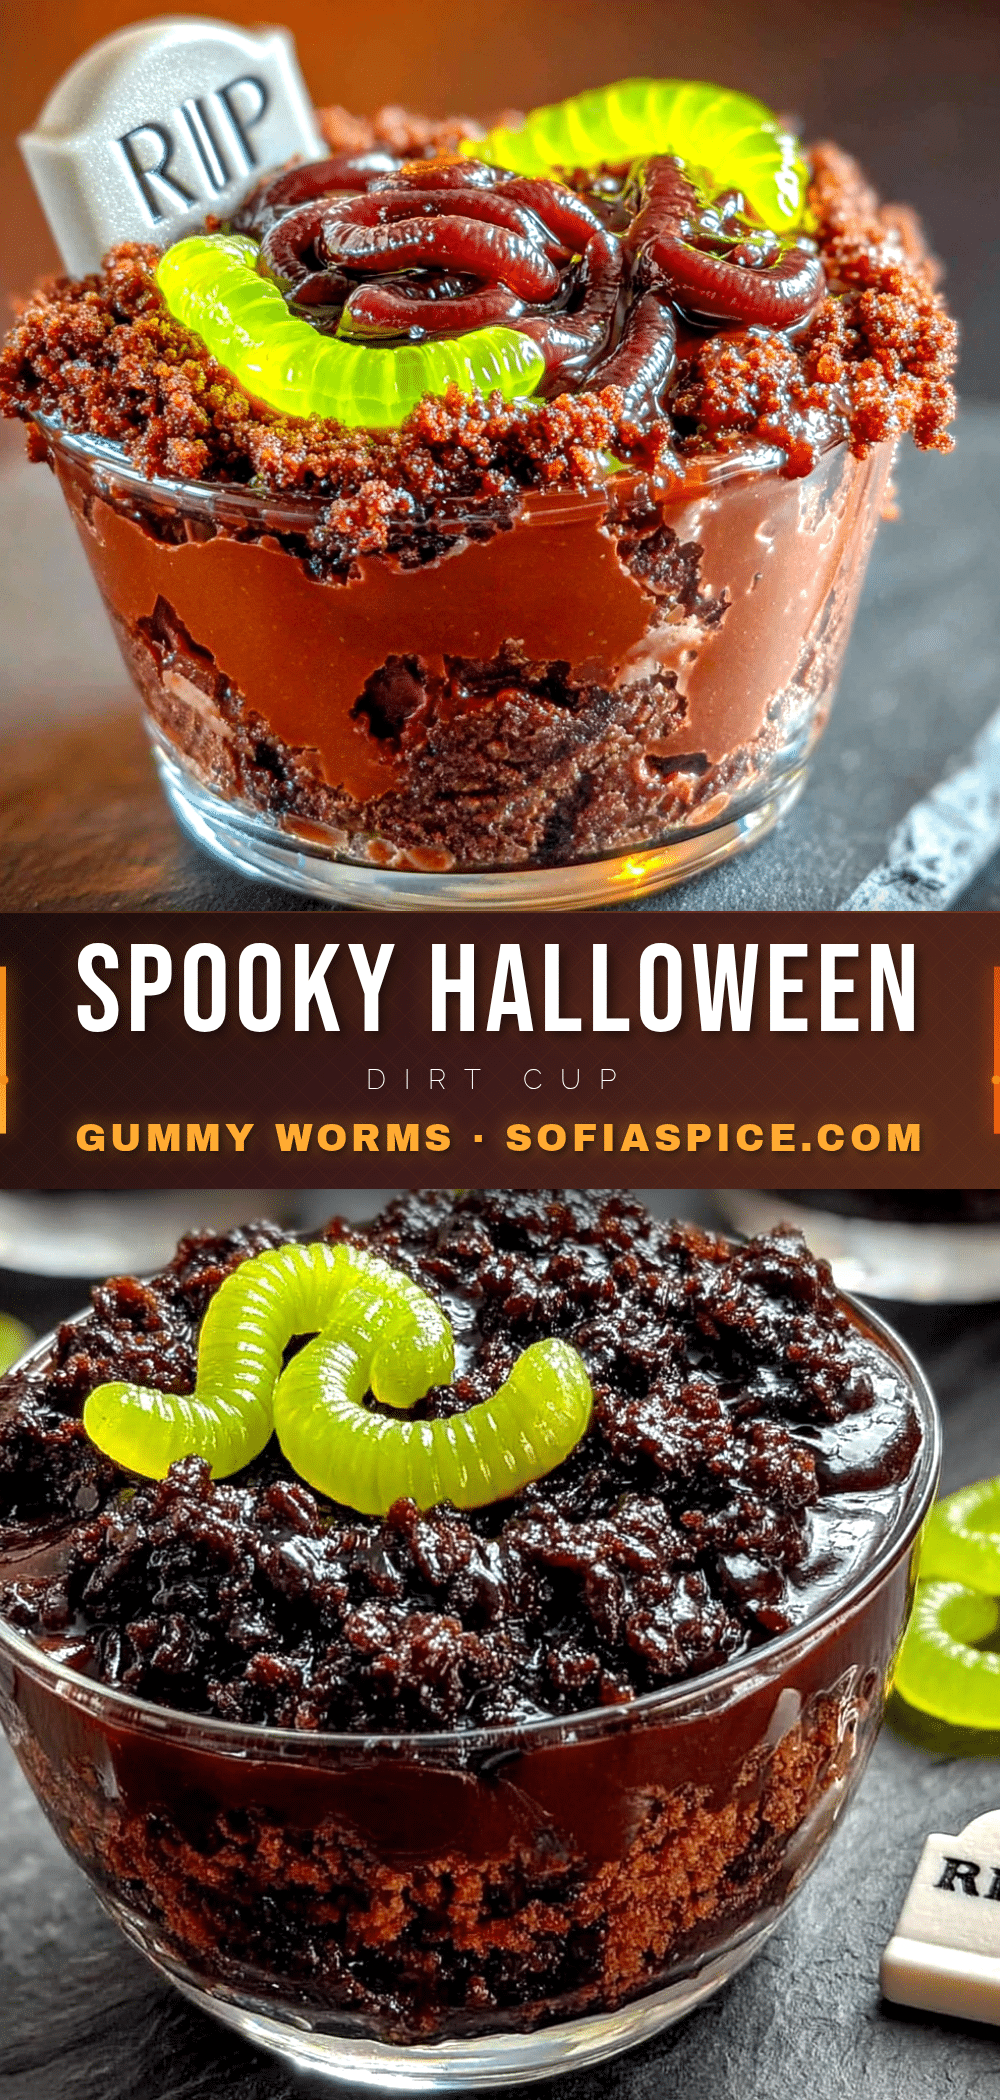
Spooky Halloween Dirt Cup Pudding with Gummy Worms
This spooky Halloween dirt cup pudding with gummy worms comes together in fifteen minutes flat, and honestly, it might be the most fun you’ll have in the kitchen all season. It’s simple, it’s fun, and it tastes like childhood in a cup.
- Prep Time: 15 minutes
- Cook Time: 0 minutes
- Total Time: 45 minutes (including 30 minutes chilling)
- Yield: 6 servings 1x
- Category: Dessert
- Cuisine: American
Ingredients
- 1 box (3.9 oz) instant chocolate pudding mix (Jell-O brand recommended)
- 2 cups cold milk (whole milk preferred, 2% or oat milk work)
- 20 Oreo cookies (regular Oreos recommended)
- 12–15 gummy worms (Trolli brand recommended)
- Optional: candy eyeballs, chocolate sprinkles, or plastic spiders for garnish
Instructions
- Make the Pudding: In a medium mixing bowl, pour 2 cups of cold milk. Add the entire box of instant chocolate pudding mix. Whisk vigorously for about 2 minutes, until the mixture thickens. Let it sit for 5 minutes to fully set.
- Crush the Oreos: While the pudding sets, place about 20 Oreos in a large Ziploc bag. Seal it tight, then crush them with a rolling pin or the bottom of a heavy pan. You want a mix of fine crumbs and tiny chunks. Set aside about 1/4 cup of the crumbs for topping.
- Layer the Cups: Grab your clear cups. Start with a generous spoonful of the crushed Oreos at the bottom—about 2 tablespoons. Then add a layer of chocolate pudding—about 1/4 cup per cup. Tap the cup gently on the counter to settle the pudding.
- Add the Worms: Take 2-3 gummy worms and press them gently into the pudding layer. Let a few peek out over the edge like they’re crawling out of the dirt.
- Top with ‘Dirt’: Sprinkle the remaining crushed Oreos over the top of each cup. You want a thick, even layer that completely covers the pudding.
- Garnish: Add one more gummy worm on top, maybe half-buried in the Oreo crumbs. If you’re using candy eyeballs or sprinkles, now’s the time.
- Chill: Place the cups in the refrigerator for at least 30 minutes. This lets the pudding firm up and the Oreo crumbs soften slightly, creating that real ‘dirt’ texture.
Notes
Assemble cups up to 24 hours in advance. Wait to add gummy worms on top until right before serving to keep them chewy. For dairy-free version, use almond or oat milk with vegan pudding mix. For gluten-free, use gluten-free chocolate sandwich cookies. Store covered in refrigerator for up to 3 days. Not recommended for freezing.
Nutrition
- Serving Size: 1 cup
- Calories: 335
- Sugar: 32
- Sodium: 380
- Fat: 14
- Saturated Fat: 5
- Carbohydrates: 48
- Fiber: 2
- Protein: 5
Keywords: Halloween dessert, dirt cups, gummy worms, chocolate pudding, no-bake dessert, easy Halloween treat, kids dessert


