I was standing in line at the hardware store, of all places, holding a bag of lightbulbs and a new garden hose, when the woman behind me—maybe seventy years old, wearing a faded flannel shirt—started talking about apples. Not the lightbulbs in my hand, not the weather. Apples. She told me she’d just come from an orchard where she’d picked three different varieties, and she was trying to figure out how to use them all before they went soft. I mumbled something polite, but she wasn’t done. She leaned in and said, “You know what I do? I throw them on a board with some cheese and call it dinner. Takes ten minutes. Tastes like you tried.”
Honestly, I almost laughed. A charcuterie board from a hardware store conversation? It felt like the most unlikely place to get recipe advice. But that night, with a bag of Honeycrisps sitting on my counter and zero energy to cook anything real, I remembered her words. I grabbed a cutting board, rummaged through the fridge, and threw together whatever I had. It wasn’t fancy. The cheese was a little too cold, and I definitely forgot to bring the prosciutto to room temperature. But you know what? It worked. It was exactly what I needed after a long Tuesday.
That chance encounter turned into a habit. Now, every fall, I make this Quick Fall Charcuterie Board in 10 Minutes whenever I need dinner on the table fast—or when friends show up unannounced and I want to look like I planned something impressive. It’s the kind of meal that feels indulgent but takes almost no effort. And honestly, isn’t that what we all need on a busy weeknight?
Why You’ll Love This Recipe
Let’s be real—most charcuterie boards look like they belong on a magazine cover, but they’re actually pretty simple to throw together. This one is designed specifically for people who are short on time but still want something that feels special. Here’s why it works:
- Ready in 10 Minutes Flat: No cooking, no complicated steps. Just slice, arrange, and serve. Perfect for those nights when you walk in the door starving.
- No Fancy Ingredients Required: You likely already have most of these items in your fridge or pantry. I’m talking basic cheese, crackers, and whatever fruit is in season. No special trips to a gourmet store.
- Perfect for Weeknight Dinners or Impromptu Gatherings: Whether it’s just you and a glass of wine or a few friends who texted “on my way,” this board adapts. It’s casual enough for a Tuesday but pretty enough for a party.
- Crowd-Pleaser Guaranteed: I’ve served this to picky eaters, cheese snobs, and kids who only want crackers. Everyone finds something they love. It’s almost magical.
- Endlessly Customizable: Use what you have. Swap out ingredients based on what’s in your fridge. That’s the beauty of a board—it never has to be the same twice.
What makes this different from every other charcuterie board out there? It’s built for speed. Most recipes tell you to fuss with garnishes and perfect spacing. Not this one. I’ll show you exactly how to arrange everything in under ten minutes without overthinking it. Plus, I’ve tested this with seasonal fall ingredients that add warmth and coziness without extra work. Think crisp apples, creamy brie, and a drizzle of honey that makes everything taste like autumn.
This isn’t just another board—it’s your weeknight dinner hero. The one you’ll turn to when you’re tired, hungry, and need something on the table before you lose your mind. And honestly? It’s the kind of meal that makes you close your eyes after the first bite and think, “I’ve got this.”
What Ingredients You Will Need
This recipe uses simple, seasonal ingredients to create a board that feels both rustic and elegant. Most of these are pantry staples or easy to find at any grocery store during fall. Here’s what you’ll need:
For the Cheese
- Brie cheese (8 oz wheel) – Look for one that’s slightly soft to the touch. I prefer a double-cream brie for extra richness. (Costco’s Kirkland brand is surprisingly good here.)
- Aged cheddar (4 oz) – Choose a sharp, crumbly cheddar. The bite cuts through the sweetness of the fruit. Cabot or Beecher’s are my go-tos.
- Goat cheese log (4 oz) – Soft and tangy. It pairs beautifully with honey and apples. (If you can find one rolled in herbs or cranberries, grab it.)
For the Meats
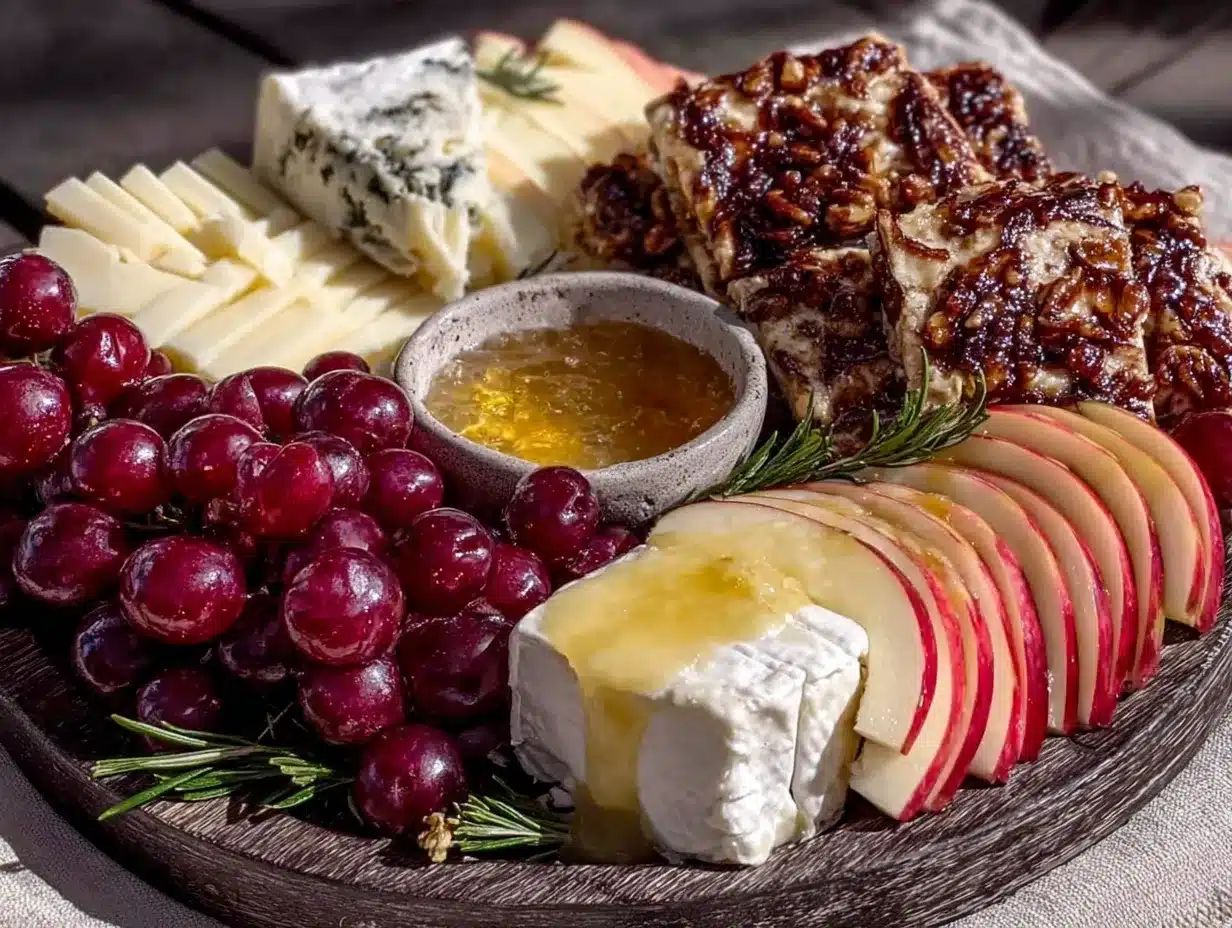
- Prosciutto (4 oz, thinly sliced) – No need to buy the most expensive kind. Just make sure it’s sliced thin so it drapes nicely.
- Salami (4 oz) – I like a dry Italian salami, sliced into thin rounds. You can also use soppressata for a spicier kick.
For the Fruits & Vegetables
- Apple (1 large, any variety) – Honeycrisp or Fuji work best for sweetness and crunch. Slice just before serving to prevent browning.
- Pear (1 large) – Bosc or Anjou are firm enough to hold up on a board. Slice thin.
- Dried figs or dates (½ cup) – Adds natural sweetness and a chewy texture. Medjool dates are my favorite.
- Red grapes (1 small bunch) – Wash and leave them on the stem for easy grabbing.
For the Crunchy Bits
- Crackers (about 6 oz) – Use a mix of textures: water crackers, whole wheat crisps, and maybe some rosemary-flavored ones. I love Rustic Bakery’s rosemary crackers.
- Nuts (½ cup) – Toasted pecans or walnuts add warmth. Buy them pre-toasted to save time.
For the Sweet & Savory Finishes
- Honey (2-3 tablespoons) – A drizzle over the brie or goat cheese transforms everything. Local honey adds a nice floral note.
- Olive oil (1 tablespoon, optional) – Drizzle over the goat cheese and sprinkle with flaky salt for a savory twist.
- Fresh rosemary or thyme (a few sprigs) – Mostly for garnish, but the aroma adds to the fall vibe. (Optional, but pretty.)
Substitution Tips: If you’re dairy-free, swap the cheeses for a vegan brie and a nut-based cheddar alternative. For a gluten-free board, use rice crackers or sliced cucumber as the base. And if you don’t have prosciutto, any thinly sliced cured meat works—or skip the meat entirely for a vegetarian version.
Equipment Needed
You don’t need anything fancy to pull this off. Here’s what I use:
- Large cutting board or wooden board (at least 12×16 inches) – A wooden board looks beautiful, but a large ceramic platter or even a baking sheet works in a pinch. I’ve used a clean pizza peel before—no judgment.
- Cheese knife or small sharp knife – For cutting the brie and cheddar. A paring knife is perfect.
- Small bowls or ramekins (2-3) – For the honey, olives, or any loose items like nuts. I use little ceramic dishes from a thrift store.
- Serving spoons or toothpicks – For the honey and for guests to grab cheese. (I always forget the toothpicks and end up using my fingers. It’s fine.)
- Parchment paper (optional) – If you’re using a board that’s seen better days, a sheet of parchment underneath makes cleanup a breeze.
Budget-friendly tip: Don’t have a wooden board? A large white dinner plate works beautifully. The contrast makes the colors pop.
Preparation Method
Here’s how to assemble this Quick Fall Charcuterie Board in 10 Minutes without stressing out. I’ve broken it down into simple steps so you can move fast.
- Set out your board. Place your cutting board or platter on the counter. If you’re using parchment, lay it down now. This is your canvas—no need to be perfect.
- Unwrap and place the cheeses. Take the brie out of its packaging and place it whole on the board, slightly off-center. Cut the aged cheddar into thin slices or small cubes and pile them next to the brie. Place the goat cheese log nearby, either whole or sliced into rounds. (If the goat cheese is too soft to slice, just plop it down—it’ll look rustic.)
- Add the meats. Drape the prosciutto slices in loose folds around the cheeses. Don’t press them flat—let them billow a bit. Arrange the salami slices in a small pile or fan them out in a line. (I usually just scatter them and move on.)
- Place the fruits. Slice the apple and pear just before adding them to the board to keep them from browning. Arrange the slices in a fan pattern or simply scatter them in gaps. Add the dried figs or dates in a small cluster. Tuck the grapes in wherever there’s space—they add nice pops of color.
- Fill in with crunchy bits. Pour the crackers into the empty spaces, but don’t stack them too high—they’ll break. Sprinkle the toasted pecans or walnuts around the board, filling any remaining gaps. (I like to put the nuts in a small bowl so they don’t roll everywhere.)
- Add the finishing touches. Drizzle honey over the brie and goat cheese. If you’re using olive oil, drizzle it over the goat cheese and sprinkle with a pinch of flaky salt. Tuck the fresh rosemary or thyme sprigs around the edges for color and aroma.
- Serve immediately. Place the board in the center of the table with small plates, napkins, and a cheese knife. Let everyone dig in. That’s it—you’re done in under ten minutes.
Sensory cues: The brie should feel soft and yielding when pressed gently. The honey should glisten as it pools on the cheese. The apples should snap when you bite into them. And the whole board should smell like a cozy fall afternoon—sweet, savory, and a little bit earthy.
Pro tip: If you’re making this ahead of time (up to 2 hours), leave the apples unsliced until just before serving. Cover the board loosely with plastic wrap and refrigerate. Let it sit at room temperature for 15 minutes before serving to let the cheeses soften.
Cooking Tips & Techniques
Over the years, I’ve made this board dozens of times—and I’ve definitely made my share of mistakes. Here’s what I’ve learned:
- Don’t overthink the arrangement. The first time I made a charcuterie board, I spent twenty minutes arranging everything perfectly. By the time I was done, the cheese was sweating and I was annoyed. Now I just place things in clusters and let it look natural. Imperfection is part of the charm.
- Let the cheese breathe. Cold cheese doesn’t taste as good. Take the brie and goat cheese out of the fridge 15-20 minutes before you start assembling. If you forget (I do all the time), microwave the brie for 10 seconds on low power. It’s not ideal, but it works.
- Slice apples at the last minute. They brown fast. If you’re prepping ahead, toss the slices in a little lemon juice to slow down oxidation. Or just slice them right before serving and don’t stress about it.
- Use small bowls for sticky things. Honey, olives, or jam will make a mess if you put them directly on the board. A few small ramekins keep everything tidy and make cleanup easier.
- Balance flavors and textures. Aim for a mix of creamy (brie), tangy (goat cheese), sharp (cheddar), salty (prosciutto), sweet (honey), and crunchy (nuts). That variety is what makes a board so satisfying.
Common mistake: Buying too much cheese. You really only need three varieties—one soft, one firm, one tangy. More than that gets overwhelming and expensive. Trust me, I’ve made that mistake. My fridge was full of half-eaten cheese for a week.
Timing strategy: If you’re serving this as a main dish, put it out right when you’re ready to eat. If it’s an appetizer, assemble it just before guests arrive and let it sit out for 10 minutes. That way, the cheese softens and the flavors meld.
Variations & Adaptations
One of the best things about a charcuterie board is how flexible it is. Here are some ways to switch it up:
- Vegetarian Version: Skip the prosciutto and salami. Add roasted chickpeas, marinated artichoke hearts, or grilled halloumi for protein. The halloumi adds a salty, chewy texture that’s amazing with honey.
- Gluten-Free Option: Replace crackers with gluten-free rice crackers, sliced cucumber rounds, or endive leaves. Endive adds a nice bitterness that balances the sweet fruit.
- Nut-Free Alternative: Swap the pecans or walnuts for pumpkin seeds or sunflower seeds. They still add crunch without the allergy risk.
- Seasonal Twist: In summer, use fresh figs, peaches, and basil instead of apples and pears. In winter, add roasted chestnuts, persimmons, and a sprinkle of pomegranate seeds. The fall version with apples and honey is my favorite, but feel free to experiment.
- Spicy Kick: Add a small bowl of hot honey or red pepper flakes for drizzling. The heat pairs surprisingly well with the creamy brie and sweet apples.
I once made a version with smoked gouda and fig jam because that’s what I had in the fridge. It was honestly better than the original. Don’t be afraid to use up leftovers—that’s how the best boards happen.
Serving & Storage Suggestions
This board is best served at room temperature, so let it sit out for 10-15 minutes after assembling. Place it in the center of the table with small plates, napkins, and a cheese knife for spreading. If you’re serving it as a main course, pair it with a simple arugula salad dressed with lemon and olive oil—it cuts through the richness.
What to drink with it: A crisp white wine like Sauvignon Blanc or a light red like Pinot Noir works beautifully. For non-alcoholic options, sparkling water with a slice of apple or a warm mug of spiced cider is perfect for fall.
Storage: If you have leftovers (unlikely, but possible), separate the components. Wrap the cheeses in wax paper and store them in the fridge. Keep the meats in an airtight container. The crackers and nuts can stay in a sealed bag at room temperature. The fruit will get soft, so eat it within a day.
Reheating: You don’t really reheat a charcuterie board, but if the brie has firmed up in the fridge, let it come to room temperature for 20 minutes before serving again. Or pop it in the microwave for 10 seconds—no judgment.
Flavors actually improve after a few hours in the fridge, especially the cheese and honey combo. I’ve been known to eat leftover brie and apple slices for breakfast the next day. Don’t tell anyone.
Nutritional Information & Benefits
This board is naturally high in protein and healthy fats from the cheese and nuts, which makes it surprisingly filling. A typical serving (about ¼ of the board) contains approximately:
- Calories: 450-550
- Protein: 18-22g
- Fat: 30-35g (mostly from cheese and nuts)
- Carbohydrates: 25-30g (from fruit and crackers)
- Fiber: 4-6g
Health benefits: Apples and pears are rich in fiber and vitamin C. Nuts provide heart-healthy omega-3s. Cheese offers calcium and protein. And honey has antioxidants—so it’s practically a health food, right?
Dietary considerations: This recipe is naturally gluten-free if you choose gluten-free crackers. It’s also vegetarian if you skip the meat. To make it dairy-free, use vegan cheese alternatives. Watch out for added sugars in dried fruit or honey if you’re monitoring intake.
Personal note: I love that this board feels indulgent but is actually pretty balanced. It’s one of those rare meals that satisfies cravings without making you feel heavy. Plus, you can control portions easily—just take what you want and leave the rest.
Conclusion
This Quick Fall Charcuterie Board in 10 Minutes is proof that you don’t need hours in the kitchen to create something memorable. It’s simple, forgiving, and endlessly adaptable—exactly what a busy weeknight needs. Whether you’re feeding yourself after a long day or hosting friends who showed up unannounced, this board delivers every time.
I love how this recipe came from a random conversation in a hardware store. It reminds me that the best ideas often come from unexpected places. So go ahead—raid your fridge, grab whatever cheese and fruit you have, and throw it on a board. You might surprise yourself with how good it turns out.
Now I want to hear from you! What’s your favorite fall ingredient to add to a charcuterie board? Drop your ideas in the comments below—I’m always looking for new combinations to try. And if you make this board, tag me in your photos. I’d love to see your creations!
Happy snacking, friends. You’ve got this.
Frequently Asked Questions
Can I make this charcuterie board ahead of time?
Yes, you can assemble the board up to 2 hours in advance. Just leave the apples unsliced until right before serving to prevent browning. Cover the board loosely with plastic wrap and refrigerate. Let it sit at room temperature for 15 minutes before serving to soften the cheese.
How do I keep the apples from turning brown?
Slice the apples just before serving. If you need to prep them ahead, toss the slices in a little lemon juice or apple cider vinegar. The acidity slows down oxidation and adds a subtle tang that pairs well with the cheese.
What if I don’t have a wooden board?
No problem! Use a large ceramic platter, a baking sheet, or even a clean pizza peel. You can also line a regular dinner plate with parchment paper for easy cleanup. The board is just a canvas—the food is the star.
How much should I serve per person?
For a main course, plan on about 4-6 ounces of cheese and 3-4 ounces of meat per person. For an appetizer, cut those amounts in half. When in doubt, err on the side of more—leftovers are never a bad thing with a board like this.
Can I use different cheeses than the ones listed?
Absolutely! Swap in whatever you have on hand. A soft cheese like camembert, a firm cheese like manchego, and a tangy option like blue cheese all work beautifully. The key is variety—aim for different textures and flavors.
Pin This Recipe!
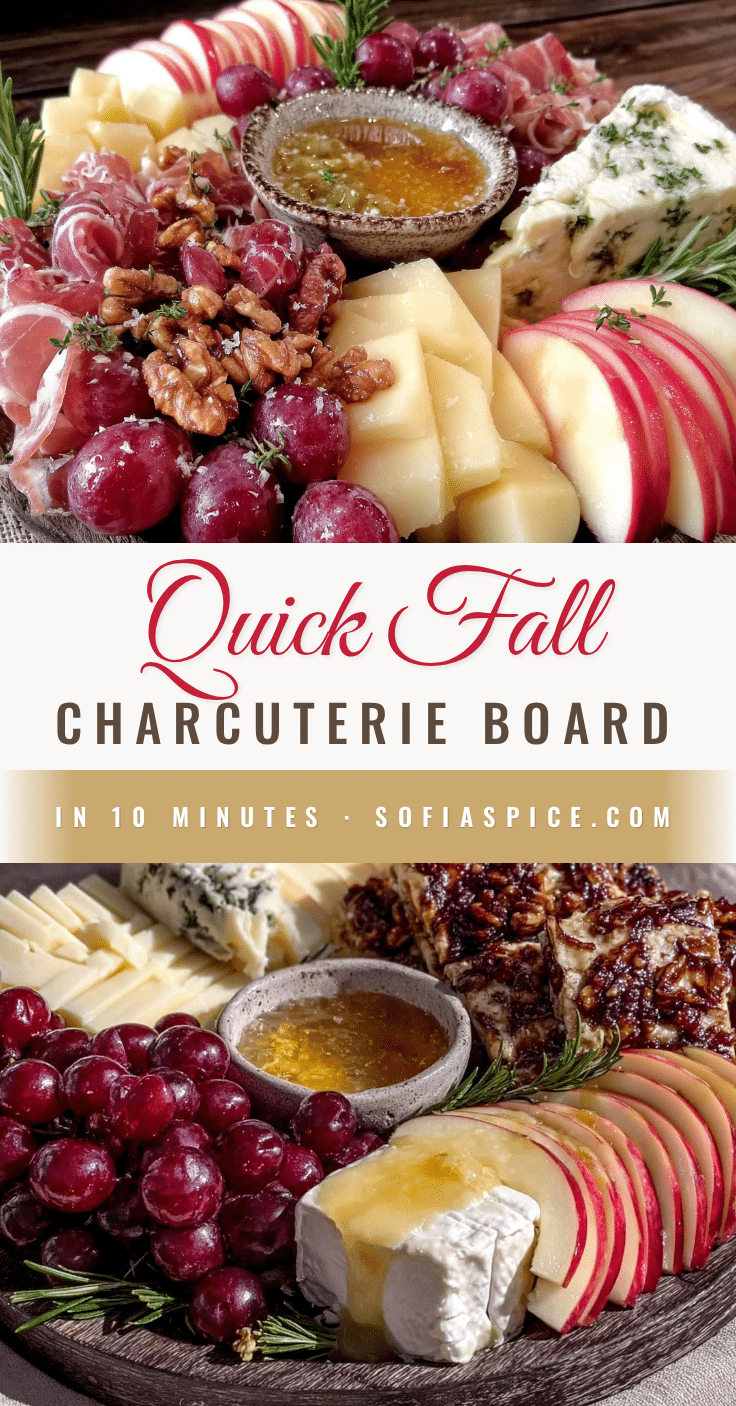
Quick Fall Charcuterie Board in 10 Minutes – Easy & Perfect

A quick and easy fall charcuterie board that comes together in just 10 minutes, perfect for weeknight dinners or impromptu gatherings. Featuring seasonal ingredients like crisp apples, creamy brie, and a drizzle of honey, this board is both rustic and elegant.
- Prep Time: 10 minutes
- Cook Time: 0 minutes
- Total Time: 10 minutes
- Yield: 4 servings 1x
- Category: Appetizer
- Cuisine: American
Ingredients
- 8 oz Brie cheese
- 4 oz Aged cheddar
- 4 oz Goat cheese log
- 4 oz Prosciutto, thinly sliced
- 4 oz Salami, sliced into thin rounds
- 1 large Apple (Honeycrisp or Fuji)
- 1 large Pear (Bosc or Anjou)
- ½ cup Dried figs or dates (Medjool dates recommended)
- 1 small bunch Red grapes
- 6 oz Crackers (mix of water crackers, whole wheat crisps, rosemary-flavored)
- ½ cup Toasted pecans or walnuts
- 2–3 tablespoons Honey
- 1 tablespoon Olive oil (optional)
- Fresh rosemary or thyme sprigs (for garnish)
Instructions
- Set out your board. Place your cutting board or platter on the counter. If using parchment, lay it down now.
- Unwrap and place the cheeses. Place the brie whole on the board, slightly off-center. Cut the aged cheddar into thin slices or small cubes and pile them next to the brie. Place the goat cheese log nearby, either whole or sliced into rounds.
- Add the meats. Drape the prosciutto slices in loose folds around the cheeses. Arrange the salami slices in a small pile or fan them out in a line.
- Place the fruits. Slice the apple and pear just before adding them to the board. Arrange the slices in a fan pattern or scatter them in gaps. Add the dried figs or dates in a small cluster. Tuck the grapes in wherever there’s space.
- Fill in with crunchy bits. Pour the crackers into the empty spaces. Sprinkle the toasted pecans or walnuts around the board, filling any remaining gaps. (Put nuts in a small bowl to prevent rolling.)
- Add the finishing touches. Drizzle honey over the brie and goat cheese. If using olive oil, drizzle over the goat cheese and sprinkle with flaky salt. Tuck fresh rosemary or thyme sprigs around the edges.
- Serve immediately. Place the board in the center of the table with small plates, napkins, and a cheese knife.
Notes
Let the cheese sit at room temperature for 15-20 minutes before assembling for best flavor. Slice apples just before serving to prevent browning; toss with lemon juice if prepping ahead. The board can be assembled up to 2 hours in advance (leave apples unsliced). Leftovers can be stored separately: wrap cheeses in wax paper, meats in an airtight container, and crackers/nuts in a sealed bag at room temperature.
Nutrition
- Serving Size: 1/4 of the board
- Calories: 450550
- Fat: 3035
- Carbohydrates: 2530
- Fiber: 46
- Protein: 1822
Keywords: fall charcuterie board, quick charcuterie board, easy appetizer, weeknight dinner, fall entertaining, cheese board, 10 minute recipe


