Fourth batch in three days, and I finally stopped scraping burnt butter off the bottom of the pan. The first three tries were edible—barely. One was too dense, like a hockey puck that had been lightly dusted with pumpkin pie spice. Another crumbled into sad little pebbles the moment I tried to slice it. The third one actually tasted fine, but the glaze slid right off like it had somewhere better to be. I was this close to giving up and just sticking with my easy one-bowl pumpkin muffins with maple glaze for the season. But there was something about the idea of a scone that kept pulling me back. Not a muffin. Not a cookie. A scone. That specific cross between a biscuit and a pastry, the kind that should be crisp on the outside and tender on the inside, begging for a hot drink to go with it.
The problem, I realized, was the butter. I was melting it like a fool. Scones need cold butter. Ice cold. The kind of cold that makes your fingers ache when you rub it into the flour. Once I figured that out, everything clicked. The dough stopped being sticky and started being cooperative. The edges got flaky. The centers stayed soft. And the glaze—oh, the glaze. I added a pinch of cayenne to the maple syrup on the fifth batch, and that was it. That was the one. The warmth hits you right after the sweetness, and it makes total sense. These are the pumpkin scones I was chasing. And now I get to share them with you.
Why You’ll Love This Recipe
I have tested this recipe seven times in my own kitchen. Seven. My family has eaten pumpkin scones for breakfast, snack, and dessert. They are not tired of them yet, which tells me something. Here is why these scones work:
- Simple Ingredients : You probably have most of these in your pantry right now. No weird specialty flours or hard-to-find extracts. Just real butter, canned pumpkin, and basic baking staples.
- Quick & Easy : From start to finish, these come together in about 35 minutes. That includes baking time. You can have warm scones on the table before your coffee finishes brewing.
- Perfect for Fall Mornings : These scones were made for crisp October mornings when you want something cozy but not heavy. They pair beautifully with a hot latte or a mug of spiced apple cider.
- Crowd-Pleaser : I brought a batch to my book club last week, and they vanished in under ten minutes. One friend asked for the recipe before she even finished her first scone.
- Unbelievably Delicious : The spiced maple glaze is the real star here. It soaks into the warm scones just enough to make every bite sweet, buttery, and slightly warm from the cayenne. It is the kind of breakfast that makes you slow down and actually enjoy your morning.
What makes this recipe different from all the other pumpkin scone recipes out there is the texture. Most pumpkin scones turn out more like muffins in a triangle shape. They are soft and cakey, which is fine, but that is not a scone. A real scone should have flaky layers and a slight crumble. The trick is handling the dough as little as possible and keeping everything cold. I promise you, that extra effort pays off in the first bite.
What Ingredients You Will Need
This recipe uses simple, wholesome ingredients to deliver bold flavor and satisfying texture without the fuss. Most of these are pantry staples, especially if you do a lot of fall baking.
- All-purpose flour (2 ½ cups, spooned and leveled) — I use King Arthur Flour for consistent results. Do not scoop directly from the bag with your measuring cup; it packs the flour and makes scones dry.
- Granulated sugar (⅓ cup) — Just enough to sweeten the scones without making them taste like dessert. The glaze adds plenty of sweetness on top.
- Baking powder (1 tablespoon) — Make sure it is fresh. Expired baking powder is the number one reason scones turn out flat and dense.
- Pumpkin pie spice (1 ½ teaspoons) — You can use store-bought or make your own with cinnamon, nutmeg, ginger, and cloves. I prefer the blend from Penzeys for its warm, aromatic profile.
- Salt (½ teaspoon) — Balances the sweetness and enhances the pumpkin flavor. Do not skip it.
- Unsalted butter (½ cup, cold and cubed) — This is non-negotiable. The butter must be straight from the fridge. If it softens at all, your scones will not be flaky.
- Canned pumpkin puree (½ cup) — Not pumpkin pie filling. Make sure you grab the 100% pure pumpkin. I recommend Libby’s for consistent thickness and flavor.
- Heavy cream (⅓ cup, plus more for brushing) — Adds richness and tenderness. You can substitute whole milk in a pinch, but the scones will be slightly less tender.
- Vanilla extract (1 teaspoon) — Pure vanilla, not imitation. It makes a difference in the overall flavor.
- Egg (1 large, room temperature) — Helps bind the dough and adds structure.
For the Spiced Maple Glaze:
- Powdered sugar (1 cup, sifted) — Sifting prevents lumps. Trust me on this one.
- Pure maple syrup (2 tablespoons) — Use the real stuff, not pancake syrup. Grade A dark amber works beautifully here.
- Heavy cream or milk (1-2 tablespoons) — Adjust the consistency as needed. You want the glaze thick enough to cling to the scones but thin enough to drizzle.
- Pumpkin pie spice (¼ teaspoon) — For that extra layer of fall flavor.
- Cayenne pepper (⅛ teaspoon, optional but recommended) — This is my secret ingredient. It does not make the glaze spicy; it just adds a gentle warmth that lingers on your tongue.
Equipment Needed
You do not need anything fancy to make these scones. Here is what you will need:
- Large mixing bowl — For combining dry ingredients.
- Pastry cutter or two forks — To cut the cold butter into the flour. A pastry cutter is faster, but forks work fine in a pinch.
- Whisk — For mixing the wet ingredients and the glaze.
- Baking sheet — Line it with parchment paper for easy cleanup. I use Nordic Ware baking sheets because they distribute heat evenly and do not warp.
- Bench scraper or sharp knife — For cutting the dough into wedges. A bench scraper is ideal because it cuts cleanly without squishing the dough.
- Pastry brush — For brushing the tops with cream before baking. This gives the scones that beautiful golden crust.
- Cooling rack — Essential for letting the scones cool properly so the glaze sets instead of melting into a puddle.
If you do not have a pastry cutter, do not run out and buy one just for this recipe. Two forks or even your fingertips will work. Just work quickly so the butter stays cold.
Preparation Method
Preheat your oven to 400°F (200°C). Line a baking sheet with parchment paper and set it aside.
Step 1: Combine the dry ingredients. In a large mixing bowl, whisk together the flour, sugar, baking powder, pumpkin pie spice, and salt. Make sure everything is evenly distributed. I like to whisk for a solid 15 seconds to aerate the flour a bit.
Step 2: Cut in the butter. Add the cold, cubed butter to the flour mixture. Using a pastry cutter or two forks, cut the butter into the flour until the mixture resembles coarse meal with pea-sized butter pieces. Do not overdo it. Those little chunks of butter are what create flaky layers as they melt in the oven. If the butter starts to soften, pop the bowl in the fridge for 5 minutes.
Step 3: Mix the wet ingredients. In a separate small bowl, whisk together the pumpkin puree, heavy cream, vanilla extract, and egg until smooth. The mixture should be a uniform orange color with no streaks of egg white.
Step 4: Combine wet and dry. Pour the wet ingredients into the dry ingredients. Stir with a rubber spatula or wooden spoon just until the dough comes together. It will look shaggy and a little dry in spots. That is exactly what you want. If you keep stirring until it looks smooth, you have overmixed it and your scones will be tough.
Step 5: Shape the dough. Turn the dough out onto a lightly floured surface. Gently bring it together with your hands, kneading just 2 or 3 times. Pat the dough into a circle about ¾-inch thick. Do not use a rolling pin; your hands give you better control and keep the dough from getting overworked.
Step 6: Cut the scones. Using a bench scraper or sharp knife, cut the circle into 8 wedges like you are slicing a pizza. Transfer the wedges to the prepared baking sheet, spacing them about 2 inches apart. They will spread a little, but not much.
Step 7: Brush and bake. Brush the tops of the scones with a little extra heavy cream. This helps them brown beautifully. Bake for 14 to 16 minutes, or until the scones are golden brown on the edges and a toothpick inserted into the center comes out clean. The kitchen will smell incredible at this point.
Step 8: Cool slightly. Let the scones cool on the baking sheet for 5 minutes, then transfer them to a cooling rack. If you glaze them while they are too hot, the glaze will just run right off. If you wait until they are completely cool, the glaze will sit on top and not soak in at all. The sweet spot is about 10 minutes of cooling.
Step 9: Make the glaze. While the scones are cooling, whisk together the powdered sugar, maple syrup, pumpkin pie spice, and cayenne (if using). Add heavy cream or milk 1 tablespoon at a time until the glaze reaches a thick but pourable consistency. It should drizzle off the whisk in a smooth ribbon.
Step 10: Glaze and serve. Drizzle the glaze over the warm scones. I like to use a spoon and zigzag back and forth for that rustic bakery look. Let the glaze set for about 5 minutes before serving. The scones are best eaten the day they are made, preferably while still slightly warm.
Cooking Tips & Techniques
I learned most of these the hard way, so you do not have to. Here are my best tips for perfect pumpkin scones every time:
Keep everything cold. I cannot say this enough. If your butter warms up, your scones will be dense and flat. I sometimes pop my flour mixture in the freezer for 10 minutes before adding the butter, especially if my kitchen is warm. It makes a noticeable difference.
Measure your flour correctly. Spoon the flour into your measuring cup and level it off with a knife. Scooping directly from the bag can add up to 25% more flour, which makes scones dry and crumbly. I learned this lesson after my third failed batch.
Do not overmix the dough. Stir just until the flour is incorporated. A few dry spots are fine. Overmixing develops gluten, and developed gluten means tough scones. You want them tender, not chewy.
Use the right pumpkin. Canned pumpkin puree varies in moisture content between brands. Libby’s is consistently thick, which works perfectly here. If your pumpkin puree seems watery, blot it with a paper towel before adding it to the wet ingredients.
Let the glaze set. I know it is tempting to dig in immediately, but giving the glaze those 5 minutes to set makes a huge difference. The glaze firms up just enough that it does not smear all over your fingers when you pick up a scone.
Double the recipe if you are feeding a crowd. These scones disappear fast. I usually make a double batch for holiday brunches and freeze half of them (unglazed) for later.
Variations & Adaptations
One of the best things about this recipe is how flexible it is. Here are some variations I have tried and loved:
Gluten-Free Version: Substitute the all-purpose flour with a 1:1 gluten-free baking flour blend that contains xanthan gum. I have tested this with Bob’s Red Mill 1:1 Baking Flour, and the texture is remarkably close to the original. Just be gentle with the dough, as gluten-free doughs are more delicate.
Vegan Adaptation: Use cold vegan butter (I like Miyoko’s) and replace the heavy cream with full-fat coconut cream. Swap the egg with a flax egg (1 tablespoon ground flaxseed mixed with 3 tablespoons water, let sit for 5 minutes). The scones will be slightly less flaky but still delicious.
Add-Ins: Fold in ½ cup of chopped pecans, dried cranberries, or white chocolate chips before shaping the dough. The pecans add a lovely crunch that contrasts with the tender scone. Dried cranberries give a tart pop that plays well with the sweet maple glaze.
Spice It Up: If you love warm spices, add an extra ½ teaspoon of cinnamon and a pinch of ground ginger to the dough. You can also swap the cayenne in the glaze for a pinch of chipotle powder for a smokier heat.
Citrus Twist: Add 1 teaspoon of orange zest to the wet ingredients and swap the maple syrup in the glaze with fresh orange juice. The bright citrus cuts through the richness of the butter and pumpkin beautifully.
I personally love the pecan version for Thanksgiving morning. It feels special without requiring any extra effort. If you are looking for another fall breakfast option, my easy soft pumpkin spice snickerdoodle cookies are also a huge hit with my family.
Serving & Storage Suggestions
These scones are best served warm, ideally within an hour of baking. The contrast between the slightly crisp exterior and the tender, flaky interior is at its peak when they are fresh from the oven.
For a cozy fall breakfast, serve them alongside a hot cup of coffee, chai latte, or mulled apple cider. If you are feeling extra indulgent, split a scone in half and spread it with a little salted butter or apple butter. The combination is divine.
These scones also make a lovely addition to a brunch spread. Arrange them on a wooden board with fresh apple slices, a bowl of whipped honey butter, and maybe a few of my easy small batch pumpkin cinnamon rolls for variety.
Storage: Store leftover scones in an airtight container at room temperature for up to 2 days. The glaze may soften slightly, but they will still taste great. Do not refrigerate them; the fridge dries out baked goods and makes them stale faster.
Freezing: You can freeze the unbaked scones for up to 3 months. Cut the dough into wedges, place them on a baking sheet, and freeze until solid. Transfer the frozen scones to a zip-top bag. When you are ready to bake, place them on a parchment-lined baking sheet and add 2-3 minutes to the baking time. No need to thaw first.
Reheating: To revive day-old scones, pop them in a 300°F oven for 5-7 minutes. This crisps up the exterior and warms the interior without drying them out. The microwave works in a pinch, but it will make the scones soft and chewy rather than flaky.
One thing I have noticed is that the flavors actually deepen overnight. The pumpkin and spices meld together, and the maple glaze soaks into the scone just a little more. They are not as crisp on day two, but they are still delicious.
Nutritional Information & Benefits
Here is the estimated nutritional breakdown for one scone (with glaze, based on 8 servings):
- Calories: 310
- Total Fat: 14g
- Saturated Fat: 8g
- Cholesterol: 55mg
- Sodium: 210mg
- Total Carbohydrates: 44g
- Dietary Fiber: 2g
- Sugars: 22g
- Protein: 4g
These numbers are estimates and will vary based on specific brands and substitutions you use.
Pumpkin is packed with vitamin A, which supports eye health and immune function. It is also a good source of fiber, which helps keep you full and aids digestion. The cayenne in the glaze contains capsaicin, which has anti-inflammatory properties and can give your metabolism a gentle boost.
While these scones are certainly a treat, they offer more nutritional value than your average pastry. The pumpkin adds moisture and nutrients without requiring a lot of extra fat. If you are watching your sugar intake, you can reduce the glaze or skip it entirely. The scones are still flavorful on their own, thanks to the pumpkin pie spice and the natural sweetness of the pumpkin.
For those with dietary restrictions, this recipe can be adapted to be gluten-free or vegan as noted in the variations section. Always check your ingredient labels for potential allergens, especially if you are serving guests with food sensitivities.
Conclusion
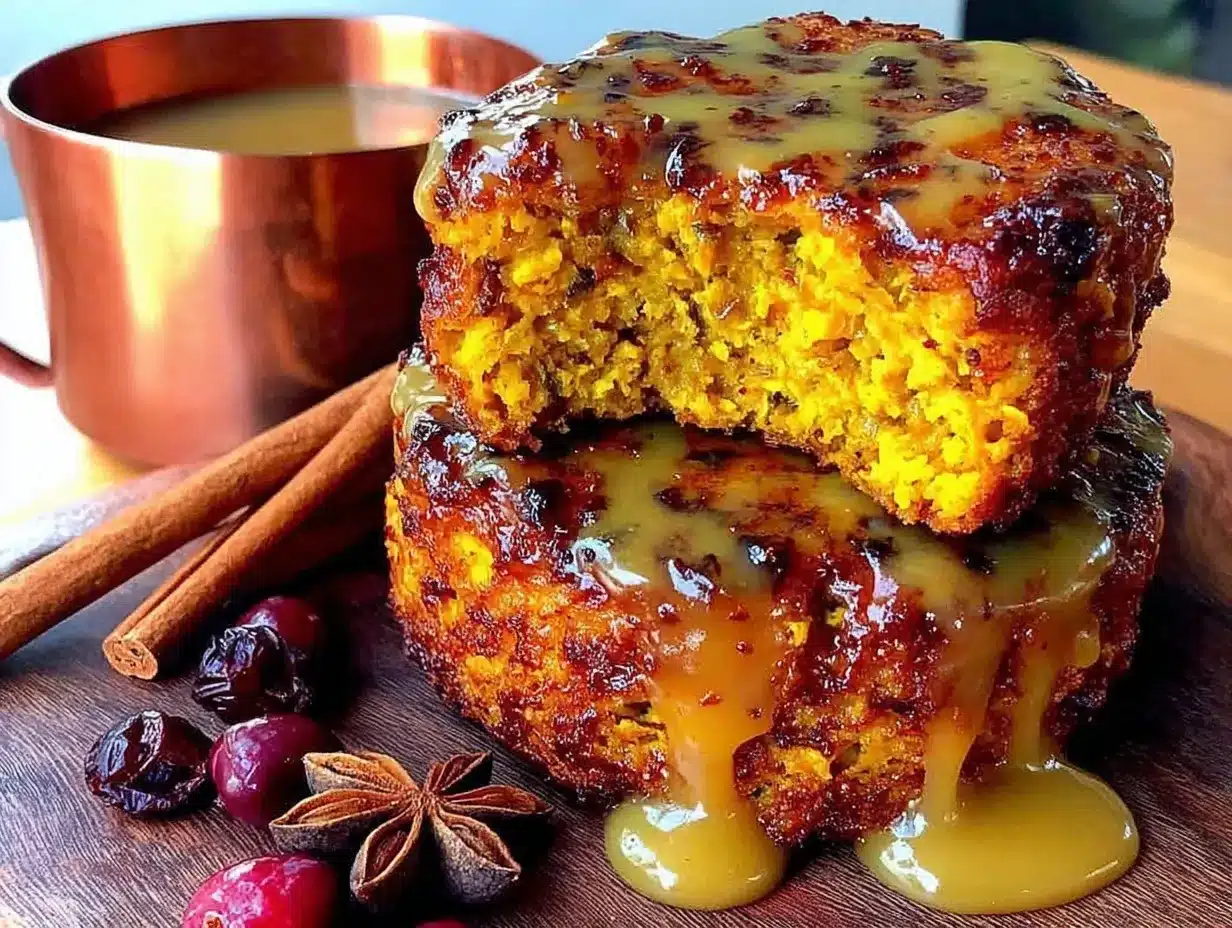
These perfect pumpkin scones with spiced maple glaze are everything I wanted them to be. They are flaky without being dry, tender without being cakey, and sweet without being cloying. The spiced maple glaze adds that little something extra that makes them feel special, whether you are serving them for a holiday brunch or just a regular Tuesday morning.
I love that this recipe uses real ingredients and simple techniques. You do not need to be a professional baker to pull these off. You just need cold butter, a light hand, and a little patience. The first time you pull a tray of golden scones out of the oven and drizzle that glaze over the top, you will understand why I made seven batches in three days.
If you try these pumpkin scones, I would love to hear how they turn out. Leave a comment below and let me know if you added the cayenne, threw in some pecans, or came up with your own twist. And if you are looking for more fall baking inspiration, do not miss my best pumpkin pie cheesecake bars with pecan crust — they are another reader favorite that disappears just as fast as these scones.
Happy baking, friends. I hope these scones make your fall mornings a little warmer and a lot more delicious.
Frequently Asked Questions
Can I use fresh pumpkin instead of canned?
Yes, but you will need to roast and puree it first, then drain off any excess liquid. Fresh pumpkin puree tends to be more watery than canned, which can throw off the texture of the scones. If using fresh, blot the puree with paper towels before adding it to the wet ingredients.
Why did my scones turn out dry?
Dry scones usually come from one of two problems: too much flour or overbaking. Make sure you are measuring your flour correctly by spooning it into the measuring cup and leveling it off. Also, check your oven temperature with an oven thermometer; many ovens run hot, which can dry out baked goods.
Can I make the dough ahead of time?
Absolutely. You can prepare the dough, shape it into wedges, and refrigerate them on the baking sheet for up to 24 hours before baking. You may need to add 1-2 minutes to the baking time since the dough will be cold. You can also freeze the unbaked scones for up to 3 months.
Do I have to use the cayenne pepper in the glaze?
Not at all. The cayenne is optional, and the glaze is still delicious without it. If you are serving kids or prefer a straightforward sweet glaze, leave it out. If you want a tiny bit of warmth, start with just a pinch and taste as you go.
How do I get my scones to rise higher?
Make sure your baking powder is fresh and your butter is very cold. Also, handle the dough as little as possible. Overworking the dough warms up the butter and develops gluten, both of which prevent the scones from rising properly. If your scones are spreading instead of rising, try chilling the shaped dough for 15 minutes before baking.
Pin This Recipe!

Perfect Pumpkin Scones with Spiced Maple Glaze

Flaky, tender pumpkin scones with a spiced maple glaze that adds a gentle warmth. Perfect for fall mornings, these scones come together in about 35 minutes and are made with simple ingredients.
- Prep Time: 15 minutes
- Cook Time: 14-16 minutes
- Total Time: 35 minutes
- Yield: 8 servings 1x
- Category: Breakfast
- Cuisine: American
Ingredients
- 2 ½ cups all-purpose flour, spooned and leveled
- ⅓ cup granulated sugar
- 1 tablespoon baking powder
- 1 ½ teaspoons pumpkin pie spice
- ½ teaspoon salt
- ½ cup unsalted butter, cold and cubed
- ½ cup canned pumpkin puree (not pumpkin pie filling)
- ⅓ cup heavy cream, plus more for brushing
- 1 teaspoon vanilla extract
- 1 large egg, room temperature
- 1 cup powdered sugar, sifted
- 2 tablespoons pure maple syrup
- 1–2 tablespoons heavy cream or milk
- ¼ teaspoon pumpkin pie spice
- ⅛ teaspoon cayenne pepper (optional but recommended)
Instructions
- Preheat oven to 400°F (200°C). Line a baking sheet with parchment paper.
- In a large mixing bowl, whisk together flour, sugar, baking powder, pumpkin pie spice, and salt.
- Add cold, cubed butter to the flour mixture. Using a pastry cutter or two forks, cut the butter into the flour until the mixture resembles coarse meal with pea-sized butter pieces.
- In a separate small bowl, whisk together pumpkin puree, heavy cream, vanilla extract, and egg until smooth.
- Pour the wet ingredients into the dry ingredients. Stir with a rubber spatula or wooden spoon just until the dough comes together. It will look shaggy and a little dry.
- Turn the dough out onto a lightly floured surface. Gently bring it together with your hands, kneading just 2 or 3 times. Pat the dough into a circle about ¾-inch thick.
- Using a bench scraper or sharp knife, cut the circle into 8 wedges. Transfer to the prepared baking sheet, spacing them about 2 inches apart.
- Brush the tops of the scones with a little extra heavy cream. Bake for 14 to 16 minutes, until golden brown on the edges and a toothpick inserted into the center comes out clean.
- Let the scones cool on the baking sheet for 5 minutes, then transfer to a cooling rack. Cool for about 10 minutes before glazing.
- While the scones are cooling, whisk together powdered sugar, maple syrup, pumpkin pie spice, and cayenne (if using). Add heavy cream or milk 1 tablespoon at a time until the glaze reaches a thick but pourable consistency.
- Drizzle the glaze over the warm scones. Let the glaze set for about 5 minutes before serving.
Notes
Keep butter and ingredients cold for flaky scones. Measure flour correctly by spooning and leveling. Do not overmix the dough. Use canned pumpkin puree, not pumpkin pie filling. Let glaze set for 5 minutes before serving. Scones are best eaten the day they are made.
Nutrition
- Serving Size: 1 scone
- Calories: 310
- Sugar: 22
- Sodium: 210
- Fat: 14
- Saturated Fat: 8
- Carbohydrates: 44
- Fiber: 2
- Protein: 4
Keywords: pumpkin scones, maple glaze, fall breakfast, pumpkin spice, scone recipe


