My nephew Leo took one bite of these brownies, paused mid-chew, and just pointed at the plate with this look of pure, undivided focus. He didn’t say anything for a solid ten seconds—which, for a seven-year-old, is basically a lifetime. Then he asked if he could have another one for breakfast. I told him no, obviously, but I also kind of understood the impulse.
These Perfect Chocolate Halloween Brownies with Orange Buttercream started as a happy accident. I was testing a new brownie recipe for a Halloween party and had some leftover buttercream from a batch of monster sugar cookies I’d made earlier that week. The orange buttercream was supposed to be for something else entirely, but I’d accidentally added a little too much zest and it was just too good to waste. So I slapped a swirl of it on top of a warm brownie, and honestly? The chocolate-orange combo hit different. It was like a grown-up version of those Halloween candies you loved as a kid, but way more sophisticated and way less artificial tasting.
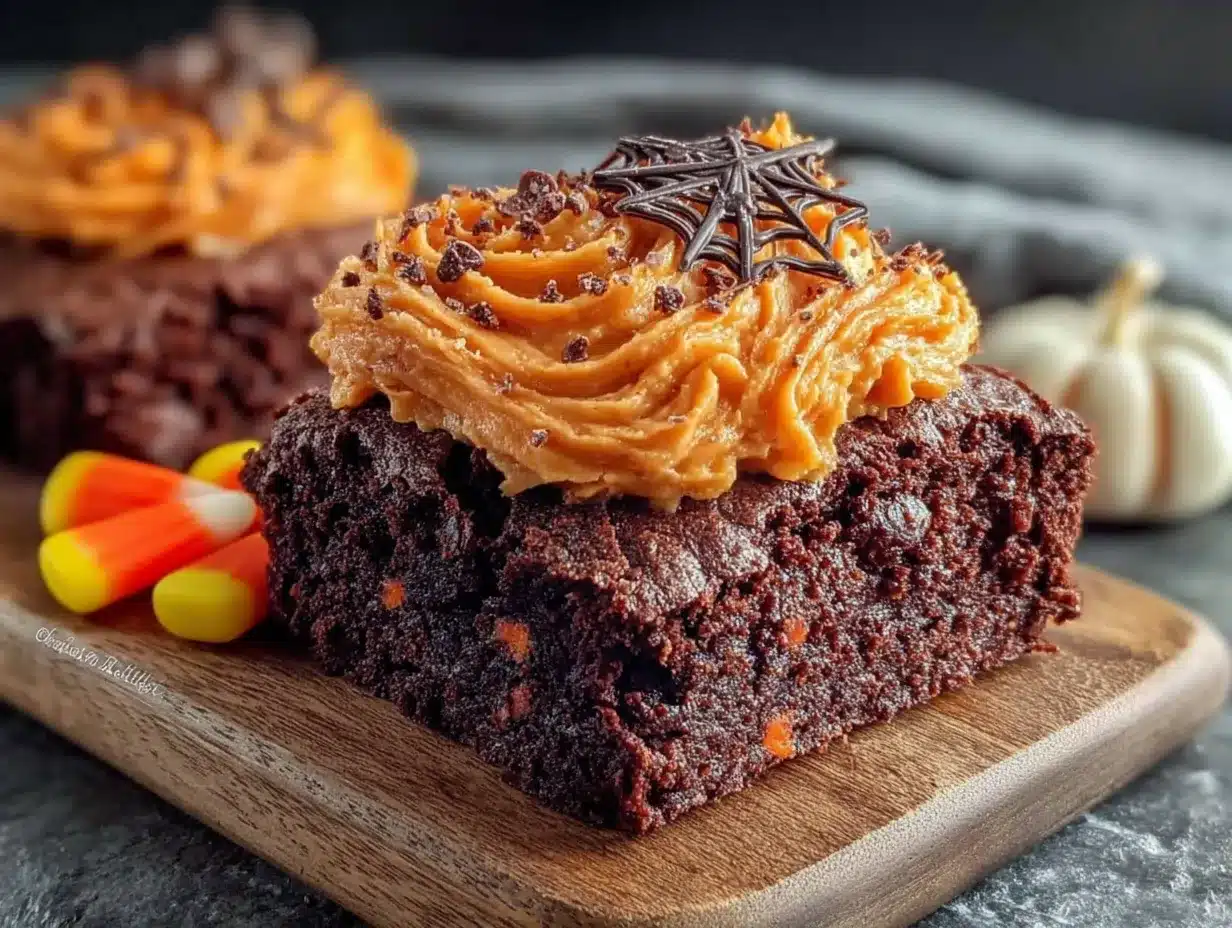
These brownies have that perfect crackly top, the kind that gives way to a fudgy, almost gooey center. And the orange buttercream—it’s not too sweet, not too tart, just bright enough to cut through the richness of the chocolate. I’ve made them three times since that first accidental batch, and each time, someone asks for the recipe before they’ve even finished their first bite. That’s how I know it’s a keeper.
Why You’ll Love This Recipe
Let me tell you why these brownies are going to become your new Halloween tradition. I’ve tested this recipe more times than I care to admit (my neighbors have been very happy taste-testers), and every single batch has been a hit. Here’s what makes them special:
- Fudgy, Not Cakey: These brownies have that dense, almost truffle-like texture that brownie lovers dream about. No dry crumbs here.
- That Crackly Top: You know the shiny, paper-thin crust that forms on the best brownies? This recipe nails it every time. The secret is in the egg-sugar beating technique.
- Bright Orange Flavor: The buttercream uses both orange zest and a splash of fresh juice, so it tastes like real oranges—not that fake candy flavor.
- Perfect for Halloween Parties: They look festive without being fussy. A few sprinkles or a candy spider on top and you’re done.
- Simple Ingredients: Nothing weird or hard to find. You probably have most of this in your pantry right now.
- Make-Ahead Friendly: The brownies actually taste better the next day, and the buttercream keeps beautifully in the fridge.
What really sets these apart is the balance. The chocolate is deep and rich, but the orange buttercream keeps everything from feeling heavy. It’s the kind of dessert that makes you close your eyes after the first bite, just for a second. And honestly? That’s exactly what Halloween sweets should do—make you feel like a kid again, even if only for a moment.
What Ingredients You Will Need
This recipe uses simple, everyday ingredients to create something that tastes surprisingly fancy. The magic is in how they work together, not in any complicated or hard-to-find items. Here’s what you’ll need:
For the Brownies
- Unsalted butter, 1 cup (226g), melted and slightly cooled
- Granulated sugar, 2 cups (400g)
- Large eggs, 3, at room temperature
- Vanilla extract, 2 teaspoons
- Unsweetened cocoa powder, 1 cup (85g) – I prefer Dutch-process for a deeper, smoother chocolate flavor, but natural cocoa works too
- All-purpose flour, 1 cup (120g)
- Salt, 1 teaspoon
- Baking powder, 1/2 teaspoon
- Semi-sweet chocolate chips, 1 cup (175g) – optional but highly recommended for extra fudgy pockets
For the Orange Buttercream
- Unsalted butter, 1 cup (226g), softened to room temperature
- Powdered sugar, 3 cups (360g), sifted
- Fresh orange zest, 2 tablespoons (from about 2 medium oranges)
- Fresh orange juice, 2-3 tablespoons
- Vanilla extract, 1 teaspoon
- Salt, a pinch
- Orange gel food coloring (optional, for a more vibrant Halloween look)
For Decoration (Optional)
- Halloween sprinkles, candy eyes, or small candy spiders
- Orange and black nonpareils
When it comes to the cocoa powder, I’ve tried both Dutch-process and natural, and I honestly prefer Dutch-process here. It gives the brownies a darker, more sophisticated chocolate flavor that pairs beautifully with the orange. But if all you have is natural cocoa, it’ll still work—just expect a slightly lighter color and a more straightforward chocolate taste.
For the oranges, try to get organic if you can. You’re using the zest, so you want to avoid any wax or pesticides. And roll the oranges on the counter before zesting—it helps release the oils and gives you more flavor.
Equipment Needed
You don’t need any fancy equipment for these brownies, which is part of why I love this recipe. Here’s what you’ll need:
- 9×13-inch baking pan – This is the perfect size for a generous batch of brownies. If you only have an 8×8 pan, you can use it, but you’ll need to increase the baking time by about 10 minutes and the brownies will be thicker.
- Mixing bowls – One large bowl for the brownie batter, one medium bowl for the buttercream. Glass or stainless steel works best.
- Whisk – For combining the wet ingredients. A hand mixer or stand mixer works too, but honestly, a whisk does the job just fine.
- Rubber spatula – For folding in the chocolate chips and scraping every last bit of batter into the pan.
- Parchment paper – This is non-negotiable for easy removal. I learned this the hard way after a brownie-stuck-to-pan disaster.
- Electric hand mixer or stand mixer – For the buttercream. You can do it by hand with a wooden spoon, but your arm will thank you for using a mixer.
- Microplane or fine grater – For zesting the oranges. A box grater works in a pinch, but a microplane gives you that fine, fluffy zest that melts into the buttercream.
- Cooling rack – For letting the brownies cool completely before frosting. Patience is key here.
- Offset spatula or butter knife – For spreading the buttercream. An offset spatula makes it look professional, but a regular knife works too.
If you don’t have a 9×13 pan, you can also use two 8-inch square pans. Just adjust the baking time slightly—start checking at 20 minutes. And if you’re like me and you hate washing dishes, line your pan with parchment paper that hangs over the edges. It makes cleanup a breeze.
Preparation Method
Let’s get to the fun part. I’ll walk you through this step by step, with all the little tips I’ve picked up along the way.
Step 1: Preheat and Prepare
Preheat your oven to 350°F (175°C). Line your 9×13-inch baking pan with parchment paper, leaving a 2-inch overhang on two opposite sides. This creates little handles that make lifting the brownies out super easy. Lightly grease the parchment with butter or non-stick spray.
Step 2: Make the Brownie Batter
In a large mixing bowl, whisk together the melted butter and granulated sugar until well combined. It should look like wet sand. Add the eggs one at a time, whisking well after each addition. The mixture should become thick, glossy, and slightly lighter in color. This takes about 2 minutes of vigorous whisking. Stir in the vanilla extract.
In a separate small bowl, sift together the cocoa powder, flour, salt, and baking powder. This step is important—sifting removes lumps and ensures everything incorporates evenly. Add the dry ingredients to the wet ingredients and fold together with a rubber spatula until just combined. Don’t overmix! A few streaks of flour are okay. Overmixing will make the brownies tough instead of fudgy.
Fold in the chocolate chips if you’re using them. They add little pockets of melted chocolate throughout the brownies, which is always a good thing in my book.
Step 3: Bake the Brownies
Pour the batter into the prepared pan and spread it into an even layer. Bake for 25-30 minutes, or until a toothpick inserted into the center comes out with a few moist crumbs attached. If it comes out clean, you’ve overbaked them. The edges should look set and slightly pulled away from the pan, but the center should still look slightly underdone.
Let the brownies cool in the pan on a wire rack for at least 30 minutes. Then, using the parchment paper handles, lift the brownies out and transfer them to the wire rack to cool completely. This is crucial—if you frost them while they’re still warm, the buttercream will melt into a sad, greasy puddle.
Step 4: Make the Orange Buttercream
While the brownies are cooling, make the buttercream. In a medium bowl, beat the softened butter with an electric mixer on medium speed until smooth and creamy, about 2 minutes. Add the sifted powdered sugar, one cup at a time, beating on low speed after each addition until incorporated.
Add the orange zest, 2 tablespoons of orange juice, vanilla extract, and a pinch of salt. Beat on medium-high speed for 3-4 minutes until the buttercream is light, fluffy, and well combined. If it’s too thick, add the remaining tablespoon of orange juice. If it’s too thin, add a little more powdered sugar.
If you want that vibrant Halloween orange color, add a drop or two of orange gel food coloring and beat until evenly distributed. Gel coloring is better than liquid because it doesn’t thin out the frosting.
Step 5: Frost and Decorate
Once the brownies are completely cool, spread the orange buttercream evenly over the top using an offset spatula or butter knife. Get creative with the swirls—I like to make little peaks and valleys for a rustic look. Add Halloween sprinkles, candy eyes, or any other decorations while the buttercream is still soft so they stick.
Step 6: Slice and Serve
For clean slices, use a sharp knife and wipe it clean between each cut. I like to cut these into 24 squares for a party, but if you want bigger portions, 16 works too. Serve at room temperature for the best texture.
Cooking Tips & Techniques
After making these brownies more times than I can count (seriously, my freezer is stocked), I’ve learned a few things that make a real difference. Here are my best tips:
Don’t overbake. This is the number one mistake people make with brownies. They look underdone when you take them out, but they continue to cook from the residual heat in the pan. Pull them when a toothpick comes out with moist crumbs, not clean. Trust me on this—overbaked brownies are sad brownies.
Room temperature eggs matter. Cold eggs can seize the melted butter and give you a lumpy batter. If you forgot to take your eggs out of the fridge, place them in a bowl of warm water for 5 minutes before using.
Sift your powdered sugar. I know it’s an extra step, but lumpy buttercream is not a good look. Sifting takes 30 seconds and makes a huge difference in the smoothness of your frosting.
Zest before you juice. It’s way easier to zest a whole orange than a squishy, juiced one. Trust me, I’ve made this mistake more than once.
Let the brownies cool completely. I know you’re excited, but warm brownies + buttercream = a melty mess. If you’re in a hurry, you can pop the brownies in the fridge for 20 minutes to speed up the cooling process.
Use a sharp knife for cutting. A dull knife will drag through the frosting and ruin those pretty swirls. Run the knife under hot water, wipe it dry, then make your cut. Clean the blade between each slice.
Variations & Adaptations
One of the best things about this recipe is how easy it is to adapt. Here are some of my favorite variations:
Gluten-Free Version: Substitute the all-purpose flour with a 1:1 gluten-free baking flour blend. I’ve used Bob’s Red Mill and King Arthur brands with great results. The texture is slightly more delicate, but still delicious.
Dairy-Free Version: Use a high-quality vegan butter stick (not spreadable margarine) in both the brownies and the buttercream. For the chocolate chips, look for dairy-free semi-sweet chips—Enjoy Life and Pascha both make good ones.
Spooky Spiderweb Design: Instead of spreading the buttercream evenly, pipe it in a spiral pattern starting from the center. Then, use a toothpick to drag lines from the center outward to create a spiderweb effect. It looks impressive but takes almost no extra effort.
Dark Chocolate Lovers: Swap the semi-sweet chocolate chips for dark chocolate (60-70% cacao) and use dark cocoa powder for an even more intense chocolate flavor.
Peppermint Twist: Replace the orange zest and juice with 1/2 teaspoon peppermint extract and a drop of red food coloring for a festive holiday version. These make great Christmas treats too.
Nutty Addition: Fold in 1/2 cup of toasted chopped walnuts or pecans along with the chocolate chips for some crunch. The nuts add a lovely texture contrast to the fudgy brownies.
I’ve personally tried the gluten-free version for a friend with celiac disease, and she said they were the best brownies she’d had in years. That’s a win in my book.
Serving & Storage Suggestions
These brownies are best served at room temperature, which is when the texture is at its peak—fudgy, dense, and perfectly moist. The buttercream softens slightly at room temperature, making each bite a perfect combination of creamy frosting and rich brownie.
For a Halloween party, I like to arrange them on a black platter or a cake stand with some fake spiderwebs and plastic spiders scattered around. It makes for a great presentation without much effort. You could also serve them alongside a glass of cold milk or a warm mug of pumpkin spice coffee for a cozy fall treat.
Storage Instructions: Store the brownies in an airtight container at room temperature for up to 3 days. If your kitchen is warm, you can refrigerate them, but bring them back to room temperature before serving for the best texture. The buttercream will firm up in the fridge, so let them sit out for about 20 minutes before eating.
Freezer Instructions: These brownies freeze beautifully. Place the unfrosted brownies in a single layer in a freezer-safe container, with parchment paper between layers if stacking. They’ll keep for up to 3 months. When you’re ready to serve, thaw them in the refrigerator overnight, then bring to room temperature and frost. You can also freeze the buttercream separately in a zip-top bag for up to 2 months—just thaw it in the fridge and re-whip before using.
Flavor Development: Honestly, these brownies taste even better the next day. The flavors meld together, and the texture becomes even more fudgy. So if you can resist them on day one, you’re in for a treat on day two.
Nutritional Information & Benefits
Let’s be real—these are a treat, not a health food. But that doesn’t mean they can’t have some redeeming qualities. Here’s the approximate nutritional breakdown per serving (based on 24 servings):
- Calories: 285
- Fat: 16g
- Carbohydrates: 35g
- Protein: 3g
- Fiber: 2g
- Sugar: 25g
On the plus side, dark chocolate is a good source of antioxidants, particularly flavonoids, which have been linked to heart health benefits. Oranges are packed with vitamin C, and while the amount in the buttercream is small, every little bit helps. Plus, making treats from scratch means you know exactly what’s going into them—no preservatives, no artificial flavors, no weird ingredients you can’t pronounce.
If you’re looking for a lighter option, you could try these as a smaller portion or serve them alongside some fresh fruit. But honestly? Halloween is one night a year. Sometimes you just need to enjoy the brownie.
Frequently Asked Questions
Can I use a brownie mix instead of making from scratch?
You can, but the texture won’t be the same. Homemade brownies have a richer, more complex flavor and that perfect fudgy texture that box mixes just can’t replicate. If you’re short on time, use your favorite box mix and focus your energy on the orange buttercream—it’s still a winning combination.
Why did my brownies turn out cakey instead of fudgy?
You likely overmixed the batter or overbaked them. For fudgy brownies, mix just until the dry ingredients are incorporated—a few streaks of flour are okay. And pull them from the oven when a toothpick comes out with moist crumbs, not clean. The residual heat will finish cooking them.
Can I make the orange buttercream ahead of time?
Absolutely. You can make the buttercream up to 3 days in advance and store it in an airtight container in the refrigerator. When you’re ready to use it, let it come to room temperature, then re-whip it with a mixer for a minute or two to bring back the fluffy texture.
How do I get clean slices without smearing the frosting?
Use a sharp knife and wipe it clean between each cut. For extra clean slices, you can refrigerate the frosted brownies for 15-20 minutes before cutting. This firms up the buttercream and makes it less likely to smudge.
Can I use bottled orange juice instead of fresh?
I don’t recommend it. Bottled orange juice has a cooked, slightly bitter flavor and lacks the brightness of fresh juice. Plus, you need the zest for the best orange flavor, and you can’t get that from a bottle. Fresh oranges are worth the extra effort here.
Conclusion
These Perfect Chocolate Halloween Brownies with Orange Buttercream are everything I want in a Halloween dessert—rich, festive, and just a little bit unexpected. The combination of deep, fudgy chocolate and bright, citrusy buttercream is one of those flavor pairings that just works, and the Halloween decorations make them fun without being fussy.
I love that this recipe feels special enough for a party but simple enough for a weeknight baking project. It’s the kind of dessert that makes people stop and say, “Wait, you made these?” And honestly, that never gets old.
Whether you’re hosting a Halloween bash, sending treats to a school party, or just want to make something fun for your family, these brownies deliver. Feel free to customize them with your favorite decorations or try one of the variations I mentioned—I’d love to hear how they turn out.
If you make these, drop a comment below and let me know what you think. Did your kids love them? Did you try a different frosting flavor? I read every comment and I love seeing your creations. Happy Halloween, and happy baking!
Pin This Recipe!
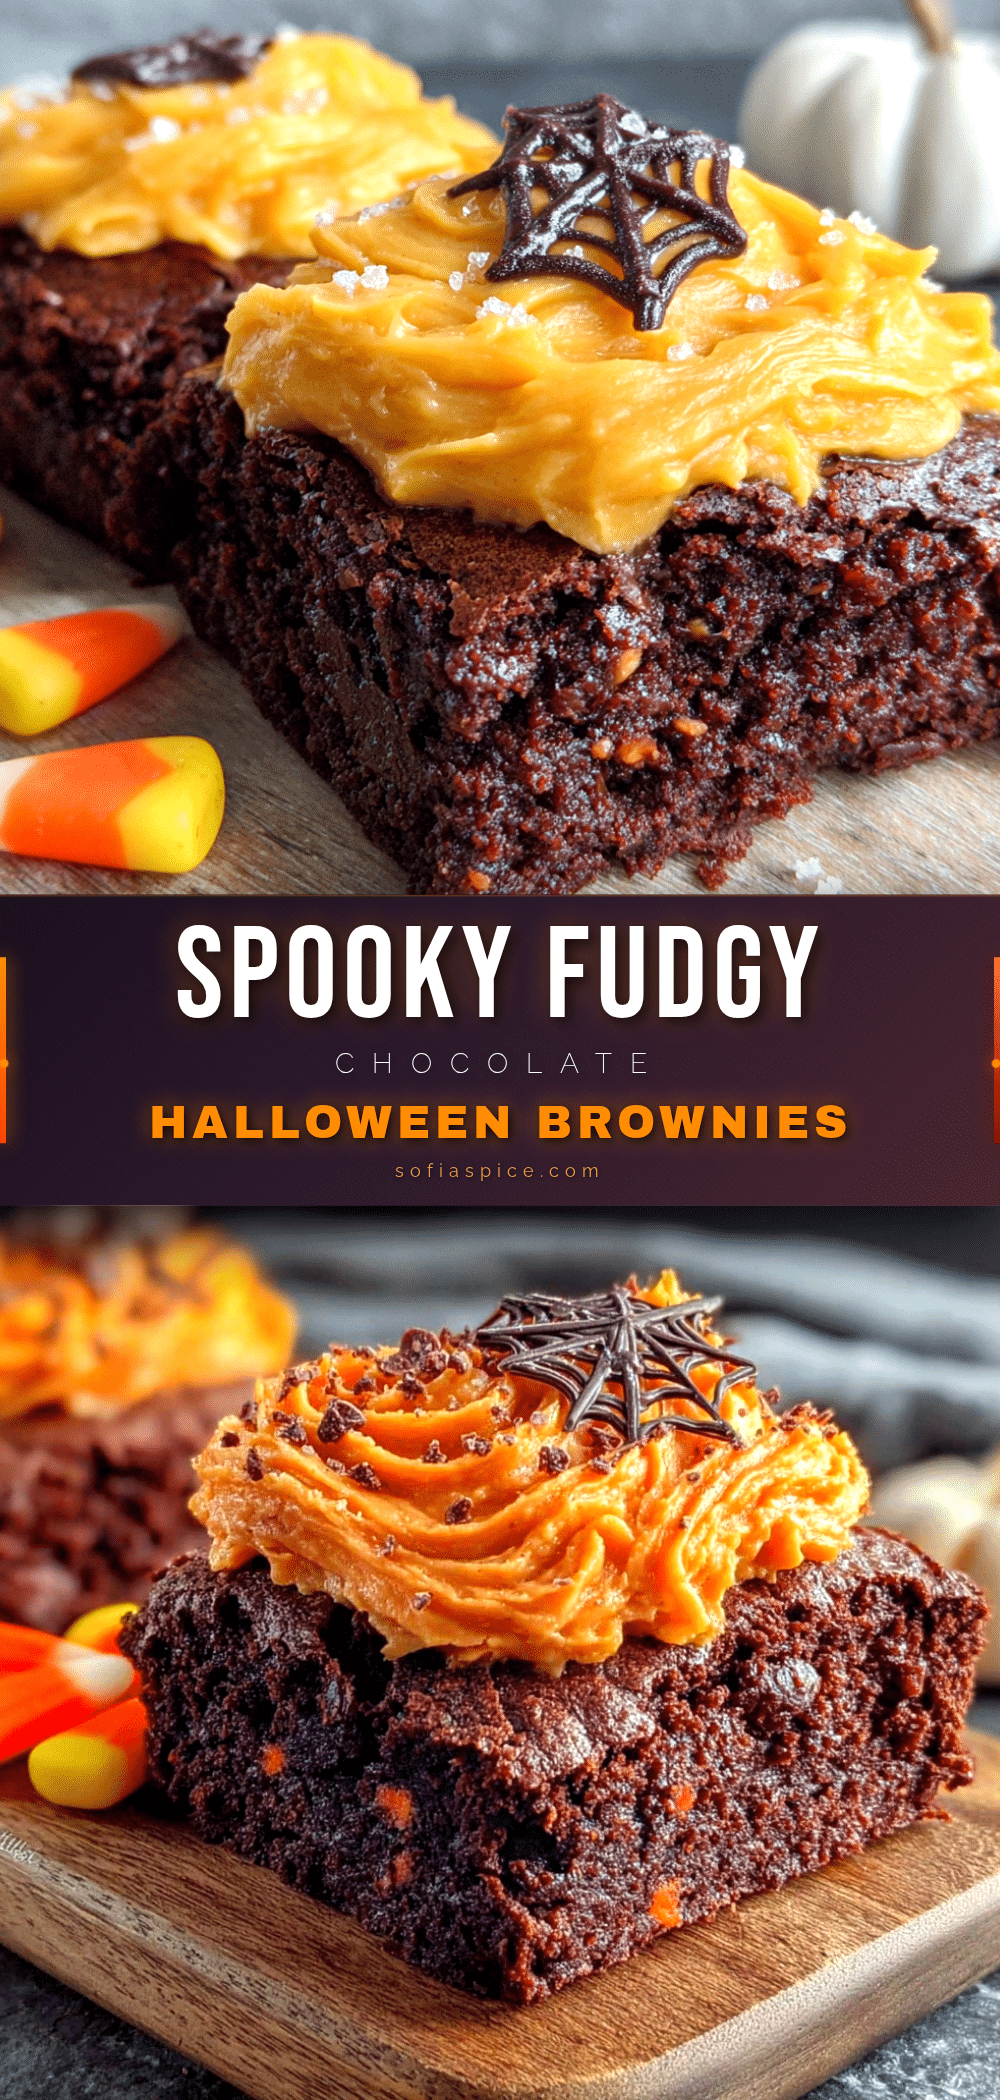
Perfect Chocolate Halloween Brownies: Easy Orange Frosting Recipe
These fudgy, crackly-topped brownies are paired with a bright orange buttercream for a sophisticated Halloween treat. The chocolate-orange combo is a grown-up twist on classic Halloween candy, and the recipe is simple enough for a weeknight baking project.
- Prep Time: 20 minutes
- Cook Time: 30 minutes
- Total Time: 50 minutes
- Yield: 24 servings 1x
- Category: Dessert
- Cuisine: American
Ingredients
- 1 cup (226g) unsalted butter, melted and slightly cooled
- 2 cups (400g) granulated sugar
- 3 large eggs, at room temperature
- 2 teaspoons vanilla extract
- 1 cup (85g) unsweetened cocoa powder (Dutch-process preferred)
- 1 cup (120g) all-purpose flour
- 1 teaspoon salt
- 1/2 teaspoon baking powder
- 1 cup (175g) semi-sweet chocolate chips (optional)
- 1 cup (226g) unsalted butter, softened to room temperature
- 3 cups (360g) powdered sugar, sifted
- 2 tablespoons fresh orange zest (from about 2 medium oranges)
- 2–3 tablespoons fresh orange juice
- 1 teaspoon vanilla extract
- a pinch of salt
- Orange gel food coloring (optional)
- Halloween sprinkles, candy eyes, or small candy spiders (optional)
- Orange and black nonpareils (optional)
Instructions
- Preheat oven to 350°F (175°C). Line a 9×13-inch baking pan with parchment paper, leaving a 2-inch overhang on two opposite sides. Lightly grease the parchment with butter or non-stick spray.
- In a large mixing bowl, whisk together the melted butter and granulated sugar until well combined (like wet sand). Add the eggs one at a time, whisking well after each addition until thick, glossy, and slightly lighter in color (about 2 minutes). Stir in the vanilla extract.
- In a separate small bowl, sift together the cocoa powder, flour, salt, and baking powder. Add the dry ingredients to the wet ingredients and fold with a rubber spatula until just combined (a few streaks of flour are okay). Fold in the chocolate chips if using.
- Pour the batter into the prepared pan and spread evenly. Bake for 25-30 minutes, until a toothpick inserted into the center comes out with a few moist crumbs attached. Cool in the pan on a wire rack for 30 minutes, then lift out using the parchment handles and cool completely on the rack.
- While brownies cool, make the buttercream: In a medium bowl, beat the softened butter with an electric mixer on medium speed until smooth and creamy (about 2 minutes). Add the sifted powdered sugar, one cup at a time, beating on low speed after each addition.
- Add the orange zest, 2 tablespoons of orange juice, vanilla extract, and a pinch of salt. Beat on medium-high speed for 3-4 minutes until light and fluffy. If too thick, add the remaining tablespoon of orange juice; if too thin, add more powdered sugar. Add orange gel food coloring if desired and beat until evenly distributed.
- Once brownies are completely cool, spread the orange buttercream evenly over the top using an offset spatula or butter knife. Add Halloween sprinkles, candy eyes, or other decorations while the buttercream is still soft.
- For clean slices, use a sharp knife and wipe it clean between each cut. Cut into 24 squares (or 16 for larger portions). Serve at room temperature.
Notes
Don’t overbake—pull brownies when toothpick comes out with moist crumbs. Use room temperature eggs to prevent lumpy batter. Sift powdered sugar for smooth buttercream. Zest oranges before juicing. Let brownies cool completely before frosting to prevent melting. For clean slices, refrigerate frosted brownies for 15-20 minutes before cutting. Brownies taste even better the next day.
Nutrition
- Serving Size: 1 brownie (based on
- Calories: 285
- Sugar: 25
- Sodium: 150
- Fat: 16
- Saturated Fat: 10
- Carbohydrates: 35
- Fiber: 2
- Protein: 3
Keywords: Halloween brownies, chocolate orange brownies, fudgy brownies, orange buttercream, Halloween dessert, easy brownie recipe


