Third time this week I’d pulled out the big wooden board, and my husband didn’t even ask anymore. He just watched me arrange apple slices in neat little rows, drizzle caramel in zigzags, and sprinkle flaky salt from way too high up—like I was some kind of pastry artist and not just someone who really, really wanted to eat cold cheese with warm caramel. By the third round, I’d figured out that the honeycrisp held up better than the granny smith if you gave them a quick lemon bath, and that the sharp cheddar needed to be sliced thick, not thin, or it just got lost in the sweetness. The board started as a snack for a football game nobody cared about and turned into the thing I kept thinking about the next morning. That’s how you know a recipe has teeth—when it sticks in your brain long after the board is clean.
I built this Perfect Caramel Apple Charcuterie Board for Fall the way I build most things I love: by accident, then with intention. The first version was just apples and caramel sauce and whatever cheese was in the fridge. The second version had nuts and a drizzle of honey. By the third, I had a full system—salty, sweet, crunchy, creamy, tart, and rich, all on one surface. It’s the kind of board that makes people stop and take a picture before they even sit down, and honestly? I don’t blame them. There’s something about those deep red apples next to golden caramel and pale, crumbly cheese that just screams autumn in a way that feels almost unfair to the other seasons.
This board isn’t fussy, but it looks like you tried really hard. And that’s the sweet spot, isn’t it? The place where effort and ease shake hands and agree to be friends. You can put this together in twenty minutes flat, and it’ll feed a crowd or just two people who really love snacks. It’s the kind of recipe that makes you feel like you’re hosting a party even when you’re just sitting on the couch in sweatpants. And honestly, that’s my favorite kind of fall cooking—the kind that feels like a hug and a celebration all at once.
Why You’ll Love This Recipe
I’ve tested this board more times than I care to admit, and every single time, someone asks for the recipe. That’s not bragging—that’s just what happens when you nail the balance between sweet, salty, crunchy, and creamy. Here’s why this one works:
- Quick & Easy: You can build this entire board in under 20 minutes. No cooking required (except maybe warming the caramel). Perfect for last-minute guests or a Tuesday night treat.
- Simple Ingredients: Apples, cheese, caramel, nuts, and a few extras. That’s it. No weird specialty items or expensive ingredients you’ll never use again.
- Perfect for Fall Gatherings: Game day, Thanksgiving appetizer, pumpkin carving party, or just a cozy night in—this board fits every autumn occasion.
- Crowd-Pleaser: Kids love the sweetness, adults love the cheese and wine pairing, and everyone loves the interactive snacking experience.
- Unbelievably Delicious: The combination of tart apple, rich caramel, salty cheese, and crunchy nuts is the kind of flavor bomb that makes people close their eyes and hum.
What makes this board different from all the other apple charcuterie boards out there? It’s the attention to texture. I don’t just throw ingredients on a board—I layer them with purpose. The caramel goes into a small dish so it doesn’t make everything sticky. The cheese is sliced thick enough to stand up to the apple crunch. The nuts are toasted (always toast your nuts, I’m begging you). And the flaky salt? Non-negotiable. It’s the little details that turn a snack board into a memory.
This board is the kind of thing that makes you feel like you’re doing fall right. You know that feeling when you bite into something and it just tastes like the season? That’s what we’re going for here. It’s comfort food reimagined—faster, more shareable, but with the same soul-soothing satisfaction as a warm apple pie. Perfect for impressing guests without stress, or turning a simple evening into something that feels special.
What Ingredients You Will Need
This recipe uses simple, wholesome ingredients that come together to create something greater than the sum of their parts. Most of these are pantry staples or easy to find at any grocery store, especially during apple season. Here’s what you’ll need:
For the Apples
- 3-4 medium apples (a mix of sweet and tart varieties—Honeycrisp, Granny Smith, Fuji, or Pink Lady all work beautifully)
- 1 tablespoon fresh lemon juice (to prevent browning; mix with 1 cup cold water for a quick bath)
For the Cheese
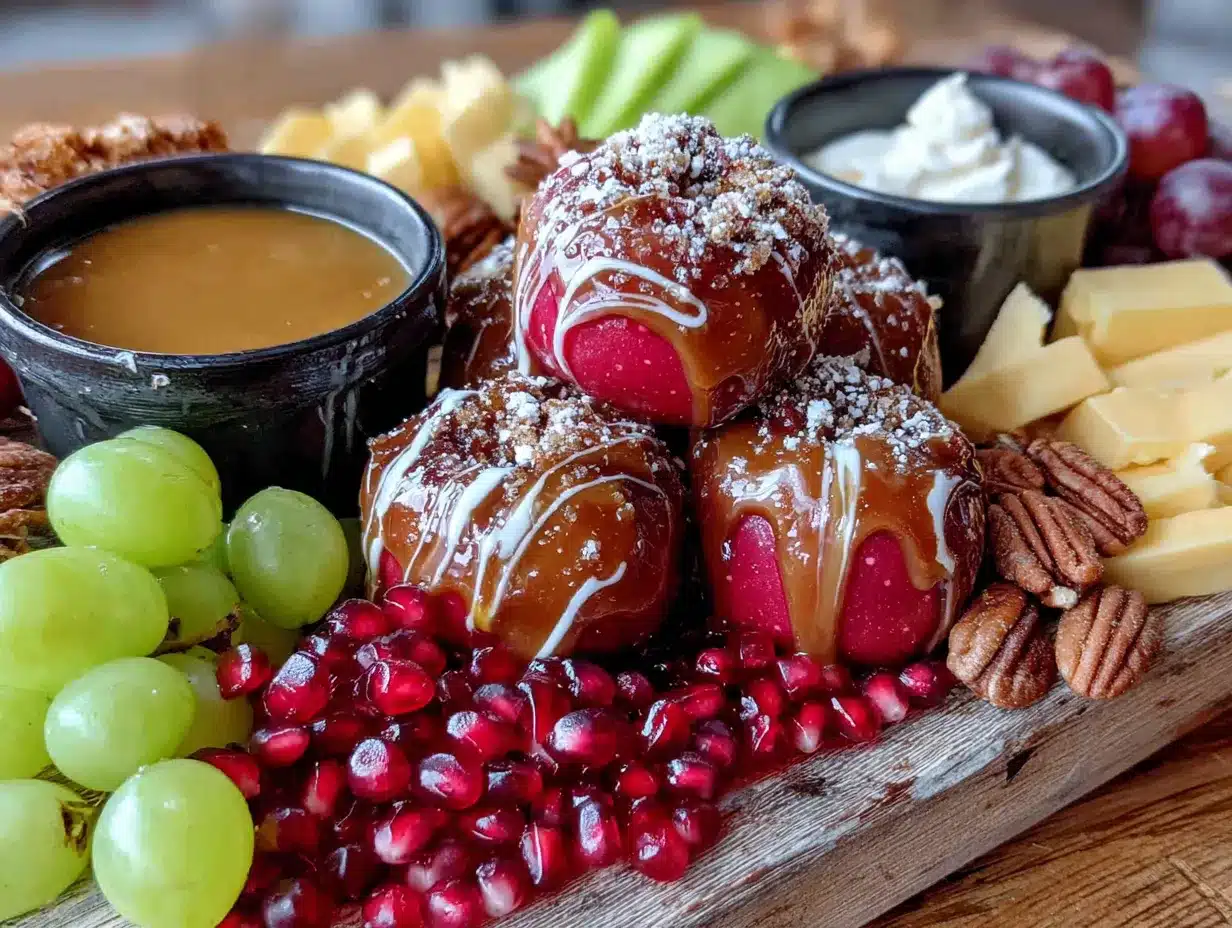
- 4-6 ounces sharp cheddar cheese (I prefer a good aged white cheddar—the sharpness cuts through the sweetness)
- 4-6 ounces brie or camembert (soft and creamy, perfect for spreading on apple slices)
- 2-3 ounces blue cheese or gorgonzola (optional, but the salty funk is incredible with caramel—trust me on this)
For the Caramel
- 1/2 cup high-quality caramel sauce (store-bought is fine—I love the Trader Joe’s fleur de sel caramel or make your own if you’re feeling ambitious)
- 1-2 tablespoons heavy cream (for thinning the caramel if it’s too thick to drizzle)
For the Crunch
- 1/2 cup roasted salted almonds (or pecans, walnuts, or pistachios—whatever you have on hand)
- 1/4 cup candied pecans or walnuts (optional, but adds a lovely sweet crunch—look for them near the bakery section)
- 1/4 cup pumpkin seeds (pepitas) (toasted, for that extra fall vibe)
For the Extras
- 2 tablespoons honey (a drizzle over the brie is absolute magic)
- Flaky sea salt (like Maldon—this is not optional, I’m serious)
- Fresh rosemary or thyme sprigs (for garnish and a little earthy fragrance)
- Dried figs or dates (optional, but they add a chewy sweetness that plays well with everything)
- Crackers or sliced baguette (for scooping up cheese and caramel—choose something sturdy, not too flavored)
Ingredient Tips from My Kitchen
I’ve made this board with every apple variety you can name, and my favorite combo is Honeycrisp and Granny Smith. The Honeycrisp brings the sweet crunch, and the Granny Smith cuts through all that richness with a bright, tart zing. If you can only get one type, go with Honeycrisp—they’re the crowd favorite every time.
For the cheese, don’t skimp. A good aged cheddar makes a huge difference. I look for one that’s been aged at least 12 months—it has those little crunchy crystals that taste like pure umami. And the brie should be soft and ripe, not hard and chalky. Give it a gentle squeeze at the store; it should give just a little, like a firm pillow.
The caramel sauce matters too. I’ve tried the squeeze-bottle stuff and it’s just not the same. Look for a caramel that lists cream and butter near the top of the ingredients. If you’re feeling fancy, you can warm it gently on the stove with a splash of heavy cream and a pinch of salt—it takes two minutes and tastes like you spent hours on it.
Equipment Needed
You don’t need much to build this board, which is part of the beauty. Here’s what you’ll want to have on hand:
- Large wooden cutting board or serving platter (at least 12×16 inches—the more surface area, the better for arranging)
- Small bowls or ramekins (for the caramel sauce, honey, and any dips—I use 4-ounce ramekins)
- Sharp knife (for slicing apples and cheese—a good chef’s knife or paring knife works fine)
- Cutting board (for prep work, separate from your serving board)
- Cheese knife or spreader (optional, but nice for the brie)
- Small saucepan (if you’re warming the caramel or toasting nuts)
- Citrus juicer or reamer (for the lemon juice—or just squeeze it by hand, no judgment)
- Paper towels (for drying apple slices after their lemon bath)
If you don’t have a big wooden board, a large ceramic platter or even a baking sheet lined with parchment paper works perfectly. I’ve used a clean cutting board in a pinch and it looked great. The key is having enough space to spread everything out so it looks abundant and inviting, not crowded and sad.
I found my favorite board at a thrift store for five bucks. It’s got some knife marks and a small crack on one end, but that just adds character. Don’t feel like you need fancy equipment—this is about the food, not the presentation tools.
Preparation Method
Building this board is more about assembly than actual cooking, but there’s a method to the madness. Follow these steps and you’ll have a board that looks like it came from a fancy restaurant, not your kitchen counter.
Step 1: Prep the Apples (5 minutes)
Wash your apples thoroughly and pat them dry. Core them (I use an apple corer, but you can just cut around the core) and slice them into thin wedges—about 8-10 slices per apple, depending on size. The slices should be about 1/4 inch thick, not paper thin. You want them sturdy enough to hold up to dipping and spreading.
Here’s the trick: toss the apple slices in a bowl with 1 tablespoon of lemon juice mixed into 1 cup of cold water. Let them sit for 2-3 minutes, then drain and pat them dry with paper towels. This prevents browning and adds a subtle brightness that balances the sweet caramel. I learned this the hard way after watching a beautiful board turn brown in 20 minutes at a party. Never again.
Step 2: Prep the Cheese (5 minutes)
Take your cheeses out of the fridge about 15 minutes before you start assembling. Cheese is always better at room temperature—the flavors open up and the texture gets creamier. Slice the cheddar into thin triangles or rectangles, about 1/4 inch thick. Leave the brie whole or cut it into wedges if you prefer smaller portions. For the blue cheese, crumble it into small pieces or cut it into thin slices, depending on the type.
Pro tip: use separate knives for different cheeses to avoid flavor mixing. Blue cheese has a strong personality and it will absolutely take over your cheddar if you’re not careful.
Step 3: Warm the Caramel (2 minutes)
If your caramel sauce is thick and cold, pour it into a small saucepan and warm it over low heat for 1-2 minutes, stirring occasionally. Add a tablespoon of heavy cream if you want a thinner, more drizzle-friendly consistency. You’re not trying to boil it—just warm enough to pour easily. Transfer to a small ramekin or bowl for serving.
If you’re using a store-bought caramel that’s already pourable, you can skip this step. But honestly, even the good stuff benefits from a quick warm-up. It smells incredible and makes the whole board feel more intentional.
Step 4: Toast the Nuts (3-5 minutes)
If your nuts aren’t already toasted, heat a dry skillet over medium heat and add your almonds, pecans, or whatever you’re using. Toast for 3-5 minutes, shaking the pan frequently, until they’re fragrant and slightly golden. Watch them carefully—nuts go from perfect to burnt in about 30 seconds. Let them cool completely before adding to the board.
I forgot to toast the nuts the first time I made this board, and honestly, it was still good. But toasting them adds this deep, warm flavor that makes the whole board taste more autumnal. It’s one of those small steps that makes a big difference.
Step 5: Assemble the Board (10 minutes)
Now for the fun part. Start by placing your small bowls or ramekins on the board—caramel sauce, honey, and any other dips. Spread them out so they create natural anchors for the rest of the arrangement.
Next, arrange the cheese. Place the brie in one section, the cheddar slices in another, and the blue cheese in a third. Group them so they’re easy to reach but not touching—this keeps the flavors distinct and looks more intentional.
Add the apple slices in small clusters or fan them out in rows. I like to group them by variety so people can choose their favorite. Place them near the caramel bowl so the connection is obvious.
Fill in the gaps with nuts, pumpkin seeds, dried figs or dates, and crackers. Sprinkle the flaky sea salt over the caramel and the apple slices—just a light dusting, not a heavy hand. Tuck in sprigs of fresh rosemary or thyme for color and fragrance.
Step 6: Final Touches (2 minutes)
Step back and look at your board. Are there any empty spots? Fill them with extra nuts, a few more crackers, or a small pile of dried fruit. The goal is abundance—you want it to look generous and full, not sparse and calculated. Drizzle a little honey over the brie and sprinkle another pinch of flaky salt over everything for that final pop of flavor.
Serve immediately, or let it sit at room temperature for up to an hour (the cheese will only get better). Provide small plates, napkins, and plenty of little knives for spreading. Watch everyone gather around and disappear into apple-caramel-cheese heaven.
Cooking Tips & Techniques
I’ve made this board probably a dozen times now, and I’ve learned a few things the hard way so you don’t have to. Here’s what I wish someone had told me:
The Apple Situation
Don’t slice your apples too far in advance. Even with the lemon bath, they’ll start to lose their crispness after a couple of hours. If you’re prepping for a party, slice them no more than 2 hours ahead and keep them in the fridge in the lemon water until you’re ready to assemble. Pat them really dry before adding to the board—wet apples make everything slippery and sad.
The Cheese Temperature Thing
I cannot stress this enough: let your cheese come to room temperature. Cold cheese is flavorless cheese. Pull it out of the fridge at least 30 minutes before serving, preferably 45. If you forget, you can microwave the brie for 10-15 seconds on low power—just enough to take the chill off, not melt it. I’ve done this in a panic and it worked perfectly.
The Caramel Consistency
If your caramel is too thick, it won’t drizzle nicely and people will struggle to dip their apples. Too thin, and it runs everywhere and makes a mess. Aim for a consistency similar to warm honey—thick enough to coat a spoon, thin enough to pour. If you accidentally thin it too much, just simmer it for a minute or two to reduce it back down.
The Salt Balance
Flaky salt is not just for looks. It cuts through the sweetness of the caramel and the richness of the cheese in a way that makes every bite more interesting. But go easy—you can always add more, but you can’t take it away. I usually do one light pass over the whole board, then taste a piece of apple with caramel and add more if needed.
Multitasking Strategy
This board comes together fastest if you do things in parallel. While the nuts are toasting, slice the apples and give them their lemon bath. While the caramel is warming, slice the cheese. While everything cools and sets, arrange the board. You can have the whole thing done in 15 minutes flat if you’re efficient.
Variations & Adaptations
One of the best things about this board is how flexible it is. Here are some ways to make it your own:
Dietary Variations
- Vegan: Use dairy-free caramel sauce (coconut-based works great), vegan brie or cashew cheese, and skip the honey (use maple syrup instead). The nuts and fruit will carry the board beautifully.
- Gluten-Free: Most of this board is naturally gluten-free. Just swap the crackers for gluten-free crackers or sliced cucumber rounds. Check your caramel sauce label—some brands use wheat-based thickeners.
- Nut-Free: Skip the almonds and pecans, and use roasted pumpkin seeds, sunflower seeds, or even crispy chickpeas for crunch. The texture will be different but still delicious.
Seasonal Twists
- Late Summer: Swap apples for sliced pears and figs. Use a honeycomb instead of caramel sauce for a lighter, less sweet board.
- Winter Holiday: Add pomegranate seeds, candied orange peel, and a sprinkle of cinnamon. Use a spiced caramel sauce with a pinch of nutmeg and cloves.
- Spring: Use strawberries and rhubarb compote instead of apples and caramel. Add fresh mint and edible flowers for a bright, fresh look.
Flavor Customizations
- Spicy: Add a drizzle of hot honey over the brie and sprinkle the apples with a tiny pinch of cayenne pepper. The heat plays surprisingly well with the sweet caramel.
- Herby: Swap the rosemary for fresh thyme or sage. I once added fried sage leaves as a garnish and it was incredible—crispy, earthy, and perfect with the cheddar.
- Chocolate Lover: Add dark chocolate shavings, chocolate-covered almonds, or a small bowl of chocolate sauce alongside the caramel. Because why not?
Serving & Storage Suggestions
This board is best enjoyed at room temperature, so let it sit out for about 15-20 minutes after assembling before diving in. Serve it with small plates, napkins, and a few small knives for spreading the brie and blue cheese. I like to put out little cocktail forks for the apple slices, but fingers work just fine too.
For drinks, this board pairs beautifully with a crisp hard cider, a dry riesling, or a light pinot noir. If you’re keeping it non-alcoholic, a sparkling apple cider or a hot cup of chai tea is perfect. I also love serving it alongside a warm bowl of creamy roasted butternut squash soup for a full fall meal that feels both cozy and impressive.
If you have leftovers (unlikely, but possible), here’s how to store them:
- Apples: Store in an airtight container in the fridge for up to 2 days. They’ll brown a bit, but they’re still fine for snacking or baking.
- Cheese: Wrap tightly in wax paper or cheese paper and store in the fridge. Hard cheese keeps for up to a week; soft cheese is best within 3-4 days.
- Caramel: Store in a sealed jar in the fridge for up to 2 weeks. Warm gently before using again.
- Nuts: Keep in an airtight container at room temperature for up to a week, or in the freezer for months.
One thing I’ve noticed: the flavors actually get better after a few hours. The caramel soaks into the apple slices just a little, and the cheese softens and becomes more spreadable. If you’re making this for a party, you can assemble the whole board up to 2 hours ahead and just keep it covered with plastic wrap in a cool spot (not the fridge—cold kills the cheese flavor).
Nutritional Information & Benefits
This board is more of a shared experience than a measured meal, but here’s a rough estimate per serving (about 1/6 of the board):
- Calories: Approximately 380-450 calories
- Protein: 12-15 grams
- Fat: 22-28 grams
- Carbohydrates: 35-42 grams
- Fiber: 5-7 grams
- Sugar: 22-28 grams
The apples are the real star here nutritionally—they’re packed with fiber, vitamin C, and antioxidants called flavonoids that support heart health. The cheese provides calcium and protein, and the nuts offer healthy fats, vitamin E, and magnesium. Even the caramel, in moderation, gives you a little quick energy and a lot of happiness.
If you’re watching your sugar intake, you can use a sugar-free caramel sauce or just rely on the natural sweetness of the apples and honey. The nuts and cheese will help balance blood sugar by adding protein and fat to the mix. This board is naturally gluten-free (depending on your crackers) and can be made vegetarian or vegan with the substitutions mentioned above.
FAQs
Can I make this board ahead of time?
Yes! You can prep all the components up to 2 hours in advance. Slice the apples and toss them in lemon water, slice the cheese and let it come to room temperature, toast the nuts, and warm the caramel. Assemble the board just before serving for the best presentation. If you’re really short on time, you can assemble the whole thing and cover it loosely with plastic wrap, but don’t refrigerate it—cold cheese loses its flavor and the apples might get soggy.
What are the best apples for a charcuterie board?
I recommend a mix of sweet and tart varieties. Honeycrisp and Fuji are sweet and stay crunchy for hours. Granny Smith and Braeburn bring that bright, tart contrast that cuts through the rich cheese and caramel. Pink Lady apples are a great all-around choice if you can only pick one. Avoid mealy apples like Red Delicious—they get soft and unappealing quickly.
How do I keep apples from turning brown?
The lemon water bath is your best friend. Mix 1 tablespoon of lemon juice with 1 cup of cold water, toss your apple slices in it for 2-3 minutes, then pat them dry. You can also use a commercial product like Fruit-Fresh, but lemon juice works perfectly and adds a nice brightness. If you’re serving the board over several hours, just refresh the apple slices halfway through with a fresh batch.
Can I use store-bought caramel sauce?
Absolutely. I use store-bought caramel all the time, and nobody has ever complained. Look for a high-quality brand that lists cream, butter, and sugar as the main ingredients—not corn syrup and artificial flavors. Trader Joe’s fleur de sel caramel, Stonewall Kitchen, or even a good jarred dulce de leche all work beautifully. Warm it up with a splash of heavy cream and a pinch of salt, and it’ll taste homemade.
What if I don’t have a wooden board?
No problem at all. Use a large ceramic platter, a marble slab, a clean cutting board, or even a baking sheet lined with parchment paper or a pretty napkin. The key is having enough surface area to spread everything out. I’ve used a large white platter from IKEA and it looked beautiful. Don’t let the lack of a fancy board stop you—the food is what matters.
Conclusion
This Perfect Caramel Apple Charcuterie Board for Fall is the kind of recipe that makes you look like a hostess genius without actually having to work that hard. It’s beautiful, it’s delicious, and it captures everything we love about autumn in one shareable, snackable format. The combination of crisp apples, rich caramel, creamy cheese, and crunchy nuts is basically fall on a plate—and honestly, it doesn’t get much better than that.
I love this board because it brings people together. There’s something about a shared board that makes conversation flow easier and laughter come more freely. Everyone gathers around, reaches for the same apple slice, argues over the last piece of brie, and leaves with sticky fingers and a full heart. That’s the kind of cooking I believe in—the kind that feeds more than just your stomach.
If you’re looking for another cozy fall treat to round out your spread, these pumpkin chocolate chip cookies are the perfect sweet ending. And if you’re planning a full fall gathering, this creamy mashed potato casserole is always a hit alongside the board.
I’d love to hear how your board turns out. Did you add something unexpected? Swap out a cheese? Drizzle it with hot honey? Drop a comment below and tell me about it—I read every single one, and I’m always looking for new ideas to try. And if you’re sharing your board on social media, tag me so I can see your beautiful creation. Now go build yourself a board, grab a glass of cider, and enjoy the season. You’ve earned it.
Pin This Recipe!
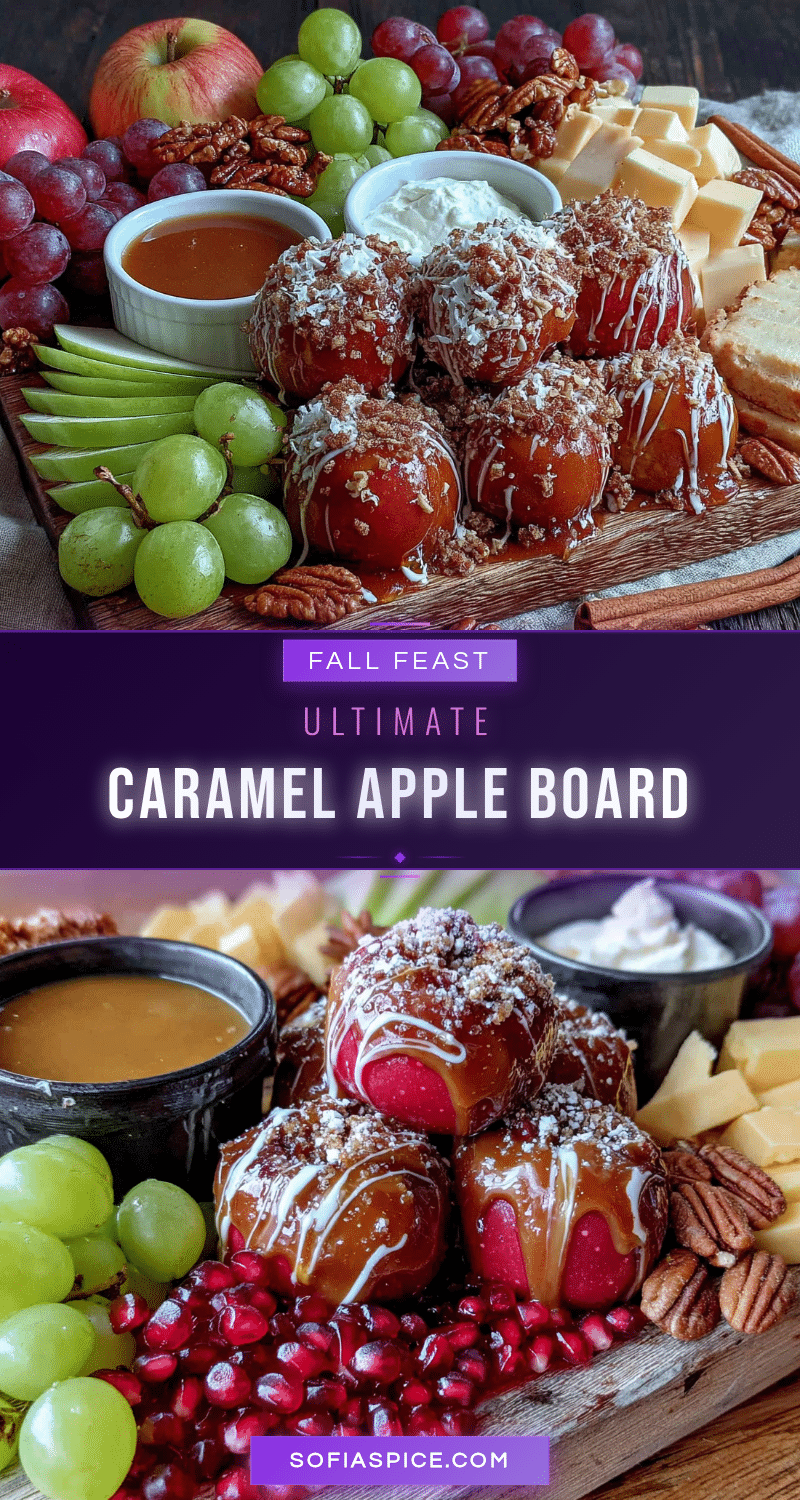
Perfect Caramel Apple Charcuterie Board Fall Easy

A stunning and easy-to-assemble fall charcuterie board featuring crisp apples, rich caramel sauce, creamy cheeses, crunchy nuts, and a touch of flaky salt. Perfect for gatherings or a cozy night in, this board balances sweet, salty, and savory flavors in under 20 minutes.
- Prep Time: 15 minutes
- Cook Time: 5 minutes
- Total Time: 20 minutes
- Yield: 6 servings 1x
- Category: Appetizer
- Cuisine: American
Ingredients
- 3–4 medium apples (Honeycrisp, Granny Smith, Fuji, or Pink Lady)
- 1 tablespoon fresh lemon juice (mixed with 1 cup cold water)
- 4–6 ounces sharp cheddar cheese (aged white cheddar recommended)
- 4–6 ounces brie or camembert cheese
- 2–3 ounces blue cheese or gorgonzola (optional)
- 1/2 cup high-quality caramel sauce
- 1–2 tablespoons heavy cream (for thinning caramel)
- 1/2 cup roasted salted almonds (or pecans, walnuts, pistachios)
- 1/4 cup candied pecans or walnuts (optional)
- 1/4 cup pumpkin seeds (pepitas), toasted
- 2 tablespoons honey
- Flaky sea salt (e.g., Maldon)
- Fresh rosemary or thyme sprigs (for garnish)
- Dried figs or dates (optional)
- Crackers or sliced baguette (for serving)
Instructions
- Prep the apples: Wash, core, and slice apples into thin wedges (about 1/4 inch thick). Toss in a bowl with lemon juice and cold water for 2-3 minutes. Drain and pat dry with paper towels.
- Prep the cheese: Remove cheeses from fridge 15 minutes before serving. Slice cheddar into thin triangles or rectangles. Leave brie whole or cut into wedges. Crumble or slice blue cheese.
- Warm the caramel: If thick, warm caramel sauce in a small saucepan over low heat for 1-2 minutes, stirring occasionally. Add heavy cream if needed for a thinner consistency. Transfer to a small ramekin.
- Toast the nuts: Heat a dry skillet over medium heat. Add nuts and toast for 3-5 minutes, shaking frequently, until fragrant and slightly golden. Let cool completely.
- Assemble the board: Place small bowls of caramel, honey, and any dips on a large wooden board or platter. Arrange cheeses in separate sections. Add apple slices in clusters near the caramel. Fill gaps with nuts, pumpkin seeds, dried fruit, and crackers. Sprinkle flaky sea salt over caramel and apples. Garnish with fresh rosemary or thyme sprigs.
- Final touches: Drizzle honey over brie. Add another pinch of flaky salt if desired. Serve immediately or let sit at room temperature for up to an hour.
Notes
For best results, let cheese come to room temperature before serving. Slice apples no more than 2 hours ahead and keep in lemon water in the fridge. Toast nuts just before assembling for maximum flavor. Flaky sea salt is non-negotiable—it balances the sweetness. The board can be assembled up to 2 hours ahead and kept covered at room temperature (do not refrigerate).
Nutrition
- Serving Size: 1/6 of board
- Calories: 415
- Sugar: 25
- Sodium: 480
- Fat: 25
- Saturated Fat: 12
- Carbohydrates: 38
- Fiber: 6
- Protein: 13
Keywords: caramel apple charcuterie board, fall appetizer, easy charcuterie board, apple cheese board, fall entertaining, no-cook appetizer


