My older brother, Mark, had claimed for years that he hated popcorn balls. For a solid decade, every Halloween, he’d turn up his nose at the sticky, crumbly things that showed up on dessert tables. “Too messy,” he’d say. “They always fall apart.” And honestly, he had a point—the ones from the store were always dry and sad. Then, last October, I was testing this version “just for my kids” on a random Tuesday night. I was standing at the counter, trying to get the marshmallow mixture just right, when I heard a crunch behind me. I turned around, and there was Mark, mid-bite, with a guilty look on his face. He had candy eyeball goo on his finger. “These are… different,” he mumbled, reaching for another one. That was the moment I knew I had cracked the code. It was a quiet victory, you know? I didn’t say a word. I just smiled and handed him the wax paper.
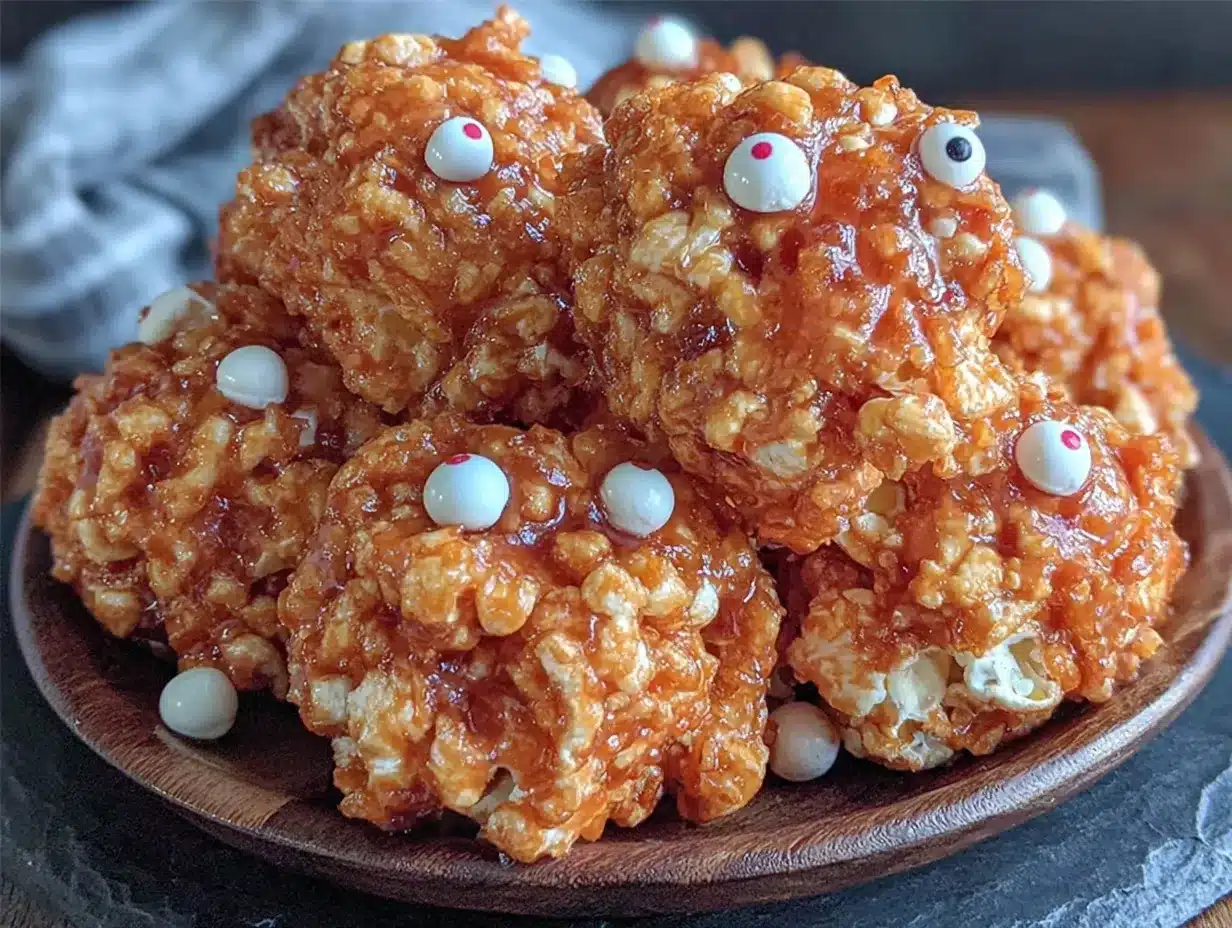
This isn’t just a recipe; it’s a total crowd-pleaser that finally turned a skeptic into a fan. These Halloween popcorn balls are the perfect blend of sweet, salty, and crunchy, with a creepy-cute factor that kids and adults absolutely love. They are surprisingly simple to put together, which is a lifesaver when you are hosting a party. I mean, let’s be honest, the last thing you want to do on Halloween is spend hours in the kitchen. You want something impressive that looks like you tried way harder than you actually did. These little guys fit the bill perfectly.
The secret is getting that perfect sticky-but-not-too-sticky texture. It took me a few batches—and a few sticky messes on the stove—to figure it out. The trick is using fresh marshmallows and watching the heat carefully. Once you get it right, you are golden. The candy eyeballs peeking out from the popcorn are just the best. They give the whole thing a playful, slightly spooky vibe that is perfect for a Halloween bash. So, if you have a popcorn ball hater in your life, or if you just want a fun, no-fuss treat for your next gathering, you have come to the right place. Let me show you how to make these.
Why You’ll Love This Recipe
I’ve tested this recipe about six times now—much to my neighbors’ delight—and I can tell you with confidence that this is the version that works. It is the one that doesn’t crumble, doesn’t get rock hard, and actually tastes like a treat you’d want to eat, not just look at. Here is why it stands out:
- Quick & Easy: From start to finish, you are looking at about 20 minutes of active work. Perfect for a busy Halloween weeknight or a last-minute party prep session.
- Simple Ingredients: You probably have most of this in your pantry right now. No weird specialty items—just popcorn, marshmallows, butter, and some candy eyes.
- Perfect for Parties: These are the ultimate grab-and-go treat. They are not messy, they are portable, and they look fantastic on a dessert table. Your guests will think you spent all day on them.
- Crowd-Pleaser: I’ve seen kids fight over the one with the most eyeballs, and adults sneak them into their pockets for later. They are universally loved.
- Unbelievably Delicious: The combination of salty popcorn, sweet marshmallow, and the little burst of sugar from the candy eyes is just next-level comfort food. It hits that nostalgic spot perfectly.
What makes this recipe different from the rest is the technique. Most recipes have you melt the butter and marshmallows together and hope for the best. I add a pinch of salt to balance the sweetness and use a specific low-and-slow melting method to prevent the sugar from seizing. This gives you a chewy, pliable ball that holds its shape without turning into a jawbreaker. It is comfort food reimagined—faster, easier, and with the same soul-soothing satisfaction. Honestly, it is the kind of treat that makes you close your eyes after the first bite.
What Ingredients You Will Need
This recipe uses simple, wholesome ingredients to deliver big flavor without the fuss. The magic is in the ratio of sticky to crunchy. Here is what you need to grab:
- 12 cups popped popcorn (about 1/2 cup unpopped kernels) — I prefer to pop my own on the stove for the best texture, but a bag of plain, unsalted microwave popcorn works in a pinch. Just make sure to pick out any unpopped kernels.
- 1/2 cup unsalted butter (1 stick) — Adds richness and helps the marshmallows stay soft. I use Land O’Lakes, but any brand is fine. You can use salted butter, just reduce the added salt to a pinch.
- 10 ounces mini marshmallows (about 5 1/2 cups) — Fresh marshmallows are key here. If they are stale, your mixture will be grainy. Jet-Puffed is my go-to brand for consistency.
- 1/4 teaspoon kosher salt — This is the secret ingredient. It cuts the sweetness and makes the flavors pop. Do not skip it.
- 1/2 teaspoon vanilla extract (optional) — Adds a warm, bakery-like flavor. It’s not strictly necessary, but it makes them taste more “homemade.”
- 1/2 cup candy eyeballs — The star of the show! I use the Wilton brand candy eyeballs you find in the baking aisle. They come in different sizes, which is fun. You can also use M&Ms, Reese’s Pieces, or any small candy you like.
- Non-stick cooking spray — You’ll need this for your hands and the bowl. Trust me on this one.
Ingredient Tips: For the popcorn, I recommend using a neutral oil if you are popping on the stove. Coconut oil adds a nice subtle flavor. If you are a fan of extra salt, you can sprinkle a little flaky sea salt on top right after you shape the balls. It gives them a fancy, salty-sweet finish. For a dairy-free version, use a plant-based butter like Miyoko’s. The texture will be slightly different, but still delicious.
Equipment Needed
You don’t need a lot of fancy gear for this recipe, which is part of its charm. Here is what you will need:
- Large pot (6-quart or larger) — For melting the marshmallow mixture. A Dutch oven works perfectly.
- Large mixing bowl — To hold the popped popcorn.
- Silicone spatula or wooden spoon — For stirring the hot marshmallow. A silicone spatula is great because it doesn’t stick.
- Wax paper or parchment paper — For shaping and cooling the popcorn balls. It is non-negotiable.
- Measuring cups and spoons — For accuracy.
- Candy thermometer (optional) — If you want to be super precise about the marshmallow temperature. I don’t usually use one, but it can help.
Personal note: I have a cheap silicone spatula that I use just for candy making. It has survived many a sticky situation and is worth its weight in gold. If you don’t have one, a wooden spoon works, but expect a little more cleanup. Also, a heavy-bottomed pot is better than a thin one—it distributes the heat more evenly and prevents the sugar from burning.
Preparation Method
Alright, let’s get to the fun part. This method is straightforward, but there are a few little tricks that make all the difference. Follow these steps, and you will be a hero at your Halloween party.
- Prep your popcorn (5 minutes): Pop your popcorn however you like. I use 1/2 cup of kernels in a bit of oil on the stove. Shake the pot constantly to prevent burning. Once the popping slows down, take it off the heat. Pour the popcorn into your large mixing bowl. Pick out any unpopped kernels—they are a dental hazard. Set the bowl aside.
- Melt the butter (2 minutes): In your large pot, melt the 1/2 cup of butter over medium-low heat. Do not rush this. You want it melted but not bubbling or browning. If it browns, it will change the flavor. Swirl the pot to help it melt evenly.
- Add the marshmallows (5 minutes): Pour the 10 ounces of mini marshmallows into the melted butter. Stir constantly with your silicone spatula. Keep the heat on low. The marshmallows will puff up and then slowly melt down. Be patient. It takes about 5 minutes. You are looking for a smooth, glossy, completely melted mixture. No lumps allowed.
- Season the mixture (1 minute): Once the marshmallows are smooth, take the pot off the heat. Immediately stir in the 1/4 teaspoon of kosher salt and the 1/2 teaspoon of vanilla extract (if using). Stir until everything is combined. The salt will dissolve into the hot mixture.
- Combine with popcorn (2 minutes): Pour the hot marshmallow mixture over the popcorn in the bowl. Use your spatula to gently fold it together. Work from the bottom up. You want every kernel to get a little bit of the sticky coating. It will look stringy at first—that’s normal. Keep folding until it is evenly distributed.
- Add the candy eyeballs (1 minute): Sprinkle in 1/2 cup of candy eyeballs. Fold them in gently. You don’t want them all to sink to the bottom. Try to distribute them as evenly as possible. Reserve a few to press onto the outside of the balls later.
- Shape the balls (10 minutes): This is the crucial part. Spray your hands generously with non-stick cooking spray. While the mixture is still warm (but not burning hot), grab a handful and gently squeeze it into a ball shape. It should be about the size of a tennis ball. Don’t squeeze too hard, or you will get dense, hard balls. You want them to be light and airy. Place each ball on a sheet of wax paper. Repeat until you have used all the mixture. You should get about 12-14 balls.
- Decorate and set (15 minutes): While the balls are still slightly tacky, press a few extra candy eyeballs onto the surface for a fun, spooky look. Let them cool completely on the wax paper. They will set up in about 15 minutes. Do not put them in the fridge—the condensation will make them sticky.
Pro Tip: If the mixture starts to get too stiff while you are shaping, just pop it in the microwave for 10 seconds to soften it up. It happens to the best of us. Also, if your hands get too sticky, just reapply the cooking spray. I keep a little bowl of water nearby to wet my hands slightly—it helps prevent sticking too.
Cooking Tips & Techniques
I’ve made a lot of mistakes with popcorn balls over the years, so you don’t have to. Here are the lessons I learned the hard way:
- Low and slow is the rule: The biggest mistake is melting the marshmallows over high heat. It will scorch the sugar and give you a grainy, burnt mess. Keep the heat on low and stir constantly. Your patience will be rewarded.
- Don’t overmix the popcorn: Once you add the marshmallow to the popcorn, fold it gently. If you stir it too aggressively, you will crush the popcorn and end up with a dense, chewy brick. You want those airy pockets of crunch.
- Work quickly but carefully: The marshmallow mixture sets up fast. Have your wax paper ready and your hands sprayed before you start shaping. You want to work while the mixture is still pliable.
- Use fresh marshmallows: This is non-negotiable. Stale marshmallows don’t melt smoothly. Check the date on the bag before you start. If they are hard, they won’t work.
- Timing is everything: I like to pop my popcorn first, then melt the butter and marshmallows. That way, the popcorn is ready to go when the sticky mixture is hot. If you let the popcorn sit too long, it gets stale and chewy.
My biggest failure: The first time I made these, I used salted butter and added the extra salt anyway. They were inedibly salty. I had to throw out the whole batch. Now, I always taste the marshmallow mixture before adding it to the popcorn. A little taste test goes a long way.
Variations & Adaptations
One of the best things about this recipe is how easy it is to tweak. Here are some of my favorite variations:
- Chocolate Drizzle: After the balls have set, melt some chocolate chips and drizzle it over the top. It adds a beautiful, decadent touch. Dark chocolate is great for balancing the sweetness.
- Spooky Spider Version: Instead of just eyeballs, use black licorice strings to make spider legs sticking out of the popcorn balls. It is a huge hit with the kids.
- Peanut Butter Twist: Add 1/4 cup of peanut butter to the marshmallow mixture while it is melting. Stir until smooth. It gives the balls a rich, nutty flavor. Just be sure to check for allergies if you are serving a crowd.
- Gluten-Free Option: This recipe is naturally gluten-free if you use plain popcorn. Just double-check your marshmallow and candy labels to be safe. Most are, but it is always good to verify.
- Fall Spice Version: Add 1/2 teaspoon of pumpkin pie spice to the marshmallow mixture. It gives the balls a warm, autumnal flavor that is perfect for a Halloween party.
My personal favorite: I love adding a handful of salted pretzel pieces along with the candy eyeballs. The salty crunch is just incredible. It makes the treat feel more like a snack than just a dessert.
Serving & Storage Suggestions
These popcorn balls are best served the day you make them, but they do keep well for a few days if stored properly.
- Serving: Arrange them on a large platter or cake stand. They look fantastic on a black tablecloth with some fake spider webs around them. Serve them at room temperature. They are perfect for a Halloween party, a school treat, or a movie night.
- Storage: Store any leftover balls in an airtight container at room temperature. Do not refrigerate them—the moisture will make them sticky and soft. They will stay fresh for up to 3 days. If you stack them, place a piece of wax paper between the layers.
- Freezing: You can freeze these! Wrap each ball individually in plastic wrap, then place them in a freezer-safe bag. They will keep for up to 2 months. Thaw them at room temperature for about 30 minutes before serving.
- Flavor development: Honestly, they are best on day one. The popcorn is at its crunchiest. After a day or two, the popcorn starts to soften slightly from the marshmallow moisture. They are still delicious, just a little chewier.
Nutritional Information & Benefits
Let’s be real—these are a treat, not a health food. But here is the breakdown if you are curious:
- Estimated per serving (1 ball): Calories: 220, Fat: 10g, Carbs: 32g, Protein: 2g, Sugar: 18g.
- Health highlights: Popcorn is a whole grain, so you are getting a little bit of fiber. The butter provides some fat-soluble vitamins. The candy eyeballs? Well, they make you happy, and that counts for something.
- Dietary considerations: This recipe is naturally gluten-free and nut-free (depending on your candy choice). It is not low-carb or sugar-free, but it is a fun, occasional indulgence.
- Allergens: Contains dairy (butter). Check your marshmallow and candy labels for potential soy or corn allergens.
I like to serve these as a special treat, not an everyday snack. They are perfect for celebrating a holiday or a special occasion. Everything in moderation, right?
Conclusion
These Halloween popcorn balls with candy eyeballs are more than just a cute treat—they are a crowd-pleasing, conversation-starting hit that is surprisingly easy to make. They have that perfect balance of sweet, salty, and crunchy, with a fun, spooky look that everyone loves. I’ve made them for parties, for my kids’ school events, and even just for a quiet night in, and they never last long.
I encourage you to make them your own. Add a drizzle of chocolate, throw in some pretzels, or use different colored candy eyes. The possibilities are endless. And honestly, the mess is worth it when you see the smiles on people’s faces. I love this recipe because it brings people together. It is simple, joyful, and delicious.
I would love to hear how yours turn out! Leave a comment below and tell me about your favorite variation. Did you add peanut butter? Did you make them extra spooky? Share a photo and tag me on social media. Let’s make this Halloween the tastiest one yet!
Frequently Asked Questions
Why are my popcorn balls falling apart?
This usually happens if the marshmallow mixture isn’t hot enough when you combine it with the popcorn, or if you didn’t use enough marshmallow. Make sure your mixture is fully melted and smooth before adding it to the popcorn. Also, let the balls set for at least 15 minutes before you move them.
Can I use microwave popcorn?
Yes, you can! Just use a bag of plain, unsalted microwave popcorn. Avoid the butter-flavored varieties, as they can make the balls greasy. Pop it, let it cool slightly, and pick out any unpopped kernels.
How do I keep the mixture from sticking to my hands?
Spray your hands generously with non-stick cooking spray before you start shaping. You can also slightly wet your hands with water. The key is to work quickly before the mixture cools and gets stickier.
Can I make these ahead of time for a party?
Absolutely! You can make them up to 2 days in advance. Store them in an airtight container at room temperature. Do not refrigerate them. They are best if you make them the day before your party.
My popcorn balls turned out rock hard. What did I do wrong?
This is usually from overcooking the marshmallow mixture. You melted it too long or at too high a heat. Next time, take the pot off the heat as soon as the marshmallows are smooth. Also, make sure you are not squeezing the popcorn too hard when shaping the balls—gentle hands make for soft, airy treats.
Pin This Recipe!
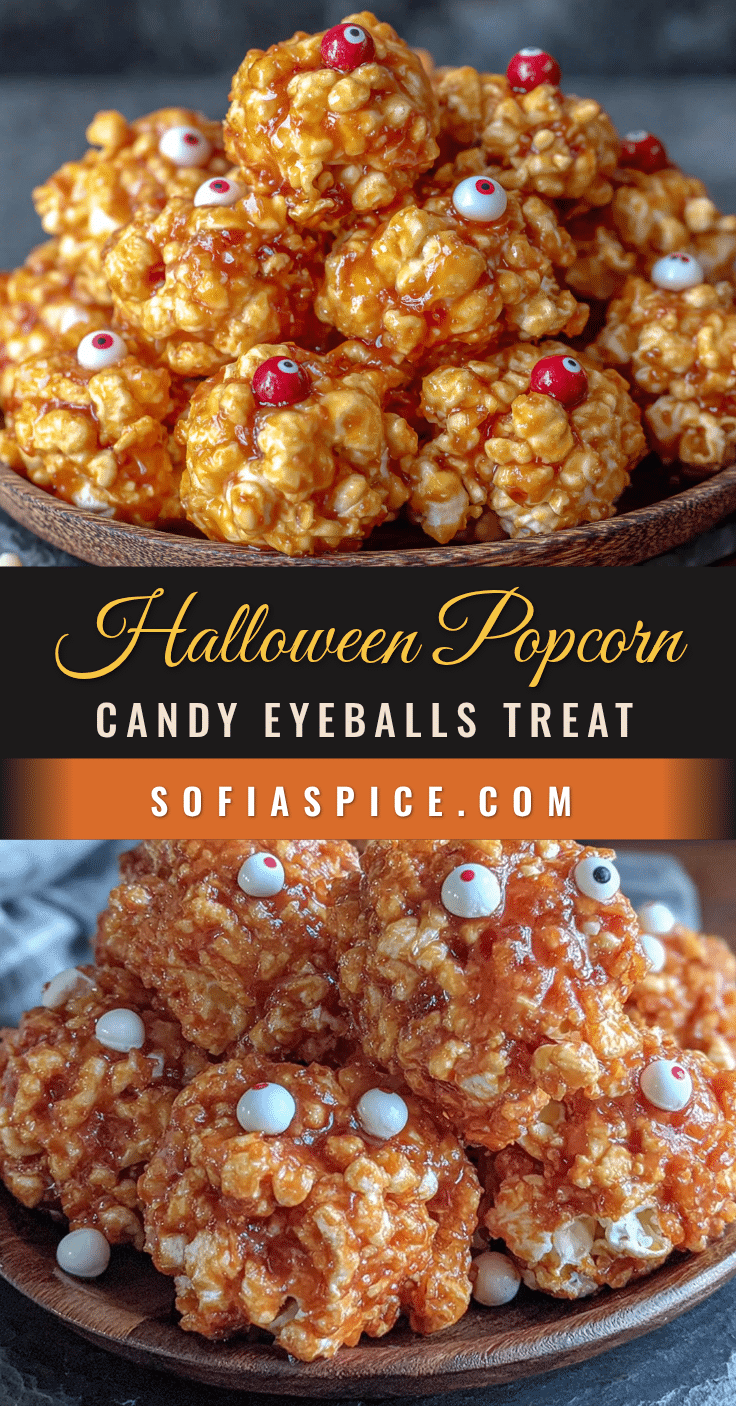
Halloween Popcorn Balls: Easy Candy Eyeball Treats

These Halloween popcorn balls are the perfect blend of sweet, salty, and crunchy, with a creepy-cute factor that kids and adults absolutely love. They are surprisingly simple to put together, making them a lifesaver when hosting a party.
- Prep Time: 20 minutes
- Cook Time: 15 minutes
- Total Time: 35 minutes
- Yield: 12-14 servings 1x
- Category: Dessert
- Cuisine: American
Ingredients
- 12 cups popped popcorn (about 1/2 cup unpopped kernels)
- 1/2 cup unsalted butter (1 stick)
- 10 ounces mini marshmallows (about 5 1/2 cups)
- 1/4 teaspoon kosher salt
- 1/2 teaspoon vanilla extract (optional)
- 1/2 cup candy eyeballs
- Non-stick cooking spray
Instructions
- Prep your popcorn (5 minutes): Pop your popcorn however you like. I use 1/2 cup of kernels in a bit of oil on the stove. Shake the pot constantly to prevent burning. Once the popping slows down, take it off the heat. Pour the popcorn into your large mixing bowl. Pick out any unpopped kernels—they are a dental hazard. Set the bowl aside.
- Melt the butter (2 minutes): In your large pot, melt the 1/2 cup of butter over medium-low heat. Do not rush this. You want it melted but not bubbling or browning. If it browns, it will change the flavor. Swirl the pot to help it melt evenly.
- Add the marshmallows (5 minutes): Pour the 10 ounces of mini marshmallows into the melted butter. Stir constantly with your silicone spatula. Keep the heat on low. The marshmallows will puff up and then slowly melt down. Be patient. It takes about 5 minutes. You are looking for a smooth, glossy, completely melted mixture. No lumps allowed.
- Season the mixture (1 minute): Once the marshmallows are smooth, take the pot off the heat. Immediately stir in the 1/4 teaspoon of kosher salt and the 1/2 teaspoon of vanilla extract (if using). Stir until everything is combined. The salt will dissolve into the hot mixture.
- Combine with popcorn (2 minutes): Pour the hot marshmallow mixture over the popcorn in the bowl. Use your spatula to gently fold it together. Work from the bottom up. You want every kernel to get a little bit of the sticky coating. It will look stringy at first—that’s normal. Keep folding until it is evenly distributed.
- Add the candy eyeballs (1 minute): Sprinkle in 1/2 cup of candy eyeballs. Fold them in gently. You don’t want them all to sink to the bottom. Try to distribute them as evenly as possible. Reserve a few to press onto the outside of the balls later.
- Shape the balls (10 minutes): This is the crucial part. Spray your hands generously with non-stick cooking spray. While the mixture is still warm (but not burning hot), grab a handful and gently squeeze it into a ball shape. It should be about the size of a tennis ball. Don’t squeeze too hard, or you will get dense, hard balls. You want them to be light and airy. Place each ball on a sheet of wax paper. Repeat until you have used all the mixture. You should get about 12-14 balls.
- Decorate and set (15 minutes): While the balls are still slightly tacky, press a few extra candy eyeballs onto the surface for a fun, spooky look. Let them cool completely on the wax paper. They will set up in about 15 minutes. Do not put them in the fridge—the condensation will make them sticky.
Notes
Use fresh marshmallows for best results. Work quickly as the marshmallow mixture sets up fast. If the mixture gets too stiff while shaping, microwave for 10 seconds to soften. Store in an airtight container at room temperature for up to 3 days. Can be frozen for up to 2 months.
Nutrition
- Serving Size: 1 ball
- Calories: 220
- Sugar: 18
- Sodium: 150
- Fat: 10
- Saturated Fat: 6
- Carbohydrates: 32
- Fiber: 1
- Protein: 2
Keywords: Halloween popcorn balls, candy eyeball treats, easy Halloween dessert, popcorn balls recipe, spooky treats


