“Mom, can you make the thermos mac and cheese for lunch tomorrow?” My daughter asked this on a Tuesday evening, her face buried in the lunch menu calendar she’d brought home from school. And that was it. I’d been making her school lunches for three years by then, and this was the first time she’d specifically requested something hot. Not a sandwich, not leftovers from dinner, not even those cute little bento boxes I see all over Pinterest. She wanted mac and cheese. In a thermos. And honestly? I had no idea if it would even work.
The first time I tried it, I’ll admit—I just dumped leftover mac and cheese into a thermos and hoped for the best. Big mistake. By lunchtime, it was a clumpy, lukewarm mess that she pushed around with her fork. She didn’t complain, but I saw the disappointment in her eyes when she got home. That’s when I decided to figure out the right way. The way that keeps the pasta creamy, the cheese sauce smooth, and the whole thing actually warm by the time that lunch bell rings.
This recipe for thermos mac and cheese for school lunches came from trial and error, a few late-night kitchen experiments, and one very honest conversation with my daughter about what makes a good hot lunch. It’s not complicated. It doesn’t use fancy ingredients. But it works. Every single time. And that’s the kind of recipe you hold onto.
Why You’ll Love This Recipe
Let me tell you why this thermos mac and cheese has become the most requested lunch in our house. It’s not just because my kids love cheese—though they definitely do. It’s because this recipe solves the real problems that come with packing a hot lunch for school.
- Stays Warm for Hours: The right prep method keeps this mac and cheese hot until lunchtime. No more cold, sad pasta.
- No Soggy Noodles: I’ve tested this dozens of times, and the pasta holds its texture beautifully. You won’t open the thermos to find mushy noodles.
- Simple Pantry Ingredients: You probably have everything you need right now. Butter, milk, cheese, pasta. That’s it.
- Kid-Approved and Parent-Tested: My daughter has eaten this at least twice a week for the past month. She hasn’t gotten tired of it yet.
- Comes Together in Under 20 Minutes: Morning routine is chaotic enough. This recipe won’t add stress to your day.
What makes this different from every other thermos mac and cheese recipe out there? It’s the technique. Most recipes tell you to just heat up leftovers and pour them in. That doesn’t work. I figured out that you need to warm the thermos first, make the sauce a little thinner than usual, and undercook the pasta just slightly. These small adjustments make all the difference between a lunch that gets eaten and one that comes home half-full.
This is the kind of recipe that makes you feel like you’ve got this whole school lunch thing figured out. It’s comfort food that travels well, stays warm, and brings a little bit of home to the lunch table. Honestly, it’s the little wins that keep us going, right?
What Ingredients You Will Need
This recipe uses simple, everyday ingredients to create a creamy, kid-friendly mac and cheese that holds up beautifully in a thermos. Nothing fancy here—just good, reliable staples that deliver consistent results.
- Elbow macaroni (8 ounces / 225 grams): I prefer Barilla or De Cecco for this recipe. They hold their shape well and don’t get mushy. Cook them one minute less than the package directions say—they’ll finish cooking in the thermos.
- Unsalted butter (3 tablespoons / 42 grams): Salted butter works too, just reduce the added salt. I use Land O’Lakes because it’s consistent and widely available.
- All-purpose flour (3 tablespoons / 24 grams): This thickens the cheese sauce. Whole wheat flour works but gives a slightly nuttier flavor and grainer texture.
- Whole milk (2 cups / 480 ml): Don’t use skim milk here. The fat content helps keep the sauce creamy and prevents it from separating in the thermos. If you need dairy-free, oat milk is the best substitute—it has a similar thickness.
- Sharp cheddar cheese (2 cups shredded / 200 grams): Buy a block and shred it yourself. Pre-shredded cheese has anti-caking agents that prevent smooth melting. I use Cabot or Tillamook—both melt beautifully.
- Mozzarella cheese (1/2 cup shredded / 50 grams): This adds extra creaminess and stretch. Low-moisture mozzarella works best here.
- Salt (1/2 teaspoon / 3 grams): I use fine sea salt. Adjust to taste, especially if you’re using salted butter.
- Dry mustard powder (1/4 teaspoon / 1 gram): This is optional but highly recommended. It enhances the cheese flavor without making it taste like mustard. Trust me on this one.
- White pepper (1/8 teaspoon / 0.5 grams): Black pepper works too, but white pepper blends in without those dark specks that kids sometimes notice and question.
One thing I’ve learned from making this recipe over and over: the quality of your cheese matters a lot. Cheap cheese doesn’t melt as smoothly, and it can turn grainy in the thermos. Spend the extra dollar on a good block of cheddar—your kids will taste the difference.
Equipment Needed
You don’t need much for this recipe, which is part of what makes it so great for busy mornings.
- A good thermos: This is non-negotiable. I use a Stanley thermos or a Thermos brand food jar. Look for one with a wide mouth—it makes filling and eating much easier. A 16-ounce size is perfect for a school lunch portion.
- A medium saucepan: You’ll use this for both cooking the pasta and making the sauce. A 3-quart saucepan works well.
- A colander: For draining the pasta. Nothing fancy needed here.
- A whisk: Essential for making a smooth cheese sauce without lumps. A silicone whisk won’t scratch your pan.
- A wooden spoon or spatula: For stirring everything together.
- A kettle or microwave: For boiling water to preheat the thermos. This step is crucial—don’t skip it.
- A kitchen scale: Optional but helpful for accurate measurements. I use mine all the time.
If you don’t have a thermos yet, check thrift stores or online marketplaces. I found my favorite one for five dollars at a garage sale. It works just as well as the expensive ones.
Preparation Method
Let me walk you through this step by step. I promise it’s easier than it sounds, and after you do it once, it’ll become second nature.
- Preheat your thermos: Fill your thermos with boiling water, screw the lid on, and let it sit while you prepare everything else. This step is absolutely critical—a cold thermos will suck the heat right out of your mac and cheese. I learned this the hard way after sending my daughter to school with lukewarm pasta three times in a row. The hot thermos keeps everything warm for hours.
- Cook the pasta: Bring a large pot of salted water to a rolling boil. Add your elbow macaroni and cook for one minute less than the package directions. For most brands, that’s about 7 to 8 minutes. The pasta will finish cooking in the thermos, so undercooking it slightly prevents it from turning mushy. Drain the pasta in a colander, but don’t rinse it—you want that starch to help the sauce stick.
- Start the cheese sauce: In the same pot you used for the pasta, melt the butter over medium heat. Once it’s fully melted and bubbling, add the flour. Whisk constantly for about one minute. This cooks the raw flour taste out and creates a roux that will thicken your sauce perfectly. It should smell nutty and look like wet sand.
- Add the milk slowly: Pour in the milk a little at a time, whisking continuously. I usually add about a quarter cup at first, whisk until smooth, then add another quarter cup. This prevents lumps from forming. Once all the milk is in, keep whisking until the mixture thickens enough to coat the back of a spoon. This takes about 3 to 4 minutes. Don’t rush this step—a thin sauce won’t hold up in the thermos.
- Add the cheese: Remove the pot from the heat. Add your shredded cheddar and mozzarella a handful at a time, stirring gently until each addition is fully melted before adding the next. The residual heat from the sauce will melt the cheese perfectly. If the sauce seems too thick, add a splash more milk. If it’s too thin, let it sit for a minute—it will continue to thicken as it cools slightly.
- Combine everything: Add the drained pasta to the cheese sauce and stir until every piece is coated. Taste it and adjust the salt and pepper. This is also when I add the dry mustard powder if I’m using it. The sauce should be slightly looser than you’d normally want for stovetop mac and cheese—it will thicken as it sits in the thermos.
- Fill the thermos: Empty the hot water from your thermos. Use a spoon or spatula to fill it with the mac and cheese, packing it in gently to minimize air pockets. The more full it is, the longer it stays hot. Screw the lid on tightly.
- Wrap it up: For extra insulation, I wrap the thermos in a clean kitchen towel or put it in an insulated lunch bag. This helps maintain the temperature until lunchtime. My daughter’s lunch is at 11:45, and the mac and cheese is still steaming when she opens it.
One thing I want to mention: the first time you make this, the sauce might seem too thin. Don’t panic. The pasta absorbs some of the liquid as it sits, and the sauce thickens beautifully. By lunchtime, it will be perfectly creamy—not runny, not gloppy. Trust the process.
Cooking Tips & Techniques
I’ve made this thermos mac and cheese at least thirty times now, and I’ve learned a few things along the way. Here are the tips that make the biggest difference.
Always warm the thermos first. I cannot stress this enough. The first few times I skipped this step, the mac and cheese was barely warm by lunch. Now I fill the thermos with boiling water before I even start cooking. By the time everything is ready, the thermos is hot to the touch. That initial heat makes a huge difference in how long the food stays warm.
Make the sauce a little thinner than usual. This was the biggest lesson I learned. When you’re serving mac and cheese straight from the stovetop, you want a thick, clingy sauce. But for a thermos, you need it slightly looser. The pasta will continue to absorb liquid as it sits, and a sauce that seems perfect on the stove will be too thick and dry by lunchtime. Add an extra splash of milk—you’ll be glad you did.
Don’t overfill the thermos. Leave about a half-inch of space at the top. This allows the steam to circulate and helps maintain even temperature throughout. If you pack it too tightly, the center might not stay as hot as the edges.
Use room temperature ingredients. If you have time, let your milk and shredded cheese sit out for about 15 minutes before you start cooking. Cold ingredients can cause the sauce to seize up or become grainy. I’ve definitely made this mistake when I was rushing—the sauce turned out lumpy and never really smoothed out.
Shred your own cheese. I know it’s tempting to buy pre-shredded bags, especially on busy mornings. But the anti-caking agents in those bags prevent the cheese from melting smoothly. Your sauce will be grainy and less creamy. It takes two minutes to shred a block of cheddar—do it the night before if mornings are hectic.
Test the temperature before packing. The mac and cheese should be piping hot when it goes into the thermos. If it’s only warm, it won’t stay warm long enough. I use an instant-read thermometer—I aim for at least 165°F (74°C) before packing.
Variations & Adaptations
One of the best things about this recipe is how easily it adapts to different tastes and dietary needs. Here are some variations I’ve tried and loved.
Add some protein: My son likes his thermos mac and cheese with diced ham or cooked bacon bits stirred in. I’ve also used shredded rotisserie chicken when I had leftovers. Just make sure any added protein is fully cooked and heated through before adding it to the thermos. For a vegetarian option, try adding steamed broccoli florets or peas—they add color and nutrition without changing the flavor too much.
Make it gluten-free: Use gluten-free pasta and a gluten-free all-purpose flour blend for the roux. I’ve tested this with several brands, and Barilla’s gluten-free elbows work best. They hold their shape well and don’t get mushy. The sauce might be slightly thinner, so let it cook an extra minute before adding the cheese.
Try different cheese combinations: Sharp cheddar is classic, but don’t be afraid to mix it up. I’ve made versions with Gouda (smoky and creamy), Monterey Jack (mild and melty), and even a little bit of Parmesan (adds a salty, nutty kick). My personal favorite is half sharp cheddar and half Gruyère—it’s fancy enough for adults but still kid-friendly.
Spice it up: For older kids or adults, add a pinch of cayenne pepper or a few dashes of hot sauce to the cheese sauce. I’ve also stirred in some diced jalapeños for a Southwest twist. Just be careful not to make it too spicy for little ones.
Vegan option: Use plant-based butter, unsweetened oat milk, and your favorite vegan cheddar shreds. I’ve had good results with Daiya and Violife brands. The sauce won’t be quite as creamy, but it’s still delicious and holds up well in the thermos.
Serving & Storage Suggestions
This thermos mac and cheese is designed to be eaten warm, straight from the thermos at lunchtime. But here’s how to make the most of it.
Serving temperature: The mac and cheese should be hot when packed and still warm when eaten. If your child prefers it less hot, let it sit on the counter for 5 minutes before packing. But honestly, the whole point of the thermos is to keep it warm, so I always pack it piping hot.
What to serve with it: I usually pack a few apple slices, some baby carrots, or a small container of grapes alongside the thermos. The contrast between warm, creamy pasta and cold, crunchy fruit or vegetables is perfect. My daughter also loves when I add a small container of ranch dressing for dipping her veggies. If you want to add a little treat, these easy no-bake peanut butter oat energy bars make a great dessert or afternoon snack.
Storage instructions: If you’re making this ahead of time, you can store the mac and cheese in an airtight container in the refrigerator for up to 3 days. When you’re ready to pack it, reheat it on the stovetop or in the microwave until it’s steaming hot, then follow the same thermos prep steps. I don’t recommend freezing this recipe—the sauce can separate and become grainy when thawed.
Reheating tips: To reheat, add a splash of milk to the mac and cheese before warming it up. This helps restore the creamy texture. Heat it slowly—medium heat on the stovetop or 50% power in the microwave—stirring every 30 seconds. Once it’s hot and bubbly, pack it in your preheated thermos as usual.
How flavors develop: Honestly, this mac and cheese tastes best when it’s freshly made. But I’ve noticed that the flavors meld together nicely after a day in the fridge. The cheese sauce becomes more cohesive, and the pasta absorbs just enough sauce to be perfectly coated. Just don’t let it sit for more than a couple of days.
Nutritional Information & Benefits
Here’s the estimated nutritional breakdown for one serving of this thermos mac and cheese. Values are approximate and will vary based on specific ingredients and portion sizes.
| Nutrient | Amount Per Serving |
|---|---|
| Calories | 480 |
| Total Fat | 24g |
| Saturated Fat | 14g |
| Cholesterol | 70mg |
| Sodium | 580mg |
| Total Carbohydrates | 45g |
| Dietary Fiber | 2g |
| Sugars | 6g |
| Protein | 20g |
| Calcium | 350mg |
This recipe provides a good source of protein and calcium, thanks to the milk and cheese. The carbohydrates from the pasta give kids energy for the school day. If you want to boost the nutritional value, try adding steamed broccoli or peas—they add fiber and vitamins without changing the flavor too much.
For dietary considerations: this recipe contains gluten and dairy. For a gluten-free version, use gluten-free pasta and flour. For a dairy-free version, use plant-based butter, milk, and cheese alternatives. The texture won’t be exactly the same, but it’s still a satisfying lunch option.
I personally love that this recipe feels like comfort food but isn’t loaded with artificial ingredients or preservatives. It’s real food, made from scratch, and that makes me feel good about packing it for my kids.
Conclusion
This thermos mac and cheese for school lunches has honestly changed our morning routine. Instead of scrambling to pack a lunch that I know will just sit there uneaten, I have a reliable, kid-approved option that I can make in under 20 minutes. And the best part? It actually gets eaten. Every single time.
I love this recipe because it’s simple, practical, and it works. It’s not fancy or complicated—it’s just good food that travels well and makes lunchtime a little bit better. Whether you’re packing for a picky eater, a busy teenager, or even yourself, this mac and cheese delivers warmth and comfort in a way that few other lunches can.
Try it this week. Play around with the variations, add your favorite mix-ins, and make it your own. I’d love to hear how it turns out for you. Drop a comment below and let me know what your kids thought—or share your own twist on this recipe. And if you’re looking for more easy lunch ideas, check out these quick mini chicken Caesar wraps or this easy turkey pesto pinwheel wraps recipe for more inspiration. Happy packing!
Frequently Asked Questions
Can I use a different type of pasta?
Absolutely. While elbow macaroni is classic, any small pasta shape works well. I’ve used shells, rotini, and even ditalini with great results. Just make sure to cook it one minute less than the package directions to prevent it from getting mushy in the thermos.
How long will the mac and cheese stay warm in the thermos?
With proper preheating and packing, it stays warm for about 4 to 5 hours. I’ve tested this multiple times, and the mac and cheese is still steaming when my daughter opens it at 11:45 AM after packing it at 7:30 AM. Wrapping the thermos in a towel or using an insulated lunch bag helps maintain the temperature even longer.
Can I make this recipe the night before?
Yes, you can prepare the mac and cheese the night before and store it in the refrigerator. In the morning, reheat it on the stovetop or in the microwave until it’s piping hot, then pack it in your preheated thermos. Just add a splash of milk when reheating to restore the creamy texture.
Why did my mac and cheese turn out dry?
This usually happens when the sauce is too thick before packing, or when the thermos isn’t preheated properly. Make sure your sauce is slightly looser than you’d normally want—it will thicken as it sits. Also, always warm your thermos with boiling water first to prevent the food from cooling down too quickly.
Can I add vegetables to this recipe?
Definitely. Steamed broccoli florets, peas, or finely diced carrots work well. Just make sure any vegetables are fully cooked and not too watery—excess moisture can make the sauce thin. I like to add peas because they’re small, sweet, and blend right in with the pasta.
Pin This Recipe!
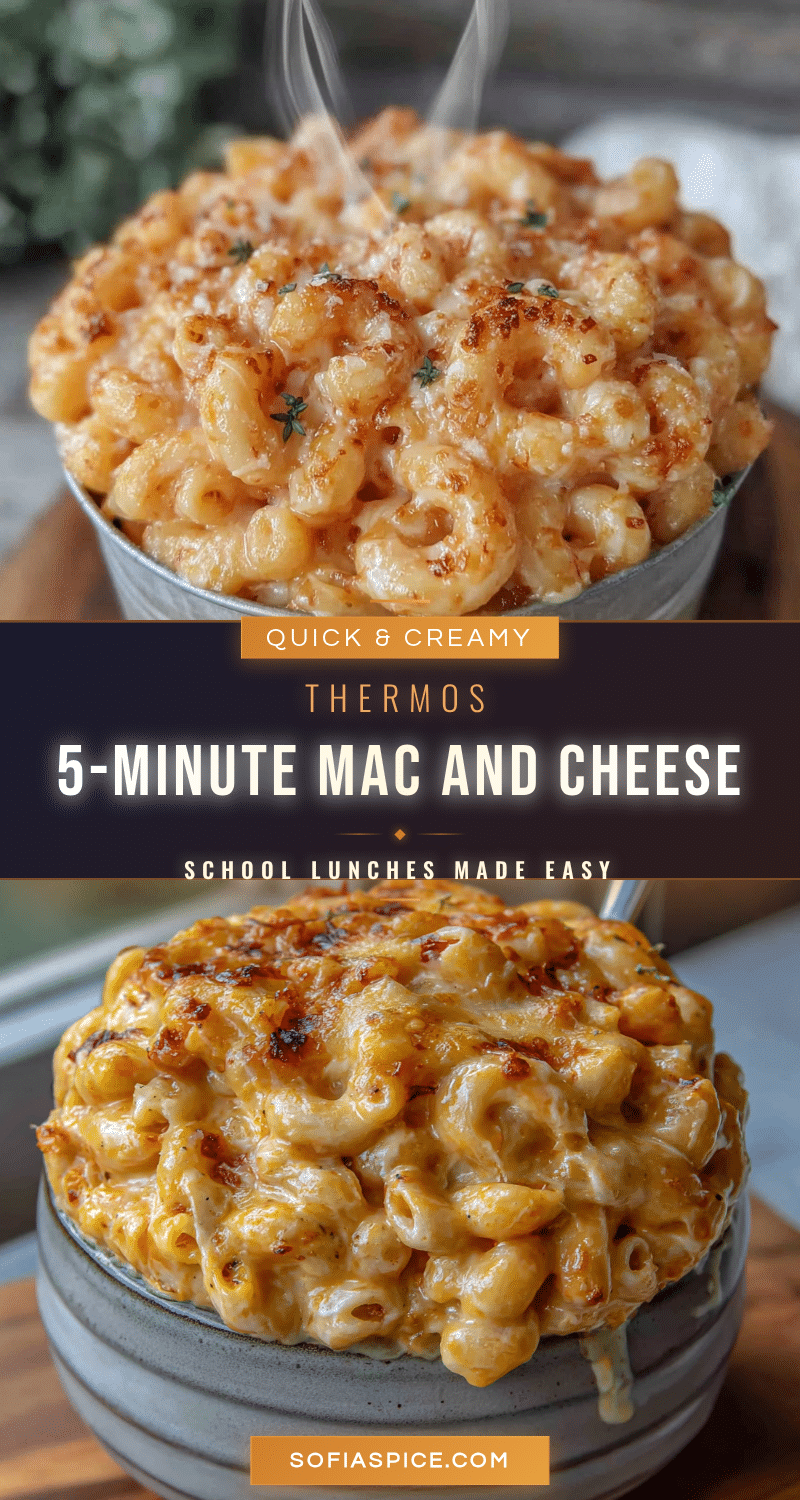
Easy Thermos Mac and Cheese for School Lunches

A creamy, kid-friendly mac and cheese recipe designed to stay warm in a thermos for school lunches. Simple ingredients and a special technique ensure the pasta stays tender and the cheese sauce smooth until lunchtime.
- Prep Time: 10 minutes
- Cook Time: 10 minutes
- Total Time: 20 minutes
- Yield: 4 servings 1x
- Category: Main Course
- Cuisine: American
Ingredients
- 8 ounces (225 grams) elbow macaroni
- 3 tablespoons (42 grams) unsalted butter
- 3 tablespoons (24 grams) all-purpose flour
- 2 cups (480 ml) whole milk
- 2 cups (200 grams) shredded sharp cheddar cheese
- 1/2 cup (50 grams) shredded low-moisture mozzarella cheese
- 1/2 teaspoon (3 grams) fine sea salt
- 1/4 teaspoon (1 gram) dry mustard powder (optional)
- 1/8 teaspoon (0.5 grams) white pepper
Instructions
- Preheat your thermos: Fill your thermos with boiling water, screw the lid on, and let it sit while you prepare everything else.
- Cook the pasta: Bring a large pot of salted water to a rolling boil. Add elbow macaroni and cook for one minute less than the package directions (about 7 to 8 minutes). Drain in a colander, but do not rinse.
- Start the cheese sauce: In the same pot, melt the butter over medium heat. Once bubbling, add the flour and whisk constantly for about one minute until the mixture smells nutty and looks like wet sand.
- Add the milk slowly: Pour in the milk a little at a time, whisking continuously to prevent lumps. Once all milk is added, continue whisking until the mixture thickens enough to coat the back of a spoon, about 3 to 4 minutes.
- Add the cheese: Remove the pot from the heat. Add shredded cheddar and mozzarella a handful at a time, stirring gently until each addition is fully melted. If the sauce seems too thick, add a splash more milk.
- Combine everything: Add the drained pasta to the cheese sauce and stir until every piece is coated. Taste and adjust salt and pepper. Add dry mustard powder if using. The sauce should be slightly looser than usual for stovetop mac and cheese.
- Fill the thermos: Empty the hot water from the thermos. Use a spoon or spatula to fill it with the mac and cheese, packing it in gently to minimize air pockets. Screw the lid on tightly.
- Wrap it up: For extra insulation, wrap the thermos in a clean kitchen towel or place it in an insulated lunch bag.
Notes
Always preheat the thermos with boiling water to keep the mac and cheese warm. Make the sauce slightly thinner than usual as it will thicken in the thermos. Shred your own cheese for smoother melting. The mac and cheese should be piping hot (at least 165°F/74°C) when packed. Leave about half an inch of space at the top of the thermos for steam circulation.
Nutrition
- Serving Size: 1 serving (about 1 c
- Calories: 480
- Sugar: 6
- Sodium: 580
- Fat: 24
- Saturated Fat: 14
- Carbohydrates: 45
- Fiber: 2
- Protein: 20
Keywords: thermos mac and cheese, school lunch, kid-friendly, easy mac and cheese, hot lunch, creamy mac and cheese


