The Sunday night dread was real. I was staring into the pantry, the clock ticking past nine, and the lunch bags were still empty. The peanut butter jar was scraped clean—again—and I just didn’t have the energy for another sad sandwich debate. That’s when my eyes landed on the sunbutter. It was a last-ditch effort, honestly. I grabbed the bread, the jelly, and a small cookie cutter shaped like a star that had been lurking in the back of a drawer for years. I wasn’t trying to be creative. I was just tired. But as I pressed that little star into the soft bread, something clicked. It wasn’t just a sandwich anymore. It was a tiny, happy thing. And the next morning, when my kid opened their lunchbox and saw those little stars instead of a folded-over slice of bread, they actually smiled. No negotiations, no trading. Just quiet, happy eating. That’s the moment these Easy Sunbutter and Jelly Lunch Box Bites were born—not from a fancy recipe book, but from a real Tuesday morning win.
Why You’ll Love This Recipe
Let’s be honest, getting a lunch packed that actually comes back empty is a small victory. These bites aren’t just another sandwich alternative. They are a reliable little tool in the lunch-packing toolbox. I’ve tested a dozen ways to keep bread from getting soggy, and this method wins every single time.
- Incredibly Fast: You can have a week’s worth of these assembled in under 10 minutes. No cooking, no heating, no fuss.
- Simple Ingredients: You only need three main things. Sunbutter, jelly, and bread. That’s it. No fancy grocery store trips required.
- Perfect for Picky Eaters: The small, fun shapes make them way less intimidating than a full sandwich. Kids love the novelty, and you’ll love that they’re actually eating.
- Nut-Free School Safe: Sunbutter is a fantastic, nut-free alternative that tastes just as good. It makes these lunches totally classroom-friendly.
- Less Waste, More Fun: No more crusts thrown away. Every single piece gets eaten, and the crusts you do cut off can be saved for breadcrumbs or a fun snack.
I’m not a chef, but I am a mom who has packed hundreds of lunches. I’ve learned that the secret isn’t fancy ingredients. It’s about making food feel like a little gift. These bites do exactly that. They turn a simple sandwich into a moment of joy in the middle of a busy school day. It’s the kind of recipe that makes you feel good, not stressed.
What Ingredients You Will Need
This recipe is all about simplicity. You don’t need a long list of specialty items. Just a few pantry staples that come together to make something genuinely fun and delicious. Here’s what you’ll grab.
- Bread: (8 slices) This is your canvas. I prefer a sturdy whole wheat or a soft white bread. Avoid super thin, flimsy bread as it can tear when you press the cookie cutter. You can use any shape or size you like.
- Sunbutter: (1/2 cup) The star of the show. Make sure to stir it well before using, as the oil can separate. I like the brand SunButter for its smooth, creamy texture and neutral flavor. It spreads beautifully and doesn’t overpower the jelly.
- Jelly or Jam: (1/4 cup) Use your favorite flavor. Strawberry, grape, raspberry, or even apricot all work wonderfully. I recommend a seedless jam for the smoothest texture, but a little bit of texture from seeds is nice too. (If you are feeling adventurous, try a homemade fig jam like the one from our Best Small-Batch Fig Jam recipe—it’s incredible!)
- Cookie Cutters: (1-2) This is the fun part. You can use any shape you like. Stars, hearts, circles, dinosaurs, or even simple squares. The size should be small enough to fit a few pieces in a lunchbox but large enough to hold a good amount of filling.
That’s it. Three main ingredients and a fun tool. You likely already have everything in your kitchen right now. The beauty is in the assembly, not the grocery list.
Equipment Needed
You don’t need a fancy kitchen to make these. The equipment list is short and sweet.
- Cookie Cutters: A set of small, sharp cookie cutters is your best friend here. I have a set of metal stars that I use almost every week. Plastic ones work too, but metal cuts through bread more cleanly.
- Butter Knife: For spreading the sunbutter and jelly. A small offset spatula works even better for getting a thin, even layer.
- Cutting Board: A clean, flat surface is essential. A wooden or plastic board works perfectly.
- Rolling Pin (Optional): If your bread is very thick, gently rolling it out a bit can make it easier to cut and seal.
If you don’t have cookie cutters, don’t worry. You can use a small glass or a shot glass to cut out circles. Or, just cut the sandwiches into small squares or triangles with a knife. The shape doesn’t matter as much as the fun of the small size. I’ve even used a clean, empty tuna can before in a pinch—it works!
Preparation Method
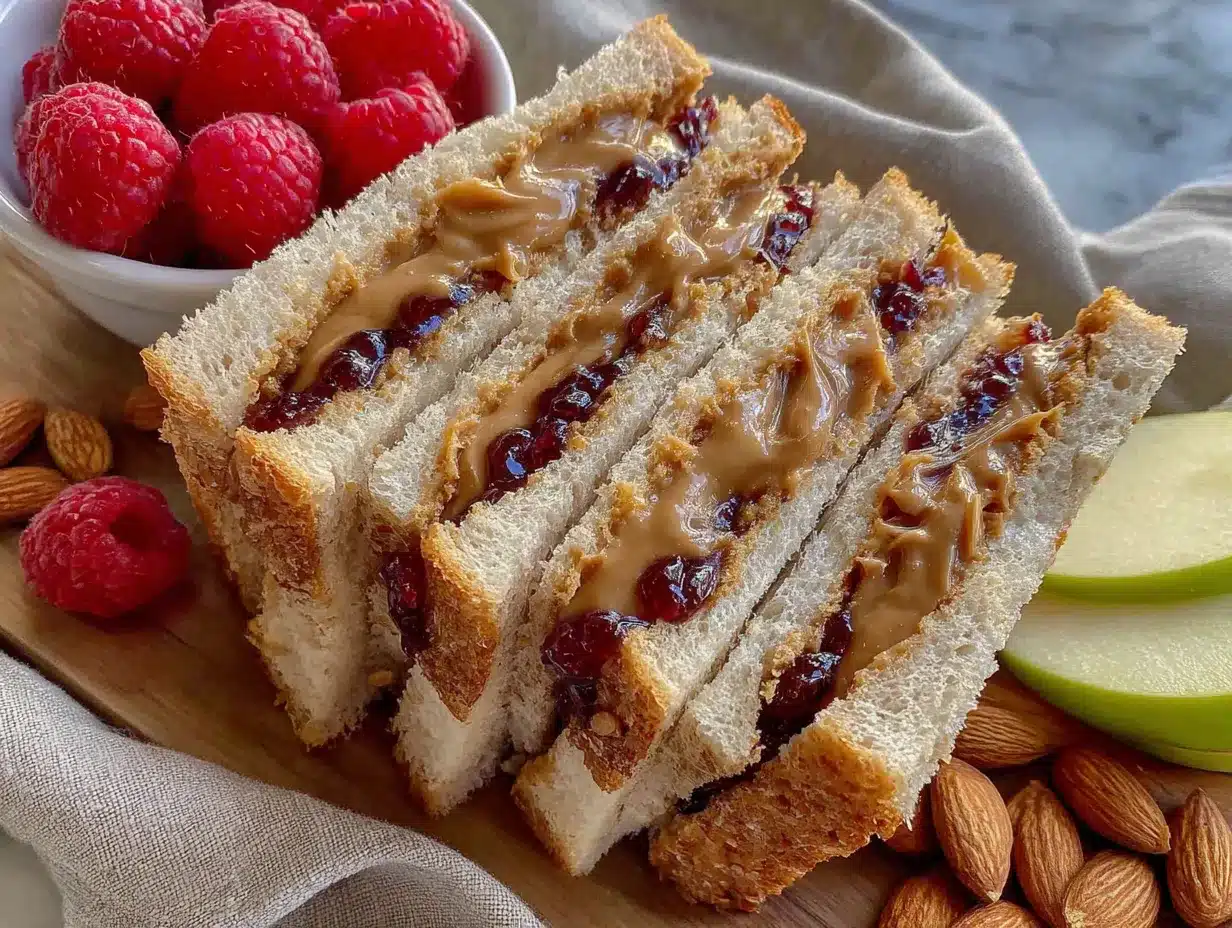
This is where the magic happens. It’s so simple, you’ll wonder why you didn’t do it sooner. Follow these steps, and you’ll have a batch ready in minutes.
- Prepare Your Workspace: Lay out your bread slices on a clean cutting board. If you are using a rolling pin, gently roll each slice to about 1/2 inch thickness. This helps the bread hold its shape and prevents it from tearing.
- Spread the Sunbutter: Take one slice of bread and spread a thin, even layer of sunbutter all the way to the edges. Don’t go too thick, or it will squish out when you cut. You want just enough to cover the surface. I like to use a small offset spatula for this.
- Add the Jelly: On a second slice of bread, spread a thin layer of your jelly or jam. Again, thin and even is the goal. Too much jelly can make the bread soggy.
- Assemble the Sandwich: Place the sunbutter slice on top of the jelly slice, sunbutter side down. Press gently but firmly to seal the two slices together. You want them to stick so the filling doesn’t leak out when you cut.
- Cut Out the Shapes: Now for the fun part. Take your cookie cutter and press it firmly through the assembled sandwich. Give it a little twist to make sure you cut all the way through. Lift the cutter and pop out your little bite. Repeat with the remaining sandwich, getting as many shapes as you can from each one.
- Save the Scraps: Don’t throw away the leftover bread crusts and scraps! You can toast them up and blitz them into breadcrumbs. Or, you can bake them with a little cinnamon and sugar for a crunchy snack. I sometimes just eat them as a little cook’s treat while I’m packing.
- Pack Them Up: Place your finished bites into a lunchbox container. They stack nicely, but try not to pile them too high or they might stick together. A little bit of space between them is perfect.
A quick note on timing: The entire process for a week’s worth of lunches (about 20 bites) takes me less than 10 minutes. It’s faster than making individual sandwiches, I promise. If you are making them the night before, store them in an airtight container in the fridge. They stay fresh and delicious for up to 3 days.
Cooking Tips & Techniques
I’ve made these a hundred times, and I’ve learned a few tricks along the way. Here are my best tips to make sure your bites come out perfect every single time.
The Bread Trick: The biggest mistake people make is using bread that is too soft or too fresh. Day-old bread is actually better. It’s a little firmer and holds its shape much better when you press the cookie cutter. If your bread is super fresh, you can pop it in the toaster for 30 seconds to dry it out just a bit. Don’t toast it all the way, just enough to take the edge off.
The Spreading Secret: Always spread your sunbutter and jelly all the way to the very edge of the bread. If you leave a border, the filling won’t reach the corners of your shapes, and you’ll end up with some bites that are just plain bread. A thin, even layer is your friend here. You want every bite to have a little bit of that sweet and salty goodness.
The Cutting Pressure: Don’t be shy with the cookie cutter. Press down firmly and give it a little twist. If you just press straight down, you might not cut all the way through, and the bread will tear when you try to pull it out. A clean, sharp cut makes all the difference. If your cookie cutter is sticking, dip it in a little bit of flour or powdered sugar first.
Multitasking is Key: I like to make these while I’m cleaning up after dinner. I put on a podcast, and in ten minutes, I have a whole week of lunches sorted. It’s a great way to use that last bit of evening energy. You can also get the kids involved. Let them press the cookie cutters—it’s a great fine motor skill activity, and they are more likely to eat something they helped make.
Variations & Adaptations
One of the best things about this recipe is how easy it is to change up. You can make it new every week without any extra effort. Here are a few of my favorite variations.
- Flavor Twists: Swap the jelly for a different flavor. Try a honey drizzle with a sprinkle of cinnamon. Or, use a thin layer of cream cheese in place of the jelly for a savory-sweet combo. A little bit of sunflower buttercream would be a fun, decadent treat for a special lunch.
- Dietary Adaptations: This recipe is naturally nut-free and vegetarian. For a gluten-free option, use your favorite gluten-free bread. Just be aware that gluten-free bread can be a bit more fragile, so you might need to be extra gentle with the cookie cutter. You can also use a seed-based bread for extra fiber.
- Savory Bites: Who says it has to be sweet? Try a thin layer of cream cheese with a slice of cucumber or a little bit of turkey. Cut them into small circles for a fun, savory lunchbox snack. It’s a great way to use up leftover deli meat.
- Seasonal Swaps: In the fall, use a pumpkin-shaped cookie cutter and a pumpkin spice jelly. In the winter, use snowflakes or gingerbread men. It’s a simple way to make lunch feel festive without any extra work. I’ve even made heart-shaped ones for Valentine’s Day.
I once tried a version with a thin layer of Nutella and strawberry jam. It was delicious, but a little too sweet for a regular lunch. It’s a perfect treat for a birthday or a special occasion, though. Don’t be afraid to experiment. The worst that can happen is you end up with a tasty snack for yourself.
Serving & Storage Suggestions
These bites are best served cold, straight from the lunchbox. They are the perfect temperature for a midday meal. I like to pack them in a small, compartmentalized container so they don’t get squished by a heavy apple.
What to Serve With Them: These bites are a fantastic main event. Pair them with some crunchy veggie sticks (carrots, cucumbers, bell peppers), a small handful of grapes or berries, and a yogurt tube. For a heartier lunch, add a side of crunchy homemade dill pickles or a small cup of soup. They also go wonderfully with a side of mini chicken caesar wraps for a fun variety.
Storage Instructions: Store any leftover bites in an airtight container in the refrigerator. They will stay fresh for up to 3 days. I don’t recommend freezing them, as the bread can become a bit soggy when it thaws. If you are making them for the week, just make a batch on Sunday and grab them each morning. They hold up beautifully.
Reheating: You don’t need to reheat these. They are designed to be eaten cold. If you prefer a slightly softer texture, you can let them sit at room temperature for 10 minutes before serving. The flavors actually meld together a bit more after a day in the fridge, so they taste even better on day two.
Nutritional Information & Benefits
These bites are a great way to get a balanced, satisfying lunch. Here’s a rough estimate for one serving (about 4 bites, depending on the size of your cookie cutter).
- Calories: Approximately 250-300
- Protein: 8-10 grams (from the sunbutter and bread)
- Healthy Fats: 12-15 grams (from the sunflower seeds in the sunbutter)
- Fiber: 4-6 grams (depending on your bread choice)
Health Benefits: Sunbutter is a fantastic source of vitamin E, magnesium, and healthy fats. It’s also naturally nut-free, making it a safe choice for school lunches. The whole wheat bread provides complex carbohydrates for sustained energy, and the fruit in the jelly offers a small dose of antioxidants. It’s a much better option than processed snack bars or sugary treats.
Dietary Considerations: This recipe is naturally nut-free, vegetarian, and can be made gluten-free with a simple bread swap. It’s also free of dairy and eggs. Always check the labels on your sunbutter and bread to ensure they meet your specific dietary needs. Some brands of sunbutter may be processed in facilities that also handle nuts, so look for certified nut-free options if that is a concern.
Conclusion
These Easy Sunbutter and Jelly Lunch Box Bites are more than just a recipe. They are a little act of love packed into a tiny, star-shaped package. They are proof that you don’t need to spend hours in the kitchen to make something special. Sometimes, the best ideas come from a moment of desperation and a single, simple cookie cutter. I hope you give them a try. I promise, the next time you open a lunchbox and see those happy little shapes, you’ll feel a little win, too.
I would love to hear about your own lunchbox wins. What shapes did you use? What flavor combinations did you try? Drop a comment below and share your creations. Don’t forget to pin this recipe to your favorite lunch ideas board on Pinterest so you can find it again later. Happy packing, friend.
Frequently Asked Questions
Can I use any type of bread?
Yes, absolutely. Sturdy breads like whole wheat, sourdough, or a soft white bread work best. Avoid very thin or flimsy bread as it can tear. Day-old bread is actually ideal because it holds its shape better.
How do I keep the bites from getting soggy?
The key is to spread a thin layer of both sunbutter and jelly. The sunbutter acts as a barrier, preventing the jelly from soaking into the bread. Also, make sure your bread is not too fresh. A little bit of drying helps a lot.
Can I make these ahead of time for the whole week?
Yes! They store beautifully in an airtight container in the refrigerator for up to 3 days. I usually make a batch on Sunday evening and grab them each morning. They taste even better after a day in the fridge.
My cookie cutter is sticking to the bread. What should I do?
This is a common issue. Dip your cookie cutter in a little bit of flour or powdered sugar before pressing it into the bread. This helps it slide through cleanly without tearing the bread. You can also try a sharper metal cutter.
Can I use a different nut or seed butter?
Of course! While this recipe is designed to be nut-free with sunbutter, you can absolutely use peanut butter, almond butter, or any other seed butter you like. Just adjust for any allergies in your household.
Pin This Recipe!

Easy Sunbutter and Jelly Lunch Box Bites

These fun, star-shaped sunbutter and jelly bites are a quick, nut-free lunchbox solution that kids love. Made with just three ingredients, they come together in under 10 minutes and are perfect for picky eaters.
- Prep Time: 10 minutes
- Cook Time: 0 minutes
- Total Time: 10 minutes
- Yield: 4 servings (about 20 bites) 1x
- Category: Lunch
- Cuisine: American
Ingredients
- 8 slices bread (sturdy whole wheat or soft white)
- 1/2 cup sunbutter (stirred well)
- 1/4 cup jelly or jam (seedless recommended)
Instructions
- Prepare your workspace: Lay out bread slices on a clean cutting board. If using a rolling pin, gently roll each slice to about 1/2 inch thickness.
- Spread the sunbutter: Take one slice of bread and spread a thin, even layer of sunbutter all the way to the edges.
- Add the jelly: On a second slice of bread, spread a thin layer of jelly or jam.
- Assemble the sandwich: Place the sunbutter slice on top of the jelly slice, sunbutter side down. Press gently but firmly to seal.
- Cut out the shapes: Use a cookie cutter to press firmly through the assembled sandwich. Give it a little twist to cut all the way through. Repeat to get as many shapes as possible from each sandwich.
- Save the scraps: Toast leftover bread scraps for breadcrumbs or a crunchy snack.
- Pack them up: Place finished bites in a lunchbox container. Store in an airtight container in the fridge for up to 3 days.
Notes
Use day-old bread for best results. Spread sunbutter and jelly all the way to the edges to ensure every bite has filling. Dip cookie cutter in flour or powdered sugar if it sticks. Store in an airtight container in the fridge for up to 3 days.
Nutrition
- Serving Size: 4 bites
- Calories: 275
- Sugar: 10
- Sodium: 220
- Fat: 13.5
- Saturated Fat: 1.5
- Carbohydrates: 32
- Fiber: 5
- Protein: 9
Keywords: sunbutter and jelly, lunch box bites, nut-free lunch, kid-friendly, easy lunch, school lunch, no-cook


