The neighborhood fall block party was in six hours and I’d completely forgotten. Everyone else would be bringing those elaborate, Pinterest-perfect desserts—you know the ones. Caramel apple pies with lattice crusts. Hand-piped pumpkin cheesecakes that looked like they belonged in a bakery window. I had a can of pumpkin puree, a box of butter, and a vague sense of panic.
I mean, let’s be real. I’d spent the whole morning cleaning the garage and somehow convinced myself the party was next weekend. Classic move. So there I was, staring into my pantry like it owed me something, when I spotted that lonely can of Libby’s pumpkin. And honestly? A little spark went off. I’d been tinkering with a pumpkin bar recipe for months, but I never had the guts to serve it to actual people. Desperate times, my friend.
The thing about pumpkin bars is they’re forgiving. They don’t care if you’re rushing or if you accidentally over-measure the cinnamon (which, full disclosure, I totally did). The batter comes together in one bowl—no stand mixer required, no sifting, no nonsense. While they baked, I whipped up a brown butter frosting that made my tiny kitchen smell like toasted nuts and pure fall magic. By the time the bars were cool enough to frost, I had a tray of something that looked like I’d planned it for days.
Here’s where it gets good. I showed up late, sweaty, and apologizing, carrying these humble little bars on a paper plate. And wouldn’t you know it—they disappeared first. People kept coming back, asking for the recipe, saying they tasted like the best part of autumn. My neighbor Dave, who’s a retired pastry chef, asked me for seconds. That’s when I knew this was the one. These Easy Pumpkin Bars with Brown Butter Frosting aren’t just a backup plan. They’re the star of the show, even when you show up looking like you just wrestled a rake.
Why You’ll Love This Recipe
Let me tell you why these pumpkin bars have become my most-requested dessert, even over the fancy stuff. I’ve tested this recipe at least a dozen times—through burnt batches, frosting disasters, and one memorable incident where I forgot the eggs entirely. What I landed on is pure weeknight gold.
- Quick & Easy : From start to finish, you’re looking at about 45 minutes. The bars bake in under 25 minutes, and you can make the frosting while they cool. No marathon baking sessions here.
- Simple Ingredients : You probably have most of this in your pantry right now. Canned pumpkin, flour, sugar, eggs, butter, and spices. No weird extracts or trips to a specialty store.
- Perfect for Fall Gatherings : Whether it’s a potluck, a Halloween party, or just a Tuesday that needs some warmth, these bars deliver. They’re sturdy enough to travel and pretty enough to serve company.
- Crowd-Pleaser : I’ve served these to kids, adults, picky eaters, and even a gluten-free friend (using a flour blend). They never last long.
- Unbelievably Delicious : The brown butter frosting is the secret weapon here. It takes these bars from “good pumpkin cake” to “what did you put in this?” level. The nutty, toasty flavor pairs perfectly with the spiced pumpkin base.
What makes these different from every other pumpkin bar recipe out there? It’s the texture. They’re not too dense and not too cakey—they hit that sweet spot between a brownie and a muffin. Plus, the brown butter frosting isn’t overly sweet. It’s rich, slightly salty, and absolutely addictive. This isn’t just another version of pumpkin bars. It’s the one you’ll make every single fall.
What Ingredients You Will Need
This recipe uses simple, wholesome ingredients to deliver that deep fall flavor without any fuss. Most of these are pantry staples, which is exactly what you want on a busy weeknight.
For the Pumpkin Bars
- 1 ¾ cups (220g) all-purpose flour — Spoon and level for accuracy. Too much flour makes the bars dry.
- 1 ½ cups (300g) granulated sugar — Regular white sugar works best here. It keeps the bars tender.
- 1 cup (240ml) pumpkin puree — Not pumpkin pie filling. Make sure it’s 100% pure pumpkin. I prefer Libby’s for consistent texture.
- ½ cup (120ml) vegetable oil — Or canola oil. Any neutral oil works. It keeps the bars moist without adding flavor.
- 2 large eggs — Room temperature is ideal, but if you’re in a rush, place them in warm water for 5 minutes.
- 1 teaspoon vanilla extract — Pure vanilla extract adds warmth. Avoid imitation if you can.
- 2 teaspoons baking powder — Make sure it’s fresh. Test by dropping a bit in hot water—it should fizz.
- 1 teaspoon baking soda — This helps the bars rise and stay fluffy.
- ½ teaspoon salt — Fine sea salt or table salt. It balances the sweetness.
- 2 teaspoons ground cinnamon — The backbone of the spice blend. I used a generous 2 teaspoons in my panicked batch.
- 1 teaspoon ground ginger — Adds a little warmth and zing.
- ½ teaspoon ground nutmeg — Freshly grated if you have it, but pre-ground works fine.
- ¼ teaspoon ground cloves — Just a pinch. It’s potent.
For the Brown Butter Frosting
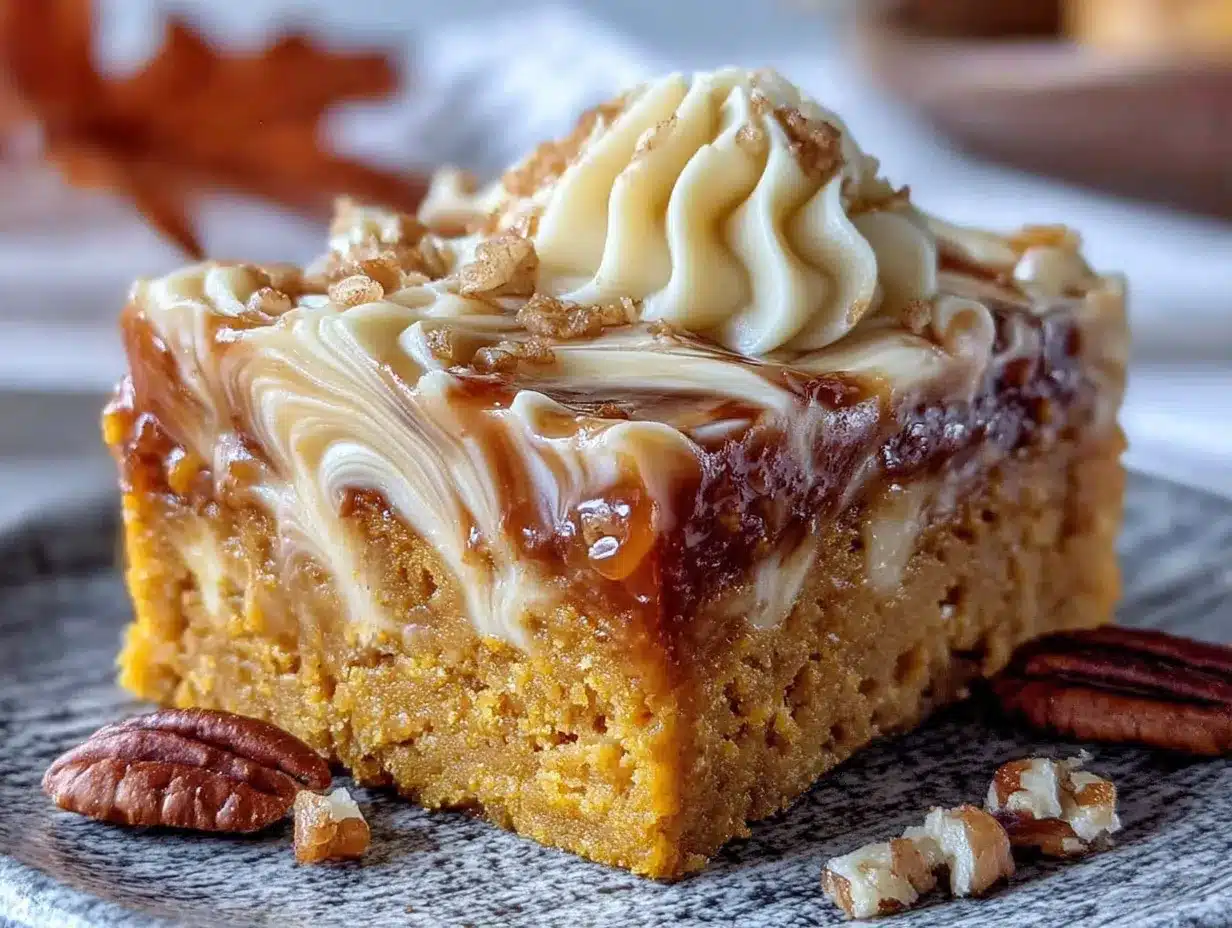
- ½ cup (113g) unsalted butter — You’ll brown this, so don’t use salted butter or it’ll be too salty.
- 2 cups (240g) powdered sugar — Sifted if it’s lumpy, but honestly, I rarely sift and it turns out fine.
- 2-3 tablespoons milk — Whole milk works best, but any milk or even heavy cream will do. Start with 2 tablespoons and add more if needed.
- 1 teaspoon vanilla extract — Adds depth to the nutty butter.
- Pinch of salt — Flaky sea salt on top is optional but amazing.
Ingredient Tips: For the best texture, use a good-quality pumpkin puree. I’ve tried store brands, and they can be watery. Libby’s is consistently thick and smooth. If your pumpkin puree looks watery, blot it with a paper towel before measuring. Also, make sure your spices are fresh—spices older than six months lose their punch.
Substitution Guidance: Need this gluten-free? Swap the all-purpose flour with a 1:1 gluten-free baking blend. I’ve used Bob’s Red Mill with great results. For a dairy-free frosting, use plant-based butter (I like Miyoko’s) and oat milk. The brown butter flavor won’t be as intense, but it’s still delicious.
Equipment Needed
You don’t need a fancy kitchen to pull these off. Here’s what you’ll need:
- 9×13-inch baking pan — A metal pan gives you crispier edges. Glass works too, but you might need an extra 2-3 minutes of baking time.
- Mixing bowls — One large bowl for the wet ingredients, one medium for the dry. Or just use one bowl if you’re lazy like me.
- Whisk — For mixing the dry ingredients evenly. A fork works in a pinch.
- Spatula — Silicone is best for scraping every last bit of batter.
- Small saucepan — For browning the butter. Light-colored pans make it easier to see the color change.
- Hand mixer or stand mixer — For the frosting. You can whisk by hand, but your arm will thank you for the mixer.
- Parchment paper — Line your pan for easy removal. I’ve forgotten this before and spent 20 minutes scraping bars out. Learn from my mistake.
- Cooling rack — Lets the bars cool evenly so the frosting doesn’t melt into a puddle.
Budget-Friendly Tip: Don’t have a hand mixer? A sturdy whisk and some elbow grease will work for the frosting. Just make sure your butter is fully browned and slightly cooled before you start whisking in the sugar.
Preparation Method
Alright, let’s get into it. This recipe is straightforward, but I’ll walk you through every step with the little tricks I’ve learned along the way.
Step 1: Preheat and Prep
Preheat your oven to 350°F (175°C). Line your 9×13-inch pan with parchment paper, leaving a little overhang on the long sides. This makes lifting the bars out so much easier. Lightly grease the parchment with cooking spray or a smear of butter.
Step 2: Mix the Dry Ingredients
In a medium bowl, whisk together the flour, baking powder, baking soda, salt, cinnamon, ginger, nutmeg, and cloves. Whisk for about 15 seconds to make sure everything is evenly distributed. This step matters—nobody wants a bite that’s all baking powder.
Step 3: Combine the Wet Ingredients
In a large bowl, whisk together the sugar, pumpkin puree, vegetable oil, eggs, and vanilla extract. Whisk until smooth and fully combined. It should look like a thick, glossy orange batter. If it looks curdled, your eggs were too cold—just keep whisking, it’ll come together.
Step 4: Combine Wet and Dry
Pour the dry ingredients into the wet mixture. Fold together with a spatula until just combined. A few streaks of flour are okay—overmixing will make the bars tough. Seriously, stop as soon as you don’t see dry flour anymore.
Step 5: Bake
Pour the batter into your prepared pan and spread it evenly. Bake for 22-25 minutes, or until a toothpick inserted in the center comes out clean or with a few moist crumbs. The edges should be pulling away from the pan slightly. My oven runs hot, so I check at 20 minutes. Yours might be different.
Step 6: Cool Completely
Let the bars cool in the pan on a wire rack for about 10 minutes, then use the parchment to lift them out and transfer to the rack to cool completely. This is crucial—if you frost them while they’re warm, the frosting will slide right off. I learned this the hard way and ended up with a puddle of sweet butter on my counter.
Step 7: Make the Brown Butter Frosting
While the bars cool, make the frosting. Place the butter in a small saucepan over medium heat. Stir constantly with a spatula or whisk. The butter will melt, foam, and then start to turn golden. Watch closely—it goes from perfect to burnt in seconds. When you see brown specks forming at the bottom and it smells nutty and toasty, remove it from the heat immediately. Pour it into a heatproof bowl and let it cool for 5-10 minutes.
Step 8: Finish the Frosting
Once the brown butter is slightly cooled but still liquid, add the powdered sugar, 2 tablespoons of milk, vanilla, and a pinch of salt. Beat with a hand mixer on low speed until combined, then increase to medium and beat for 2-3 minutes until smooth and creamy. If it’s too thick, add the remaining tablespoon of milk. If it’s too thin, add a little more powdered sugar.
Step 9: Frost and Serve
Spread the frosting evenly over the cooled bars. For a fancy touch, sprinkle a little flaky sea salt on top. Let the frosting set for about 15 minutes before slicing. Cut into 24 bars, or 12 if you’re feeling generous.
Cooking Tips & Techniques
Let me save you some trouble with a few things I’ve picked up from my many, many batches of these bars.
Don’t overbake. Pumpkin bars can go from perfectly moist to dry and crumbly in about two minutes. Start checking at 20 minutes. The toothpick should come out with a few moist crumbs, not clean and dry. If you wait until it’s completely clean, you’ve gone too far.
The brown butter secret. Browning butter is easy to mess up if you walk away. Stay by the stove. Swirl the pan occasionally. The moment you see those brown specks and smell that nutty aroma, pull it off the heat. I once got distracted by a phone call and ended up with black butter. It smelled like burnt popcorn and I had to start over.
Room temperature eggs matter. Cold eggs can seize the batter and make it lumpy. If you forgot to take them out, place them in a bowl of warm water for 5 minutes. Problem solved.
Measure your flour correctly. Scooping directly from the bag packs the flour and gives you too much. Instead, spoon it into your measuring cup and level it off with a knife. This one trick makes a huge difference in texture.
Let the bars cool completely. I know it’s tempting to rush, but warm bars + frosting = a melty mess. If you’re in a hurry, pop the bars in the fridge for 20 minutes after they’ve cooled to room temperature. That speeds things up without compromising the texture.
Use a light-colored pan for browning butter. Dark pans make it hard to see the color change. If all you have is dark, use a lower heat and watch like a hawk.
Variations & Adaptations
One of the best things about this recipe is how flexible it is. Here are some ways I’ve adapted it over the years.
Gluten-Free Version: Swap the all-purpose flour with a 1:1 gluten-free baking blend. I’ve used King Arthur’s and Cup4Cup with great results. Add an extra tablespoon of milk to the batter since gluten-free flours tend to absorb more liquid.
Dairy-Free Frosting: Use plant-based butter and oat milk. The brown butter flavor won’t be as pronounced, but it’s still creamy and delicious. Miyoko’s European Style Cultured Butter is my go-to for this.
Spice It Up: Add a pinch of cayenne pepper or a teaspoon of cardamom to the dry ingredients for a warm, unexpected kick. I did this once on a whim and it was incredible—like a chai latte in bar form.
Add-Ins: Fold in ½ cup of chopped pecans or walnuts to the batter before baking. Or sprinkle them on top of the frosting for crunch. Chocolate chips also work—dark chocolate pairs beautifully with the pumpkin and brown butter.
Make It a Sheet Cake: Double the recipe and bake in a half-sheet pan (18×13 inches). Increase the baking time to 30-35 minutes. Perfect for a crowd.
Pumpkin Cream Cheese Frosting: Not a fan of brown butter? Swap the frosting for a classic cream cheese version. Beat 8 ounces of cream cheese with ½ cup of butter, then add 4 cups of powdered sugar and a teaspoon of vanilla. It’s a totally different vibe but equally delicious.
Serving & Storage Suggestions
These bars are best served at room temperature. The frosting firms up nicely, but it softens slightly at room temp, making every bite perfectly creamy. If you’ve refrigerated them, let them sit out for 15-20 minutes before serving.
Presentation Ideas: Cut them into clean squares and arrange on a wooden board or a white platter. A dusting of cinnamon or a sprinkle of flaky sea salt on top makes them look bakery-worthy. For fall parties, I like to serve them on a plate with a few cinnamon sticks and star anise for decoration.
What to Serve with Them: A hot cup of coffee or spiced chai is the perfect pairing. If you’re serving them as dessert after a meal, try them with a scoop of vanilla ice cream or a dollop of whipped cream. They’re also great alongside a bowl of slow cooker chili for a cozy fall dinner.
Storage: Store leftover bars in an airtight container at room temperature for up to 3 days. If your kitchen is warm, refrigerate them to keep the frosting from getting too soft. They actually taste even better on day two—the flavors meld together beautifully.
Freezing: These bars freeze like a dream. Freeze them unfrosted for up to 3 months. Wrap the entire pan in plastic wrap, then foil. When you’re ready, thaw overnight in the fridge and frost the next day. You can also freeze frosted bars in a single layer on a baking sheet, then transfer to a freezer bag. Thaw in the fridge and bring to room temperature before serving.
Reheating: If you want a warm bar, microwave a single piece for 10-15 seconds. It softens the frosting slightly and makes the pumpkin flavor more pronounced. Don’t overdo it or the frosting will melt.
Nutritional Information & Benefits
Here’s a rough estimate per bar (based on 24 servings). These numbers are approximate and will vary based on your specific ingredients.
| Nutrient | Amount Per Bar |
|---|---|
| Calories | 210 |
| Total Fat | 10g |
| Saturated Fat | 4g |
| Cholesterol | 30mg |
| Sodium | 180mg |
| Total Carbohydrates | 29g |
| Dietary Fiber | 1g |
| Sugars | 20g |
| Protein | 2g |
Health Highlights: Pumpkin is packed with vitamin A, which is great for your eyes and immune system. It’s also a good source of fiber, which helps with digestion. The spices—cinnamon, ginger, and nutmeg—have anti-inflammatory properties. Plus, using vegetable oil instead of butter in the bars keeps the saturated fat lower than a traditional cake.
Dietary Considerations: This recipe can be made gluten-free and dairy-free with simple swaps. It’s nut-free as written (unless you add pecans). Not suitable for low-carb or keto diets due to the sugar content. For a lower-sugar version, you can reduce the sugar to 1 cup, but the texture will be slightly less tender.
Personal Note: I love that these bars feel indulgent but aren’t as heavy as a full-on pumpkin cheesecake. They’re the kind of dessert that satisfies your sweet tooth without making you feel like you need a nap afterward. And honestly? That’s a win in my book.
Frequently Asked Questions
Can I use fresh pumpkin instead of canned?
Yes, but you’ll need to roast and puree it first. Fresh pumpkin has more water than canned, so you’ll need to drain the puree in a cheesecloth-lined strainer for about an hour. Otherwise, the bars will be too wet and might not set properly.
Why did my brown butter frosting turn out grainy?
Grainy frosting usually happens when the brown butter is too hot when you add the powdered sugar. Let the butter cool for at least 5-10 minutes before mixing. Also, make sure your powdered sugar isn’t lumpy—sift it if necessary.
Can I make these bars ahead of time?
Absolutely. Bake the bars a day ahead and store them unfrosted at room temperature. Make the frosting and frost them the day you plan to serve. They’re actually better the next day because the flavors have time to meld.
How do I know when the brown butter is done?
Watch for the butter to turn a golden-amber color with brown specks at the bottom of the pan. It should smell nutty and toasty, like toasted hazelnuts. The whole process takes about 5-7 minutes over medium heat. Don’t walk away!
Can I double this recipe?
Yes, this recipe doubles beautifully. Use a half-sheet pan (18×13 inches) and increase the baking time to 30-35 minutes. The frosting recipe can also be doubled easily.
Conclusion
Look, I’m not going to tell you these pumpkin bars will change your life. But they might change your fall baking game. They’re simple enough for a Tuesday night, impressive enough for a party, and forgiving enough for those days when you’re running on three hours of sleep and a lot of coffee. The brown butter frosting is the kind of thing that makes people close their eyes when they take a bite—I’ve seen it happen.
What I love most about this recipe is how it came together. It wasn’t planned. It wasn’t perfect. It was born out of panic and a pantry that happened to have exactly what I needed. And honestly, that’s how the best recipes happen, right? They show up when you need them most.
So go ahead—make these bars for your next fall gathering, or just for yourself on a cozy Sunday afternoon. Customize them however you like. Add nuts, skip the frosting, double the cinnamon. Make them yours. And when someone asks for the recipe, tell them the story about the block party and the retired pastry chef. It’s a good one.
I’d love to hear how yours turn out. Drop a comment below and let me know if you tried any variations, or tag me in your photos on social media. Happy baking, friends!
P.S. If you’re looking for more easy fall desserts, you might also enjoy my apple cider donut cake or these no-fuss pecan pie bars. Both are perfect for weeknights and disappear just as fast.
Pin This Recipe!
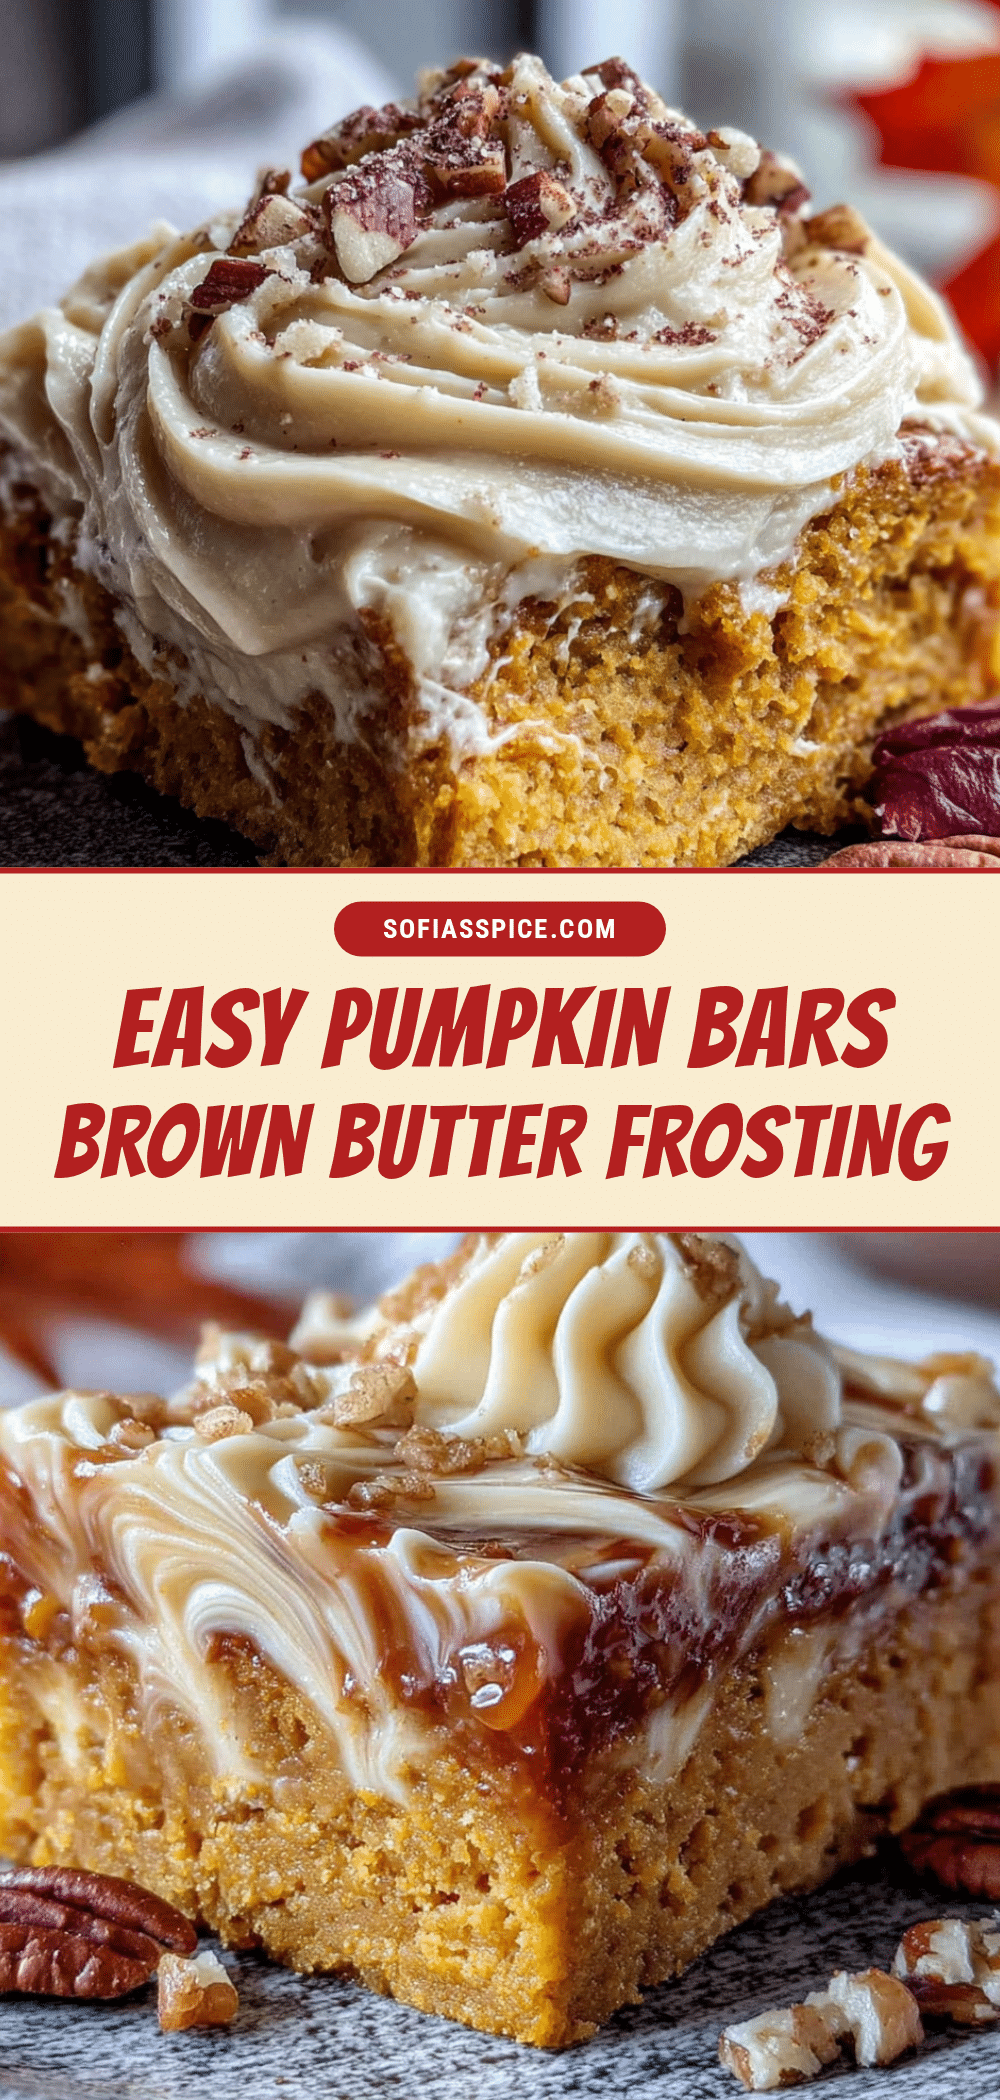
Easy Pumpkin Bars with Brown Butter Frosting
These easy pumpkin bars are moist, spiced, and topped with a nutty brown butter frosting. Perfect for fall gatherings, they come together in one bowl and are always a crowd-pleaser.
- Prep Time: 15 minutes
- Cook Time: 25 minutes
- Total Time: 45 minutes
- Yield: 24 bars 1x
- Category: Dessert
- Cuisine: American
Ingredients
- 1 ¾ cups (220g) all-purpose flour
- 1 ½ cups (300g) granulated sugar
- 1 cup (240ml) pumpkin puree
- ½ cup (120ml) vegetable oil
- 2 large eggs
- 1 teaspoon vanilla extract
- 2 teaspoons baking powder
- 1 teaspoon baking soda
- ½ teaspoon salt
- 2 teaspoons ground cinnamon
- 1 teaspoon ground ginger
- ½ teaspoon ground nutmeg
- ¼ teaspoon ground cloves
- ½ cup (113g) unsalted butter
- 2 cups (240g) powdered sugar
- 2–3 tablespoons milk
- 1 teaspoon vanilla extract
- Pinch of salt
Instructions
- Preheat oven to 350°F (175°C). Line a 9×13-inch baking pan with parchment paper, leaving overhang on the long sides. Lightly grease the parchment.
- In a medium bowl, whisk together flour, baking powder, baking soda, salt, cinnamon, ginger, nutmeg, and cloves.
- In a large bowl, whisk together sugar, pumpkin puree, vegetable oil, eggs, and vanilla extract until smooth.
- Pour dry ingredients into wet mixture. Fold with a spatula until just combined (a few streaks of flour are okay).
- Pour batter into prepared pan and spread evenly. Bake for 22-25 minutes, or until a toothpick inserted in the center comes out clean or with a few moist crumbs.
- Cool bars in the pan on a wire rack for 10 minutes, then lift out using parchment and transfer to rack to cool completely.
- While bars cool, make the frosting: Place butter in a small saucepan over medium heat. Stir constantly until butter melts, foams, and turns golden with brown specks and a nutty aroma. Remove from heat immediately and pour into a heatproof bowl. Let cool for 5-10 minutes.
- Add powdered sugar, 2 tablespoons milk, vanilla, and a pinch of salt to the brown butter. Beat with a hand mixer on low until combined, then on medium for 2-3 minutes until smooth and creamy. Add more milk if too thick, or more powdered sugar if too thin.
- Spread frosting evenly over cooled bars. Optionally, sprinkle with flaky sea salt. Let frosting set for about 15 minutes before slicing into 24 bars.
Notes
For best results, use 100% pure pumpkin puree (not pumpkin pie filling). Let bars cool completely before frosting to prevent melting. Brown butter can burn quickly—watch closely and remove from heat as soon as it turns golden and smells nutty. Store leftovers in an airtight container at room temperature for up to 3 days, or refrigerate if warm. Bars can be frozen unfrosted for up to 3 months.
Nutrition
- Serving Size: 1 bar
- Calories: 210
- Sugar: 20
- Sodium: 180
- Fat: 10
- Saturated Fat: 4
- Carbohydrates: 29
- Fiber: 1
- Protein: 2
Keywords: pumpkin bars, brown butter frosting, fall dessert, easy pumpkin recipe, pumpkin bars with frosting


