My husband scraped the last bit of garlic butter sauce off his plate with a piece of bread and said, “You know, this might be my favorite chicken you make.” That caught me off guard. I mean, I’ve tested more chicken recipes than I can count—sticky honey garlic versions, crispy air fryer thighs, slow cooker dinners that fill the house with that sweet-savory smell. But this one? This was a Tuesday night experiment born from a fridge full of green beans and a package of chicken thighs I forgot to thaw properly. And he was right. There was something about the way the garlic butter pooled around the crispy skin and coated each tender green bean that just worked. Honestly, it felt less like a recipe and more like a happy accident I’d been cooking toward for years without knowing it.
The best part? It all happens in one pan. No juggling multiple skillets, no extra dishes to scrub while you’re trying to get dinner on the table. The chicken gets beautifully golden and crisp on the skin side, then finishes cooking nestled right next to the green beans that soak up all that garlicky, buttery goodness. It’s the kind of meal that feels a little fancy—like something you’d order at a cozy neighborhood bistro—but comes together with the kind of ease you need on a busy weeknight. I’ve made this easy one-pan garlic butter chicken thighs with green beans at least a dozen times since that first night, tweaking the timing and the garlic-to-butter ratio until it felt just right. Now it’s the recipe I turn to when I want something that tastes like I spent hours in the kitchen, even though I really didn’t.
So if you’re looking for a dinner that delivers on flavor without demanding a lot from you, this is it. No complicated techniques, no long ingredient lists, just honest food that makes everyone at the table happy.
Why You’ll Love This Recipe
- One-Pan Wonder : Everything cooks in a single skillet, which means less cleanup and more time to actually sit down and enjoy your meal. It’s the kind of efficiency that makes weeknight cooking feel manageable instead of overwhelming.
- Simple Ingredients : You probably already have garlic, butter, chicken thighs, and green beans in your kitchen right now. No special trips to the store for exotic spices or hard-to-find items. It’s pantry cooking at its finest.
- Perfect for Busy Weeknights : From start to finish, this dish comes together in about 35 minutes. That’s faster than takeout delivery and twice as satisfying.
- Crowd-Pleaser : I’ve served this to picky kids, skeptical in-laws, and friends who claim they don’t love green beans. Every single person went back for seconds. The garlic butter has a way of winning people over.
- Naturally Low-Carb & Gluten-Free : If you’re watching your carbs or avoiding gluten, this recipe fits right into your lifestyle without feeling like a compromise. It’s satisfying and flavorful without relying on grains or starches.
What makes this recipe different from all the other chicken thigh recipes out there? It’s the technique. Getting that crispy, golden-brown skin while keeping the meat juicy and tender requires a specific approach—starting the chicken skin-side down in a cold pan, letting the fat render slowly, and then finishing everything together so the green beans absorb all that garlic butter goodness without turning mushy. I learned this method after a few disappointing attempts where the skin came out rubbery or the beans were either raw or overcooked. This version nails the texture every time.
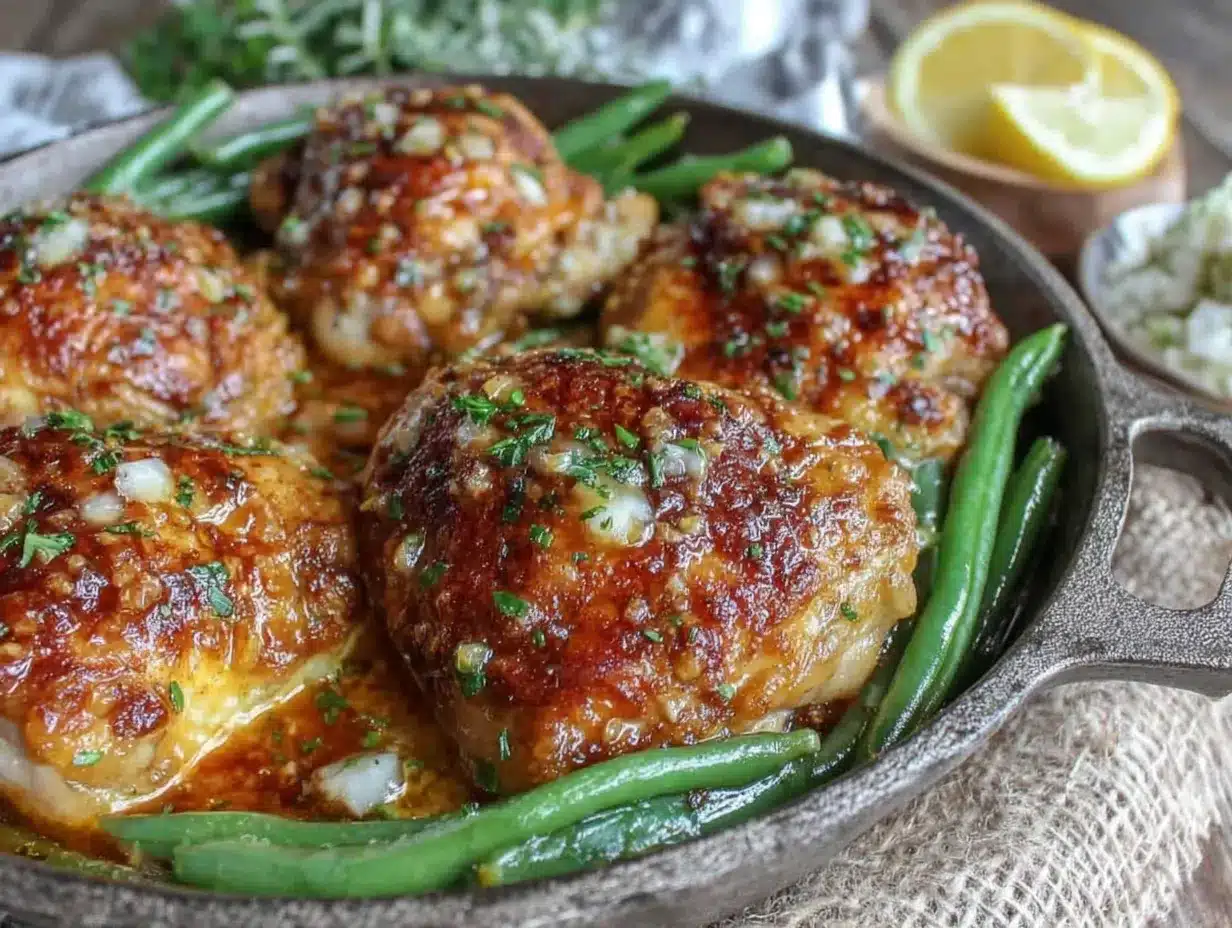
There’s also something deeply satisfying about pulling a single pan out of the oven and seeing perfectly cooked chicken thighs nestled next to glistening green beans. It feels complete. It feels like a real dinner, the kind that makes you close your eyes after the first bite and just breathe for a second. That’s what I wanted to capture here—that moment of quiet satisfaction that comes from food made with care, even if it only took thirty minutes.
What Ingredients You Will Need
This recipe relies on a handful of quality ingredients that work together to create something greater than the sum of their parts. The beauty is in the simplicity—each component plays a specific role, and none of them are complicated.
- Bone-in, skin-on chicken thighs (4-6 thighs, about 2 pounds total): This cut is the star of the show. The bone keeps the meat moist during cooking, and the skin crisps up beautifully when rendered properly. I prefer thighs from pasture-raised chickens when I can find them—they have deeper flavor and better texture. If you only have boneless thighs, reduce the cooking time by about 8-10 minutes and watch the internal temperature closely.
- Fresh green beans (1 pound, trimmed): Look for beans that are bright green, firm, and snap when you bend them. Avoid any that look limp or have brown spots. I like to use haricots verts (the thin French variety) when they’re in season because they cook faster and have a more delicate texture, but standard green beans work perfectly too. Just trim the stem ends and you’re good to go.
- Unsalted butter (4 tablespoons, divided): Butter is the backbone of the garlic sauce. Using unsalted butter lets you control the salt level of the finished dish. I’ve tested this with salted butter in a pinch, and it still works—just reduce the added salt by about ¼ teaspoon.
- Garlic (6-8 cloves, minced): Fresh garlic is non-negotiable here. The pre-minced stuff in a jar won’t give you the same aromatic punch. I mince my garlic by hand because I like the texture, but a garlic press works fine too. If you’re a garlic lover (like me), feel free to add an extra clove or two.
- Olive oil (2 tablespoons): A little olive oil helps the butter brown without burning, and it adds a subtle fruity note to the finished dish. I use extra-virgin olive oil for flavor, but regular olive oil works just as well for cooking.
- Dried thyme (1 teaspoon): Thyme and chicken are a classic pairing for good reason. The earthy, slightly floral notes complement the garlic butter beautifully. If you have fresh thyme, use about 1 tablespoon of leaves—just strip them off the stems and sprinkle them over the chicken before roasting.
- Paprika (1 teaspoon): Paprika adds color and a subtle smokiness that deepens as the chicken roasts. I use sweet Hungarian paprika, but smoked paprika works too if you want a bolder flavor.
- Salt and black pepper (to taste): Don’t be shy with the seasoning. Chicken thighs can handle a generous amount of salt, and freshly cracked black pepper adds warmth and bite.
- Chicken broth (¼ cup): A small amount of broth deglazes the pan and creates a light sauce that coats the green beans. You can use water in a pinch, but broth adds another layer of savory depth.
- Lemon juice (1 tablespoon, fresh): A squeeze of lemon at the end brightens everything up. It cuts through the richness of the butter and makes the flavors pop. Don’t skip this—it’s the secret to making the dish feel balanced.
- Red pepper flakes (optional, ¼ teaspoon): If you like a little heat, sprinkle some red pepper flakes over the finished dish. It’s completely optional, but I love the tiny kick it adds.
Equipment Needed
One of the best things about this recipe is how little equipment it requires. You don’t need a fancy kitchen full of gadgets to pull this off.
- Large oven-safe skillet (12-inch cast iron or stainless steel): This is your workhorse. Cast iron holds heat beautifully and gives the chicken skin that deep golden crust. A stainless steel skillet works too—just make sure it’s oven-safe up to 425°F. I’ve used my trusty 12-inch cast iron for years, and it only gets better with age.
- Tongs: Essential for flipping the chicken without piercing the skin and losing those precious juices. A good pair of metal tongs with silicone grips will serve you well for years.
- Instant-read thermometer: This is the tool that separates good chicken from great chicken. Guessing when it’s done leads to dry meat. A quick temperature check takes the guesswork out completely. I use a Thermapen, but any reliable instant-read thermometer will do.
- Cutting board and knife: For mincing garlic and trimming green beans. Nothing fancy needed—just a sharp chef’s knife and a sturdy board.
- Measuring spoons: For the spices, broth, and lemon juice. Eyeballing works for some things, but getting the salt and paprika right makes a noticeable difference here.
If you don’t have an oven-safe skillet, you can transfer the seared chicken and green beans to a baking dish before roasting. It adds one extra step, but the results are still excellent. Just make sure the baking dish is large enough to hold everything in a single layer.
Preparation Method
- Preheat your oven to 425°F and position a rack in the center. While the oven heats up, pat the chicken thighs dry with paper towels. This is important—moisture is the enemy of crispy skin. Season both sides generously with salt, pepper, paprika, and dried thyme. Let them sit at room temperature for about 15 minutes while you prep the green beans.
- Trim the green beans by lining up a handful at a time and cutting off the stem ends. Give them a quick rinse and pat them dry. Mince your garlic cloves and set them aside. Having everything prepped before you start cooking makes the whole process smoother and less stressful.
- Place your skillet over medium heat and add 2 tablespoons of olive oil and 2 tablespoons of butter. Let the butter melt and foam slightly—it should sizzle gently when you add the chicken. Place the chicken thighs skin-side down in the skillet, making sure not to overcrowd them. If your skillet is small, cook them in two batches. You want each thigh to have direct contact with the pan surface.
- Cook the chicken skin-side down for 6-8 minutes without moving them. Resist the urge to peek or flip too early. The skin needs uninterrupted contact with the hot pan to develop that deep golden crust. You’ll know it’s ready when the edges look brown and the skin releases easily from the pan. If it sticks, give it another minute.
- Flip the chicken thighs using your tongs and cook for 2 minutes on the second side. Remove the chicken to a plate and set aside. Don’t worry if they’re not fully cooked through—they’ll finish in the oven.
- Reduce the heat to medium-low and add the remaining 2 tablespoons of butter to the skillet. Once it melts, add the minced garlic and cook for 30-60 seconds until fragrant. Stir constantly so the garlic doesn’t burn—burnt garlic turns bitter and will ruin the sauce. Pour in the chicken broth and scrape up any browned bits from the bottom of the pan with a wooden spoon. Those browned bits are pure flavor.
- Add the trimmed green beans to the skillet and toss them in the garlic butter mixture. Spread them into an even layer. Nestle the chicken thighs back into the skillet, skin-side up, placing them on top of the green beans. The beans will act as a little bed for the chicken, keeping it elevated so the skin stays crispy.
- Transfer the skillet to the preheated oven and roast for 20-25 minutes, or until the chicken reaches an internal temperature of 175-185°F when tested at the thickest part (avoiding the bone). Dark meat is more forgiving than white meat and actually benefits from cooking to a higher temperature—the collagen breaks down and the meat becomes incredibly tender and juicy. The green beans should be tender-crisp and slightly wrinkled in spots.
- Remove the skillet from the oven and squeeze fresh lemon juice over everything. Sprinkle with red pepper flakes if you’re using them. Let the dish rest for 5 minutes before serving—this allows the juices to redistribute and the green beans to absorb a bit more of that garlic butter sauce.
- Serve directly from the skillet or transfer to a platter. Spoon any remaining garlic butter from the pan over the chicken and green beans. The sauce is liquid gold—don’t leave a drop behind.
Cooking Tips & Techniques
I’ve made this recipe enough times to know exactly where things can go wrong, and I want you to avoid those same pitfalls. The first time I tried it, I rushed the searing step and ended up with pale, rubbery skin that no amount of oven time could fix. Patience at the stove pays off in the oven.
Start with a cold pan if you’re using cast iron. Place the skillet over medium heat and let it warm up gradually. A preheated cast iron pan holds heat evenly and creates a better sear than one that’s been blasted on high heat. You want the butter to foam gently, not brown aggressively. If the butter turns dark brown before you even add the chicken, your heat is too high.
Don’t skip the drying step. Patting the chicken thighs dry with paper towels removes surface moisture that would otherwise steam the skin instead of crisping it. I usually do this step right after I take the chicken out of the fridge, then let it sit while I prep other ingredients. The salt has time to penetrate the meat, and the surface dries out even more.
For the green beans, aim for even thickness. If some beans are much thicker than others, they’ll cook at different rates. I try to pick through the bag and group similar-sized beans together, or I cut thicker ones in half lengthwise. It’s a small detail that makes a noticeable difference in texture.
One mistake I made early on was overcrowding the skillet. When the chicken thighs are too close together, they steam instead of sear, and you lose that beautiful golden crust. If your skillet isn’t large enough, cook the chicken in two batches. It adds a few extra minutes but the result is worth it.
Timing is everything here. While the chicken roasts, I usually throw together a quick side salad or set the table. The 20-minute oven time is just enough to get everything else ready. If you’re serving this with rice or crusty bread (both excellent choices), start those before you begin the chicken so everything finishes around the same time.
For the crispiest skin, don’t cover the skillet when it comes out of the oven. Letting it rest uncovered keeps the skin from steaming and turning soft. If you’re not serving immediately, tent it loosely with foil—but honestly, this dish is best enjoyed fresh from the oven.
Variations & Adaptations
One of the reasons I keep coming back to this recipe is how easily it adapts to different tastes and dietary needs. Here are a few variations I’ve tried and loved:
- Lemon-Herb Version : Add the zest of one lemon along with the garlic, and swap the dried thyme for a mix of fresh rosemary and oregano. The citrus brightens everything up and makes it feel lighter—perfect for spring or summer evenings.
- Spicy Honey Garlic : Add 2 tablespoons of honey and an extra teaspoon of red pepper flakes to the garlic butter mixture before adding the green beans. The sweetness balances the heat, and the honey helps the chicken skin caramelize even more in the oven. I made this version for a game day gathering and it disappeared fast—alongside a batch of honey garlic baked chicken wings, it was a hit.
- Dairy-Free Adaptation : Substitute the butter with a high-quality vegan butter or ghee (if you can tolerate clarified butter). Coconut oil works in a pinch, though it adds a slight coconut flavor that may or may not appeal to you. The texture will still be excellent.
- Vegetable Swap : Not a fan of green beans? Try asparagus (trimmed and cut into 2-inch pieces), broccoli florets, or even thick slices of zucchini. Adjust the roasting time based on your vegetable choice—asparagus may need 5 minutes less, while broccoli might need 5 minutes more.
- Balsamic Glaze Finish : Drizzle a little balsamic glaze over the finished dish before serving. The tangy sweetness cuts through the richness of the butter and adds a beautiful dark swirl to the plate. It’s an easy way to dress things up if you’re serving company.
I’ve also made this with boneless, skinless chicken thighs when that’s all I had on hand. The cooking time drops to about 15-18 minutes in the oven, and you lose the crispy skin, but the garlic butter sauce still carries the dish. It’s not the same experience, but it’s still delicious.
Serving & Storage Suggestions
This dish is incredibly versatile when it comes to serving. I usually bring the skillet straight to the table and let everyone help themselves—there’s something rustic and inviting about eating from the same pan. The garlic butter sauce pools at the bottom, so I like to spoon a little extra over each portion right before serving.
For sides, crusty bread is my top recommendation. You’ll want something to soak up every last drop of that garlic butter. A simple baguette or sourdough slice works perfectly. If you’re keeping it low-carb, serve it alongside a fresh green salad with a bright vinaigrette to balance the richness. Rice or quinoa also work well—the grains catch the sauce beautifully. I’ve even served this over creamy mashed potatoes on cold winter nights, and it was pure comfort.
For a complete meal that feels effortless, pair this with a creamy dill cucumber salad for a refreshing contrast to the warm, buttery chicken. The cool crunch of the cucumbers balances the richness perfectly.
Leftovers keep well in an airtight container in the refrigerator for up to 3 days. The green beans will soften a bit as they sit, but the flavor actually deepens overnight. To reheat, I recommend using the oven or a skillet rather than the microwave. Place everything in a 350°F oven for about 10 minutes, or until warmed through. The microwave tends to make the chicken skin soggy and the green beans mushy. If you’re in a hurry, a hot skillet with a splash of water or broth will revive the dish much better.
This recipe freezes surprisingly well. Let the dish cool completely, then transfer it to a freezer-safe container. It will keep for up to 3 months. Thaw overnight in the refrigerator and reheat in a 350°F oven until hot. The green beans won’t be as crisp as fresh, but the overall flavor holds up nicely.
Nutritional Information & Benefits
Each serving (based on 4 servings) contains approximately:
- Calories: 485
- Protein: 32g
- Fat: 36g
- Carbohydrates: 8g
- Fiber: 3g
- Sugar: 3g
- Sodium: 680mg
Chicken thighs are an excellent source of high-quality protein, iron, and B vitamins, particularly B12 and niacin, which support energy metabolism and nervous system health. The skin contains healthy fats that help your body absorb fat-soluble vitamins from the green beans. Speaking of which—green beans are packed with vitamin K, vitamin C, and fiber, all of which support bone health, immune function, and digestive regularity.
Garlic isn’t just for flavor—it contains allicin, a compound with antimicrobial and anti-inflammatory properties that may support heart health and immune function. And while butter gets a bad reputation in some circles, it provides fat-soluble vitamins A, D, and E, plus a healthy dose of conjugated linoleic acid, which has been linked to various health benefits.
This recipe is naturally gluten-free and low-carb, making it suitable for keto, paleo, and whole30 diets (use ghee instead of butter for whole30). It’s also nut-free and egg-free, so it works for most common food allergies. If you’re watching your sodium, use low-sodium chicken broth and reduce the added salt.
Conclusion
This easy one-pan garlic butter chicken thighs with green beans has become one of those recipes I genuinely look forward to making, even on nights when I’m tired and tempted to order takeout. It’s reliable without being boring, simple without sacrificing flavor, and satisfying in a way that feels like a warm hug on a plate. The crispy skin, the tender meat, the garlicky green beans swimming in buttery sauce—it all comes together in one pan with minimal fuss and maximum reward.
I hope you give this recipe a try and make it your own. Maybe you’ll add extra garlic like I do, or throw in some red pepper flakes for heat, or serve it over a bed of rice with a squeeze of lemon. However you adapt it, I think you’ll find yourself coming back to it again and again, just like I do. And when you make it, I’d love to hear how it turned out—drop a comment below or tag me in your photos. Happy cooking!
Frequently Asked Questions
Can I use chicken breasts instead of thighs?
You can, but I don’t recommend it for this recipe. Chicken breasts cook faster and dry out more easily, especially with the oven roasting method. If you really want to use breasts, choose bone-in, skin-on breasts and reduce the oven time to 18-22 minutes. Check the internal temperature at 160°F and let carryover cooking bring it to 165°F. The green beans may need to be added a few minutes later so they don’t overcook.
How do I know when the chicken is fully cooked?
The most reliable method is using an instant-read thermometer. Insert it into the thickest part of the thigh without touching the bone. Dark meat is safe at 165°F, but I prefer cooking it to 175-185°F—the higher temperature breaks down collagen and makes the meat more tender and juicy. The juices should run clear when you pierce the thigh near the bone.
Can I make this recipe ahead of time?
You can prep the ingredients ahead—trim the green beans, mince the garlic, and season the chicken—but I recommend cooking it fresh for the best texture. The crispy skin and tender-crisp green beans are at their peak right out of the oven. Leftovers reheat well, but the texture won’t be quite the same as fresh.
What if I don’t have an oven-safe skillet?
No problem. Sear the chicken and cook the garlic butter in any skillet, then transfer everything to a baking dish or sheet pan before roasting. Make sure the baking dish is large enough to hold the chicken and green beans in a single layer. The results will be just as delicious, and you’ll have one fewer pan to wash.
Can I add other vegetables to the pan?
Absolutely. This recipe is flexible—try adding halved cherry tomatoes, sliced bell peppers, or chunks of zucchini along with the green beans. Just keep in mind that different vegetables have different cooking times. Add quicker-cooking vegetables like tomatoes or zucchini halfway through the roasting time so they don’t turn to mush. For heartier vegetables like carrots or potatoes, par-cook them first or slice them thin so they finish at the same time as the chicken.
Pin This Recipe!

Easy One-Pan Garlic Butter Chicken Thighs with Green Beans

Crispy, golden chicken thighs and tender green beans are cooked together in a rich garlic butter sauce, all in one pan. This simple yet elegant weeknight dinner comes together in about 35 minutes and is naturally low-carb and gluten-free.
- Prep Time: 15 minutes
- Cook Time: 35 minutes
- Total Time: 50 minutes
- Yield: 4 servings 1x
- Category: Main Course
- Cuisine: American
Ingredients
- 4–6 bone-in, skin-on chicken thighs (about 2 pounds)
- 1 pound fresh green beans, trimmed
- 4 tablespoons unsalted butter, divided
- 6–8 cloves garlic, minced
- 2 tablespoons olive oil
- 1 teaspoon dried thyme
- 1 teaspoon paprika
- Salt and black pepper to taste
- 1/4 cup chicken broth
- 1 tablespoon fresh lemon juice
- 1/4 teaspoon red pepper flakes (optional)
Instructions
- Preheat oven to 425°F. Pat chicken thighs dry with paper towels. Season both sides generously with salt, pepper, paprika, and dried thyme. Let sit at room temperature for 15 minutes.
- Trim green beans by cutting off stem ends. Rinse and pat dry. Mince garlic and set aside.
- Place a large oven-safe skillet (12-inch cast iron or stainless steel) over medium heat. Add olive oil and 2 tablespoons butter. Let butter melt and foam slightly.
- Place chicken thighs skin-side down in the skillet. Cook without moving for 6-8 minutes until skin is deep golden brown and releases easily from the pan.
- Flip chicken and cook for 2 minutes on the second side. Remove chicken to a plate and set aside.
- Reduce heat to medium-low. Add remaining 2 tablespoons butter to the skillet. Once melted, add minced garlic and cook for 30-60 seconds until fragrant, stirring constantly.
- Pour in chicken broth and scrape up any browned bits from the bottom of the pan. Add trimmed green beans and toss in the garlic butter mixture. Spread into an even layer.
- Nestle chicken thighs back into the skillet, skin-side up, on top of the green beans.
- Transfer skillet to preheated oven and roast for 20-25 minutes, until chicken reaches an internal temperature of 175-185°F and green beans are tender-crisp.
- Remove from oven. Squeeze fresh lemon juice over everything. Sprinkle with red pepper flakes if using. Let rest 5 minutes before serving. Serve directly from the skillet, spooning remaining garlic butter over the chicken and green beans.
Notes
For the crispiest skin, pat chicken thighs dry thoroughly before seasoning. Start with a cold cast iron pan and let it heat gradually. Do not overcrowd the skillet; cook chicken in batches if necessary. Let the dish rest uncovered after roasting to keep the skin crispy. Leftovers keep in the refrigerator for up to 3 days; reheat in a 350°F oven or skillet for best texture.
Nutrition
- Serving Size: 1 serving (about 1 c
- Calories: 485
- Sugar: 3
- Sodium: 680
- Fat: 36
- Saturated Fat: 14
- Carbohydrates: 8
- Fiber: 3
- Protein: 32
Keywords: one-pan chicken, garlic butter chicken, chicken thighs, green beans, low-carb, gluten-free, weeknight dinner


