Introduction
Honestly, I thought making ice cream at home without an ice cream maker sounded like a mistake until my stubborn sister insisted I try her easy no-churn vanilla bean ice cream recipe. She swore it was foolproof and tasted just like the fancy stuff from the parlor. I was, let’s say, skeptical. Ice cream usually means machines, patience, and a mess — not something I was eager to wrestle with on a random Sunday afternoon.
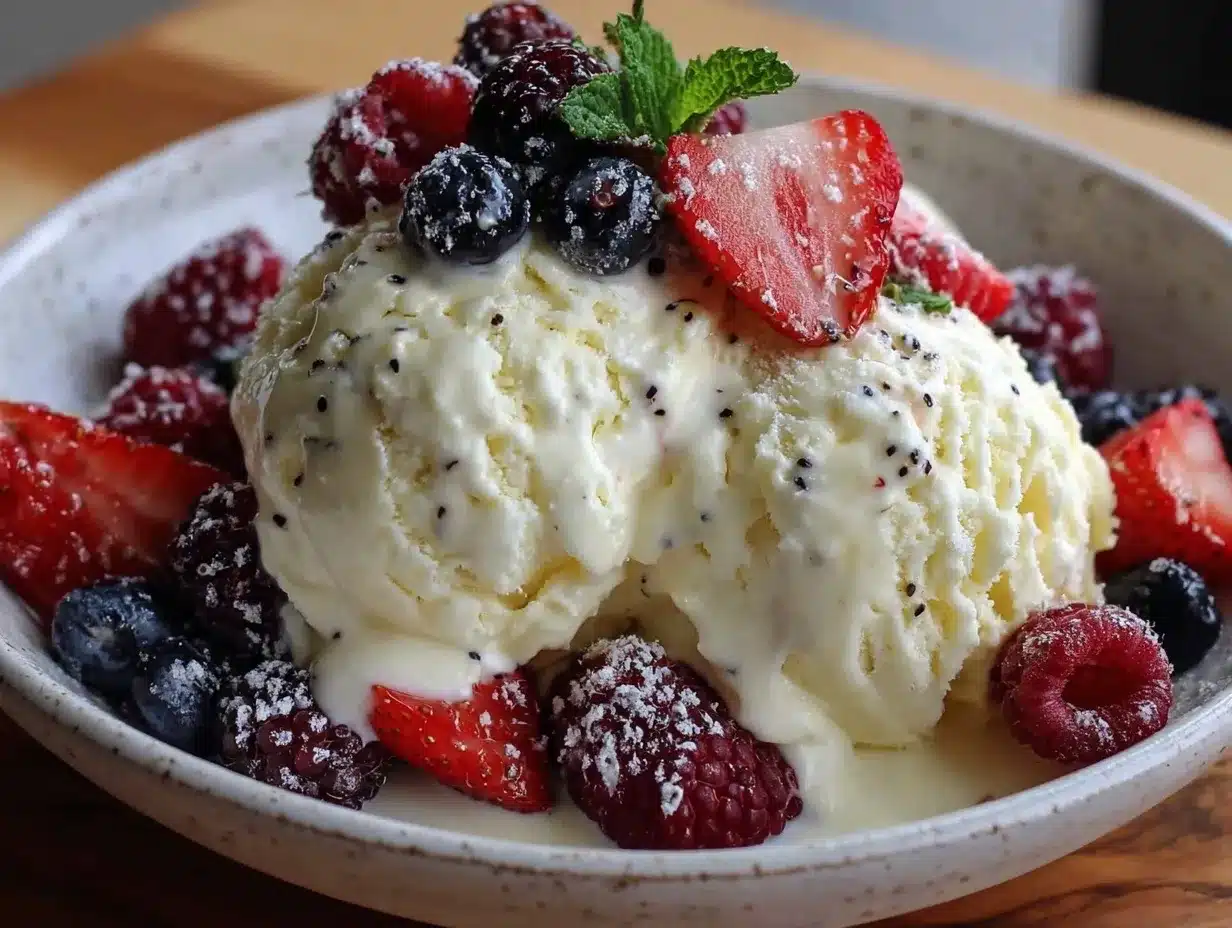
Still, the idea of rich, creamy vanilla bean ice cream paired with fresh, juicy berries was tempting enough to give it a shot. What surprised me most wasn’t just how simple the recipe was but how the natural vanilla bean flecks gave it this honest, homemade vibe. No artificial stuff, no freezer burn, just smooth, comforting ice cream that felt like summer trapped in a bowl.
The fresh berries on top brought that bright, tart contrast that made each spoonful feel like a little celebration. It wasn’t just dessert; it was a quiet moment of indulgence that somehow made me appreciate the small wins of kitchen experiments. This easy no-churn vanilla bean ice cream with fresh berries stuck with me because it proved you don’t need fancy gadgets or complicated steps to pull off something genuinely delicious at home. It’s a recipe I trust now, one I keep going back to when I want that creamy sweetness without any fuss.
Why You’ll Love This Recipe
- Quick & Easy: Ready in under 15 minutes of prep, perfect for those last-minute dessert cravings or relaxed weekends.
- Simple Ingredients: Uses pantry staples like heavy cream and sweetened condensed milk, plus the magic of a real vanilla bean.
- Perfect for Summer Gatherings: Whether it’s a casual family dinner or an outdoor potluck, this ice cream impresses with minimal effort.
- Crowd-Pleaser: Both kids and adults rave about the creamy texture and fresh berry topping — seriously, it disappears fast.
- Unbelievably Delicious: The vanilla bean seeds add an authentic flavor that’s far from ordinary, making it feel homemade in the best way.
- What Makes It Different: Unlike other no-churn recipes that rely on just extracts, this one uses the whole vanilla bean pod for that subtle, earthy aroma and speckled look that tells you it’s real deal.
- Emotional Connection: This isn’t just about making ice cream; it’s about the satisfaction that comes from making a classic treat from scratch, without the usual hassle.
What Ingredients You Will Need
This recipe uses simple, wholesome ingredients to deliver bold flavor and satisfying texture without the fuss. Most of these are pantry staples, and the fresh berries add a seasonal, vibrant touch that you can adapt based on what’s ripe at the market.
- Heavy Cream (2 cups / 480 ml) – cold, for whipping into fluffy peaks
- Sweetened Condensed Milk (1 can, 14 oz / 396 g) – adds sweetness and creaminess without extra sugar measuring
- Vanilla Bean (1 whole pod) – split and scraped for fresh vanilla seeds (trust me, this makes the flavor pop!)
- Pure Vanilla Extract (1 tsp) – just a little extra vanilla boost
- Fresh Berries (1 to 2 cups / 150-300 g) – I like a mix of blueberries, raspberries, and strawberries for color and tang
- Lemon Zest (optional, 1 tsp) – brightens the berry topping nicely
Ingredient tips: If you can’t find a vanilla bean pod, use high-quality pure vanilla extract but expect a slightly less intense vanilla flavor. For a dairy-free version, swap the heavy cream with full-fat coconut cream and use sweetened condensed coconut milk.
Equipment Needed
- Mixing Bowl: A large bowl for whipping the cream comfortably.
- Hand Mixer or Stand Mixer: For whipping heavy cream to stiff peaks. You could whisk by hand, but it takes longer and is a workout!
- Spatula: For folding the condensed milk and vanilla bean seeds into the whipped cream gently.
- Freezer-Safe Container: Any shallow container with a lid will do — I’ve even used loaf pans with foil wrapped tight.
- Knife and Spoon: For splitting and scraping the vanilla bean pod.
If you don’t have a mixer, a good old-fashioned balloon whisk and some elbow grease can work, but the texture might be less fluffy. For budget-friendly options, small hand mixers from brands like Hamilton Beach do the job well without breaking the bank. Keeping your bowl chilled before whipping helps the cream get firmer faster.
Preparation Method
- Prepare the Vanilla Bean: Using a sharp knife, carefully split the vanilla bean pod lengthwise. Scrape the tiny black seeds out with the back of the knife and set aside. This step releases the authentic vanilla flavor that makes this ice cream stand out. (Approx. 3 minutes)
- Whip the Heavy Cream: In a large mixing bowl, pour the cold heavy cream. Using a hand mixer or stand mixer, whip on medium-high speed until stiff peaks form. You’ll know it’s ready when the cream holds its shape firmly when you lift the beaters. This usually takes about 3 to 5 minutes. (Approx. 5 minutes)
- Combine Sweetened Condensed Milk and Vanilla: In a separate bowl, mix the sweetened condensed milk with the vanilla bean seeds and vanilla extract. Stir well so the seeds are evenly distributed throughout the milk. (Approx. 2 minutes)
- Fold Ingredients Together: Gently fold the condensed milk mixture into the whipped cream using a spatula. Use slow, careful motions to avoid deflating the cream — you want to keep it light and airy. (Approx. 3 minutes)
- Transfer to Freezer Container: Spoon the mixture into your freezer-safe container, smoothing the top with a spatula. Cover tightly with a lid or plastic wrap to prevent freezer burn. (Approx. 2 minutes)
- Freeze: Place the container in the freezer for at least 6 hours, preferably overnight. The ice cream will firm up without needing any churning. (No hands-on time)
- Prepare Fresh Berries: Just before serving, rinse and gently pat dry your fresh berries. Toss with a little lemon zest if using, to brighten their flavor. (Approx. 3 minutes)
- Serve: Scoop the creamy vanilla bean ice cream into bowls or cones and top with the fresh berry medley. The cold, creamy texture combined with the juicy berries is pure bliss.
Tip: If you find your ice cream a bit too firm after freezing, let it sit at room temperature for 5 minutes before scooping to soften slightly.
Cooking Tips & Techniques
One of the trickiest parts of no-churn ice cream is getting that perfect creamy texture without an ice cream maker. I learned early on that whipping the heavy cream to stiff peaks is the secret — anything less and your ice cream can turn out dense or icy. Also, folding gently is an art; you don’t want to lose all that air you just whipped in.
Using a fresh vanilla bean instead of just extract makes a big flavor difference. Those tiny seeds aren’t just for looks—they infuse the ice cream with a depth you won’t get from artificial vanilla. If you’re worried about the expense, a single vanilla bean pod goes a long way and is worth it for the authentic taste.
Multi-tasking while the ice cream freezes can save time. I often prep the fresh berries or whip up a quick sauce, like a drizzle of homemade sweet peach preserves that pairs beautifully with the vanilla.
Watch out for freezer burn — tightly sealing your container is key. If you skip this, the surface can dry out and ruin the smooth texture. Lastly, be patient. The six-hour freeze time is non-negotiable for the right consistency.
Variations & Adaptations
This recipe is a perfect base for variations to suit your tastes or dietary needs. Here are a few I’ve tried and loved:
- Berry Swirl: Fold in a homemade berry compote or fresh berry puree into the ice cream mixture before freezing for a fruity ripple effect.
- Dairy-Free Version: Use coconut cream instead of heavy cream and sweetened condensed coconut milk. The texture is slightly different but still creamy and delicious.
- Chocolate Chip: Add mini dark chocolate chips or chunks just before freezing for a classic combo with vanilla bean.
- Herbal Twist: Infuse the cream with a few sprigs of fresh lavender or mint before whipping (strain before adding condensed milk) for a subtle floral note.
- Nutty Crunch: Mix in toasted chopped almonds or pistachios once the ice cream is partially frozen for added texture.
For alternative cooking methods, this recipe is strictly no-churn, but if you want to try a quick no-churn blackberry lavender ice cream, the technique is similar — just swap flavors!
Serving & Storage Suggestions
Serve this vanilla bean ice cream slightly softened for the best scoop. It pairs wonderfully with fresh fruit, but also with crunchy cookies or a drizzle of homemade sauces — like the easy no-bake strawberry cheesecake topping I often keep on hand.
Store leftovers in an airtight container in the freezer. It keeps well for up to 2 weeks, but honestly, it rarely lasts that long in my house! When reheating for serving, let sit at room temperature for 5–10 minutes to soften naturally — avoid microwaving as it changes the texture.
Over time, the flavors meld even more, so if you prep this a day ahead, it actually tastes richer the next day. Just give it a quick stir before serving to break up any ice crystals on the surface.
Nutritional Information & Benefits
This easy no-churn vanilla bean ice cream recipe is a treat that balances indulgence with simplicity. A typical serving (about ½ cup / 125 ml) contains roughly 250 calories, mostly from fat and sugars, so it’s definitely a dessert to enjoy in moderation.
Key ingredients like vanilla bean offer trace antioxidants, while fresh berries added on top bring vitamins C and fiber, making your scoop a little more nutrient-rich. If you swap in coconut cream for dairy-free, you also get medium-chain triglycerides that some find beneficial for energy.
For those with allergies, this recipe contains dairy and is not gluten-free unless you add toppings thoughtfully. You can customize it to be lower sugar by using unsweetened condensed milk alternatives, but I find the balance here is just right for that classic creamy, sweet flavor.
Conclusion
This easy no-churn vanilla bean ice cream with fresh berries is a recipe that proved its worth to me through honest, simple pleasure — no gimmicks, just real ingredients and straightforward steps. It’s a dessert that anyone can make at home without special tools or advanced skills, yet it feels special enough to serve when company drops by unexpectedly.
The fresh vanilla bean and vibrant berries make it stand apart from run-of-the-mill store-bought ice cream, and the no-churn method means you can whip it up whenever the craving hits. I love how adaptable it is, too—you can tweak it to suit your pantry or mood with ease.
I hope you find as much joy in making and eating this as I did turning from a skeptic to a total believer. If you try it, I’d love to hear your version or any twists you add to make it your own.
FAQs
- Can I use vanilla extract instead of a vanilla bean?
Yes, you can substitute 1 to 2 teaspoons of pure vanilla extract if you don’t have a vanilla bean, but the flavor won’t be quite as intense or speckled. - How long does the ice cream need to freeze?
It needs at least 6 hours, preferably overnight, to firm up properly since there’s no churning involved. - Can I add mix-ins like nuts or chocolate chips?
Absolutely! Fold them in gently after combining the cream and condensed milk, before freezing. - Is there a dairy-free option?
Yes! Use full-fat coconut cream and sweetened condensed coconut milk for a creamy, dairy-free alternative. - What fresh berries work best as a topping?
A mix of blueberries, raspberries, and strawberries works beautifully, but feel free to use whatever fresh berries are in season or your favorite.
Pin This Recipe!
Easy No-Churn Vanilla Bean Ice Cream Recipe with Fresh Berries at Home
A simple and foolproof no-churn vanilla bean ice cream recipe that delivers rich, creamy texture and authentic vanilla flavor, topped with fresh berries for a bright, tart contrast.
- Prep Time: 15 minutes
- Cook Time: 0 minutes
- Total Time: 6 hours 15 minutes
- Yield: 6 servings 1x
- Category: Dessert
- Cuisine: American
Ingredients
- 2 cups (480 ml) cold heavy cream
- 1 can (14 oz / 396 g) sweetened condensed milk
- 1 whole vanilla bean pod, split and scraped
- 1 tsp pure vanilla extract
- 1 to 2 cups (150–300 g) fresh berries (blueberries, raspberries, strawberries mix)
- 1 tsp lemon zest (optional)
Instructions
- Using a sharp knife, carefully split the vanilla bean pod lengthwise. Scrape the tiny black seeds out with the back of the knife and set aside.
- In a large mixing bowl, pour the cold heavy cream. Using a hand mixer or stand mixer, whip on medium-high speed until stiff peaks form, about 3 to 5 minutes.
- In a separate bowl, mix the sweetened condensed milk with the vanilla bean seeds and vanilla extract. Stir well to evenly distribute the seeds.
- Gently fold the condensed milk mixture into the whipped cream using a spatula, using slow, careful motions to keep it light and airy.
- Spoon the mixture into a freezer-safe container, smoothing the top with a spatula. Cover tightly with a lid or plastic wrap to prevent freezer burn.
- Place the container in the freezer for at least 6 hours, preferably overnight, to firm up without churning.
- Just before serving, rinse and gently pat dry the fresh berries. Toss with lemon zest if using to brighten the flavor.
- Scoop the vanilla bean ice cream into bowls or cones and top with the fresh berry medley.
Notes
If the ice cream is too firm after freezing, let it sit at room temperature for 5 minutes before scooping. For dairy-free, substitute heavy cream with full-fat coconut cream and sweetened condensed coconut milk. Use high-quality vanilla extract if vanilla bean pod is unavailable, but flavor will be less intense. Tightly seal container to avoid freezer burn. Whip cream to stiff peaks for best texture.
Nutrition
- Serving Size: About 1/2 cup (125 m
- Calories: 250
- Sugar: 22
- Sodium: 55
- Fat: 16
- Saturated Fat: 10
- Carbohydrates: 24
- Fiber: 1
- Protein: 3
Keywords: no-churn ice cream, vanilla bean ice cream, easy ice cream recipe, homemade ice cream, fresh berries dessert, summer dessert, no ice cream maker


