The other evening, I found myself in the kitchen at 9 p.m., craving something sweet but without the energy or patience for baking. I’d bought a punnet of strawberries earlier that week, hoping to use them for a dessert that never quite came to be. With a fridge full of cream cheese and a box of graham crackers barely touched, I decided to throw caution to the wind and whip up these easy no-bake strawberry cheesecake cups. Honestly, it felt a bit like a last-minute rescue mission after a long day that somehow turned into a sweet little victory.
What surprised me most wasn’t just the creamy texture or the bright, fresh strawberry flavor—though those were fantastic—but how effortlessly this recipe came together without heating up the kitchen or requiring fancy equipment. It quickly became a go-to for those “I want dessert but don’t want to bake” moments. Plus, the ease with which you can customize it keeps me coming back, whether I’m craving that classic creamy cheesecake feel or a fruity twist.
There’s something quietly satisfying about layering crushed graham crackers, luscious cream cheese filling, and juicy strawberries in a cup. It’s like dessert therapy, served in single portions, perfect for quiet nights or unexpected guests. I keep thinking about how these would be a hit alongside a batch of simple coconut lime popsicles for a refreshing summer spread. But before getting ahead of myself, I’m happy to share this easy no-bake strawberry cheesecake cups recipe that feels like summer in every bite.
It’s one of those recipes that stuck with me because it’s just so darn reliable—and honestly, it’s the kind of treat that makes you pause and smile after the first spoonful. No fuss, no mess, just pure creamy, fruity delight.
Why You’ll Love This Recipe
Having tested this easy no-bake strawberry cheesecake cups recipe several times (and I’m not even kidding, I made it three times in one week), I can say with confidence this dessert is a keeper. Here’s why you might want to keep it on speed dial for summer and beyond:
- Quick & Easy: Comes together in under 20 minutes. Seriously, you can make it while your favorite summer playlist is playing.
- Simple Ingredients: No need to hunt down fancy imports. You likely have cream cheese, strawberries, and graham crackers on hand already.
- Perfect for Summer Treats: Cool, refreshing, and just sweet enough to satisfy those warm-weather cravings.
- Crowd-Pleaser: Whether it’s a backyard barbecue or an office potluck, people ask for seconds (and sometimes thirds).
- Unbelievably Delicious: The creamy texture of the cheesecake filling contrasts perfectly with the crunch of crushed crackers and juicy strawberries.
What really sets this cheesecake cups recipe apart from others is the way the filling is whipped to a fluffy yet thick consistency—no graininess, just smooth, creamy bliss. I like to use full-fat cream cheese for richness, but you can swap in light cream cheese if you want to keep things a bit lighter. Also, the graham cracker base is crushed just right, not too fine, so you get that lovely texture in every bite.
It’s the kind of dessert that feels both indulgent and fresh, perfect for impressing guests without any stress. Honestly, it’s like a little summer party in a cup, and the balance of flavors makes you close your eyes and savor the moment.
What Ingredients You Will Need
This recipe uses simple, wholesome ingredients to deliver bold flavor and satisfying texture without the fuss. You’ll find most of these in your pantry or fridge, and if you’re shopping, they’re easy to track down year-round.
- For the Cheesecake Filling:
- 8 ounces (225g) cream cheese, softened (I prefer Philadelphia brand for creaminess)
- 1/2 cup (120ml) heavy cream, cold (helps achieve that fluffy texture)
- 1/3 cup (67g) granulated sugar (adjust to taste)
- 1 teaspoon vanilla extract (pure vanilla makes a difference here)
- 1 tablespoon fresh lemon juice (adds brightness and balances sweetness)
- For the Crust:
- 1 1/2 cups (150g) graham cracker crumbs (you can crush store-bought crackers or use pre-packaged crumbs)
- 3 tablespoons (43g) unsalted butter, melted (adds richness and helps bind the crumbs)
- 1 tablespoon granulated sugar (optional, for extra sweetness)
- For the Topping:
- 1 1/2 cups (225g) fresh strawberries, hulled and sliced (choose ripe, fragrant berries for best flavor)
- Optional: fresh mint leaves for garnish (for a pop of color and freshness)
If you want to switch things up, you can swap the graham crackers for digestive biscuits or gluten-free crackers to keep it gluten-free. Also, using Greek yogurt instead of some cream cheese can make the filling tangier and a bit lighter. For those who love a bit of sparkle, a drizzle of strawberry sauce or a sprinkle of lemon zest works wonders.
Equipment Needed
- Mixing bowls – one large for the filling, one small for the crust mixture.
- Electric mixer or hand whisk – whipping the cream cheese and cream to the perfect creamy texture is much easier with a mixer, but a sturdy whisk can do the job if you’re patient.
- Measuring cups and spoons – for accurate ingredient amounts.
- Spatula – to fold ingredients gently and scrape bowls clean.
- Serving glasses or small jars – individual cups make presentation easy and fun.
- Food processor or plastic bag and rolling pin – to crush graham crackers finely.
If you don’t have a food processor, placing crackers inside a sealed plastic bag and crushing them with a rolling pin works just fine. I’ve used both methods, and while the processor is quicker and more uniform, the rolling pin crush gives a bit more rustic texture, which I find charming.
Preparation Method
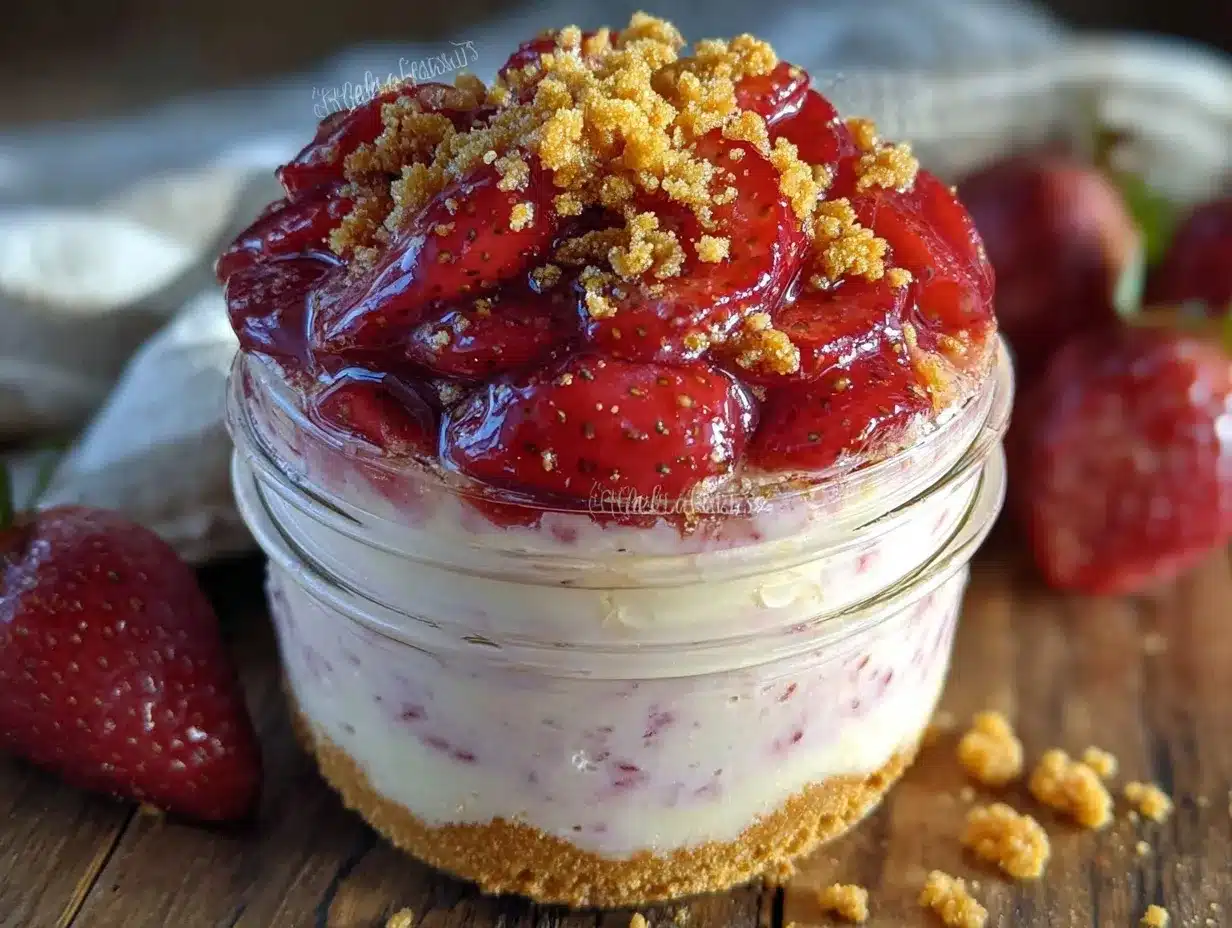
- Prepare the Crust: In a medium bowl, mix graham cracker crumbs, melted butter, and sugar until evenly combined. The mixture should feel like wet sand, holding together when pressed. (About 5 minutes.)
- Assemble the Crust in Cups: Spoon about 2 tablespoons (30g) of the crust mixture into each serving cup. Press down gently with the back of a spoon or your fingers to form a compact base. Set aside in the fridge while you prepare the filling. (5 minutes)
- Make the Cheesecake Filling: In a large mixing bowl, beat softened cream cheese with sugar and lemon juice until smooth and creamy using an electric mixer (about 2-3 minutes). The mixture should be lump-free and silky.
- Whip the Cream: In a separate bowl, whip the cold heavy cream and vanilla extract until soft peaks form (about 3-5 minutes). The cream should hold shape but still be soft and fluffy.
- Combine Filling and Cream: Gently fold the whipped cream into the cream cheese mixture using a spatula. Do this carefully to keep the airy texture. Your filling should be light, creamy, and spreadable. (2-3 minutes)
- Fill the Cups: Spoon or pipe the cheesecake filling over the chilled crust in each cup, filling nearly to the top. Smooth the surface with the back of a spoon.
- Add Strawberry Topping: Arrange sliced strawberries on top of each cup, covering the filling generously. Garnish with fresh mint leaves if using.
- Chill: Refrigerate the cups for at least 2 hours to let everything set properly and flavors meld. (You can prep these a day ahead for convenience.)
- Serve: Bring out your cool, creamy no-bake strawberry cheesecake cups and enjoy!
Pro tip: When folding the whipped cream, don’t rush. It’s tempting to mix quickly, but a gentle fold keeps that fluffy texture intact, making all the difference in the final mouthfeel.
Cooking Tips & Techniques
Because this recipe skips baking, technique is all about texture and timing. Here are some lessons I learned the hard way:
- Softened Cream Cheese Is Key: If the cream cheese is too cold, lumps sneak into the filling. Let it sit at room temperature for at least 30 minutes before starting.
- Whip the Cream Just Right: Over-whipping can turn cream grainy or even into butter. Stop as soon as you see soft peaks that hold their shape but still look smooth.
- Press Your Crust Firmly: This keeps it from crumbling when you dig in. A loosely packed crust leads to messy cups (been there!).
- Chill Time Matters: Don’t skip the refrigeration step. It helps the filling firm up and the flavors to marry. Overnight chilling is even better if you can wait.
- Use Fresh Strawberries: Frozen or watery berries can make the cups soggy. If you’re out of season, consider a quick maceration with a little sugar and lemon juice to boost flavor.
Multitasking here is a breeze—while the crust chills, whip the cream and mix the filling. This keeps the process smooth, and you won’t feel overwhelmed, especially on a busy summer afternoon.
Variations & Adaptations
This easy no-bake strawberry cheesecake cups recipe lends itself well to creative twists. Here are some ideas I’ve tried or thought would be fun:
- Berry Medley: Swap strawberries for a mix of blueberries, raspberries, and blackberries for a vibrant, antioxidant-rich topping.
- Chocolate Drizzle: Finish with a drizzle of melted dark chocolate or even sprinkle with mini chocolate chips for a touch of indulgence.
- Gluten-Free Option: Use gluten-free crackers instead of graham crackers to accommodate dietary needs without losing that satisfying crunch.
- Vegan Version: Replace cream cheese with a cashew-based vegan alternative and use coconut cream instead of dairy heavy cream. The texture changes slightly but stays delicious.
- Lemon Twist: Add extra lemon zest to the filling for a zesty flavor profile, similar to my no-bake lemon icebox pie. It’s a refreshing alternative when you want something tangier.
I personally love a combo of fresh strawberries with a few blueberries tossed in for color contrast. The subtle tartness balances the rich creaminess beautifully.
Serving & Storage Suggestions
These cheesecake cups are best served chilled, straight from the fridge. I like to garnish with a sprig of fresh mint or a small strawberry slice on the rim for a pretty presentation. They make a lovely finish to a summer meal, especially paired with light dishes like grilled chicken or a fresh salad.
For a casual summer gathering, they sit nicely alongside other cold treats like the coconut lime popsicles or even a crisp fruit salad.
To store, cover the cups tightly with plastic wrap or lids and refrigerate. They keep well for up to 3 days—beyond that, the crust can start to soften. If you want to prep ahead for a party, assembling the crust and filling separately and combining just before serving helps maintain that perfect crunch.
If you need to transport them, I recommend a sturdy container with dividers or individual lids, so the layers stay intact. Reheating isn’t really recommended here since it’s best enjoyed cold, but letting them sit at room temperature for 10 minutes before serving can soften the filling slightly for a creamier mouthfeel.
Nutritional Information & Benefits
Each serving of these no-bake strawberry cheesecake cups contains roughly:
| Nutrient | Amount per Serving |
|---|---|
| Calories | 280 kcal |
| Fat | 18 g |
| Carbohydrates | 22 g |
| Sugar | 15 g |
| Protein | 4 g |
The cream cheese provides a good dose of calcium and protein, while fresh strawberries add vitamin C and antioxidants. Using real cream and cream cheese means it’s a richer dessert, so moderation is key if you’re watching fat intake.
This recipe is naturally gluten-containing unless you swap out the graham crackers for gluten-free options. It’s free from nuts and eggs, making it suitable for those with those allergies.
From a wellness standpoint, this dessert hits the sweet spot between indulgence and freshness—perfect when you want a treat that feels homemade and satisfying without being overly heavy or complicated.
Conclusion
This easy no-bake strawberry cheesecake cups recipe has become a personal favorite for those moments when I want a creamy, dreamy dessert without the fuss of an oven. It’s simple to make, uses straightforward ingredients, and offers a fresh, summery vibe that feels like a little reward after a busy day.
What I love most is how adaptable it is—you can tweak the toppings, swap ingredients for dietary needs, or even dress it up for a special occasion. Plus, it pairs beautifully with other light summer dishes, making it a flexible option for any meal.
If you try this recipe, I’d love to hear how you make it your own. Whether you add a chocolate drizzle, try a berry mix, or keep it classic with strawberries, it’s a dessert that welcomes your personal touch. Don’t hesitate to share your versions or questions below—there’s always room for more cheesecake love!
FAQs About Easy No-Bake Strawberry Cheesecake Cups
Can I make these cheesecake cups ahead of time?
Yes! They actually taste better after chilling for a few hours or overnight, which helps the flavors meld and the texture firm up nicely.
Can I use frozen strawberries instead of fresh?
Fresh strawberries are best to avoid sogginess, but if frozen, thaw them first and drain any excess liquid well before topping the cups.
How do I get the creamy texture without lumps in the filling?
Make sure your cream cheese is fully softened before mixing, and whip the cream to soft peaks before folding gently into the cream cheese mixture.
Is there a dairy-free version of this cheesecake cups recipe?
Absolutely! Use vegan cream cheese and coconut cream instead of dairy products. The texture will be slightly different but still delicious.
Can I substitute the graham cracker crust with something else?
Yes, digestive biscuits, gluten-free crackers, or even crushed nuts (if no allergies) can be used to create a crunchy base.
Pin This Recipe!
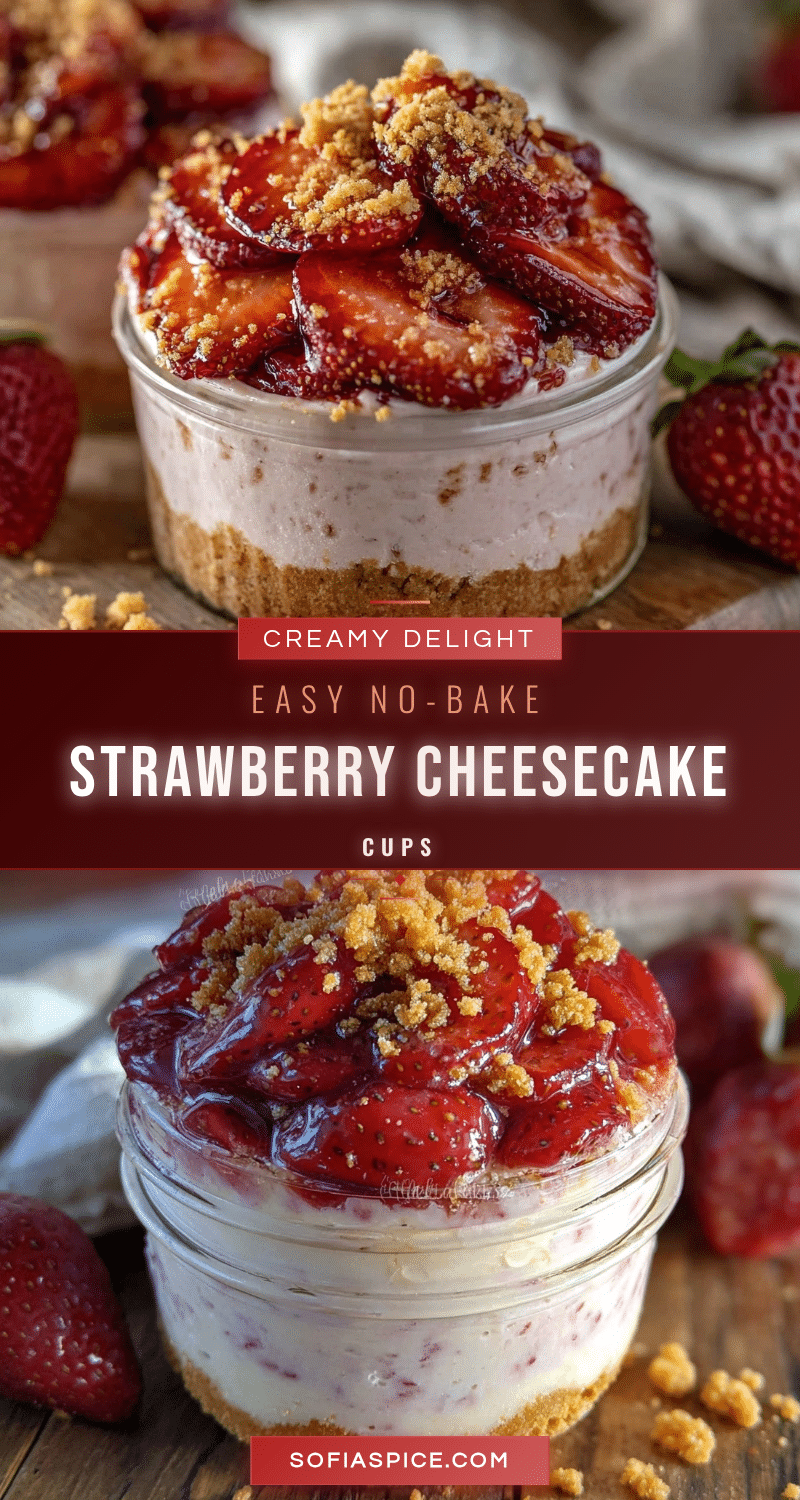
Easy No-Bake Strawberry Cheesecake Cups
A quick and easy no-bake dessert featuring creamy cheesecake filling layered over a crunchy graham cracker crust and topped with fresh strawberries. Perfect for summer treats and gatherings.
- Prep Time: 15 minutes
- Cook Time: 0 minutes
- Total Time: 2 hours 15 minutes
- Yield: 6 servings 1x
- Category: Dessert
- Cuisine: American
Ingredients
- 8 ounces cream cheese, softened
- 1/2 cup heavy cream, cold
- 1/3 cup granulated sugar
- 1 teaspoon vanilla extract
- 1 tablespoon fresh lemon juice
- 1 1/2 cups graham cracker crumbs
- 3 tablespoons unsalted butter, melted
- 1 tablespoon granulated sugar (optional)
- 1 1/2 cups fresh strawberries, hulled and sliced
- Optional: fresh mint leaves for garnish
Instructions
- Prepare the crust by mixing graham cracker crumbs, melted butter, and sugar until evenly combined and the mixture feels like wet sand.
- Spoon about 2 tablespoons of the crust mixture into each serving cup and press down gently to form a compact base. Refrigerate while preparing the filling.
- In a large bowl, beat softened cream cheese with sugar and lemon juice until smooth and creamy.
- In a separate bowl, whip cold heavy cream and vanilla extract until soft peaks form.
- Gently fold the whipped cream into the cream cheese mixture to keep the airy texture.
- Spoon or pipe the cheesecake filling over the chilled crust in each cup and smooth the surface.
- Arrange sliced strawberries on top of each cup and garnish with fresh mint leaves if desired.
- Refrigerate the cups for at least 2 hours to set and meld flavors.
- Serve chilled and enjoy.
Notes
Use softened cream cheese to avoid lumps. Whip cream to soft peaks to prevent graininess. Press crust firmly to avoid crumbling. Chill for at least 2 hours or overnight for best results. Fresh strawberries are preferred to avoid sogginess. Can substitute graham crackers with gluten-free crackers for gluten-free option.
Nutrition
- Serving Size: 1 cup
- Calories: 280
- Sugar: 15
- Fat: 18
- Carbohydrates: 22
- Protein: 4
Keywords: no-bake cheesecake, strawberry dessert, summer treats, easy dessert, cheesecake cups, no bake, quick dessert


