Slamming the fridge door shut with my hip, a carton of heavy cream in one hand and a pound of strawberries in the other, when I realized I had completely forgotten to turn on the oven. It was ninety-three degrees outside, the AC was struggling, and I had promised my neighbor I’d bring dessert to her last-minute backyard get-together. Standing there in the humidity, the last thing I wanted to do was heat up my entire kitchen. I needed something cold, something creamy, and something that wouldn’t make me sweat.
I spotted the graham crackers in the pantry, and it just clicked. No-bake. Layers. Icebox cake. It’s one of those old-school desserts that feels like cheating because it’s so simple, but honestly, it looks like you fussed for hours. I grabbed what I had, started layering, and hoped for the best. The result was this ridiculously good Easy No-Bake Strawberry Icebox Cake.
That first bite was a revelation. The cookies softened into a cake-like texture, the cream stayed light and fluffy, and the strawberries—well, they did what they do best. It was the kind of dessert that makes you forget you’re eating something assembled in under fifteen minutes. I knew right then this recipe was going to stick around for every hot summer day to come.
Why You’ll Love This Recipe
This isn’t just another dessert you throw together when you’re in a pinch. This Easy No-Bake Strawberry Icebox Cake has earned a permanent spot in my summer rotation, and here is exactly why:
- No Oven Required: When the temperature hits ninety, turning on the oven is basically a punishment. This recipe keeps your kitchen cool while delivering maximum dessert satisfaction.
- Simple Ingredients: You probably have most of these in your kitchen right now. No weird specialty items, no trips to three different stores. Just real, recognizable ingredients.
- Make-Ahead Magic: This cake actually gets better with time. You make it the night before, let it chill, and wake up to a perfectly set dessert. It’s the ultimate stress-free entertaining move.
- Crowd-Pleaser Guaranteed: I have brought this to barbecues, potlucks, and family dinners, and it disappears every single time. Kids love it, adults love it, and people always ask for the recipe.
- Perfect Summer Dessert: It’s light, refreshing, and packed with fresh strawberry flavor. Not too heavy, not too sweet—just right for those long, lazy summer evenings.
What makes this version different from the rest? It’s the technique. I learned the hard way that regular whipped cream can deflate and make the cake soggy. So I stabilized the cream with a little cream cheese, which gives it structure and a subtle tang that plays perfectly with the sweet strawberries. It’s not just another icebox cake—it’s the best version of one.
This is the kind of dessert that makes you close your eyes after the first bite. It’s comfort food reimagined for hot weather—lighter, faster, but with the same soul-soothing satisfaction. Perfect for impressing guests without stress, or turning a simple Tuesday night into something memorable.
What Ingredients You Will Need
This recipe uses simple, wholesome ingredients to deliver bold flavor and satisfying texture without the fuss. Most of these are pantry staples, and the fresh strawberries do all the heavy lifting in the flavor department.
- Fresh Strawberries (2 pounds, hulled and sliced): This is the star of the show. Look for berries that are deep red, fragrant, and ripe but still firm. I prefer buying local strawberries when they are in season—they are sweeter and more flavorful than the ones shipped from far away. If you can’t find great fresh berries, you can use frozen strawberries that have been thawed and drained, but fresh really makes a difference here.
- Heavy Cream (2 cups, cold): The backbone of the creamy filling. Make sure it is very cold before whipping, and I recommend using a brand like Organic Valley or Horizon for the best flavor and stability. Do not substitute with half-and-half or milk—you need the high fat content for the cream to whip properly and hold its shape.
- Cream Cheese (8 ounces, softened): This is my secret weapon for stabilizing the whipped cream. It adds a slight tanginess and helps the layers hold together without getting runny. Use full-fat cream cheese for the best texture. Let it sit on the counter for about 30 minutes before you start so it blends smoothly.
- Powdered Sugar (¾ cup): Dissolves easily into the cream without any grittiness. It sweetens the filling without making it heavy. You can adjust the amount slightly depending on how sweet your strawberries are.
- Vanilla Extract (1 teaspoon): Use pure vanilla extract, not imitation. It adds warmth and depth to the cream filling. I like Nielsen-Massey, but any good quality brand works.
- Graham Crackers (about 2 full sleeves, or 24 whole sheets): These create the “cake” layers. They soften beautifully as the cake chills, turning into a tender, cake-like texture. I use Honey Maid brand. You can also use gluten-free graham crackers if needed, or even vanilla wafers for a different twist.
- Lemon Juice (1 tablespoon, fresh): A tiny squeeze of lemon juice brightens the strawberries and balances the sweetness. It also helps the cream cheese mixture stay smooth. Don’t skip this—it makes a difference.
- Optional Garnishes: Extra sliced strawberries, mint leaves, and a dusting of powdered sugar for serving. Totally optional but makes it look gorgeous.
Equipment Needed
You don’t need any fancy gadgets for this one, which is part of the beauty. Here is what you will need:
- 9×13 Inch Baking Dish: This is the perfect size for layering. I use a glass dish so I can see the beautiful layers. A ceramic dish works great too.
- Electric Mixer (Hand Mixer or Stand Mixer): Whipping cream by hand is possible but exhausting. A hand mixer makes this job a breeze. If you have a stand mixer with the whisk attachment, even better.
- Large Mixing Bowls: You will need one for the cream mixture and one for the strawberries. I recommend stainless steel or glass.
- Sharp Knife and Cutting Board: For hulling and slicing the strawberries. A sharp knife makes clean slices without crushing the berries.
- Spatula: A rubber spatula is perfect for folding the cream mixture and spreading the layers evenly.
- Plastic Wrap: Essential for covering the dish while it chills in the fridge. Make sure it touches the surface of the top layer to prevent a skin from forming.
If you don’t have a 9×13 dish, you can use a 9×9 square dish and just make fewer layers, or even a trifle bowl for a more dramatic presentation. I have used both, and the trifle bowl version is especially fun for parties.
Preparation Method
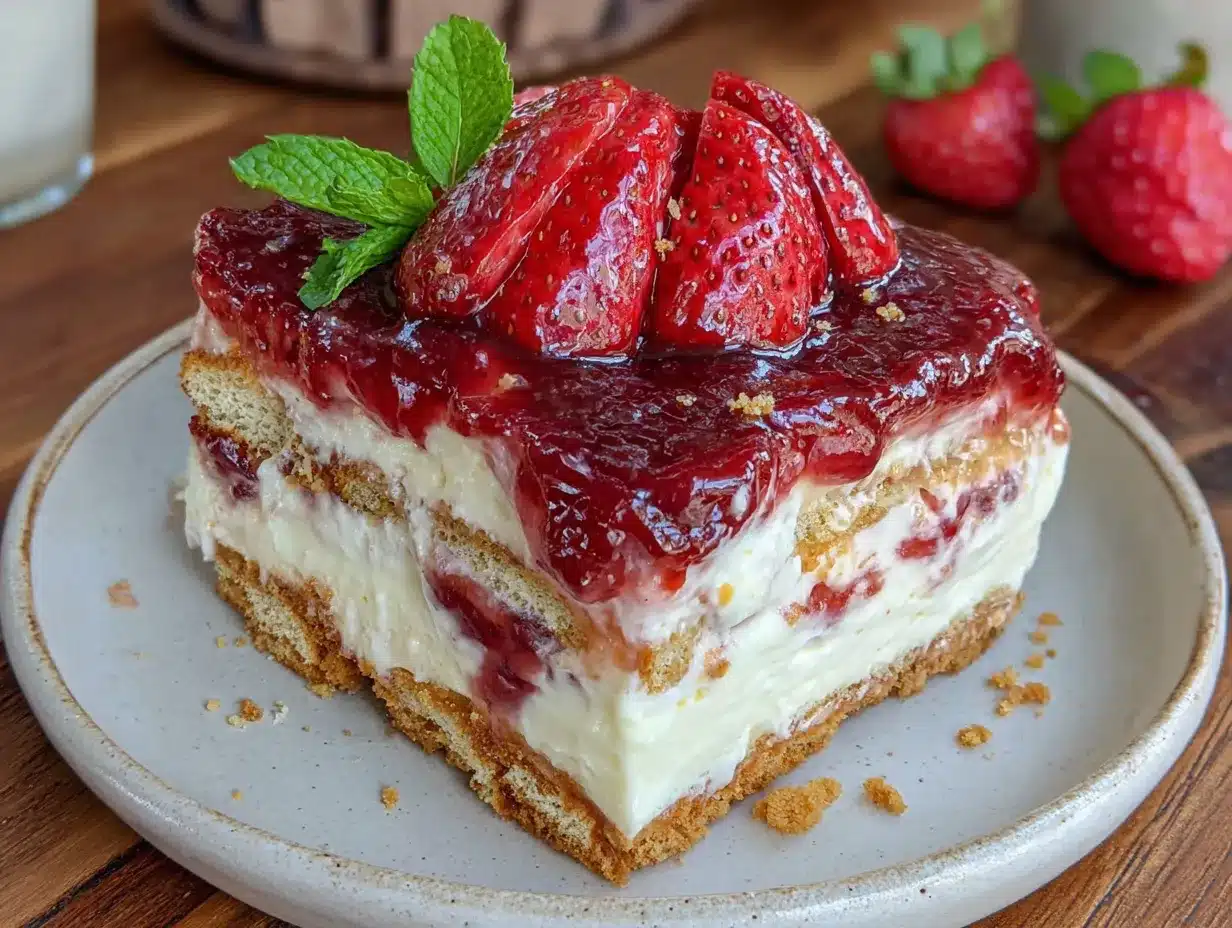
Let me walk you through this step by step. It is simpler than you think, and I promise, you cannot mess this up.
- Prepare the Strawberries (10 minutes): Wash and dry the strawberries thoroughly. Remove the green tops (hull them) and slice them into even slices, about ¼ inch thick. Place them in a bowl and toss gently with the lemon juice. Set aside. The lemon juice keeps them bright and enhances their flavor. If you have extra strawberries, save the prettiest slices for the top layer.
- Make the Cream Filling (10 minutes): In a large mixing bowl, beat the softened cream cheese with an electric mixer on medium speed until smooth and creamy, about 2 minutes. Scrape down the sides of the bowl. Add the powdered sugar and vanilla extract, and beat until well combined and fluffy. This step is important—you want the cream cheese to be completely smooth with no lumps.
- Whip the Cream (5 minutes): In a separate large bowl (or the bowl of your stand mixer), pour in the cold heavy cream. Using clean beaters, whip the cream on medium-high speed until stiff peaks form. You will know it is ready when you lift the beaters and the cream stands up in firm peaks. Be careful not to over-whip, or you will end up with butter. It should be billowy and thick.
- Fold It Together (3 minutes): Gently fold the whipped cream into the cream cheese mixture using a rubber spatula. Use a gentle, sweeping motion—fold from the bottom up, turning the bowl as you go. You want to combine them fully but keep the mixture light and airy. Do not stir vigorously, or you will deflate all that lovely air. The final mixture should be smooth, creamy, and hold its shape.
- Start Layering (10 minutes): Spread a thin layer of the cream mixture (about ½ cup) on the bottom of your 9×13 baking dish. This helps the first layer of graham crackers stick and prevents them from sliding around. Arrange a single layer of graham crackers on top, breaking them as needed to fit snugly. I usually fit about 8 whole sheets per layer.
- Build the Layers (15 minutes): Spread about one-third of the remaining cream mixture evenly over the graham crackers. Arrange a layer of sliced strawberries on top of the cream. Then add another layer of graham crackers. Repeat the process: cream, strawberries, graham crackers. You should have three layers of graham crackers and three layers of cream and strawberries. End with a final layer of cream on top. Spread it smoothly, covering the entire surface.
- Top with Strawberries (5 minutes): Arrange the reserved prettiest strawberry slices on top of the final cream layer in a decorative pattern. I like to fan them out in rows or create a simple border. Press them gently into the cream so they stay in place.
- Chill Overnight (8 hours minimum): Cover the dish tightly with plastic wrap, making sure the wrap touches the surface of the cream to prevent a skin from forming. Refrigerate for at least 8 hours, but overnight is best. This is crucial—the graham crackers need time to soften and absorb the moisture from the cream and strawberries, turning into a cake-like texture. Do not rush this step.
- Serve (5 minutes): When you are ready to serve, remove the dish from the fridge. Slice into squares and serve cold. Garnish with fresh mint leaves and a light dusting of powdered sugar if you like. The cake should be firm enough to slice cleanly, with beautifully defined layers.
Cooking Tips & Techniques
After making this Easy No-Bake Strawberry Icebox Cake more times than I can count, I have picked up a few tricks that make a real difference. Let me share them so you can skip the trial and error.
Stabilize Your Cream: The cream cheese trick is non-negotiable. I learned this the hard way after making a version with just whipped cream that turned into a soupy mess by morning. The cream cheese gives the filling structure and prevents it from weeping. Make sure your cream cheese is fully softened before you start, or you will end up with lumps.
Don’t Skimp on the Chill Time: I know it is tempting to dig in after a few hours, but trust me on this one. The graham crackers need a full 8 hours to soften properly. If you cut into it too early, you will get crunchy crackers and runny cream. After a full night in the fridge, the layers meld together into something magical. It is worth the wait.
Slice Evenly: For the prettiest slices, use a sharp knife and wipe it clean between each cut. Run the knife under hot water and dry it off before slicing. This gives you clean, sharp edges instead of dragging the cream across the surface.
Strawberry Selection: I have made this with both fresh and frozen strawberries, and fresh is hands down better. Frozen berries release a lot of water as they thaw, which can make the cake soggy. If you must use frozen, thaw them completely, drain off all the liquid, and pat them dry with paper towels before using.
Layer Evenly: Take your time when spreading the cream mixture. Uneven layers can lead to some bites being too creamy and others too dry. Use an offset spatula if you have one—it makes spreading a dream.
Variations & Adaptations
This recipe is incredibly forgiving and easy to adapt. Here are some of my favorite variations:
- Berry Medley Version: Swap half the strawberries for fresh blueberries, raspberries, or blackberries. The combination of berries adds complexity and a beautiful color contrast. I made this for a Fourth of July party with strawberries and blueberries, and it was a hit.
- Chocolate Strawberry Dream: Add a layer of chocolate. Spread a thin layer of chocolate pudding or chocolate ganache between the cream layers. You can also use chocolate graham crackers instead of regular ones for an even deeper chocolate flavor.
- Peach or Mango Twist: When stone fruits are in season, swap the strawberries for sliced peaches or mangoes. The creamy filling pairs beautifully with the sweetness of summer peaches. Just make sure the fruit is ripe but firm so it holds its shape.
- Vegan Version: Use coconut cream (the solid part from a can of full-fat coconut milk, chilled overnight) instead of heavy cream, and vegan cream cheese. Use dairy-free graham crackers. The texture will be slightly different but still delicious.
- Gluten-Free Option: Simply use gluten-free graham crackers. Most brands work well, and the texture is nearly identical to the original. I have tested this with Schär brand and it turned out perfectly.
If you love no-bake desserts as much as I do, you should definitely try my Easy Frozen Yogurt Dipped Strawberry Bites for another quick, refreshing treat. And for a protein-packed breakfast that tastes like dessert, my Easy 4-Ingredient Strawberry Overnight Oats is a lifesaver on busy mornings.
Serving & Storage Suggestions
This cake is best served cold, straight from the fridge. I like to let it sit at room temperature for about 5 minutes before slicing—it takes the chill off slightly and makes the cream even more luscious. But don’t leave it out too long, or it will start to soften and lose its structure.
Presentation Ideas: Slice into neat squares and serve on a platter. A dollop of extra whipped cream on top is never a bad idea. Garnish with fresh mint leaves for a pop of color, and a light dusting of powdered sugar makes it look bakery-worthy. For a fancier presentation, serve individual squares in shallow bowls with a drizzle of strawberry syrup.
What to Serve With It: This cake is rich enough to stand on its own, but it pairs beautifully with a cup of coffee or iced tea. For a truly indulgent summer spread, serve it alongside fresh fruit salad or a scoop of vanilla ice cream. It also works wonderfully as a light ending to a heavy meal, like after a barbecue or potluck.
Storage Instructions: Cover the dish tightly with plastic wrap or transfer leftovers to an airtight container. Store in the refrigerator for up to 3 days. The texture is best on the first and second days. After that, the graham crackers can become a bit too soft, and the strawberries may release more liquid. I usually make it the night before I plan to serve it, and it is always perfect.
Can You Freeze It? Yes, you can! This cake freezes surprisingly well. Assemble the cake completely, but do not add the top garnish strawberries. Cover tightly with a layer of plastic wrap and then a layer of aluminum foil. Freeze for up to 2 months. To serve, thaw in the refrigerator overnight. The texture will be slightly different—a bit more like ice cream cake—but still absolutely delicious.
Reheating: You don’t reheat this one. It is meant to be enjoyed cold. If you freeze it, just let it thaw in the fridge and serve chilled.
Nutritional Information & Benefits
While this is definitely a treat, it does have some redeeming qualities. Here is the estimated nutritional breakdown per serving (based on 12 servings):
- Calories: 310
- Fat: 22g
- Carbohydrates: 28g
- Protein: 4g
- Sugar: 18g
- Fiber: 2g
Health Highlights: Strawberries are packed with vitamin C, antioxidants, and fiber. They are one of the lowest-sugar fruits, making them a smart choice for dessert. The cream and cream cheese provide calcium and protein, which help keep you full. This dessert is also surprisingly lower in sugar than many traditional cakes because the strawberries provide natural sweetness.
Dietary Considerations: This recipe is vegetarian. For gluten-free, use gluten-free graham crackers. For a lower-sugar version, you can reduce the powdered sugar to ½ cup or use a sugar substitute like monk fruit sweetener. The texture may be slightly different, but it will still work. This dessert is not suitable for dairy-free diets unless you use the vegan adaptations mentioned above.
Personally, I love that this dessert feels indulgent without being overly heavy. It is the kind of treat you can enjoy on a warm summer evening without feeling like you need a nap afterward. It hits that sweet spot between satisfying and refreshing.
Conclusion
This Easy No-Bake Strawberry Icebox Cake is everything I want in a summer dessert—simple, stunning, and absolutely delicious. It proves that you don’t need an oven, complicated techniques, or a long list of ingredients to create something truly special. The layers of creamy filling, sweet strawberries, and softened graham crackers come together in a way that feels both nostalgic and fresh.
What I love most about this recipe is how adaptable it is. You can make it your own by swapping in different fruits, adding chocolate, or adjusting the sweetness to your liking. It is forgiving enough for beginners but impressive enough for experienced cooks. And honestly, anything that lets me keep my kitchen cool on a hot day is a winner in my book.
I would love to hear how yours turns out! Did you try a fun variation? Did your family love it? Drop a comment below and share your experience. And if you snap a photo, tag me on social media—I love seeing your creations. Don’t forget to share this recipe with a friend who needs a no-bake dessert in their life. Happy no-baking!
Frequently Asked Questions
Can I use Cool Whip instead of making whipped cream?
Yes, you can substitute 8 ounces of thawed Cool Whip for the homemade whipped cream. Just fold it into the cream cheese mixture instead of making whipped cream from scratch. The texture will be slightly different—a bit lighter and airier—but it still works great and saves you a step.
Why did my icebox cake turn out runny?
This usually happens for a few reasons. You might have used strawberries that were too watery (thawed frozen berries are a common culprit). Or you might not have chilled the cake long enough—it needs a full 8 hours minimum. Another possibility is that you over-whipped the cream, causing it to break down. Make sure your cream is cold and you stop whipping when stiff peaks form.
Can I make this with other fruits?
Absolutely! This recipe works beautifully with almost any soft fruit. Peaches, nectarines, raspberries, blueberries, and mango are all excellent choices. Just make sure the fruit is ripe but firm, and slice it evenly. If using very juicy fruits like peaches, toss them with a little lemon juice and let them sit for a few minutes, then drain off any excess liquid before layering.
How long does this cake last in the fridge?
This cake is best enjoyed within 2 to 3 days. After that, the graham crackers become very soft, and the strawberries may release more liquid, making the texture less appealing. I recommend making it the night before you plan to serve it for the best texture. Leftovers are still good the next day, but they won’t be as firm or pretty.
Can I use a different type of cookie instead of graham crackers?
Yes, you can experiment with different cookies. Vanilla wafers, shortbread cookies, or even thin chocolate cookies work well. Keep in mind that different cookies absorb moisture at different rates, so the texture will vary. Vanilla wafers create a softer, almost pudding-like texture, while shortbread stays a bit firmer. I have even used thin ginger snaps for a spicy twist, and it was wonderful.
Pin This Recipe!
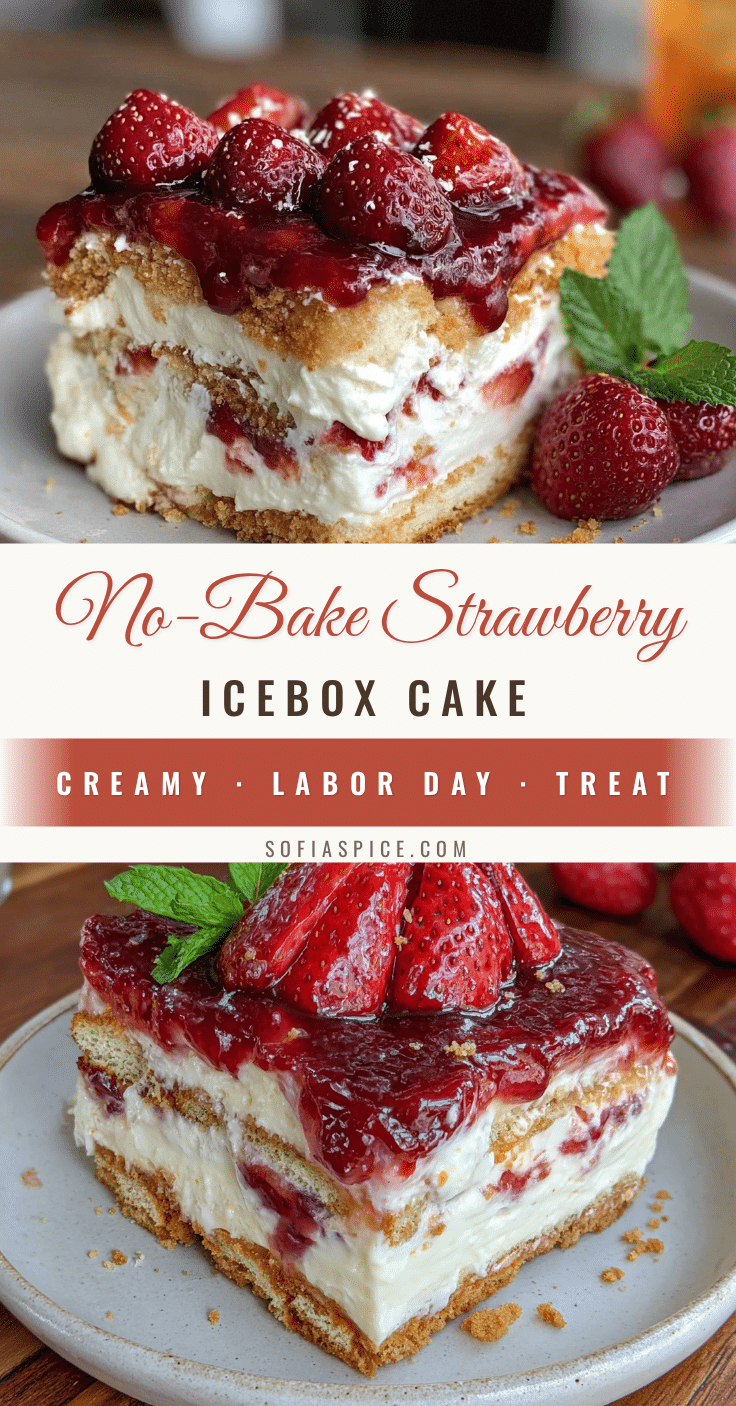
Easy No-Bake Strawberry Icebox Cake: Perfect Summer Dessert

A simple, no-bake dessert featuring layers of creamy filling, fresh strawberries, and softened graham crackers. Perfect for hot summer days when you want a cool, refreshing treat without turning on the oven.
- Prep Time: 15 minutes
- Cook Time: 0 minutes
- Total Time: 8 hours 15 minutes (includes chilling)
- Yield: 12 servings 1x
- Category: Dessert
- Cuisine: American
Ingredients
- 2 pounds fresh strawberries, hulled and sliced
- 2 cups heavy cream, cold
- 8 ounces cream cheese, softened
- 3/4 cup powdered sugar
- 1 teaspoon vanilla extract
- 24 whole graham cracker sheets (about 2 full sleeves)
- 1 tablespoon fresh lemon juice
- Optional: extra sliced strawberries, mint leaves, powdered sugar for garnish
Instructions
- Prepare the strawberries: Wash, dry, hull, and slice strawberries into 1/4-inch thick slices. Toss with lemon juice and set aside.
- Make the cream filling: In a large bowl, beat softened cream cheese with an electric mixer on medium speed until smooth, about 2 minutes. Add powdered sugar and vanilla extract, beat until fluffy.
- Whip the cream: In a separate bowl, whip cold heavy cream on medium-high speed until stiff peaks form.
- Fold together: Gently fold whipped cream into cream cheese mixture using a rubber spatula until fully combined and light.
- Start layering: Spread a thin layer (about 1/2 cup) of cream mixture on the bottom of a 9×13-inch baking dish. Arrange a single layer of graham crackers on top, breaking to fit.
- Build the layers: Spread one-third of remaining cream mixture over graham crackers. Add a layer of sliced strawberries. Repeat with graham crackers, cream, and strawberries for three layers total. End with a final layer of cream on top.
- Top with strawberries: Arrange reserved strawberry slices decoratively on top, pressing gently into cream.
- Chill: Cover tightly with plastic wrap, ensuring wrap touches the surface. Refrigerate for at least 8 hours or overnight.
- Serve: Slice into squares and serve cold. Garnish with mint leaves and powdered sugar if desired.
Notes
For best results, chill overnight. The cream cheese stabilizes the whipped cream and prevents sogginess. Use fresh strawberries for optimal texture; if using frozen, thaw and drain thoroughly. For gluten-free, use gluten-free graham crackers. For a vegan version, use coconut cream and vegan cream cheese.
Nutrition
- Serving Size: 1 square
- Calories: 310
- Sugar: 18
- Sodium: 180
- Fat: 22
- Saturated Fat: 13
- Carbohydrates: 28
- Fiber: 2
- Protein: 4
Keywords: no-bake dessert, strawberry icebox cake, summer dessert, easy dessert, icebox cake, no-bake cake


