It was 10:47 PM on a frantic Wednesday in November, and I had that specific, panicky feeling that only a preschooler’s classroom party can trigger. You know the one—where you’ve agreed to bring “a healthy, fun snack” and suddenly realize you have zero ideas and approximately twelve hours to figure it out. I was standing in my kitchen, staring into the fridge like it held the secrets to the universe, when my eyes landed on a block of cheddar, a bag of baby carrots, and some slightly sad grapes. My kid was already asleep, dreaming of whatever three-year-olds dream about, and I was supposed to be the parent who showed up with something that wasn’t just a bag of store-bought cookies. Honestly, I was this close to giving up and just bringing a fruit pouch.
Then it hit me—that weird, late-night creative spark that only shows up when you’re too tired to overthink things. I remembered a hand turkey craft my son had brought home from daycare, the one where you trace your hand on construction paper and turn it into a turkey. The idea was so simple it felt almost stupid: why not make a real, edible hand turkey? I didn’t have any fancy cookie cutters or bento supplies, but I had my own two hands, a paring knife, and a desperate need to look like I had my life together. I started arranging cheese slices in the shape of a palm, using grapes for the eyes and a baby carrot for the beak. It was messy, slightly lopsided, and honestly, a little ridiculous. But there was something about the quiet of the kitchen and the silly challenge that made me keep going.
Let me tell you, that first attempt was not pretty. The turkey’s “feathers” were uneven, the cheese kept sliding off the plate, and I may or have used a pretzel stick as a last-minute leg. But when I showed up at the classroom the next day and saw the kids’ faces light up, I knew I was onto something. That lopsided, slightly chaotic hand turkey became the star of the snack table, and the other parents were asking me how I made it. I just laughed and said I was a crazy person with a cheese block at 11 PM. This recipe is the polished, slightly more dignified version of that late-night experiment—a kid-approved, parent-friendly snack platter that looks impressive but takes almost no real skill to pull off. It’s the kind of thing that makes you look like a Pinterest superstar when really, you just traced your hand and called it a day.
Why You’ll Love This Recipe
This isn’t just a snack platter—it’s a secret weapon for any parent who’s ever needed a quick, healthy, and genuinely fun option for a school party, playdate, or rainy afternoon. I’ve tested this with my own picky eater (who once declared a banana “too yellow”) and a room full of skeptical preschoolers, and it passed the ultimate test: they ate it without a single complaint. Here’s why this recipe works so well for real families on a budget.
- Quick & Easy: This whole platter comes together in under 15 minutes. No baking, no cooking, no complicated steps. Just slice, arrange, and watch the magic happen.
- Simple Ingredients: You probably already have most of these things in your fridge. Cheddar cheese, grapes, baby carrots, and a few pretzels are all you need. No special trips to a fancy grocery store.
- Perfect for School Parties & Playdates: It’s a guaranteed crowd-pleaser that stands out from the usual fruit cups and granola bars. Plus, it’s totally nut-free and easy to adapt for different allergies.
- Crowd-Pleaser: I’ve never seen a kid turn down a hand turkey. The visual fun makes them curious, and the familiar flavors keep them coming back for more. Even the parents sneak a grape or two.
- Unbelievably Delicious: The combination of sharp cheddar, sweet grapes, and salty pretzels is a classic for a reason. It hits all the right notes without any added sugar or processed junk.
What makes this recipe different from just throwing some snacks on a plate is the presentation. It’s not about fancy techniques or gourmet ingredients—it’s about turning something ordinary into an experience. The hand shape creates a natural “story” that kids love. They get to “eat the turkey’s feathers” or “give the turkey a carrot beak.” It turns snack time into a game, and any parent knows that a game is worth its weight in gold when you’re trying to get a toddler to eat a vegetable.
This recipe isnt just good—it is the kind of snack that makes you feel like a supermom (or superdad) without the stress. It’s comfort food for the eyes and the belly, and it’s perfect for impressing other parents without spending a ton of money or time. Honestly, it’s the best thing I ever made at 11 PM on a frantic Wednesday.
What Ingredients You Will Need
This recipe uses simple, everyday ingredients that you can find at any grocery store. The beauty of this snack platter is its flexibility—you can swap things in and out based on what your family likes or what you have on hand. Here’s what you’ll need to build your hand turkey.
For the Turkey Body & Feathers
- Sharp cheddar cheese slices (4-5 slices): I prefer Sargento or Tillamook for their consistent quality and meltability. You want slices that are firm enough to cut into shapes without crumbling. (Pro tip: let them sit out for 5 minutes so they’re slightly softer and easier to cut.)
- Red or green seedless grapes (1 cup): These will be the turkey’s “feathers” and eyes. I like using red grapes for a pop of color, but green works just as well. (Use dairy-free cheese and omit the cheese feathers for a vegan version.)
- Baby carrots (3-4): These become the turkey’s beak and feet. Look for carrots that are straight and not too thick for easier cutting.
- Pretzel sticks (2-3): These are the turkey’s legs and can also be used for the wattle (the red dangly bit). I use Snyder’s of Hanover because they’re sturdy and salty.
- Raisins or dried cranberries (2-3): These are optional, but they make great “eyes” or little decorations. My kid loves the sweetness of dried cranberries.
For the Base & Extra Snacks
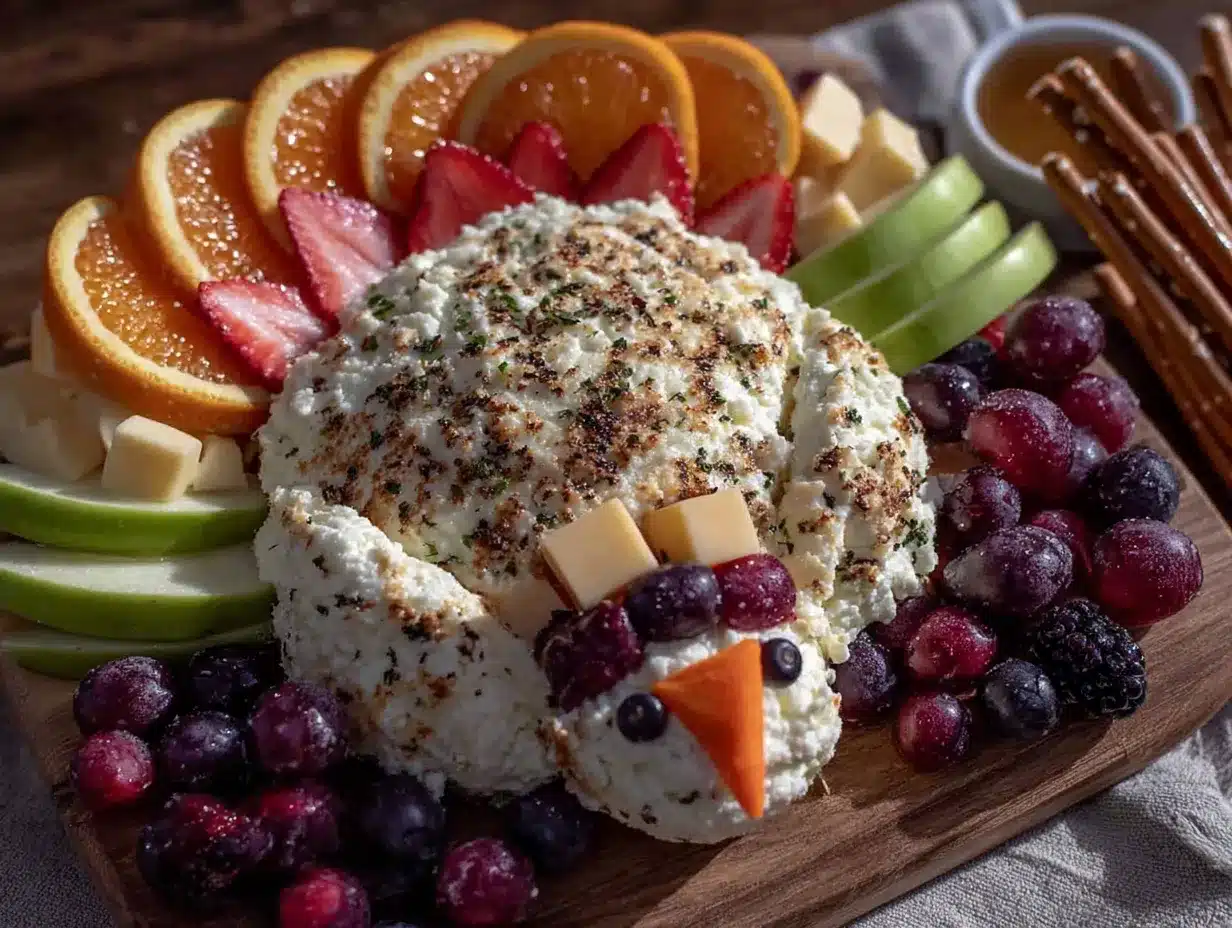
- Large round or oval platter (or a cutting board): You need a surface big enough to trace your hand and leave room for the “feathers.” A wooden cutting board adds a nice rustic look.
- Small bowl for dip (optional): If you want to add ranch dressing, hummus, or yogurt dip for the veggies. This is totally optional but adds extra fun.
Ingredient Selection Tips
When you’re shopping, look for cheese slices that are uniform in thickness—this makes cutting the “feathers” much easier. For the grapes, try to find ones that are firm and not too squishy, because you’ll be cutting them in half. If you’re feeding a crowd or want a bigger platter, just double the ingredients. I’ve also used pepper jack cheese for a little kick, but my kids prefer the classic cheddar. (Honestly, I do too.)
Substitution Guidance
If your family has dietary restrictions, this recipe is super adaptable. Use dairy-free cheese slices for a vegan version. Swap the pretzels for gluten-free pretzels or cucumber sticks. You can even use apple slices for the “feathers” instead of cheese—just brush them with a little lemon juice so they don’t brown. The goal is to make it work for your crew, not to follow a strict rulebook.
Equipment Needed
You don’t need any fancy tools for this recipe, which is part of its charm. Here’s what you’ll need to pull it off.
- A sharp paring knife: This is your most important tool. A small, sharp knife makes cutting the cheese into feather shapes and the carrots into tiny triangles much easier. I use a Victorinox paring knife—it’s cheap and stays sharp forever.
- A large round or oval platter: You need enough space to trace your hand and arrange the “feathers.” A wooden cutting board or a large dinner plate works perfectly if you don’t have a platter.
- A small bowl (optional): For dip, if you’re using it. A ramekin or a small custard cup works great.
- Paper towels: For drying the grapes and carrots after washing them. Wet ingredients slide around and make the platter messy.
If you don’t have a paring knife, a small serrated knife works too. I’ve even used a clean pair of kitchen shears to cut the cheese into feather shapes in a pinch. The key is to keep your tools sharp and your hands steady. Also, don’t stress about perfection—your first hand turkey will probably look a little goofy, and that’s part of the fun.
Preparation Method
Here’s how to build your hand turkey snack platter in 15 minutes flat. Follow these steps, and you’ll have a snack that looks like it took way more effort than it actually did.
- Wash and prep your produce (2 minutes): Rinse the grapes and baby carrots under cool water and pat them dry with paper towels. Wet fruit makes the cheese slide around, so take the extra 30 seconds to dry them thoroughly. Set them aside on a clean plate.
- Cut the cheese feathers (3 minutes): Take your cheddar cheese slices and stack them on top of each other. Using your paring knife, cut them into small, feather-like shapes—think elongated ovals or teardrops. You’ll need about 8-10 “feathers” total. Don’t worry if they’re not all exactly the same size; a little variation looks more natural. (If the cheese starts sticking to the knife, wipe the blade clean with a paper towel.)
- Prepare the grape eyes and beak (2 minutes): Take 2 grapes and cut them in half lengthwise. These will be the turkey’s eyes. For the beak, take one baby carrot and cut a small triangle shape—about the size of a grape half. You can also cut a tiny, thin strip of carrot for the wattle (the red dangly part under the beak), but this is optional.
- Cut the carrot feet (1 minute): Take one baby carrot and cut it in half lengthwise. Then, cut each half into two smaller pieces that look like little turkey feet. You want three “toes” on each foot. (I usually just make two V-shaped cuts on one end of the carrot piece.)
- Trace your hand on the platter (30 seconds): Place your non-dominant hand flat on the center of your platter, with your fingers spread slightly apart. This is your template for the turkey’s body. Don’t press too hard—you’re just marking the space.
- Arrange the cheese feathers (2 minutes): Starting from the top of your hand outline, arrange the cheese “feathers” in a fan shape. Place them so they radiate outward from where your fingers would be. Overlap them slightly for a fuller look. Leave the area where your palm and wrist are empty—that’s for the turkey’s body.
- Build the turkey body (3 minutes): Take the rest of your cheese slices and arrange them in the palm area of your hand outline. You can layer them or just place them flat. This is the turkey’s body. Don’t worry if it’s not perfectly shaped—the grapes and carrots will cover up any gaps.
- Add the face and feet (2 minutes): Place the two grape halves (cut side down) near the top of the cheese body for the eyes. Place the carrot triangle beak just below the eyes, pointing downward. If you’re using a wattle, place the tiny carrot strip right under the beak. At the bottom of the platter, place the two carrot feet so they look like the turkey is standing on them.
- Add the pretzel legs (1 minute): Take two pretzel sticks and place them under the cheese body, connecting the body to the carrot feet. These are the turkey’s legs. You can break them in half if they’re too long.
- Fill in with extra grapes (1 minute): Scatter the remaining whole grapes and any extra baby carrots around the edges of the platter. This fills out the presentation and gives kids more to grab. If you’re using a dip bowl, place it at the bottom of the platter.
Sensory cues: At the end, step back and look at your creation. The cheese should be a warm, golden yellow against the bright green or red of the grapes. The carrot beak should be a vivid orange. If something looks off, just adjust it—the beauty of this platter is that it’s forgiving. If the turkey looks too skinny, add more cheese feathers. If it looks too crowded, move the grapes to the outer edge.
Troubleshooting tip: If the cheese feathers start sliding off the platter, it means your platter is too smooth or the cheese is too warm. Try using a wooden cutting board instead, or chill the cheese for 5 minutes before cutting. Also, don’t overcrowd the platter—leave some negative space so the turkey stands out.
Cooking Tips & Techniques
After making this snack platter about a dozen times (for school parties, playdates, and even a few adult gatherings where I pretended it was “ironic”), I’ve picked up some tricks that make the process smoother. Here’s what I’ve learned the hard way.
Keep your knife sharp. I cannot stress this enough. A dull knife will crush the cheese instead of cutting it cleanly, and it makes cutting carrot triangles a nightmare. I learned this after my first attempt looked like a cheese crime scene. A sharp paring knife makes all the difference.
Use a template for consistency. If you’re making multiple platters (say, for a classroom party), trace your hand on a piece of parchment paper first. Then you can use that as a guide to arrange the feathers without having to re-trace your hand each time. I figured this out after my third platter and felt like a genius.
Prep everything before you start arranging. Cut all your cheese feathers, grape halves, and carrot pieces before you touch the platter. This prevents the cheese from getting warm and sweaty while you’re still cutting carrots. I’ve made the mistake of cutting as I go, and the cheese ends up looking sad and greasy.
Don’t overthink the feathers. They don’t have to be perfect. In fact, slightly uneven feathers look more natural. I once spent 15 minutes trying to make every cheese feather exactly the same size, and honestly, the kids didn’t care. They just wanted to eat the turkey’s “tail.”
Timing is everything. Assemble this platter no more than 2 hours before you plan to serve it. The cheese can start to dry out and the grapes can get weepy if it sits too long. If you need to prep ahead, cut all the pieces and store them in separate containers in the fridge, then assemble right before serving.
My biggest failure: I once made this platter for a birthday party and forgot to put the carrot feet on until after the kids had already started eating. The turkey looked like it was floating. My son pointed at it and said, “Mom, the turkey’s legs are missing!” I had to laugh. Now I always double-check my “anatomy” before I call it done.
Variations & Adaptations
This recipe is a canvas, not a rigid set of rules. Here are some ways I’ve adapted it for different occasions and dietary needs.
Seasonal Variations
- Fall/Halloween: Use orange cheddar and add candy corn for the “feathers.” Swap the grapes for small clementine segments. The kids go wild for the sweetness.
- Spring/Easter: Use white cheddar and add pastel-colored fruit like strawberries and blueberries. You can even use a small cookie cutter to make flower-shaped cheese pieces.
- Summer: Use melon balls or pineapple chunks for the feathers. The sweetness pairs perfectly with the salty pretzels and sharp cheese.
Dietary Adaptations
- Gluten-Free: Swap the pretzel sticks for gluten-free pretzels or use cucumber sticks for the legs. I’ve also used celery sticks, which add a nice crunch.
- Dairy-Free: Use dairy-free cheese slices (Violife and Daiya are my go-to brands) or skip the cheese entirely and use apple slices for the feathers. Brush them with lemon juice to prevent browning.
- Nut-Free: This recipe is naturally nut-free, but double-check your cheese and pretzel labels if allergies are a concern. Some pre-shredded cheeses are processed on shared equipment.
Flavor Twists
- Spicy: Use pepper jack cheese for the feathers and add a few slices of jalapeño for the eyes (for the adults, obviously).
- Sweet & Salty: Add a few chocolate chips or mini marshmallows to the platter. My kid loves sneaking a chocolate chip with a grape.
- Savory: Add small slices of salami or turkey pepperoni for the feathers. This turns it into a heartier snack that works for lunch.
I once made a “zombie turkey” for Halloween by using green grapes for the eyes and cutting the cheese into jagged shapes. It was a hit with the older kids. Don’t be afraid to get weird with it—the more creative you get, the more fun the kids have.
Serving & Storage Suggestions
This platter is best served fresh, but here’s how to handle it for different situations.
Serving Temperature: Serve the platter at room temperature. If you’ve stored it in the fridge, let it sit out for 10-15 minutes before serving. Cold cheese loses its flavor, and cold grapes are less sweet. I learned this after serving a fridge-cold platter at a playdate and getting lukewarm reviews from the kids.
Presentation Tips: Place the platter at the center of the table where kids can reach it easily. If you’re serving a crowd, make two smaller platters instead of one giant one—it prevents traffic jams and keeps the snack looking tidy. I like to add a few sprigs of fresh parsley or mint around the edges for a pop of green, but that’s purely for the adults’ Instagram photos.
Complementary Dishes: This platter pairs beautifully with a simple fruit salad, veggie sticks with ranch dip, or a batch of homemade popcorn. For a full lunch, serve it alongside a turkey and cheese sandwich cut into fun shapes. The salty-sweet combo works with almost anything.
Storage Instructions: If you have leftovers (which is rare in my house), separate the components and store them in airtight containers in the fridge. The cheese will keep for 3-4 days, the grapes for up to a week, and the carrots for 5-7 days. The pretzels will get soft if stored with the fruit, so keep them in a separate bag at room temperature.
Reheating: This is a cold snack, so no reheating needed. If the cheese has gotten too hard in the fridge, let it sit at room temperature for 10 minutes before serving again.
How Flavors Develop: Honestly, this platter is best the day it’s made. The cheese starts to dry out after a day, and the grapes can get a little soft. But if you’re prepping for a party, you can cut all the pieces the night before and assemble them in the morning. Just keep the components separate until you’re ready to build.
Nutritional Information & Benefits
This snack platter is a surprisingly balanced option for kids (and adults). Here’s a rough estimate per serving (assuming the platter serves 4-6 kids as a snack).
| Nutrient | Amount per Serving |
|---|---|
| Calories | 180-220 |
| Total Fat | 10-12g |
| Saturated Fat | 6-7g |
| Carbohydrates | 15-18g |
| Fiber | 2-3g |
| Sugar | 10-12g (natural from grapes) |
| Protein | 8-10g |
| Calcium | 200-250mg |
| Sodium | 300-400mg |
Health Benefits: The cheese provides a good dose of calcium and protein, which are essential for growing bones and muscles. Grapes are packed with antioxidants and vitamin C, and carrots are loaded with beta-carotene for eye health. The pretzels add a little carbohydrate energy for active kids. This platter is naturally low in added sugar and free from artificial colors or preservatives if you use whole ingredients.
Dietary Considerations: This recipe is naturally nut-free and can be made gluten-free and dairy-free with simple swaps. It’s also vegetarian-friendly. The main allergens to watch for are dairy (from the cheese) and gluten (from the pretzels). Always check labels if you’re serving kids with known allergies.
From a personal perspective, I love that this snack feels indulgent but is actually pretty healthy. My kid gets excited about the “turkey” and ends up eating cheese, fruit, and vegetables without a single complaint. That’s a win in my book.
Conclusion
This hand turkey snack platter is proof that you don’t need to be a Pinterest-perfect parent to pull off something special. It started as a desperate, late-night experiment in my kitchen, and it’s become a go-to for school parties, playdates, and even lazy Sunday afternoons when my kid wants something “fun.” The best part? It’s forgiving. Your turkey might be lopsided, your feathers might be uneven, and your carrot feet might look more like alien toes—but the kids won’t care. They’ll see a turkey made just for them, and they’ll eat it with joy.
I encourage you to make this your own. Swap in your kid’s favorite fruits, use a different cheese, or add a silly face with raisins and pretzels. The more you play with it, the more fun it becomes. And honestly, that’s the whole point. Snack time should be fun, not stressful.
If you make this hand turkey platter, I’d love to hear about it. Leave a comment below and tell me how your kids reacted—or share a photo of your creation. Did you add anything weird? Did your turkey end up looking like a duck? I want to know. And if you’re looking for more easy, kid-friendly snack ideas, check out my simple snack roundup for more inspiration. Happy snacking!
Frequently Asked Questions
Can I make this hand turkey platter ahead of time?
Yes, but only partially. You can cut all the cheese feathers, grape halves, and carrot pieces up to 24 hours in advance and store them in separate airtight containers in the fridge. Assemble the platter no more than 2 hours before serving to keep everything fresh and looking its best.
What if my child has a dairy allergy?
No problem at all. Swap the cheddar cheese for dairy-free cheese slices, or skip the cheese entirely and use apple slices or cucumber rounds for the “feathers.” The rest of the ingredients—grapes, carrots, pretzels—are naturally dairy-free.
How many kids does this platter serve?
This recipe as written serves 4-6 kids as a snack. If you’re feeding a larger group, simply double the ingredients and make two platters, or use a larger cutting board and scale everything up. For a classroom party of 20 kids, I usually make three platters.
Can I use other fruits or vegetables for the feathers?
Absolutely. Apple slices, pear slices, cucumber rounds, bell pepper strips, or even small tangerine segments all work beautifully. Just keep in mind that apple and pear slices will brown, so brush them with a little lemon juice or serve them immediately.
How do I keep the cheese from sliding off the platter?
Make sure your platter is completely dry before you start arranging. If the cheese is still sliding, try using a wooden cutting board instead of a smooth ceramic platter—the texture helps grip the cheese. You can also chill the cheese slices for 5 minutes before cutting them to make them firmer.
Pin This Recipe!
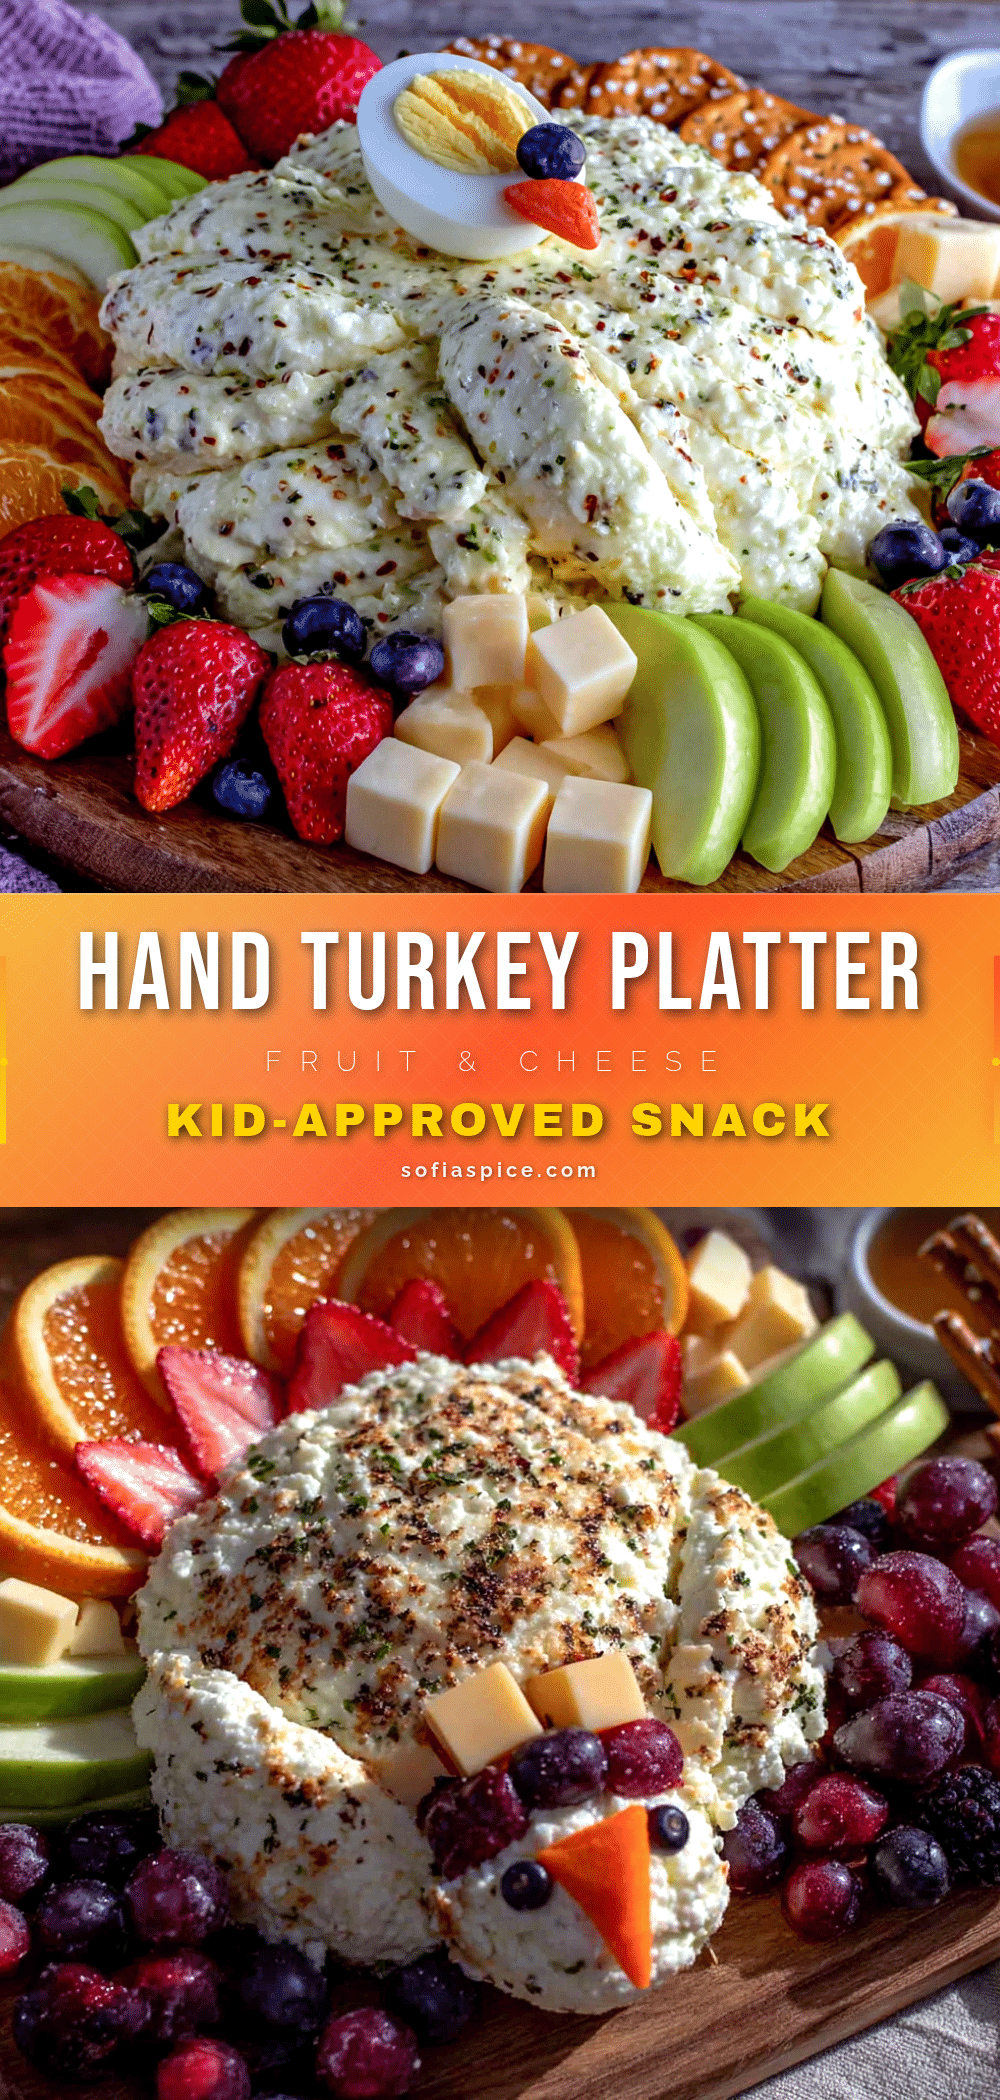
Easy Kid-Approved Hand Turkey Snack Platter
A fun, healthy, and easy snack platter shaped like a hand turkey, perfect for school parties, playdates, or a creative afternoon snack. Made with simple ingredients like cheddar cheese, grapes, baby carrots, and pretzels, it comes together in under 15 minutes.
- Prep Time: 15 minutes
- Cook Time: 0 minutes
- Total Time: 15 minutes
- Yield: 4-6 servings 1x
- Category: Snack
- Cuisine: American
Ingredients
- 4–5 slices sharp cheddar cheese
- 1 cup red or green seedless grapes
- 3–4 baby carrots
- 2–3 pretzel sticks
- 2–3 raisins or dried cranberries (optional)
- 1 large round or oval platter or cutting board
- 1 small bowl for dip (optional)
Instructions
- Wash and prep your produce: Rinse the grapes and baby carrots under cool water and pat them dry with paper towels.
- Cut the cheese feathers: Stack the cheddar cheese slices and cut them into small, feather-like shapes (elongated ovals or teardrops). You’ll need about 8-10 feathers.
- Prepare the grape eyes and beak: Cut 2 grapes in half lengthwise for the eyes. Cut one baby carrot into a small triangle for the beak. Optionally, cut a tiny strip of carrot for the wattle.
- Cut the carrot feet: Cut one baby carrot in half lengthwise, then cut each half into two pieces that look like little turkey feet (three toes each).
- Trace your hand on the platter: Place your non-dominant hand flat on the center of the platter with fingers spread slightly apart to mark the space.
- Arrange the cheese feathers: Starting from the top of your hand outline, arrange the cheese feathers in a fan shape, radiating outward from where your fingers would be. Overlap them slightly.
- Build the turkey body: Arrange the remaining cheese slices in the palm area of your hand outline to form the turkey’s body.
- Add the face and feet: Place the two grape halves (cut side down) near the top of the cheese body for eyes. Place the carrot triangle beak below the eyes, pointing downward. Add the wattle if using. Place the two carrot feet at the bottom of the platter.
- Add the pretzel legs: Place two pretzel sticks under the cheese body, connecting the body to the carrot feet.
- Fill in with extra grapes: Scatter remaining whole grapes and extra baby carrots around the edges of the platter. If using a dip bowl, place it at the bottom.
Notes
Assemble no more than 2 hours before serving. Keep cheese chilled until ready to cut. For dairy-free, use dairy-free cheese or apple slices. For gluten-free, use gluten-free pretzels or cucumber sticks. The platter is forgiving—don’t worry about perfect shapes.
Nutrition
- Serving Size: 1 serving (based on
- Calories: 180220
- Sugar: 1012
- Sodium: 300400
- Fat: 1012
- Saturated Fat: 67
- Carbohydrates: 1518
- Fiber: 23
- Protein: 810
Keywords: hand turkey, snack platter, kid-friendly, school party, healthy snack, easy snack, no-cook, fun snack


