String cheese wrappers flying everywhere, a bag of pretzel sticks already half-eaten, and the clock ticking down to when the first little goblin rings the doorbell. That’s where I found myself last October 30th, staring into the fridge like it held the secrets to the universe. I had promised the kids I’d make something “spooky but snacky” for their school Halloween party, and I had absolutely nothing planned. The Pinterest-perfect boards with their themed cookie cutters and curated candy displays felt like a joke from where I was standing. I grabbed a block of cheddar, some cream cheese, and a bag of baby carrots, fully expecting a meltdown.
Then I spotted the mozzarella cheese sticks. And a jar of black olives. And suddenly, my brain connected the dots in a way that felt less like panic and more like a real, honest-to-goodness idea. I wasn’t trying to be fancy. I was just trying to make something that looked like I tried, without actually having to try that hard. And you know what? That’s exactly how this Easy Halloween Charcuterie Board with Mummy Cheese Sticks was born—right in the middle of a chaotic kitchen, with a toddler tugging at my jeans and the dog sniffing for dropped olives.
The best part? It took me less than twenty minutes to throw together. The kids at the party devoured it. And I got asked for the recipe three times before I even left the parking lot. Honestly, that’s the kind of win I live for. No stress, no complicated techniques, just a board that looks like you spent hours on it when you really didn’t. So if you’re looking for a Halloween snack that delivers on the cute factor without the headache, this one’s for you. Let’s just say it’s become my go-to for every spooky gathering since.
Why You’ll Love This Recipe
This isn’t just another Halloween snack board. It’s the one that actually works for real life. Here’s why I keep coming back to it, and why I think you will too:
- Quick & Easy: From start to finish, you’re looking at about 20 minutes. No baking, no boiling, no complicated steps. Just assembly and a little bit of creativity.
- Simple Ingredients: Everything on this board is stuff you can find at any grocery store. No specialty items, no weird ingredients you’ll never use again. String cheese, crackers, deli meat, veggies—pantry staples, basically.
- Perfect for Halloween Parties: Whether it’s a school event, a family gathering, or just a fun night in before trick-or-treating, this board fits. It’s shareable, customizable, and undeniably festive.
- Crowd-Pleaser: Kids love the mummy cheese sticks and the sweet treats. Adults appreciate the savory options and the charcuterie vibe. Honestly, it’s one of those rare snacks that makes everyone happy.
- Unbelievably Delicious: The combination of creamy cheese, salty meats, crunchy veggies, and sweet candy is just perfect. And those mummy cheese sticks? They’re not just cute—they’re ridiculously good dipped in ranch or marinara.
What makes this board different from the countless other Halloween snack boards out there is the balance. It doesn’t lean too hard on sugar, but it doesn’t skimp on the fun either. The mummy cheese sticks are the star, but the supporting cast—the cured meats, the fresh fruit, the crunchy pretzels—makes it feel like a real meal, not just a candy free-for-all. It’s the kind of board that makes you feel like a Halloween hero without breaking a sweat. And honestly, isn’t that the best kind of recipe?
What Ingredients You Will Need
This recipe is all about flexibility, but here’s what I typically use to build a board that’s both spooky and satisfying. The ingredients are simple, but the way you arrange them makes all the difference.
- For the Mummy Cheese Sticks:
- 6 mozzarella cheese sticks (the string cheese kind, not fresh mozzarella balls)
- 1 can (2.25 oz) sliced black olives (these become the mummy eyes)
- 1 tablespoon cream cheese, softened (acts as the “glue” for the eyes)
- For the Savory Section:
- 4 ounces salami or pepperoni (I prefer genoa salami for its mild flavor)
- 4 ounces prosciutto or turkey slices (roll them up for easy grabbing)
- 1 cup assorted crackers (I like a mix of buttery rounds and whole wheat squares)
- 1 cup baby carrots
- 1 cup cucumber slices (use a crinkle cutter for a fun, wavy look)
- ½ cup cherry tomatoes
- For the Sweet Section:
- 1 cup red and green grapes (seedless, washed and dried)
- ½ cup candy corn or candy pumpkins (for that classic Halloween look)
- ½ cup chocolate-covered pretzels (sweet and salty—yes, please)
- ¼ cup mini marshmallows (optional, but great for ghost shapes)
- For the Dips and Spreads:
- ¼ cup ranch dressing (for the mummy cheese sticks and veggies)
- ¼ cup marinara sauce (warm or at room temperature)
- 2 tablespoons honey mustard (a personal favorite for the pretzels)
- For Garnish (Optional but Fun):
- Fresh rosemary sprigs (look like little trees)
- Edible eyeballs (the candy kind, for extra creepiness)
- Orange and black sprinkles (sprinkle over the sweet section)
I usually grab my cheese sticks from the store brand—they work just fine. But if you want the best texture for wrapping, go with a brand that’s firm but not too dry. And for the olives, I recommend the pre-sliced ones to save time. You can slice your own, but honestly, who has the patience for that on Halloween?
Equipment Needed
You don’t need a lot of fancy tools to pull this board together. Here’s what I use:
- Large wooden cutting board or serving platter: At least 16 inches long. A pizza pan or baking sheet works in a pinch.
- Small bowls or ramekins: For the dips. I use 4-ounce ceramic ones, but any small dish will do.
- Sharp knife: For slicing the cheese sticks and any larger fruit or veggies.
- Cutting board: A small one for prep work. Keep it separate from your serving board to avoid cross-contamination.
- Toothpicks or small skewers: Optional, but great for picking up the mummy cheese sticks without touching everything.
- Piping bag or small zip-top bag: For the cream cheese “glue.” A zip-top bag with the corner snipped off works perfectly.
If you don’t have a wooden board, a white platter actually makes the colors pop more. I’ve used a marble cutting board before, and it looked gorgeous. Just make sure whatever you use is clean and dry before you start arranging. And if you’re serving this at a party, consider using a disposable foil tray lined with parchment paper—easy cleanup and still looks cute.
Preparation Method
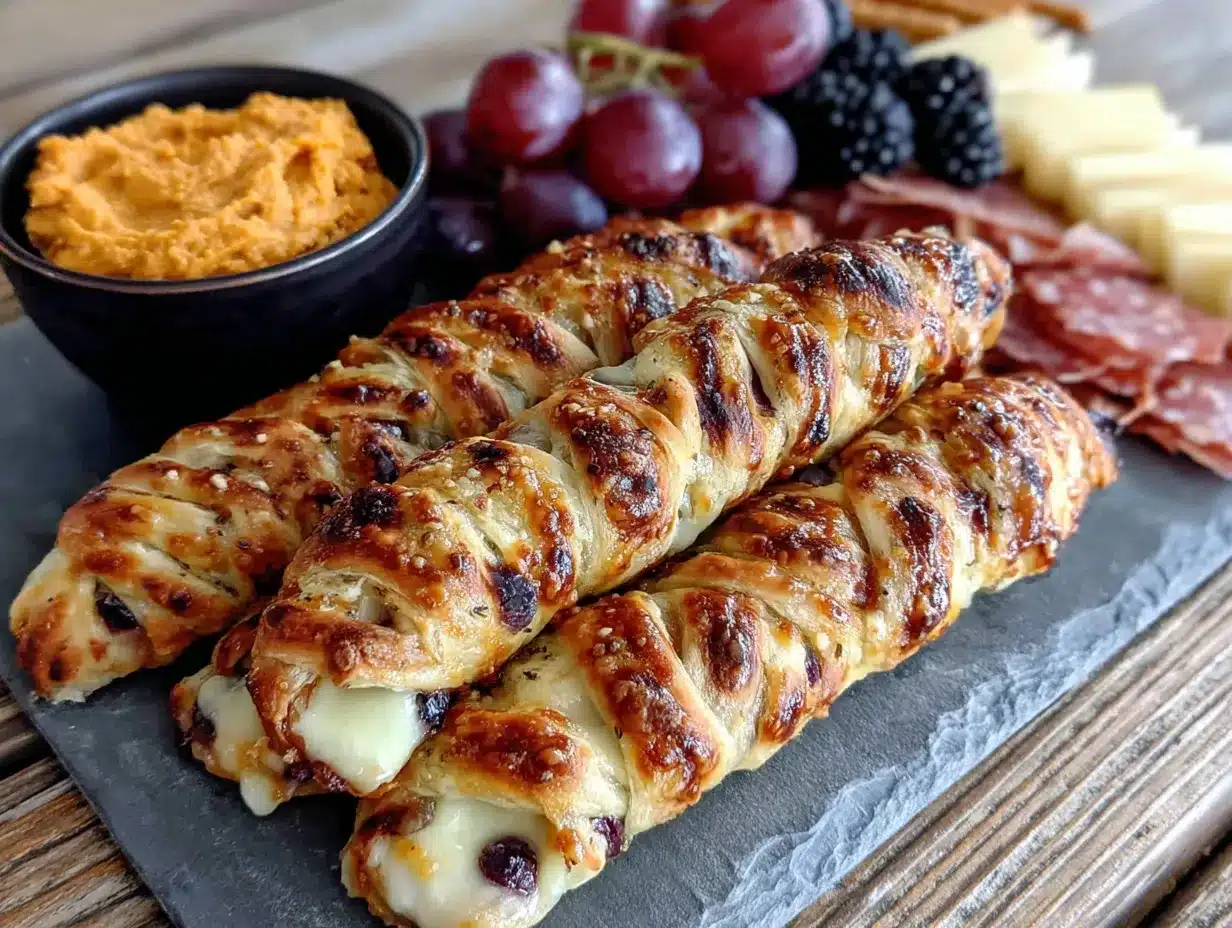
Alright, let’s get to the fun part. Here’s how I put this board together, step by step. It’s more about assembly than actual cooking, which is exactly what I love about it.
- Make the Mummy Cheese Sticks (5 minutes): Unwrap all 6 mozzarella cheese sticks. Using a sharp knife, cut each stick in half crosswise so you have 12 smaller pieces. This makes them easier to handle and more snack-sized. Next, take the cream cheese and put it in a small zip-top bag. Snip off a tiny corner—like, really tiny. Pipe two small dots of cream cheese onto each cheese piece where you want the eyes to go. Press a sliced black olive onto each dot. The cream cheese acts as glue, so make sure it’s soft enough to pipe but not runny. Set the mummies aside on a small plate.
- Prepare the Savory Ingredients (10 minutes): Wash and dry all your veggies. Slice the cucumber into rounds—use a crinkle cutter if you have one for a fun, wavy edge. Leave the baby carrots whole. Halve the cherry tomatoes if they’re large. Roll up the salami slices into little cylinders. Fold the prosciutto into loose ribbons. Arrange the crackers in a small pile or fan them out on the board.
- Prepare the Sweet Ingredients (5 minutes): Wash and dry the grapes. Leave them in small clusters if possible—it looks more natural. Place the candy corn, chocolate-covered pretzels, and mini marshmallows in separate small bowls or directly on the board if you have space.
- Assemble the Board (10 minutes): Start with the dips. Place your small bowls of ranch dressing, marinara sauce, and honey mustard in the center or off to one side of your board. They act as anchors. Next, arrange the mummy cheese sticks. Group them together in the middle of the board or in a cluster near the dips. They’re the star, so give them visual prominence. Then, fill in the gaps. Start with the larger items—salami rolls, prosciutto ribbons, and clusters of grapes. Then add the crackers, cucumber slices, baby carrots, and cherry tomatoes. Finally, tuck in the sweet items: candy corn, chocolate-covered pretzels, and mini marshmallows. Fill any empty spaces with rosemary sprigs or extra olives.
- Final Touches (2 minutes): Sprinkle orange and black sprinkles over the sweet section if using. Add edible eyeballs to the board for an extra creepy touch. Serve immediately or cover loosely with plastic wrap and refrigerate for up to 2 hours. If refrigerating, take the board out 15 minutes before serving to let the cheese soften slightly.
One thing I learned the hard way: don’t overcrowd the board. Leave a little breathing room between items so people can actually grab what they want without knocking everything over. And if you’re making this for a party, prep all your ingredients ahead of time and assemble the board right before guests arrive. It stays fresh and looks its best.
Cooking Tips & Techniques
I’ve made this board enough times to know what works and what doesn’t. Here are some real-talk tips that will save you time and frustration:
- Don’t overthink the mummy eyes: The cream cheese needs to be soft but not melted. If it’s too cold, it won’t pipe smoothly. Let it sit at room temperature for 10 minutes before using. And if you don’t have black olives, use small pieces of nori (seaweed) or even black sesame seeds. They’re smaller, but they work in a pinch.
- Keep the cheese sticks cold until assembly: Warm cheese sticks are harder to cut and don’t hold their shape as well. Work with them straight from the fridge. If they start to sweat, pat them dry with a paper towel before adding the cream cheese.
- Balance the flavors: A good charcuterie board has a mix of salty, sweet, tangy, and crunchy. If you’re heavy on the candy, add extra veggies or pickles to cut the sweetness. If you’re using a lot of rich meats, throw in some fresh fruit like apple slices or grapes to brighten it up.
- Use a variety of textures: Soft cheese sticks, crunchy crackers, chewy dried fruit, crisp veggies—each bite should feel different. That’s what keeps people coming back for more.
- Make it ahead (sort of): You can prep all the components the night before. Slice the veggies, roll the meats, make the mummy cheese sticks (store them in an airtight container in the fridge). But don’t assemble the board until you’re ready to serve. The crackers will get soggy, and the cheese sticks will soften too much if they sit out for hours.
I once tried to make the mummy cheese sticks with pre-shredded mozzarella. Don’t do it. It doesn’t hold its shape, and you end up with a sticky mess. Stick with the string cheese—it’s designed to hold together, and it’s the perfect texture for this.
Variations & Adaptations
One of the best things about this board is how easy it is to tweak. Here are some variations I’ve tried and loved:
- Vegetarian Version: Skip the salami and prosciutto. Add extra veggies like bell pepper strips, snap peas, or roasted chickpeas. You can also add cubes of cheddar or gouda to keep the protein content up.
- Gluten-Free Option: Use gluten-free crackers or swap them out for rice cakes, plantain chips, or veggie sticks. Most candy corn and chocolate-covered pretzels contain gluten, so check labels or substitute with gluten-free gummy candies.
- Sweet Tooth Board: Double the candy section. Add mini peanut butter cups, gummy worms, and ghost-shaped marshmallows. Skip the savory meats entirely and focus on cheese, fruit, and chocolate. It’s basically a dessert board, and it’s amazing.
- Spicy Upgrade: Add pickled jalapeños, spicy salami, and a sriracha ranch dip. The heat contrasts beautifully with the cool cheese sticks and sweet grapes. It’s a crowd-pleaser for adults who want a little kick.
- Kid-Friendly Mini Boards: Instead of one big board, make individual servings on small plates or in bento boxes. Each kid gets their own mummy cheese stick, a few crackers, some veggies, and a small treat. It’s perfect for parties and eliminates the chaos of everyone reaching for the same thing.
My personal favorite variation is the “Breakfast for Dinner” board. I swapped the salami for bacon strips, added hard-boiled egg halves (with olive eyes, of course), and used pancake bites instead of crackers. It was a hit with my kids, and honestly, I ate half of it myself.
Serving & Storage Suggestions
This board is best served at room temperature, so take it out of the fridge about 15 to 20 minutes before you’re ready to eat. The cheese sticks will soften slightly, and the flavors will be more pronounced. If you’re serving it outside on a cool Halloween night, it’ll stay fresh for about an hour without any issues.
For drinks, I love pairing this board with a warm mug of pumpkin spice coffee for the adults and apple cider for the kids. The sweetness of the coffee balances the salty meats and cheese perfectly. If you’re going full Halloween theme, serve it alongside a batch of spooky mummy hot dogs for a complete savory spread.
As for storage, this board doesn’t keep super well once assembled. The crackers get soft, and the cheese sticks might weep a little. But you can store the components separately. Leftover mummy cheese sticks (without the cream cheese eyes) can be wrapped in plastic and kept in the fridge for up to 3 days. Veggies and fruits should be stored in airtight containers. The dips will last for about a week in the fridge. Just don’t try to reassemble the board—it’s really a same-day kind of deal.
If you’re planning ahead, I recommend making the mummy cheese sticks the day before and keeping them in a single layer in an airtight container. Assemble the rest of the board on the day of your event. It takes less than 20 minutes, and the results are so much better than a board that’s been sitting out for hours.
Nutritional Information & Benefits
Let’s be real—this is a treat board, not a health food. But it does have some redeeming qualities. Here’s a rough estimate per serving (about ¼ of the board):
- Calories: 380-450
- Protein: 18g
- Carbohydrates: 35g
- Fat: 22g
- Fiber: 4g
- Sugar: 18g
The mozzarella cheese sticks are a great source of calcium and protein, which helps keep everyone full and satisfied. The veggies—carrots, cucumbers, and cherry tomatoes—add a decent dose of vitamins A and C, plus fiber. The grapes provide natural sweetness and antioxidants. And honestly, a little bit of candy corn never hurt anybody. It’s all about balance.
If you’re watching your sugar intake, you can easily swap the candy for more fresh fruit or dark chocolate chips. And if you’re gluten-sensitive, just swap the crackers for gluten-free options. This board is super adaptable, so you can make it work for your dietary needs without sacrificing the fun.
Conclusion
This Easy Halloween Charcuterie Board with Mummy Cheese Sticks is the kind of recipe that makes you look like a Halloween hero without any of the stress. It’s quick, it’s customizable, and it’s genuinely fun to make. Whether you’re hosting a party, sending something to a school event, or just want a festive snack for the family, this board delivers.
I love this recipe because it’s proof that you don’t need fancy tools or hours of prep to create something memorable. It’s about the little details—the olive eyes on the cheese sticks, the sprinkle of orange and black candies, the way everything comes together on one board. It feels special without being complicated.
So go ahead and make it your own. Swap in your favorite meats, add your kids’ favorite candy, or go full savory mode. And when you do, I’d love to hear about it. Leave a comment below and tell me how your board turned out. Share a photo on social media and tag me—I’m always looking for new ideas. Happy Halloween, and happy snacking!
Frequently Asked Questions
Can I make the mummy cheese sticks ahead of time?
Yes! You can make them up to 24 hours in advance. Store them in a single layer in an airtight container in the fridge. Add the cream cheese eyes just before serving to keep them looking fresh.
What can I use instead of black olives for the eyes?
If you’re not a fan of olives, try using small pieces of nori (seaweed), black sesame seeds, or even tiny dots of black food coloring on the cream cheese. Candy eyeballs work too, but they’re sweeter.
How do I keep the crackers from getting soggy?
Place the crackers on the board just before serving. If you’re prepping ahead, keep them in a sealed bag and add them at the last minute. Also, keep the dips in separate bowls so they don’t touch the crackers directly.
Can I use this board for a non-Halloween party?
Absolutely! Just skip the candy corn and edible eyeballs. The mummy cheese sticks can be served as a fun snack any time of year. You can even change the theme by using different colored sprinkles or seasonal fruits.
What’s the best way to transport this board to a party?
Assemble the board on a large, rimmed baking sheet or a disposable foil tray. Cover it tightly with plastic wrap and transport it flat in your car. Keep it in the fridge until you’re ready to serve, and add any delicate items like crackers or candy just before setting it out.
Pin This Recipe!
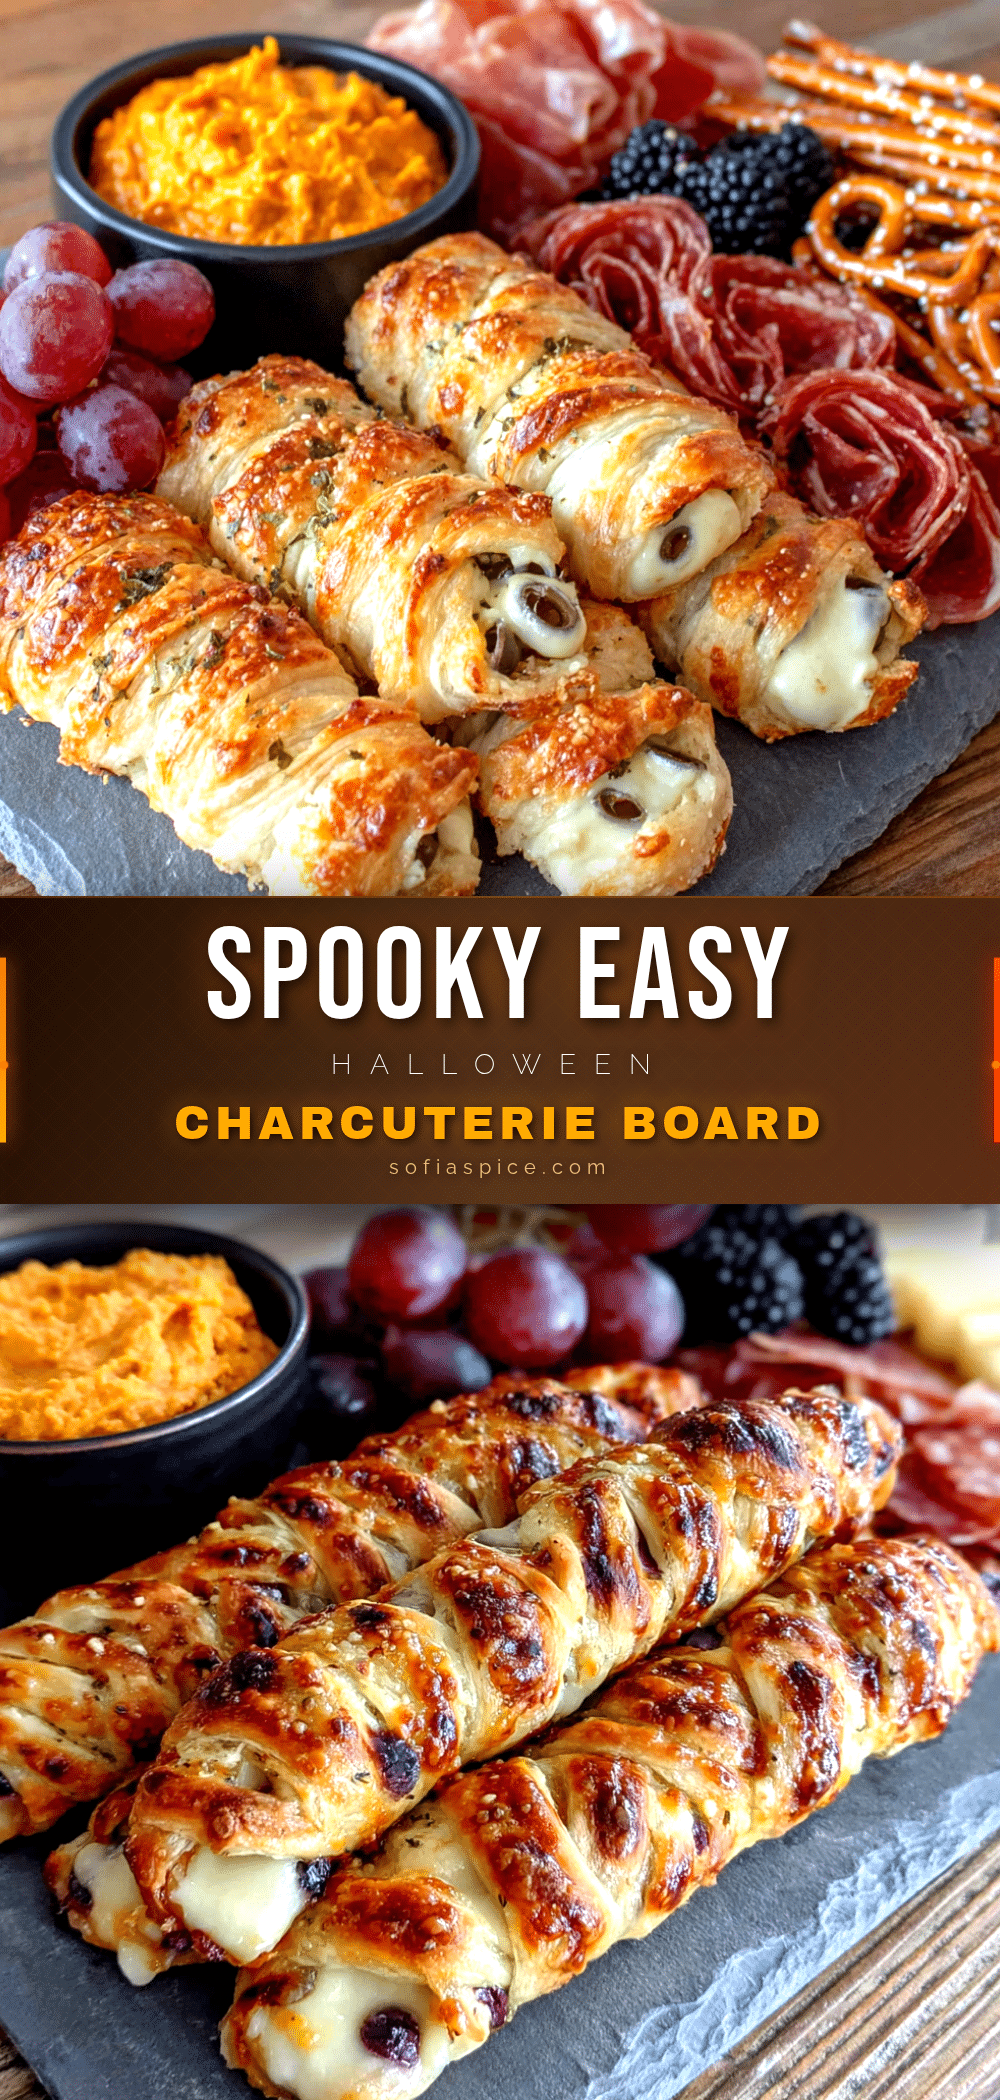
Easy Halloween Charcuterie Board with Mummy Cheese Sticks
A quick and easy Halloween snack board featuring adorable mummy cheese sticks, savory meats, fresh veggies, and sweet treats. Perfect for parties and last-minute gatherings.
- Prep Time: 20 minutes
- Cook Time: 0 minutes
- Total Time: 20 minutes
- Yield: 4 servings 1x
- Category: Appetizer
- Cuisine: American
Ingredients
- 6 mozzarella cheese sticks
- 1 can (2.25 oz) sliced black olives
- 1 tablespoon cream cheese, softened
- 4 ounces salami or pepperoni
- 4 ounces prosciutto or turkey slices
- 1 cup assorted crackers
- 1 cup baby carrots
- 1 cup cucumber slices
- ½ cup cherry tomatoes
- 1 cup red and green grapes
- ½ cup candy corn or candy pumpkins
- ½ cup chocolate-covered pretzels
- ¼ cup mini marshmallows (optional)
- ¼ cup ranch dressing
- ¼ cup marinara sauce
- 2 tablespoons honey mustard
- Fresh rosemary sprigs (optional)
- Edible eyeballs (optional)
- Orange and black sprinkles (optional)
Instructions
- Make the Mummy Cheese Sticks: Unwrap all 6 mozzarella cheese sticks. Cut each stick in half crosswise to make 12 pieces. Place cream cheese in a small zip-top bag, snip off a tiny corner, and pipe two small dots onto each cheese piece for eyes. Press a sliced black olive onto each dot. Set aside.
- Prepare the Savory Ingredients: Wash and dry all veggies. Slice cucumber into rounds (use a crinkle cutter if desired). Leave baby carrots whole. Halve cherry tomatoes if large. Roll salami slices into cylinders. Fold prosciutto into loose ribbons. Arrange crackers in a pile or fan.
- Prepare the Sweet Ingredients: Wash and dry grapes, leaving in small clusters. Place candy corn, chocolate-covered pretzels, and mini marshmallows in separate small bowls or directly on the board.
- Assemble the Board: Place small bowls of ranch dressing, marinara sauce, and honey mustard in the center or off to one side. Arrange mummy cheese sticks in a cluster near the dips. Fill in gaps with larger items (salami rolls, prosciutto ribbons, grape clusters), then add crackers, cucumber slices, baby carrots, and cherry tomatoes. Tuck in sweet items. Fill empty spaces with rosemary sprigs or extra olives.
- Final Touches: Sprinkle orange and black sprinkles over the sweet section if using. Add edible eyeballs. Serve immediately or cover loosely with plastic wrap and refrigerate for up to 2 hours. If refrigerating, take out 15 minutes before serving.
Notes
Prep all ingredients ahead of time and assemble just before serving. Keep cheese sticks cold until assembly. For best results, use firm string cheese. The board is best served at room temperature.
Nutrition
- Serving Size: 1/4 of the board
- Calories: 380450
- Sugar: 18
- Fat: 22
- Carbohydrates: 35
- Fiber: 4
- Protein: 18
Keywords: Halloween charcuterie board, mummy cheese sticks, easy Halloween snack, spooky snack board, party appetizer


