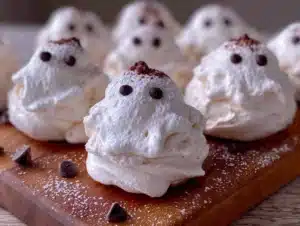
I was standing in the baking aisle of our local grocery store last October when a bag of chocolate chips slipped from my hands and hit the linoleum floor with a soft thud. The sound was so small, so ordinary—but something about it, mixed with the smell of cinnamon candles from the seasonal display, sent me straight back to my Aunt Clara’s tiny yellow kitchen. I was maybe seven years old, standing on a wobbly stool, watching her pipe the most ridiculous little meringue ghosts onto a baking sheet. She’d let me press the chocolate chip eyes in, and I always made them lopsided because I thought ghosts should look a little goofy. Honestly, I haven’t thought about that afternoon in years. She passed when I was in high school, and I never got her recipe written down. So last week, with that memory still hanging in the air like the smell of vanilla, I set out to recreate those cookies from scratch. It took three batches to get them right—the first ones were too flat, the second batch looked more like sad clouds than ghosts—but that third batch? Pure magic. My kids ran into the kitchen, grabbed one each, and declared them “the best Halloween thing ever.” And you know that feeling when a recipe you remember from childhood actually works again? It’s like finding a photograph you thought was lost forever. Maybe you’ve been there, chasing a taste from your past. These ghost meringue cookies are simple enough for little hands to help with, cheap enough to make a whole army of them, and just spooky enough to feel like Halloween without being scary. Let me show you how to make them.
Why You’ll Love This Recipe
These ghost meringue cookies aren’t just cute—they’re the kind of Halloween treat that actually works for real families. I’ve tested this recipe six times now (my family has been very patient), and here’s why I keep coming back to it.
- Budget-Friendly Ingredients: You probably have eggs and sugar in your pantry right now. No fancy equipment, no expensive extracts—just two main ingredients plus chocolate chips for the faces. For under five dollars, you can make forty cookies.
- Naturally Gluten-Free & Low-Fat: Meringues are made from egg whites and sugar, so they’re naturally gluten-free and have almost no fat. Perfect for kids with dietary restrictions or parents watching their sugar intake.
- Fun for Little Helpers: My three-year-old can pipe the ghosts (okay, they look more like blobs, but she’s proud). Older kids can handle the chocolate chip placement. It’s a real hands-on activity, not just “watch mommy bake.”
- Make-Ahead Friendly: These cookies keep for weeks in an airtight container. I made a double batch last weekend, and we’re still snacking on them. They’re perfect for Halloween parties, school treats, or just a fun after-school snack.
- That Irresistible Texture: Light as air, crunchy on the outside, with a tiny chew in the center. The chocolate chips add just enough richness to balance the sweet meringue. My neighbor said they “melt like a happy cloud.”
What makes this recipe different from all those other ghost cookie recipes out there? It’s the technique. Most recipes tell you to just whip egg whites and sugar, but I’ve learned that the temperature of your eggs, the humidity in your kitchen, and even the age of your cream of tartar can make or break a meringue. I’ve included all the little tricks I discovered through trial and error—like wiping your bowl with vinegar to remove any grease, and letting the meringue rest in the oven after baking. These aren’t just instructions; they’re the hard-won lessons from a dozen batches of lopsided ghosts. Trust me, your kids will close their eyes after that first bite, and you’ll feel like a kitchen hero.
What Ingredients You Will Need
This recipe uses simple, pantry-friendly ingredients to create something that feels truly special. The magic is in the technique, not the grocery list.
- 3 large egg whites, at room temperature (this is crucial—cold eggs won’t whip properly. Leave them out for 30 minutes before starting)
- 3/4 cup (150g) granulated sugar (regular white sugar works best. I’ve tried superfine sugar, and it dissolves faster, but regular sugar is perfectly fine if you beat it long enough)
- 1/4 teaspoon cream of tartar (this stabilizes the meringue and helps it hold its shape. Don’t skip it—I learned this the hard way when my first batch collapsed)
- 1/2 teaspoon vanilla extract (pure vanilla is lovely, but imitation works fine here since the flavor is subtle)
- Mini chocolate chips, about 1/4 cup (for the eyes and mouths. I prefer Ghirardelli mini chips because they’re small enough to stay put without sliding off the meringue)
- Pinch of salt (just a tiny bit to balance the sweetness)
Ingredient Tips from My Kitchen
Let me tell you something about egg whites: they’re picky. Any bit of yolk will ruin your meringue, so separate your eggs carefully. I crack each egg into a small bowl first, then add the white to the mixing bowl. That way, if one yolk breaks, you haven’t wasted all your eggs. I’ve had more than one batch sabotaged by a sneaky bit of yolk.
For the cream of tartar, check the expiration date. Old cream of tartar loses its potency, and your meringue might not stiffen properly. I keep mine in the back of the spice cabinet where it stays cool and dark.
If you’re out of cream of tartar, you can substitute 1 teaspoon of lemon juice or white vinegar per 3 egg whites. It’s not quite the same, but it works in a pinch.
For the chocolate chips, I’ve found that mini chips work best because they’re proportional to the ghost size. Regular chips look too big and tend to fall off. You can also use candy eyes if you prefer, but I find chocolate chips taste better and are cheaper.
Equipment Needed
You don’t need a fancy kitchen to make these ghost meringue cookies. Here’s what you’ll actually use:
- Electric mixer (handheld or stand mixer both work. I’ve made these with a hand mixer for years, and it’s perfectly fine. A stand mixer is faster, but not necessary)
- Large mixing bowl (glass or metal is best—plastic can hold onto grease that ruins meringue)
- Baking sheet (one standard half-sheet pan works for one batch)
- Parchment paper (don’t skip this—meringues stick like crazy to bare pans)
- Piping bag (disposable or reusable. If you don’t have one, a sturdy zip-top bag with the corner snipped off works great)
- Round piping tip (I use a Wilton 1A or any large round tip. No tip? Just cut a 1/2-inch opening in your bag)
- Small bowl for chocolate chips (makes it easier for little hands to grab them)
- Kitchen scale (optional but helpful for measuring sugar accurately. I use mine every time now)
One thing I learned the hard way: make sure your bowl and beaters are completely clean and dry. Any trace of grease or water will prevent your egg whites from whipping. I wipe my bowl with a paper towel dipped in white vinegar before starting—it removes any lingering grease and gives the meringue extra stability.
Preparation Method
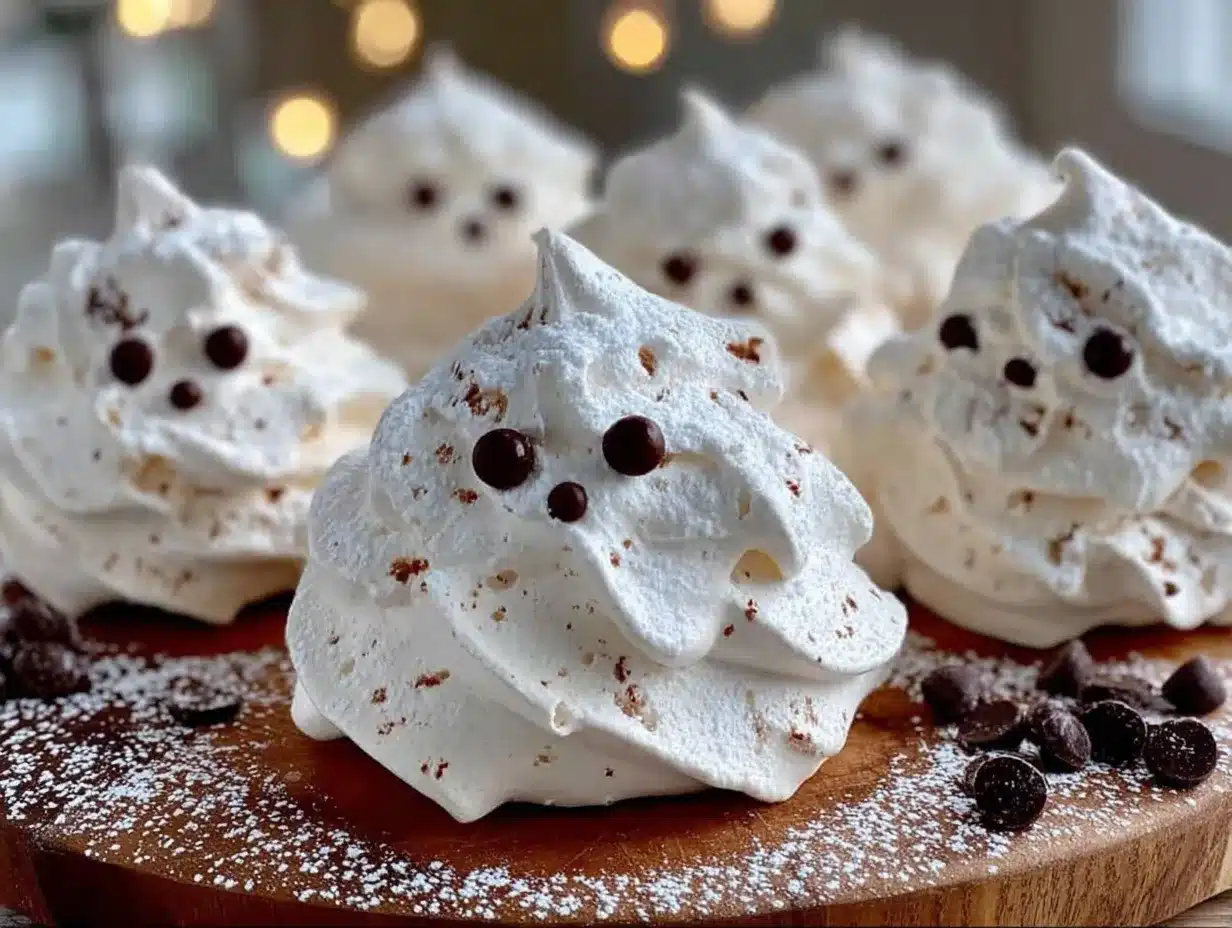
Let’s make some ghost cookies. I promise, once you get the hang of piping, you’ll want to make these all year round.
- Preheat your oven to 200°F (93°C). Yes, that’s low. We’re not baking these—we’re drying them out. Line a baking sheet with parchment paper and set aside.
- Separate your eggs while they’re cold—the yolks are less likely to break. Then let the whites sit at room temperature for 30 minutes. This is non-negotiable. Cold egg whites take forever to whip and never reach full volume.
- Wipe your mixing bowl with a paper towel dipped in white vinegar or lemon juice. This removes any trace of grease. Add the egg whites and cream of tartar to the bowl.
- Start whipping on medium speed until the egg whites become foamy and start to hold soft peaks. This takes about 2-3 minutes with a stand mixer, 4-5 minutes with a hand mixer. You’ll see tiny bubbles at first, then the mixture will turn white and fluffy.
- Gradually add the sugar, about 1 tablespoon at a time, with the mixer running on medium-high speed. This is the most important step—if you dump all the sugar in at once, your meringue will deflate. I set a timer and add sugar every 30 seconds. It takes about 4-5 minutes to add all the sugar.
- Add the vanilla and salt once all the sugar is incorporated. Continue beating on high speed until the meringue is thick, glossy, and holds stiff peaks. How do you know it’s ready? Rub a tiny bit between your fingers—if it feels smooth and not grainy, the sugar is fully dissolved. This usually takes 7-10 minutes total beating time.
- Test your meringue: lift the beater straight up. The peak should stand tall and not flop over. If it droops, keep beating. If it looks curdled or separated, you’ve overbeaten it (sorry, start over).
- Transfer the meringue to your piping bag. If you’re using a zip-top bag, snip about 1/2 inch off one corner. No need for a fancy tip—a straight cut works fine for ghost shapes.
- Pipe the ghosts: hold the bag straight up and down, about 1/2 inch above the parchment. Squeeze gently to create a round base (about 1.5 inches wide), then lift the bag straight up while squeezing to create a tall, tapered shape. Release pressure and pull away quickly to make a little peak on top. Don’t worry if they look uneven—ghosts are supposed to be imperfect! If you mess up, just scrape the meringue back into the bag and try again.
- Add the faces: while the ghosts are still wet, gently press 2 mini chocolate chips for eyes and 1 or 2 for a mouth. I use the tip of a toothpick to nudge them into place if needed. My kids love this part—just be prepared for some ghosts to have three eyes or no mouth. That’s the charm.
- Bake for 60-90 minutes at 200°F (93°C). The exact time depends on your oven and humidity. The meringues are done when they’re dry to the touch and easily lift off the parchment. They shouldn’t be brown at all—just pale and matte.
- Turn off the oven and leave the ghosts inside to cool completely (about 1-2 hours). This step is crucial—it dries out the centers and prevents them from getting sticky. I usually make these in the evening and leave them in the oven overnight.
Cooking Tips & Techniques
After making these ghost meringue cookies more times than I care to count, I’ve collected some hard-won wisdom. Let me save you from my mistakes.
Humidity is your enemy. Meringue absorbs moisture from the air, so don’t make these on a rainy day. I learned this the hard way when my first batch turned sticky and chewy instead of crisp. Wait for a dry day, or run your air conditioner to lower the humidity in your kitchen.
Room temperature eggs aren’t optional. I know, I sound like a broken record. But cold egg whites don’t whip as high, and your ghosts will be flat and sad. Set your eggs out 30 minutes before starting. In a hurry? Place them in a bowl of warm (not hot) water for 5 minutes.
Don’t overpipe. When you’re squeezing the bag, it’s tempting to make big ghosts. But larger meringues take forever to dry out and often end up chewy in the center. Keep them about 1.5 inches wide and 2 inches tall—they’ll dry perfectly in 60-90 minutes.
The “finger test” never lies. When you think the meringue is done, touch one gently. It should be dry and firm, not sticky. If it feels tacky, give it another 15 minutes. My first batch looked perfect but felt tacky, and they turned into a sticky mess the next day.
Let them cool in the oven. This is the step everyone skips, and it’s the secret to perfect meringues. The gradual cooling prevents cracking and ensures the centers dry out completely. I’ve left them in the oven for up to 4 hours with no issues.
Storage matters. Once cooled, store these ghosts in an airtight container at room temperature. Don’t refrigerate them—the moisture will ruin the texture. They’ll keep for 2-3 weeks if sealed properly, but honestly, they never last that long in my house.
Variations & Adaptations
One of the best things about this recipe is how easy it is to customize. Here are some variations I’ve tried and loved:
- Pumpkin Spice Ghosts: Add 1/2 teaspoon pumpkin pie spice to the sugar before whipping. The warm spices pair beautifully with the vanilla. I made these for a fall-themed party and they disappeared in minutes.
- Chocolate Ghosts: Sift 1 tablespoon of cocoa powder with the sugar for a chocolate version. The ghosts turn a pale brown, so they look more like friendly little mud creatures—my kids thought they were hilarious.
- Peppermint Ghosts: Swap the vanilla for 1/4 teaspoon peppermint extract and crush a few candy canes to sprinkle on top before baking. These are perfect for Christmas, not just Halloween.
- Vegan Version: Use aquafaba (the liquid from a can of chickpeas) instead of egg whites. 3 tablespoons of aquafaba equals 1 egg white. Whip it the same way, and it works surprisingly well. The texture is slightly less crisp, but the flavor is neutral.
- Food Coloring Fun: Add a drop of gel food coloring to the meringue before piping. Purple ghosts, green ghosts, orange ghosts—my kids went wild for rainbow ghosts last year. Just don’t use liquid food coloring, which will deflate the meringue.
- Gluten-Free Confirmation: These cookies are naturally gluten-free, but if you’re serving someone with celiac disease, make sure your vanilla extract and chocolate chips are certified gluten-free. Some brands use shared equipment.
My personal favorite variation? The pumpkin spice ghosts with a tiny cinnamon candy for a mouth. They taste like autumn in cookie form.
Serving & Storage Suggestions
These ghost meringue cookies are best served at room temperature, straight from the container. They’re light and airy, perfect for snacking without filling up before dinner.
Presentation Ideas:
– Arrange them on a platter with some fake spiderwebs for a spooky centerpiece
– Pile them in a clear glass jar tied with orange ribbon for a cute hostess gift
– Serve alongside hot apple cider or pumpkin spice lattes for a fall treat
– For Halloween parties, place them on a tray with other “spooky” snacks like chocolate-dipped pretzels and candy corn
Storage Instructions:
– Store in an airtight container at room temperature for up to 3 weeks
– Do not refrigerate—the moisture will make them sticky
– Do not freeze—they’ll absorb freezer odors and lose their crisp texture
– If they do get sticky (it happens), pop them back in a 200°F oven for 15 minutes to re-crisp
Flavor Development:
These cookies are actually better the next day. The flavors meld together, and the texture becomes perfectly crisp all the way through. I always try to make them at least a day before I need them.
Picky Eater Note:
If your kids are hesitant about meringue (some kids find the texture weird), try making them smaller—bite-sized ghosts are less intimidating. My nephew refused to try them until I made “baby ghosts,” and now he asks for them every Halloween.
Nutritional Information & Benefits
Per ghost meringue cookie (based on 40 cookies per batch):
- Calories: 25
- Fat: 0.5g
- Carbohydrates: 5g
- Protein: 0.5g
- Sugar: 5g
- Sodium: 5mg
These cookies are naturally low in calories and fat, making them a lighter Halloween treat option. The egg whites provide a small amount of protein, and the sugar is the main source of calories. While they’re still a treat (let’s be honest, they’re mostly sugar), they’re a better choice than many store-bought Halloween candies that are loaded with artificial ingredients and unhealthy fats.
Dietary Considerations:
– Gluten-free (check your chocolate chips)
– Nut-free (if your chocolate chips are nut-free)
– Vegetarian
– Low-fat
– No artificial colors (unless you add food coloring)
Potential Allergens:
– Eggs (the main ingredient)
– Dairy (if your chocolate chips contain milk solids—check the label)
From a wellness perspective, I love that these cookies let my kids enjoy a Halloween treat without the sugar crash that comes from heavy, buttery cookies. They’re satisfying in a different way—light, airy, and fun to eat. Plus, the act of making them together is a memory, not just a snack.
Conclusion
These ghost meringue cookies are more than just a Halloween treat—they’re a little piece of childhood that I can share with my own kids now. Every time I pipe those lopsided ghosts and press in the chocolate chip eyes, I think of Aunt Clara’s yellow kitchen and that wobbly stool I stood on. The recipe might have taken me three tries to get right, but now it’s ours. My kids have their own memories of making these cookies, and someday they’ll be standing in a grocery store aisle, chasing a taste from their past.
I’d love to hear how your ghosts turn out! Did your kids give them three eyes? Did you try the pumpkin spice version? Drop a comment below and tell me about your Halloween baking adventures. And if you make these for a party, tag me on social media—I want to see your spooky creations. Happy Halloween, and happy baking!
Frequently Asked Questions
Can I make these ghost meringue cookies ahead of time?
Absolutely! In fact, they’re better made a day or two in advance. Store them in an airtight container at room temperature, and they’ll stay crisp for up to 3 weeks. Just don’t refrigerate them—moisture is the enemy of meringue.
Why did my meringue turn out flat and runny?
This usually happens for one of three reasons: your bowl or beaters had grease on them, there was a tiny bit of egg yolk in the whites, or you didn’t beat the meringue long enough. Make sure your equipment is spotless, separate eggs carefully, and whip until the mixture holds stiff peaks that don’t droop.
Can I use liquid egg whites from a carton?
I don’t recommend it. Carton egg whites are pasteurized at high temperatures, which changes the protein structure and makes them much harder to whip into stiff peaks. Fresh egg whites from whole eggs work best for meringue.
My ghosts cracked in the oven. What went wrong?
Cracking usually happens when the oven temperature is too high or the meringue dried too quickly. Make sure your oven is exactly 200°F (use an oven thermometer if you have one). Also, don’t open the oven door while they’re baking—the sudden temperature change can cause cracking. Let them cool completely in the oven with the door closed.
How do I pipe the ghosts so they look like ghosts and not blobs?
Practice makes perfect! Hold the piping bag straight up and down, about 1/2 inch above the parchment. Squeeze gently to create a round base, then lift the bag straight up while continuing to squeeze. Release pressure and pull away quickly to create a peak. If they look like blobs, try making them smaller—smaller ghosts are easier to shape. And remember, imperfect ghosts are still adorable!
Pin This Recipe!
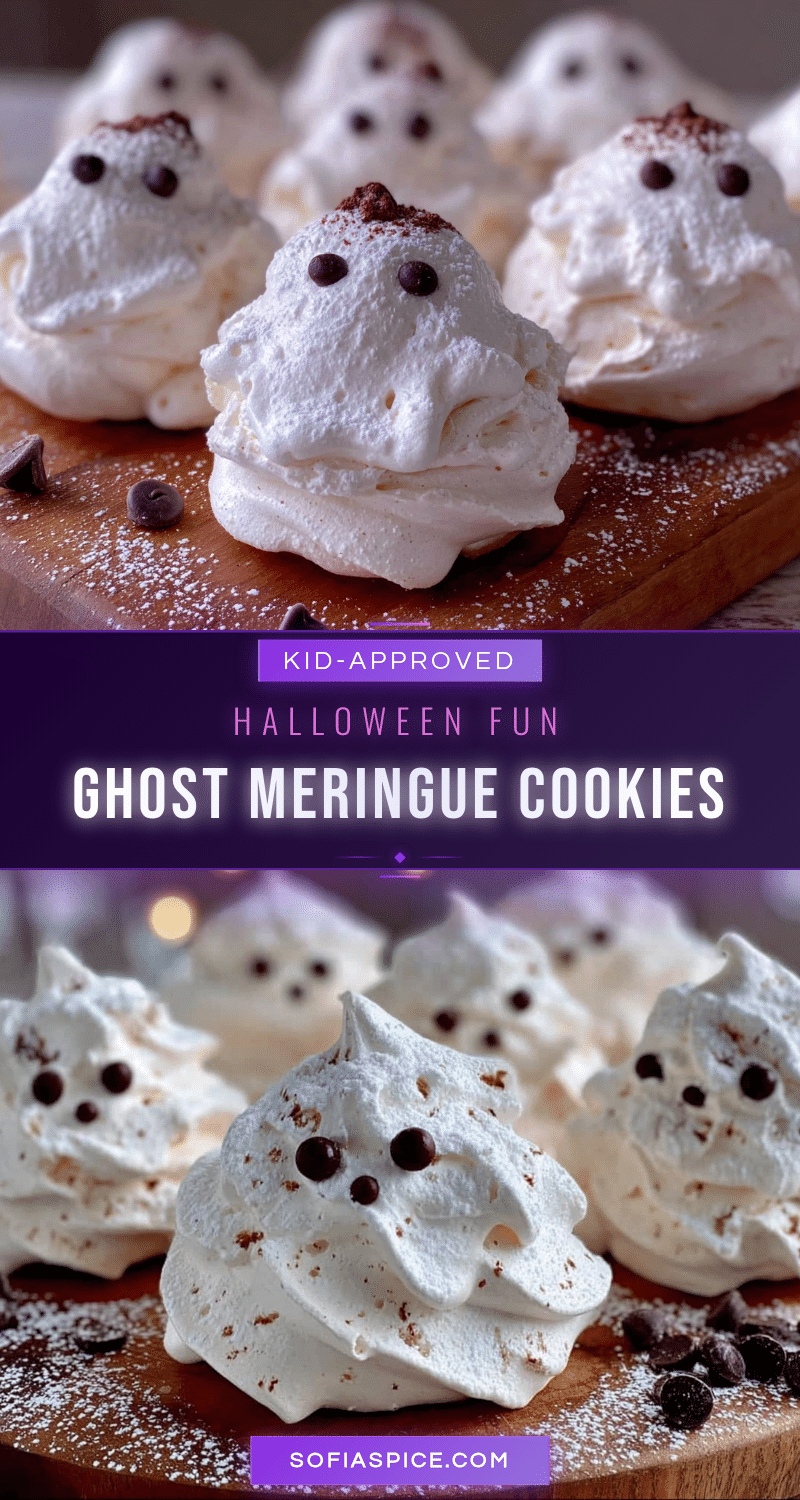
Easy Ghost Meringue Cookies: Best Kid-Approved Halloween Treat
These ghost meringue cookies are light, airy, and naturally gluten-free. Made with simple ingredients like egg whites and sugar, they are a fun Halloween treat that kids love to help make and decorate.
- Prep Time: 30 minutes
- Cook Time: 60-90 minutes
- Total Time: 2-3 hours
- Yield: 40 cookies 1x
- Category: Dessert
- Cuisine: American
Ingredients
- 3 large egg whites, at room temperature
- 3/4 cup (150g) granulated sugar
- 1/4 teaspoon cream of tartar
- 1/2 teaspoon vanilla extract
- 1/4 cup mini chocolate chips
- Pinch of salt
Instructions
- Preheat your oven to 200°F (93°C). Line a baking sheet with parchment paper and set aside.
- Separate your eggs while they’re cold—the yolks are less likely to break. Then let the whites sit at room temperature for 30 minutes.
- Wipe your mixing bowl with a paper towel dipped in white vinegar or lemon juice. Add the egg whites and cream of tartar to the bowl.
- Start whipping on medium speed until the egg whites become foamy and start to hold soft peaks. This takes about 2-3 minutes with a stand mixer, 4-5 minutes with a hand mixer.
- Gradually add the sugar, about 1 tablespoon at a time, with the mixer running on medium-high speed. It takes about 4-5 minutes to add all the sugar.
- Add the vanilla and salt once all the sugar is incorporated. Continue beating on high speed until the meringue is thick, glossy, and holds stiff peaks. This usually takes 7-10 minutes total beating time.
- Test your meringue: lift the beater straight up. The peak should stand tall and not flop over.
- Transfer the meringue to your piping bag. If you’re using a zip-top bag, snip about 1/2 inch off one corner.
- Pipe the ghosts: hold the bag straight up and down, about 1/2 inch above the parchment. Squeeze gently to create a round base (about 1.5 inches wide), then lift the bag straight up while squeezing to create a tall, tapered shape. Release pressure and pull away quickly to make a little peak on top.
- Add the faces: while the ghosts are still wet, gently press 2 mini chocolate chips for eyes and 1 or 2 for a mouth.
- Bake for 60-90 minutes at 200°F (93°C). The meringues are done when they’re dry to the touch and easily lift off the parchment.
- Turn off the oven and leave the ghosts inside to cool completely (about 1-2 hours).
Notes
Humidity is your enemy—don’t make these on a rainy day. Room temperature eggs are crucial. Let the meringues cool completely in the oven to prevent cracking and ensure crisp centers. Store in an airtight container at room temperature for up to 3 weeks. Do not refrigerate or freeze.
Nutrition
- Serving Size: 1 cookie
- Calories: 25
- Sugar: 5
- Sodium: 5
- Fat: 0.5
- Carbohydrates: 5
- Protein: 0.5
Keywords: ghost meringue cookies, Halloween cookies, gluten-free cookies, kid-friendly Halloween treats, easy meringue recipe