My neighbor, Jen, wasn’t trying to impress anyone. I’d stopped by to borrow a bag of sugar for a last-minute baking project, and the smell hit me before I even got through her screen door. It wasn’t sweet or sugary—it was savory, tangy, with a little kick of paprika. She was standing at her kitchen counter, a dozen hard-boiled eggs lined up like little soldiers, and she was piping something into them with a zip-top bag.
“Oh, these are just for the kids’ Halloween party tomorrow,” she said, not even looking up. “Nothing fancy.”
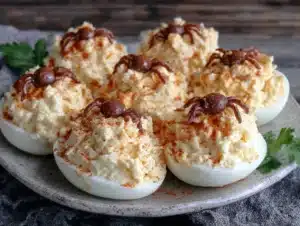
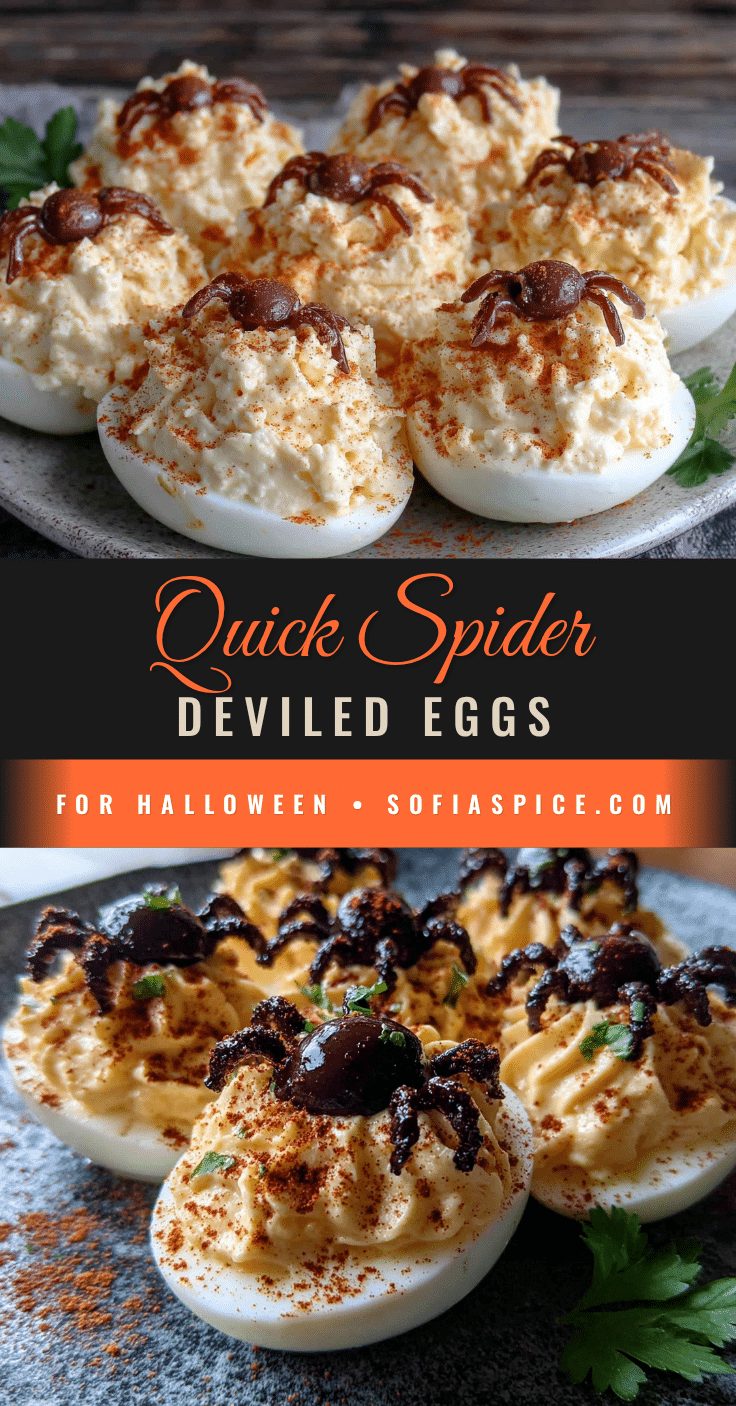
But let me tell you—they were fancy. She had turned plain deviled eggs into the cutest, creepiest little spiders I’d ever seen. Black olive bodies, little legs creeping over the yellow filling. My own kids were due for a Halloween party that weekend, and honestly, I knew right then I wasn’t leaving without that trick up my sleeve.
You know that feeling when you see something so simple and so clever that you can’t believe you didn’t think of it yourself? That was this recipe for me. It’s the kind of thing that looks like it took hours but really came together in about twenty minutes. And the best part? Jen didn’t even act like it was a big deal. That’s when you know a recipe is the real deal—when the person making it treats it like no big thing, but you can’t stop thinking about it.
I’ve been making these Quick Spider Deviled Eggs for every Halloween gathering ever since. They’re creepy, they’re cute, and they disappear faster than anything else on the table. Trust me on this one.
Why You’ll Love This Recipe
Let’s be honest—Halloween party food can be a hassle. You want something festive but not fussy, spooky but still edible. These spider deviled eggs hit every mark. I’ve tested this recipe through three Halloween parties, two school events, and one very memorable office potluck, and here’s why it keeps winning:
- Quick & Easy: From start to finish, you’re looking at about 25 minutes of active work. The eggs boil while you prep the other ingredients, so you’re never standing around waiting.
- Simple Ingredients: Eggs, mayo, mustard, paprika, and black olives. That’s it. No specialty stores, no weird items you’ll never use again.
- Perfect for Halloween Parties: Whether it’s a classroom celebration, a family gathering, or a spooky movie night, these eggs fit right in. They’re portable, they’re finger food, and they’re a conversation starter.
- Crowd-Pleaser: I’ve watched kids who swear they hate eggs go back for seconds. Something about the spider design makes them irresistible.
- Unbelievably Delicious: The creamy yolk filling with a hint of mustard and paprika is classic for a reason. The olive “spiders” add a briny pop that balances the richness perfectly.
What makes this different from every other deviled egg recipe out there? It’s the presentation, plain and simple. Anyone can make deviled eggs, but turning them into spiders takes about two extra minutes and makes a huge impression. You don’t need any special tools—just a knife and a little patience.
This is the kind of recipe that makes you look like a Halloween hero without breaking a sweat. And honestly, on a busy weeknight when you’re already juggling costumes and candy, that’s exactly what you need.
What Ingredients You Will Need
This recipe relies on pantry staples and one or two fridge items. Here’s what you’ll need to make these creepy-crawly deviled eggs come to life:
For the Deviled Eggs
- 12 large eggs (room temperature if possible—they peel easier)
- 1/3 cup mayonnaise (I prefer Hellmann’s or Duke’s for that tangy creaminess)
- 1 tablespoon yellow mustard (or Dijon if you want a sharper kick)
- 1 teaspoon white vinegar (adds brightness and helps the filling hold its shape)
- 1/2 teaspoon salt (fine sea salt works best)
- 1/4 teaspoon black pepper (freshly ground if you have it)
- 1/4 teaspoon paprika (plus extra for garnish—smoked paprika adds a nice depth)
For the Spider Decorations
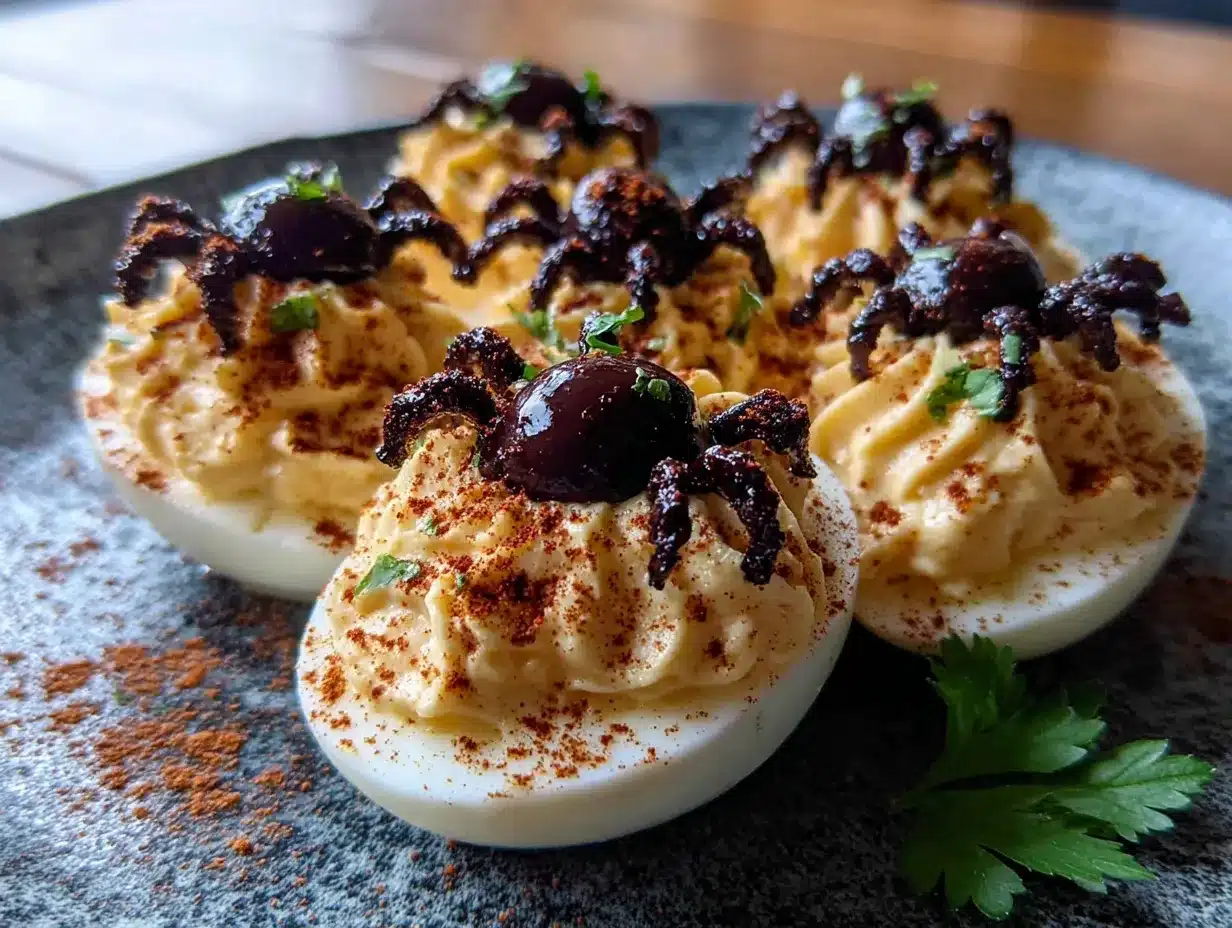
- 1 can (6 ounces) large black olives (about 24 olives—you’ll need one for each egg half)
- Optional: 1-2 additional olives for extra legs if some break
Ingredient Notes & Tips:
For the best texture, use eggs that are at least a week old. Fresh eggs are harder to peel, and trust me, you don’t want to be fighting with stubborn shells when you’re short on time. I learned this the hard way before a party once—never again!
If you’re watching your calories, you can swap half the mayo with plain Greek yogurt. It works surprisingly well, though the filling will be slightly less rich. For a dairy-free version, use vegan mayonnaise and skip the yogurt.
When choosing olives, go for the large, pitted black olives—the kind you’d put on a pizza. You need them big enough to cut into spider bodies and legs. I’ve tried using smaller olives, and honestly, the spiders just look sad. Go big or go home!
Paprika is where you can get creative. Smoked paprika gives a deeper, earthier flavor. Regular sweet paprika is more traditional. I keep both on hand and use whichever I grab first—both work great.
Equipment Needed
You don’t need much to pull these off. Here’s what I use every time:
- Large saucepan or pot (big enough to hold 12 eggs in a single layer)
- Slotted spoon (for lowering eggs into boiling water and fishing them out)
- Medium mixing bowl (for the filling)
- Fork or potato masher (to mash the yolks—a fork works fine)
- Piping bag or zip-top bag (for filling the eggs neatly)
- Sharp paring knife (for cutting olives into spiders)
- Cutting board (dedicated to the olive carving)
- Serving platter (something with a dark background makes the spiders pop)
If you don’t have a piping bag, don’t worry. A zip-top bag with the corner snipped off works exactly the same. I’ve been using that trick for years, and it saves me from having to wash extra equipment.
For the olive carving, a small paring knife is ideal, but I’ve used a steak knife in a pinch. Just make sure it’s sharp enough to cut cleanly through the olives without squishing them.
Preparation Method
Here’s the step-by-step process. Take your time with the olive spiders—they’re fiddly but worth it.
Step 1: Hard-Boil the Eggs (15 minutes)
Place your 12 eggs in a large saucepan in a single layer. Cover them with cold water by about an inch. Bring the water to a rolling boil over high heat—watch for those big, vigorous bubbles.
Once boiling, cover the pot, turn off the heat, and let the eggs sit for exactly 12 minutes. Set a timer! I’ve forgotten before and ended up with green-ringed yolks. They still taste fine, but they don’t look as pretty for the spider filling.
After 12 minutes, transfer the eggs to an ice bath (a bowl of cold water with ice cubes). Let them chill for at least 5 minutes. This stops the cooking and makes peeling a million times easier.
Step 2: Peel and Halve the Eggs (5 minutes)
Gently crack the eggs all over and peel under running cold water. The water helps separate the shell from the egg white. Pat the peeled eggs dry with a paper towel.
Using a sharp knife, slice each egg lengthwise. Wipe the knife clean between cuts for neat halves. Carefully pop out the yolks into your mixing bowl. Arrange the white halves on your serving platter.
Step 3: Make the Filling (5 minutes)
Add the mayonnaise, mustard, vinegar, salt, pepper, and paprika to the yolks. Mash everything together with a fork until smooth. I like to press the mixture through a fine-mesh sieve for an extra-silky texture, but honestly, a good mashing with a fork does the job just fine.
Taste the filling and adjust seasoning if needed. You want it creamy, tangy, and a little peppery. If it feels too thick, add another teaspoon of mayo or a splash of vinegar.
Step 4: Fill the Egg Whites (5 minutes)
Spoon the filling into a piping bag or a zip-top bag. If using a zip-top bag, snip off a small corner—about 1/4 inch wide. Pipe the filling into each egg white half, mounding it slightly in the center. You want enough filling to support the olive spider on top.
Don’t overfill! Leave a little room around the edges so the spider legs can rest on the egg white, not just the filling.
Step 5: Create the Spider Decorations (10 minutes)
This is the fun part. Drain your black olives and pat them dry. For each spider, you’ll need one whole olive for the body and one olive sliced into legs.
Take one olive and slice it in half lengthwise. Set one half aside for the spider body. Take the other half and slice it into thin strips lengthwise—these are the legs. You should get about 4-6 thin strips from each half.
Place the spider body (the whole half) on top of the filling. Arrange 4-6 leg strips on either side, gently pressing them into the filling so they stay put. The legs should curve slightly outward, as if the spider is crawling.
Repeat for all 24 egg halves. It takes a little practice, but by the third or fourth spider, you’ll be a pro.
Step 6: Garnish and Serve (2 minutes)
Sprinkle a light dusting of paprika over the eggs for color. If you want extra creepiness, you can add tiny dots of mustard or Sriracha for spider eyes—just a little dab on the olive body.
Serve immediately or refrigerate until ready to serve. These are best within a few hours of assembling.
Cooking Tips & Techniques
I’ve made these spiders more times than I can count, and I’ve picked up a few tricks along the way. Here’s what I wish someone had told me the first time:
Perfect hard-boiled eggs every time: The key is that ice bath. Don’t skip it. Not only does it stop the cooking, but it also shocks the shells, making them peel off in big pieces instead of stubborn little flakes. If you’re in a hurry, run cold water over the eggs for a full minute before peeling.
Peeling made easy: Add a teaspoon of baking soda to the boiling water. It raises the pH and helps the shells separate from the whites. This was a game-changer for me—I used to lose half the egg white to peeling accidents.
Olive carving without tears: Use a sharp knife and go slow. The olives are slippery, so I pat them dry first. If an olive breaks, just eat it and grab another. I always buy an extra can just in case—better safe than sorry when you’re on a deadline.
Filling consistency: If your filling is too thick, add a little more mayo or a splash of pickle juice. Too thin? Add another yolk or a tablespoon of breadcrumbs. The perfect filling should hold a stiff peak when you pipe it.
Multitasking strategy: While the eggs are boiling, prep the olives. While the eggs are cooling, make the filling. This way, everything comes together in under 30 minutes. I’ve done this while helping kids with costumes and answering the door for trick-or-treaters—it’s totally doable.
Common mistake to avoid: Don’t overmix the filling. You want it creamy, not gluey. Stop as soon as everything is combined. Overmixing can make the texture weird and dense.
One time, I forgot to add the mustard and only realized after piping all 24 halves. I had to scrape the filling back into the bowl, mix in the mustard, and re-pipe. It still tasted great, but it was a pain. Learn from my mistake—taste as you go!
Variations & Adaptations
This recipe is easy to tweak for different tastes and dietary needs. Here are some variations I’ve tried and loved:
Spicy Spider Eggs
Add 1/2 teaspoon of sriracha or a pinch of cayenne pepper to the filling. The heat pairs beautifully with the cool, creamy yolk and briny olives. I made these for a grown-up Halloween party, and they were the first thing to disappear.
Avocado Deviled Spiders
Swap half the mayonnaise for mashed ripe avocado. The filling turns a lovely pale green, which looks striking against the black olives. This version is dairy-free and adds healthy fats. Just be aware that the filling will brown faster, so serve within an hour of making.
Bacon-Wrapped Spiders
For extra decadence, wrap each olive spider body with a small strip of cooked bacon before placing it on the egg. Secure it with a toothpick if needed. This turns the spiders into little flavor bombs—smoky, salty, and irresistible.
Gluten-Free & Keto-Friendly
This recipe is naturally gluten-free and low-carb. For a keto version, use full-fat mayonnaise and skip any sweeteners. The olives add healthy fats, making this a perfect appetizer for low-carb diets.
Vegan Version
Use vegan mayonnaise and substitute the egg whites with halved boiled potatoes or firm tofu. For the filling, mash the potato or tofu with vegan mayo, mustard, and nutritional yeast for a cheesy flavor. The olives work the same way. It’s not exactly the same, but it’s surprisingly good.
I’ve personally tried the avocado version twice—once for a friend who’s dairy-free and once just because I had ripe avocados to use up. Both times, everyone asked for the recipe. That’s the mark of a good variation!
Serving & Storage Suggestions
These spider deviled eggs are best served chilled or at room temperature. I like to arrange them on a dark-colored platter or a black serving tray to make the spiders really stand out. A bed of fresh parsley or lettuce leaves underneath adds a nice pop of green.
What to serve with them: These eggs pair well with other Halloween finger foods like mummy pigs in a blanket, ghost-shaped caprese skewers, or a bowl of creepy crawly veggie dip. For drinks, a crisp white wine or a pumpkin spice cocktail complements the savory eggs nicely.
Storage instructions: Store leftover spider deviled eggs in an airtight container in the refrigerator for up to 2 days. The filling may soften slightly, and the olives might lose a little crunch, but they’ll still taste great.
Do not freeze! Deviled eggs do not freeze well—the texture turns watery and unpleasant. Make them fresh or a day ahead at most.
Reheating: These are served cold, so no reheating needed. If you’ve stored them in the fridge, let them sit at room temperature for about 10 minutes before serving to take the chill off.
Flavor development: Honestly, these eggs taste even better after a few hours in the fridge. The flavors meld together, and the filling firms up nicely. I often make them the night before a party, and they’re always a hit.
Nutritional Information & Benefits
Here’s the approximate nutritional breakdown per spider deviled egg (one half):
| Nutrient | Amount |
|---|---|
| Calories | 65 |
| Protein | 5g |
| Fat | 4.5g |
| Carbohydrates | 1g |
| Fiber | 0g |
| Sugar | 0.5g |
| Sodium | 180mg |
Eggs are a fantastic source of high-quality protein and contain all nine essential amino acids. They’re also rich in choline, which supports brain health, and lutein, which is good for your eyes. The olives add healthy monounsaturated fats and a dose of vitamin E.
This recipe is naturally low-carb and gluten-free, making it suitable for keto and paleo diets. It’s also nut-free and soy-free (check your mayonnaise label to be sure).
For those watching their cholesterol, the American Heart Association now says that one egg per day is fine for most people. These spiders use half an egg per serving, so you can easily enjoy two or three without worry.
I love that this recipe lets me indulge in a Halloween treat without derailing my healthy eating habits. It’s proof that festive food can be both fun and nutritious.
Conclusion
These Quick Spider Deviled Eggs are everything I want in a Halloween recipe—they’re fast, they’re fun, and they’re genuinely delicious. The first time I made them, my kids couldn’t stop giggling at the little olive spiders. Now it’s a tradition we look forward to every October.
Don’t be afraid to make these your own. Add more spice, swap in avocado, or go wild with the decorations. The beauty of this recipe is how forgiving it is. Even if your spiders look a little lopsided, they’ll still taste amazing.
I’d love to hear how yours turn out! Drop a comment below and tell me about your Halloween party spread. Did the kids love them? Did anyone dare to eat the spiders first? Share your photos, your tweaks, your stories—I read every single comment.
Here’s to a spooky, delicious, and wonderfully easy Halloween. You’ve got this!
Frequently Asked Questions
Can I make these spider deviled eggs a day ahead?
Absolutely! In fact, they taste even better after the flavors have melded overnight. Prepare the eggs and filling, but wait to add the olive spiders until just before serving. The olives can dry out or slip off if stored too long on the filling.
How do I keep the olive spiders from falling off?
Make sure you pipe enough filling to create a stable base. Gently press the olive body and legs into the filling so they stick. If they’re still slipping, use a tiny dab of cream cheese or extra filling as “glue” underneath the olive.
Can I use a different type of olive?
Large black olives work best because they’re big enough to cut into recognizable spiders. You could try kalamata olives for a different flavor, but they’re smaller and harder to carve. Green olives would work in a pinch, but the color contrast isn’t as striking.
How do I prevent the eggs from cracking while boiling?
Start with room-temperature eggs and lower them gently into the water with a slotted spoon. Adding a teaspoon of vinegar to the water can also help prevent cracks. And don’t boil them too vigorously—a gentle boil is all you need.
What if I don’t have a piping bag?
No problem! A zip-top bag with a tiny corner snipped off works perfectly. You can also use a small spoon to fill the eggs—just mound the filling neatly in the center. It won’t look as polished, but it’ll taste the same.
Pin This Recipe!
31 Easy Spider Deviled Eggs for Halloween Party
These Quick Spider Deviled Eggs are creepy, cute, and disappear faster than anything else on the table. They’re perfect for Halloween parties, easy to make with simple ingredients, and guaranteed to impress.
- Prep Time: 25 minutes
- Cook Time: 15 minutes
- Total Time: 40 minutes
- Yield: 24 servings 1x
- Category: Appetizer
- Cuisine: American
Ingredients
- 12 large eggs (room temperature if possible)
- 1/3 cup mayonnaise (Hellmann’s or Duke’s preferred)
- 1 tablespoon yellow mustard (or Dijon)
- 1 teaspoon white vinegar
- 1/2 teaspoon fine sea salt
- 1/4 teaspoon freshly ground black pepper
- 1/4 teaspoon paprika (plus extra for garnish; smoked paprika optional)
- 1 can (6 ounces) large black olives (about 24 olives)
- 1–2 additional olives for extra legs if some break (optional)
Instructions
- Hard-boil the eggs: Place 12 eggs in a large saucepan in a single layer. Cover with cold water by about an inch. Bring to a rolling boil over high heat. Once boiling, cover the pot, turn off the heat, and let sit for exactly 12 minutes. Transfer eggs to an ice bath and chill for at least 5 minutes.
- Peel and halve the eggs: Gently crack eggs all over and peel under running cold water. Pat dry. Slice each egg lengthwise with a sharp knife. Pop out yolks into a mixing bowl. Arrange white halves on a serving platter.
- Make the filling: Add mayonnaise, mustard, vinegar, salt, pepper, and paprika to the yolks. Mash together with a fork until smooth. Taste and adjust seasoning if needed.
- Fill the egg whites: Spoon filling into a piping bag or zip-top bag. Snip off a small corner (about 1/4 inch wide). Pipe filling into each egg white half, mounding slightly in the center.
- Create the spider decorations: Drain black olives and pat dry. For each spider, slice one olive in half lengthwise. Set one half aside for the spider body. Slice the other half into thin strips lengthwise (about 4-6 strips) for legs. Place the spider body on top of the filling. Arrange 4-6 leg strips on either side, gently pressing into the filling.
- Garnish and serve: Sprinkle a light dusting of paprika over the eggs. Optionally add tiny dots of mustard or Sriracha for spider eyes. Serve immediately or refrigerate until ready to serve.
Notes
For best texture, use eggs at least a week old. Add a teaspoon of baking soda to boiling water for easier peeling. If filling is too thick, add more mayo or a splash of pickle juice. Olive spiders can be made ahead but add just before serving to prevent drying out. Store leftovers in an airtight container in the refrigerator for up to 2 days. Do not freeze.
Nutrition
- Serving Size: 1 spider deviled egg
- Calories: 65
- Sugar: 0.5
- Sodium: 180
- Fat: 4.5
- Saturated Fat: 1
- Carbohydrates: 1
- Protein: 5
Keywords: spider deviled eggs, Halloween deviled eggs, easy deviled eggs, Halloween appetizer, spider eggs, deviled eggs recipe