The crunch of that first celery bite, the way the peanut butter clings to the sides, and the little pop of sweetness from the raisins—that’s the whole point of these Easy Crunchy Ants-on-a-Log Snack Bites. I didn’t set out to reinvent a childhood classic. Honestly, I was just trying to get a toddler to eat something green without a full-scale negotiation at the kitchen table.
It was a Tuesday afternoon, the kind where the snack drawer looks suspiciously empty and the clock says it’s still an hour until dinner. My three-year-old was circling the kitchen island like a tiny, hungry shark. I grabbed a bunch of celery from the crisper, a jar of peanut butter, and a box of raisins. I wasn’t thinking about nostalgia or healthy eating trends. I was thinking about survival.
But something clicked when I cut the celery into those perfect little bite-sized logs. The peanut butter felt satisfying to spread, and the raisins looked almost comical marching along the top. My kid didn’t just eat them—she giggled. And then she asked for more. That’s when I knew this wasn’t just a snack. It was a tiny, crunchy victory.
This recipe isn’t about fancy techniques or exotic ingredients. It’s about that moment when a simple, good-for-you snack actually wins over a picky eater. It’s about the quiet satisfaction of watching someone enjoy something you threw together in two minutes flat. And honestly, that’s a pretty good reason to make them.
Why You’ll Love This Recipe
I’ve tested this snack in every possible scenario—rushed school mornings, afternoon hangry attacks, and even as a last-minute appetizer for a playdate (the moms loved them, too). Here’s why these Easy Crunchy Ants-on-a-Log Snack Bites have become a non-negotiable staple in my house.
- Quick & Easy : You can have these on the table in under five minutes. No cooking, no baking, no waiting. Perfect for those moments when you need a snack *now*.
- Simple Ingredients : You probably already have celery, peanut butter, and raisins in your kitchen. No fancy grocery trips or obscure ingredients required.
- Perfect for Lunchboxes : These bites hold up surprisingly well in a lunchbox. They’re sturdy, non-messy, and way more fun than a sad sandwich. Pair them with our fresh mini bagel cream cheese snack board for a complete lunch.
- Crowd-Pleaser : Kids love the crunch and the sweet-salty combo. Adults love the nostalgia. It’s a rare snack that makes everyone at the table happy.
- Unbelievably Satisfying : The combination of crisp celery, creamy peanut butter, and chewy raisins hits every texture note. It’s simple, but it’s *perfect*.
What makes this version different? It’s the attention to the little details. I cut the celery into specific lengths so they’re easy for small hands to hold. I use a slightly thicker layer of peanut butter so the raisins stay put. And I always, always pat the celery dry first—it makes the peanut butter stick better. This isn’t just another version of ants on a log. It’s the one that actually works.
This recipe is the kind that makes you feel like you’ve got it together, even on the days when you’re pretty sure you don’t. It’s comfort food reimagined for real life—fast, healthy, and so satisfying you’ll forget it’s good for you.
What Ingredients You Will Need
This recipe uses simple, wholesome ingredients that come together to create a snack that’s both fun and filling. You probably have most of these in your kitchen right now, which is exactly the point.
- Celery (4-5 large stalks) – Look for firm, crisp stalks with no soft spots. The outer stalks tend to be more curved, which makes them perfect for holding the filling. I like to buy a whole bunch and save the inner, paler stalks for soups or stocks. Pat the celery completely dry before you start—moisture is the enemy of a good crunch.
- Peanut Butter (½ cup, creamy or crunchy) – I prefer a natural, no-stir creamy peanut butter for this recipe. It spreads smoothly and has a better texture than the super-processed stuff. If you’re using a natural peanut butter that separates, give it a good stir before you start. Pro tip: Warm it in the microwave for about 10 seconds if it’s too stiff to spread. For a nut-free version, sunflower seed butter or WowButter works beautifully.
- Raisins (¼ cup) – Regular dark raisins are the classic choice, but golden raisins add a slightly sweeter, more delicate flavor. I’ve also used dried cranberries (Craisins) when I wanted a little tartness. Make sure your raisins are soft and plump—if they’re dry and hard, soak them in warm water for 5 minutes, then pat them dry.
- Optional Toppings (for variety) – A sprinkle of chia seeds, a few mini chocolate chips (for a dessert version), or a light dusting of cinnamon can take these bites to another level. I sometimes add a tiny pinch of flaky sea salt on top of the peanut butter because I’m a salt fiend.
I recommend using your favorite brand of peanut butter—the one you already trust for sandwiches. For the raisins, Sun-Maid is my go-to because they’re consistently soft and flavorful. If you’re making these for a party or a lunchbox, consider using the mini seedless raisins—they’re smaller and easier for little kids to chew.
One thing I’ve learned the hard way: don’t skip drying the celery. If the stalks are wet, the peanut butter will slide right off, and you’ll end up with a sad, slippery mess. A quick pat with a paper towel solves everything.
Equipment Needed
You don’t need much for this recipe, which is part of its charm. Here’s what I use every time:
- Sharp Chef’s Knife or Paring Knife – A sharp knife makes clean cuts through the celery without crushing it. I use a 6-inch chef’s knife, but a good paring knife works just as well.
- Cutting Board – Any clean cutting board will do. I prefer a wooden one because it doesn’t dull my knife as quickly.
- Butter Knife or Offset Spatula – For spreading the peanut butter evenly into the celery grooves. A small offset spatula is my secret weapon—it gets into the curves perfectly.
- Paper Towels – Absolutely essential for drying the celery. Don’t skip this step.
- Small Bowl (optional) – If you’re mixing any toppings or warming the peanut butter, a small microwave-safe bowl is handy.
If you don’t have an offset spatula, don’t worry. A regular butter knife works fine—you just have to be a little more careful to get the peanut butter into all the nooks. I’ve also used the back of a spoon in a pinch, and it worked surprisingly well.
For a budget-friendly option, skip the fancy tools and use what you have. A butter knife from your silverware drawer and a plastic cutting board will get the job done perfectly.
Preparation Method
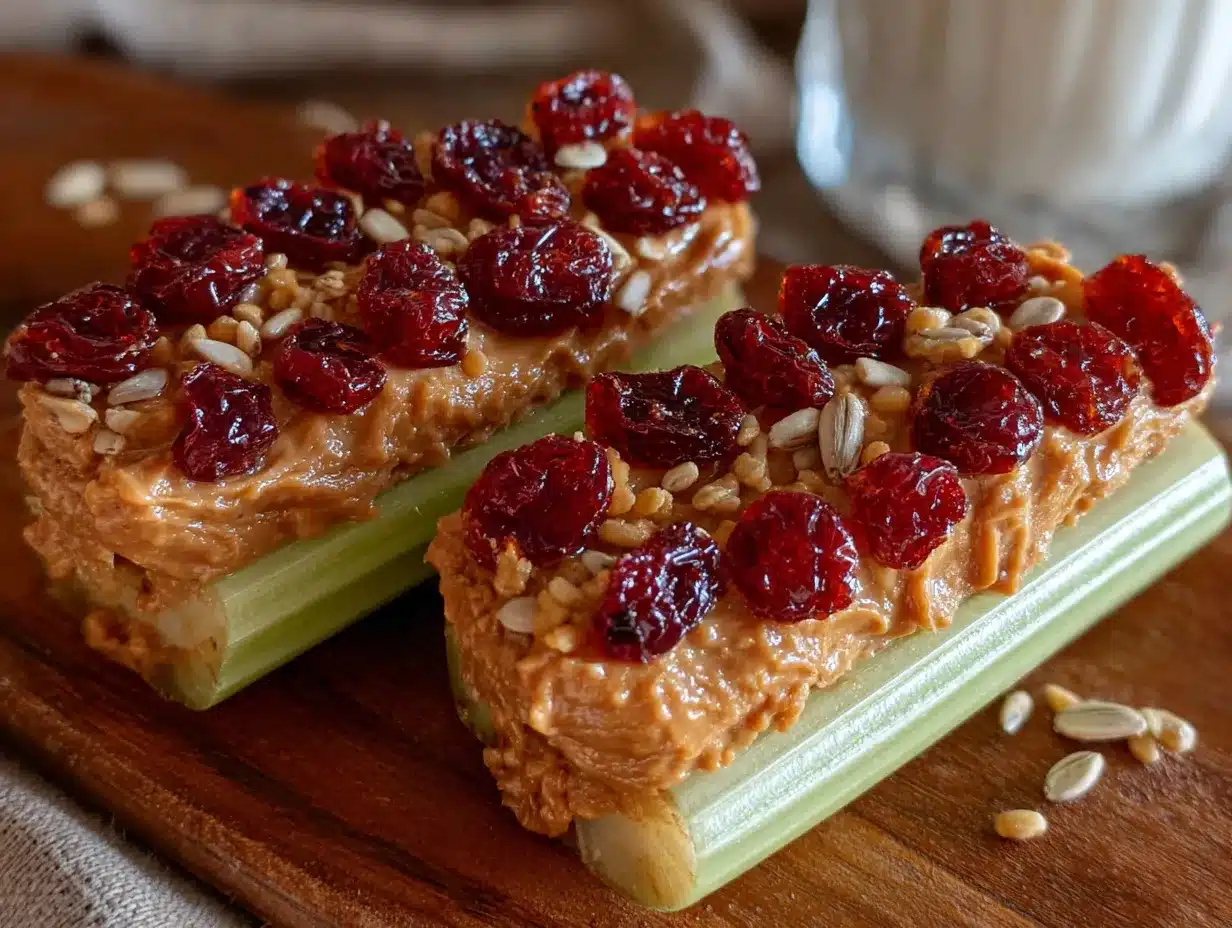
Making these Easy Crunchy Ants-on-a-Log Snack Bites is so simple, you’ll wonder why you ever bought pre-packaged snacks. Follow these steps, and you’ll have a plate of crunchy, satisfying bites in under five minutes.
- Prepare the Celery (1 minute)
Rinse the celery stalks under cold water to remove any dirt. Pat them completely dry with paper towels—this is crucial for the peanut butter to stick. Trim off the very bottom of each stalk (about ½ inch) and any leaves at the top. Cut each stalk into 3-inch lengths. For younger kids, you might want to cut them into 2-inch pieces for easier handling. You should get about 4-5 pieces per stalk. - Spread the Peanut Butter (2 minutes)
Using your butter knife or offset spatula, spread a generous layer of peanut butter into the groove of each celery piece. Don’t be shy here—you want enough to hold the raisins in place. I like to fill the groove completely so it’s level with the edges of the celery. If you’re using a natural peanut butter that’s a bit runny, you can spread it a little thicker so it doesn’t drip. Sensory cue: The peanut butter should look smooth and creamy, with no dry spots or gaps. - Add the Raisins (1 minute)
Place 3-4 raisins on top of the peanut butter along the length of each celery piece. Press them down gently so they stick. You can arrange them in a straight line (like marching ants) or scatter them randomly—it’s up to you! For a more uniform look, I place them about ½ inch apart. Troubleshooting tip: If the raisins keep falling off, your peanut butter layer might be too thin. Add a little more and try again. - Add Optional Toppings (30 seconds)
If you’re using any optional toppings like chia seeds, mini chocolate chips, or a sprinkle of cinnamon, now’s the time. Just a light dusting will do—you don’t want to overwhelm the classic flavor. I sometimes add a tiny pinch of flaky sea salt on top for a sweet-salty contrast. - Serve Immediately or Store (1 minute)
Arrange the finished bites on a plate and serve right away for maximum crunch. If you’re packing them for later, place them in an airtight container in a single layer. They’ll stay fresh for up to 4 hours at room temperature or overnight in the fridge (though the celery may soften slightly).
Personal tip: I always make a few extra because my toddler “helps” by eating the raisins before they make it onto the celery. It’s a system, and it works.
Cooking Tips & Techniques
Over the years, I’ve made plenty of mistakes with this simple snack. Here’s what I’ve learned so you don’t have to repeat my errors.
Don’t Overdry the Celery
I once left a batch of celery on the counter for an hour before assembling, thinking “dry is good.” Turns out, overly dry celery can crack when you spread the peanut butter. A quick pat with a paper towel is perfect—you want it dry to the touch but still plump and crisp.
The Peanut Butter Temperature Trick
Cold peanut butter straight from the fridge is a nightmare to spread. It pulls and tears the celery. Let it sit at room temperature for 10 minutes, or microwave it for 10-15 seconds. You want it soft enough to spread like butter, not paste. I learned this after destroying three celery stalks in a row.
Use a Serrated Knife for Extra-Crunchy Celery
If your celery is particularly thick and tough, a serrated knife will cut through it without crushing the edges. This is a game-changer for those big, woody outer stalks that are still perfectly edible.
Multitasking Strategy
While the peanut butter is softening on the counter, wash and cut your celery. By the time you’re done, the peanut butter will be ready to spread. It’s a small efficiency, but it makes the process feel seamless.
Common Mistake: Overfilling the Groove
I know I said to be generous, but there’s a limit. If you pile the peanut butter too high, the raisins will slide off when you try to eat them. Aim for a level surface—the peanut butter should fill the groove without mounding above the celery edges.
Consistency Tip
For the best results, use celery stalks that are roughly the same width. This ensures even spreading and a uniform look. If you have a mix of thick and thin stalks, cut the thick ones into shorter pieces and the thin ones into longer pieces.
Variations & Adaptations
One of the best things about this recipe is how easy it is to customize. Here are some of my favorite variations:
- Nut-Free Version – Swap the peanut butter for sunflower seed butter or WowButter. These spreads have a similar texture and work perfectly with the celery and raisins. Just be aware that sunflower seed butter can turn green when combined with baking soda (not an issue here, since we’re not baking).
- Dessert Version – Use chocolate-hazelnut spread (like Nutella) instead of peanut butter, and top with mini chocolate chips and a few raspberries. It’s decadent, but sometimes you need a sweet treat that still has a vegetable in it.
- Savory Version – Spread cream cheese or goat cheese on the celery instead of peanut butter, and top with everything bagel seasoning or a sprinkle of smoked paprika. This is my go-to for adult snack boards.
- Seasonal Twist – In the fall, I swap the raisins for dried cranberries and add a pinch of pumpkin pie spice to the peanut butter. In the summer, fresh blueberries or halved grapes make a juicy alternative to raisins.
- Protein-Packed Version – Mix a scoop of vanilla or chocolate protein powder into the peanut butter before spreading. It adds a little extra staying power, which is great for after-school snacks or post-workout bites.
I once made a batch with almond butter and dried cherries for a playdate, and the moms couldn’t stop asking for the recipe. It’s amazing how a simple swap can make something feel brand new.
Serving & Storage Suggestions
These bites are best enjoyed fresh, but they’re also surprisingly portable. Here’s how to serve and store them like a pro.
Serving Temperature: Room temperature is ideal. The peanut butter is soft, the celery is crisp, and the raisins are chewy. If you’ve stored them in the fridge, let them sit out for 5-10 minutes before serving to take the chill off.
Presentation Ideas: Arrange the bites on a wooden board or a colorful plate. For a lunchbox, place them in a small container with a lid, separating layers with a piece of parchment paper if you’re stacking them. They make a great addition to a bento box alongside our easy turkey pesto pinwheel wraps for a complete meal.
Storage Instructions: Store in an airtight container in the refrigerator for up to 24 hours. After that, the celery starts to soften and release water, which makes the peanut butter slide off. For best results, assemble them no more than 4 hours before serving.
Reheating (if needed): These are meant to be eaten cold or at room temperature, so no reheating is necessary. If the peanut butter has firmed up in the fridge, let the bites sit at room temperature for 10 minutes before eating.
Flavor Development: I actually prefer these after about 30 minutes in the fridge. The flavors meld together slightly, and the celery gets a tiny bit more tender while still retaining its crunch. It’s a subtle difference, but it’s worth trying.
Nutritional Information & Benefits
These bites are a nutritional powerhouse disguised as a fun snack. Here’s a quick breakdown per serving (about 4-5 pieces, using 2 tablespoons of peanut butter total):
- Calories: Approximately 180-220
- Protein: 7-9 grams (from the peanut butter)
- Healthy Fats: 14-16 grams (mostly monounsaturated and polyunsaturated)
- Fiber: 4-5 grams (from celery and raisins)
- Carbohydrates: 12-15 grams (natural sugars from raisins and celery)
Health Benefits: Celery is packed with vitamin K, antioxidants, and hydration (it’s mostly water). Peanut butter provides plant-based protein and heart-healthy fats. Raisins offer a natural energy boost from their concentrated sugars and are a good source of iron and potassium.
Dietary Considerations: This recipe is naturally gluten-free, dairy-free, and vegan (if you use a plant-based spread). It’s also low in added sugar—the sweetness comes entirely from the raisins. For a low-carb option, reduce the raisins or swap them for sliced almonds.
Allergen Note: Peanuts are a common allergen. For a nut-free version, use sunflower seed butter or soy-based alternatives. Always check labels if you’re serving to someone with allergies.
I love that this snack feels indulgent but is actually packed with good-for-you ingredients. It’s the kind of food that makes you feel like you’re treating yourself while secretly doing something healthy.
Conclusion
These Easy Crunchy Ants-on-a-Log Snack Bites are proof that the simplest recipes are often the best. They’re quick, they’re fun, and they’re made from ingredients you probably already have in your kitchen. Whether you’re packing a lunchbox, taming an afternoon hunger attack, or just craving a little nostalgia, these bites deliver every single time.
I love that this recipe is a blank canvas. You can stick with the classic version or get creative with different spreads, toppings, and add-ins. It’s the kind of snack that grows with you—from toddler lunchboxes to adult snack boards, it never gets old.
I’d love to hear how you make these your own. Do you add a sprinkle of cinnamon? Swap the raisins for dried cherries? Maybe you’ve discovered a nut-free spread that works even better than peanut butter. Drop a comment below and share your version—I’m always looking for new ideas to try.
Now go grab that celery and make yourself a batch. You deserve a snack that’s this easy and this good.
Frequently Asked Questions
Can I make these ants-on-a-log bites ahead of time?
Yes, you can assemble them up to 4 hours ahead. Store them in an airtight container in the refrigerator, but let them sit at room temperature for 5-10 minutes before serving to soften the peanut butter.
What’s the best way to keep the celery crunchy?
Pat the celery completely dry before spreading the peanut butter. Moisture is the enemy of crunch. Also, store the assembled bites in a single layer in an airtight container to prevent them from getting soggy.
Can I use a different nut butter?
Absolutely! Almond butter, cashew butter, or sunflower seed butter all work great. Just make sure the consistency is spreadable—if it’s too thick, warm it slightly in the microwave.
How do I make this recipe nut-free for school lunches?
Swap the peanut butter for sunflower seed butter, WowButter, or soy nut butter. These are all nut-free and safe for school environments. Just check the labels to ensure they’re processed in a nut-free facility.
Can I add other toppings besides raisins?
Yes! Try dried cranberries, chopped dates, mini chocolate chips, chia seeds, hemp seeds, or even a sprinkle of cinnamon. The possibilities are endless, so feel free to get creative.
Pin This Recipe!
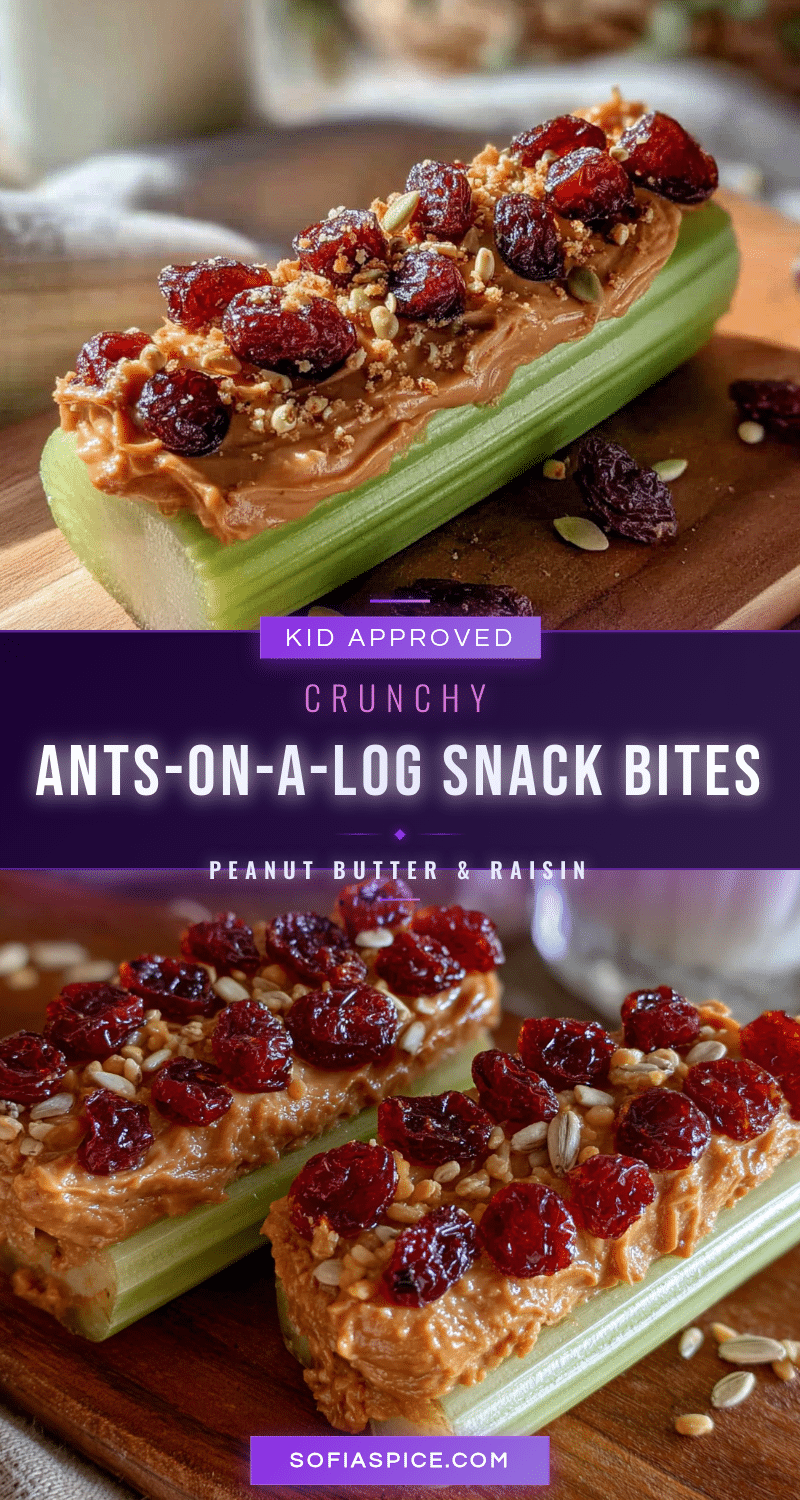
Easy Crunchy Ants-on-a-Log Snack Bites: Best Kid-Friendly Recipe

These Easy Crunchy Ants-on-a-Log Snack Bites are a quick, healthy, and fun snack made with crisp celery, creamy peanut butter, and sweet raisins. Perfect for lunchboxes, after-school snacks, or a nostalgic treat that kids and adults love.
- Prep Time: 5 minutes
- Cook Time: 0 minutes
- Total Time: 5 minutes
- Yield: 4 servings 1x
- Category: Snack
- Cuisine: American
Ingredients
- 4–5 large celery stalks
- ½ cup creamy or crunchy peanut butter
- ¼ cup raisins
- Optional: chia seeds, mini chocolate chips, cinnamon, flaky sea salt
Instructions
- Rinse the celery stalks under cold water and pat completely dry with paper towels. Trim off the bottom and any leaves, then cut each stalk into 3-inch lengths (or 2-inch pieces for younger kids).
- Using a butter knife or offset spatula, spread a generous layer of peanut butter into the groove of each celery piece, filling it level with the edges.
- Place 3-4 raisins on top of the peanut butter along each celery piece, pressing gently so they stick. Arrange in a line or scatter randomly.
- If desired, add optional toppings like chia seeds, mini chocolate chips, cinnamon, or a pinch of flaky sea salt.
- Serve immediately for maximum crunch, or store in an airtight container in a single layer. They stay fresh up to 4 hours at room temperature or overnight in the fridge.
Notes
Pat the celery completely dry to help the peanut butter stick. If peanut butter is too stiff, microwave for 10-15 seconds to soften. For a nut-free version, use sunflower seed butter or WowButter. For best crunch, serve within 4 hours of assembly.
Nutrition
- Serving Size: 4-5 pieces
- Calories: 200
- Sugar: 8
- Sodium: 150
- Fat: 15
- Saturated Fat: 3
- Carbohydrates: 14
- Fiber: 4
- Protein: 8
Keywords: ants on a log, celery snack, kid-friendly snack, healthy snack, peanut butter celery, easy snack, lunchbox idea, no-cook snack


