There used to be a little bakery tucked inside an old gas station on Route 9 that made the most incredible caramel apple crumble bars. When they closed up shop two summers ago — the owner retired, finally — I honestly felt a little lost. Those bars were my secret weapon for school bake sales, last-minute hostess gifts, and the occasional Tuesday afternoon when I just needed something sweet. After about seven tries — some were too soggy, a couple were basically just apple soup with crumbs floating on top — I finally cracked it. And let me tell you, this version might even be better than the original.
The first time I made these for my family, I was still tweaking the caramel layer. My youngest walked into the kitchen right as I was pulling the pan out of the oven, and the smell — warm apples, buttery oats, that sweet caramel — stopped him in his tracks. “Mom, is that the gas station lady’s bars?” he asked. That’s when I knew I was onto something. The second batch disappeared so fast I barely got a corner piece for myself. Maybe you’ve been there, chasing a food memory that feels just out of reach until one day, it clicks. These bars are that click for me.
The beauty of this recipe is how forgiving it is. You don’t need a pastry degree or a stand mixer. Just a bowl, a pan, and a little patience while the layers do their thing. The crumble topping gets golden and crisp, the apples soften into this jammy, cinnamon-spiced filling, and the caramel — well, the caramel seeps into everything and makes it taste like a hug. I’ve made these for picky eaters, for gluten-free friends, and for my neighbor who swears she doesn’t like dessert. Every single time, the pan comes back empty. Honestly, that’s the kind of recipe you hold onto.
Why You’ll Love This Recipe
These Easy Caramel Apple Crumble Bars aren’t just another fall dessert. They’re the kind of recipe that makes you look like a hero without breaking a sweat. Here is why they work so well for real families on real budgets:
- Simple Ingredients — No fancy extracts or hard-to-find specialty items. You probably have most of this in your pantry right now. Flour, oats, butter, sugar, apples, and caramel bits. That’s it.
- Kid-Approved — My own kids fight over the corner pieces with the most crumble topping. I’ve brought these to playdates and school events, and they disappear faster than anything else on the table.
- Budget-Friendly — Apples are cheap in the fall, especially if you buy a bag at the farmers market. This recipe stretches a few simple ingredients into a whole pan of dessert that feeds a crowd.
- Make-Ahead Friendly — These bars actually taste better the next day. The flavors meld together overnight, and the crumble stays surprisingly crisp. Perfect for busy mornings when you need dessert ready to go.
- No Fancy Equipment — Just a 9×13 pan, a mixing bowl, and your hands. No stand mixer, no food processor, no special tart pan with a removable bottom.
What makes these different from every other apple bar recipe out there is the caramel layer. Most recipes just drizzle caramel on top after baking, but I tuck a layer of soft caramel bits right into the middle. As they bake, the caramel melts into the apples and the crumble, creating these gooey pockets of sweetness that make every bite different. It’s not just a topping — it’s a whole experience. And because the caramel is tucked inside, it doesn’t burn or turn into a hard candy mess.
This recipe is the one I turn to when I need something that feels special but doesn’t require a trip to three different stores. It is comfort food at its finest — warm, spiced, sweet, and utterly satisfying. Whether you are feeding your own crew or bringing dessert to a gathering, these bars deliver every single time.
What Ingredients You Will Need
This recipe uses simple, wholesome ingredients that work together to create layers of texture and flavor. Most of these are pantry staples, especially during apple season. Here is what you will need and why each one matters:
For the Crust and Crumble Topping
- All-purpose flour (2 cups / 240g) — Provides structure for the crust and helps the crumble hold together. I use Gold Medal or King Arthur for consistent results.
- Old-fashioned rolled oats (1½ cups / 150g) — Gives the crumble that hearty, chewy texture. Quick oats work in a pinch, but the texture will be softer and less distinct.
- Light brown sugar (1 cup / 200g, packed) — Adds moisture and that deep, molasses-like sweetness that pairs so well with apples. Dark brown sugar works too, but the flavor will be more intense.
- Unsalted butter (1 cup / 226g, cold and cubed) — Cold butter is key here. It creates those flaky, tender pockets in the crust and crumble. If you only have salted butter, reduce the added salt by half.
- Ground cinnamon (1½ teaspoons) — The backbone of the apple pie spice blend. It warms up the whole dessert.
- Salt (½ teaspoon) — Balances the sweetness and makes the caramel and apple flavors pop. Don’t skip it.
For the Apple Filling
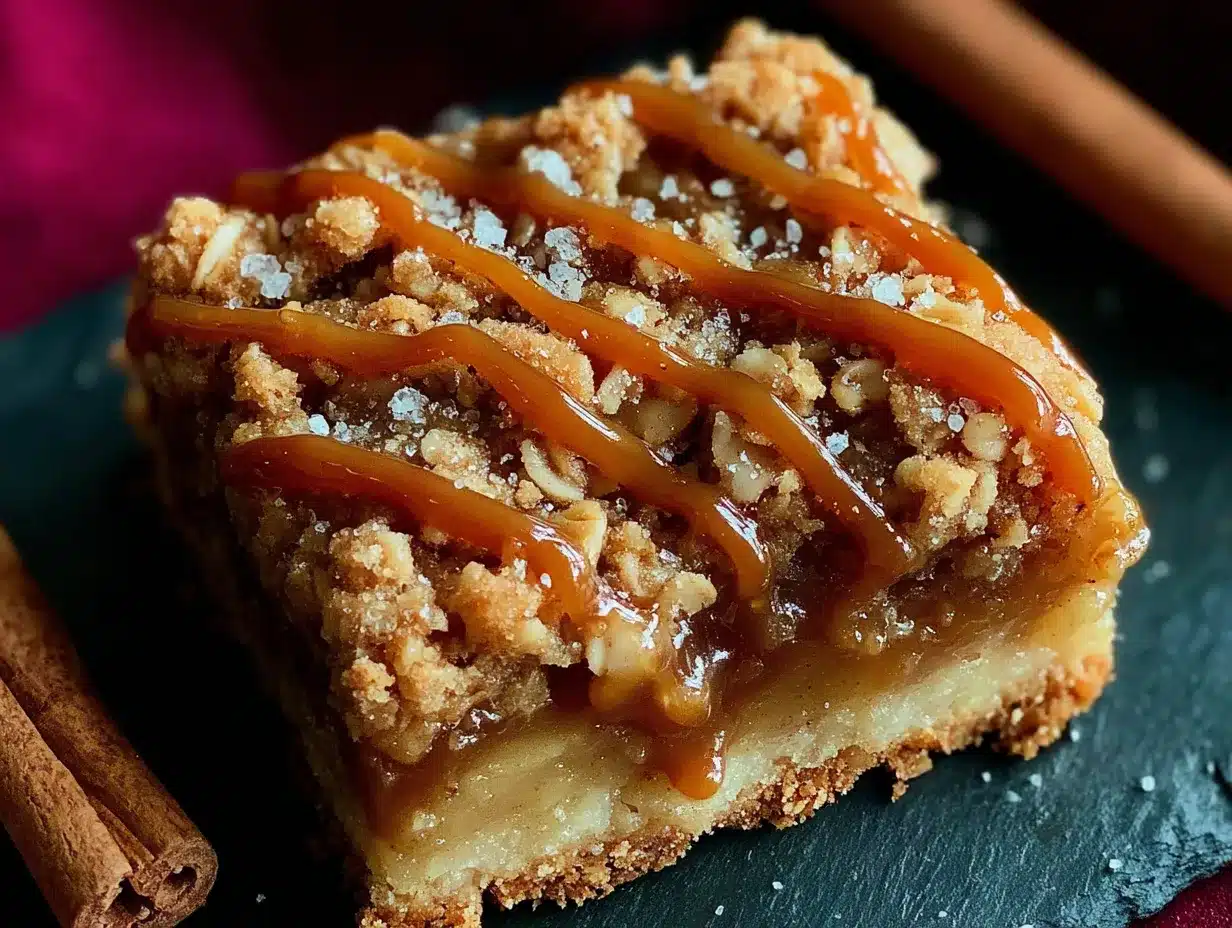
- Apples (4 medium / about 600g) — You want a firm, tart-sweet apple that holds its shape during baking. Granny Smith is my go-to because it doesn’t turn to mush. Honeycrisp or Braeburn work beautifully too. Avoid Red Delicious — they get mealy and weird.
- Granulated sugar (¼ cup / 50g) — Just enough to coax the natural sweetness out of the apples without making them cloying.
- All-purpose flour (2 tablespoons / 15g) — Thickens the juices released by the apples so the filling isn’t runny. Cornstarch works as a substitute if you need it.
- Lemon juice (1 tablespoon) — A splash of acid brightens the apple flavor and prevents browning. Fresh is best, but bottled works in a pinch.
- Vanilla extract (1 teaspoon) — Rounds out the cinnamon and adds a warm, cozy note. Use pure vanilla if you can, but imitation is fine for baking.
For the Caramel Layer
- Soft caramel candies (1 cup / about 20-25 unwrapped caramels) — I use Kraft Caramels because they melt evenly and have that classic flavor. You can also use homemade caramel sauce, but the candies are more forgiving and create those gooey pockets I mentioned earlier.
- Heavy cream (3 tablespoons) — Helps the caramels melt into a smooth, pourable layer without seizing up. Whole milk works, but the caramel won’t be as rich.
Ingredient Tips
For the best results, use cold butter straight from the fridge. If your kitchen is warm, pop the flour and oats in the freezer for 10 minutes before mixing the crust. Also, peel your apples — the texture is much nicer without the skins getting chewy. And if you are short on time, you can skip the caramel layer entirely and just sprinkle a few extra caramel bits on top before baking. It won’t be as gooey, but it will still be delicious.
Equipment Needed
You don’t need a fancy kitchen to make these bars. Here is what you will need:
- 9×13-inch baking pan — This is the sweet spot for these bars. A metal pan gives you crisper edges, but glass works fine. Just watch the baking time — glass takes a few minutes longer.
- Mixing bowls — One large bowl for the crust/crumble mixture, one medium bowl for the apples.
- Pastry cutter or two forks — For cutting the cold butter into the flour mixture. You can also use your hands, but work quickly so the butter doesn’t soften too much.
- Parchment paper — Lining the pan makes lifting the bars out a breeze. Leave a little overhang on two sides for easy removal.
- Small saucepan — For melting the caramels with the cream. A microwave-safe bowl works too if you go in 20-second bursts.
- Sharp knife and cutting board — For dicing the apples. A peeler helps too, unless you like the rustic look of skins on.
- Measuring cups and spoons — Accuracy matters in baking, even for a forgiving recipe like this one.
If you don’t have a pastry cutter, don’t sweat it. Just use two forks in a crisscross motion, or pulse the mixture in a food processor a few times. I’ve done it all three ways, and honestly, the bars turn out great no matter what. The key is keeping that butter cold, not which tool you use.
Preparation Method
Let’s get baking. This recipe comes together in about 15 minutes of active work, then the oven does the rest. Here is the step-by-step:
- Preheat and prep the pan. Preheat your oven to 375°F (190°C). Line your 9×13-inch baking pan with parchment paper, leaving about 2 inches of overhang on the long sides. This will be your lifting handles later. Lightly grease the parchment with a little butter or non-stick spray.
- Make the crust and crumble mixture. In a large bowl, whisk together 2 cups flour, 1½ cups oats, 1 cup packed brown sugar, 1½ teaspoons cinnamon, and ½ teaspoon salt. Add the cold, cubed butter. Using a pastry cutter or your fingers, work the butter into the dry ingredients until the mixture looks like coarse meal with some pea-sized butter pieces remaining. This takes about 2-3 minutes. Don’t overwork it — those butter chunks create flaky layers.
- Press the crust layer. Transfer about half of the crumb mixture (roughly 2½ cups) into your prepared pan. Press it down firmly and evenly into the bottom. I use the flat bottom of a measuring cup to get it nice and compact. A loose crust will fall apart when you cut the bars later, so really press it in there. Bake this crust layer for 12 minutes, until it is just set and lightly golden around the edges. Set the remaining crumb mixture aside for the topping.
- Prepare the apples. While the crust bakes, peel and core your apples. Dice them into ½-inch cubes — small enough to cook through but big enough to give you a nice bite. In a medium bowl, toss the diced apples with ¼ cup granulated sugar, 2 tablespoons flour, 1 tablespoon lemon juice, and 1 teaspoon vanilla. Stir until every piece is coated. The flour will look a little pasty, but that is what thickens the filling.
- Make the caramel layer. In a small saucepan over low heat, combine the unwrapped caramel candies and 3 tablespoons heavy cream. Stir constantly until the caramels are completely melted and the mixture is smooth. This takes about 5 minutes. If you are using the microwave, heat in 20-second bursts, stirring between each, until smooth. Be careful — caramel gets hot fast and can burn your fingers.
- Assemble the layers. Spread the apple mixture evenly over the pre-baked crust. Drizzle the melted caramel over the apples. Don’t worry about covering every single apple piece — the caramel will spread as it bakes. Sprinkle the remaining crumb mixture over the top, pressing it down gently so it sticks to the apples and caramel. It should look a little messy, like a good crumble should.
- Bake. Place the pan in the oven and bake for 35-40 minutes, until the top is golden brown and the filling is bubbly around the edges. If the top is browning too fast after 25 minutes, tent loosely with foil. The bars are done when a knife inserted into the center meets tender apples, not hard ones.
- Cool completely. This is the hardest part. Let the bars cool in the pan on a wire rack for at least 2 hours. The caramel needs time to set, and cutting into warm bars will give you a delicious but messy puddle. If you can wait overnight, even better. Once cool, use the parchment overhang to lift the whole slab out onto a cutting board. Slice into squares with a sharp knife, wiping the blade clean between cuts.
Cooking Tips & Techniques
I’ve made these bars more times than I can count, and I’ve learned a few things the hard way. Here are my best tips for getting them right every time:
Keep everything cold. The butter, the bowl, even your hands if you can manage it. Warm butter melts into the flour instead of creating those flaky pockets. If your kitchen is hot, pop the crumb mixture in the fridge for 10 minutes before pressing it into the pan.
Don’t skip the pre-bake. I tried skipping this step once because I was in a hurry. The bottom crust came out soggy and sad. That 12-minute pre-bake is non-negotiable — it sets the crust so it can hold up to the juicy apples and caramel.
Use a sharp knife for cutting. A dull knife will drag through the caramel and squish the bars. Run the knife under hot water and wipe it dry between cuts for the cleanest slices. I learned this after ruining an entire pan trying to cut them with a butter knife. Not my finest moment.
Watch the edges. The crumble topping around the edges of the pan tends to brown faster than the middle. If you see dark spots forming after 25 minutes, tent the pan with foil. Don’t wait until it smells burnt — by then it’s too late.
Let them cool. I know it is tempting to dig in while they are warm, but trust me on this. Warm bars are delicious but messy. The caramel needs time to set into those gooey pockets instead of running all over the plate. If you can wait the full 2 hours, you will be rewarded with perfect, clean slices.
Variations & Adaptations
One of the best things about this recipe is how easy it is to adapt. Here are some variations I have tried and loved:
Gluten-Free Version: Swap the all-purpose flour with a 1:1 gluten-free baking flour blend. I use Bob’s Red Mill, and it works perfectly. The oats are naturally gluten-free, but make sure you buy certified gluten-free oats if you are sensitive.
Dairy-Free Option: Use a plant-based butter stick (like Miyoko’s or Earth Balance) and coconut cream instead of heavy cream for the caramel. The texture will be slightly different, but still delicious. Just make sure your caramel candies are dairy-free — some brands use milk ingredients.
Nutty Crumble: Add ½ cup chopped pecans or walnuts to the crumb topping. Toast them first for extra flavor. I do this when I want the bars to feel a little more special, like for holiday gatherings.
Spiced Apple Filling: Add ¼ teaspoon nutmeg and ⅛ teaspoon cloves to the apple mixture. It gives the bars a chai-like warmth that is perfect for cold winter nights. My husband loves this version.
Berry Apple Combo: Swap one of the apples for ½ cup fresh or frozen raspberries. The tart berries cut through the sweetness and add a beautiful color. This is my go-to summer variation when apples are still a little green.
Slow Cooker Method: If you don’t want to turn on the oven, you can make these in a slow cooker. Layer the ingredients in a greased slow cooker (start with half the crumb mixture, then apples, caramel, and remaining crumbs). Cook on low for 3-4 hours. The top won’t be as crispy, but the flavor is spot on.
Serving & Storage Suggestions
These bars are versatile enough for any occasion. Here is how to serve and store them:
Serving: I like these bars at room temperature with a scoop of vanilla ice cream or a dollop of whipped cream. The cold creaminess against the warm, spiced bars is pure magic. For breakfast (no judgment), a warm bar with a cup of coffee is hard to beat. If you are serving a crowd, cut them into small squares and arrange on a platter — they look beautiful with a dusting of powdered sugar.
Storage: Store leftover bars in an airtight container at room temperature for up to 3 days. If your kitchen is warm, pop them in the fridge — they will last up to a week. The crumble softens a bit in the fridge, but the flavor actually gets better as the caramel and apples meld together.
Freezing: These bars freeze beautifully. Wrap individual squares in plastic wrap, then place them in a freezer-safe bag or container. They will keep for up to 3 months. To thaw, just leave them on the counter for about an hour, or warm them in the microwave for 20 seconds. I always keep a stash in the freezer for unexpected guests or late-night cravings.
Reheating: For that fresh-from-the-oven experience, reheat bars in a 350°F oven for 5-7 minutes. The microwave works in a pinch, but the crumble won’t be as crisp. If you are reheating a frozen bar, add a couple extra minutes in the oven.
Nutritional Information & Benefits
Let’s be real — these are a treat, not a health food. But they do have some redeeming qualities. Here is the estimated nutrition per bar (based on 16 servings):
| Nutrient | Amount per bar |
|---|---|
| Calories | 320 |
| Total Fat | 14g |
| Saturated Fat | 8g |
| Carbohydrates | 48g |
| Fiber | 3g |
| Sugar | 30g |
| Protein | 4g |
Apples are a good source of fiber and vitamin C, especially if you leave the peels on. Oats provide complex carbs and a little protein, which helps balance the sugar rush. The butter and cream add richness, but they also make these bars satisfying enough that one square is usually enough. If you are watching your sugar, you can reduce the brown sugar by a quarter cup without affecting the texture too much. I’ve done it, and the bars are still plenty sweet from the apples and caramel.
These bars are not gluten-free unless you use the substitution above, and they contain dairy. If you have allergies, check your caramel candies — some brands contain soy or other additives.
Conclusion
These Easy Caramel Apple Crumble Bars are the kind of recipe that becomes a family tradition. They are simple enough for a Tuesday night, special enough for a holiday table, and budget-friendly enough to make on repeat all fall long. The layers of buttery crumble, tender spiced apples, and gooey caramel come together in a way that feels both familiar and exciting. Every time I make them, I think of that little gas station bakery and how happy I am that I can now make these bars myself — anytime I want.
I would love to hear how these turn out for you. Did you try a variation? Did your kids help you make them? Drop a comment below and let me know. And if you share a photo on social media, tag me so I can see your beautiful bars. Happy baking, friends!
Frequently Asked Questions
Can I use pre-made caramel sauce instead of caramel candies?
You can, but the texture will be different. Caramel sauce is thinner and will soak into the crust more, making the bars softer. The caramel candies create those distinct gooey pockets that make these bars special. If you use sauce, drizzle it over the apples and reduce the amount to about ½ cup.
What is the best apple variety for these bars?
Granny Smith is my top pick because it holds its shape and provides a nice tart contrast to the sweet caramel. Honeycrisp and Braeburn are also excellent. Avoid soft apples like Red Delicious or McIntosh — they turn into applesauce during baking.
Can I make these bars ahead of time?
Absolutely. These bars actually taste better the next day after the flavors have had time to meld. Bake them a day ahead, cool completely, and store them in an airtight container at room temperature. They stay fresh for up to 3 days.
Why did my crust turn out soggy?
Soggy crust usually happens for one of three reasons: you didn’t pre-bake the crust long enough, you didn’t press it firmly enough into the pan, or you cut the bars while they were still warm. Make sure you bake the crust for a full 12 minutes until it is set and golden, and press it down firmly with a measuring cup.
Can I freeze these bars?
Yes, they freeze beautifully. Wrap individual squares in plastic wrap, then place them in a freezer-safe bag. They will keep for up to 3 months. Thaw at room temperature or reheat in the oven for a few minutes. I always keep a stash in the freezer for emergencies!
Pin This Recipe!
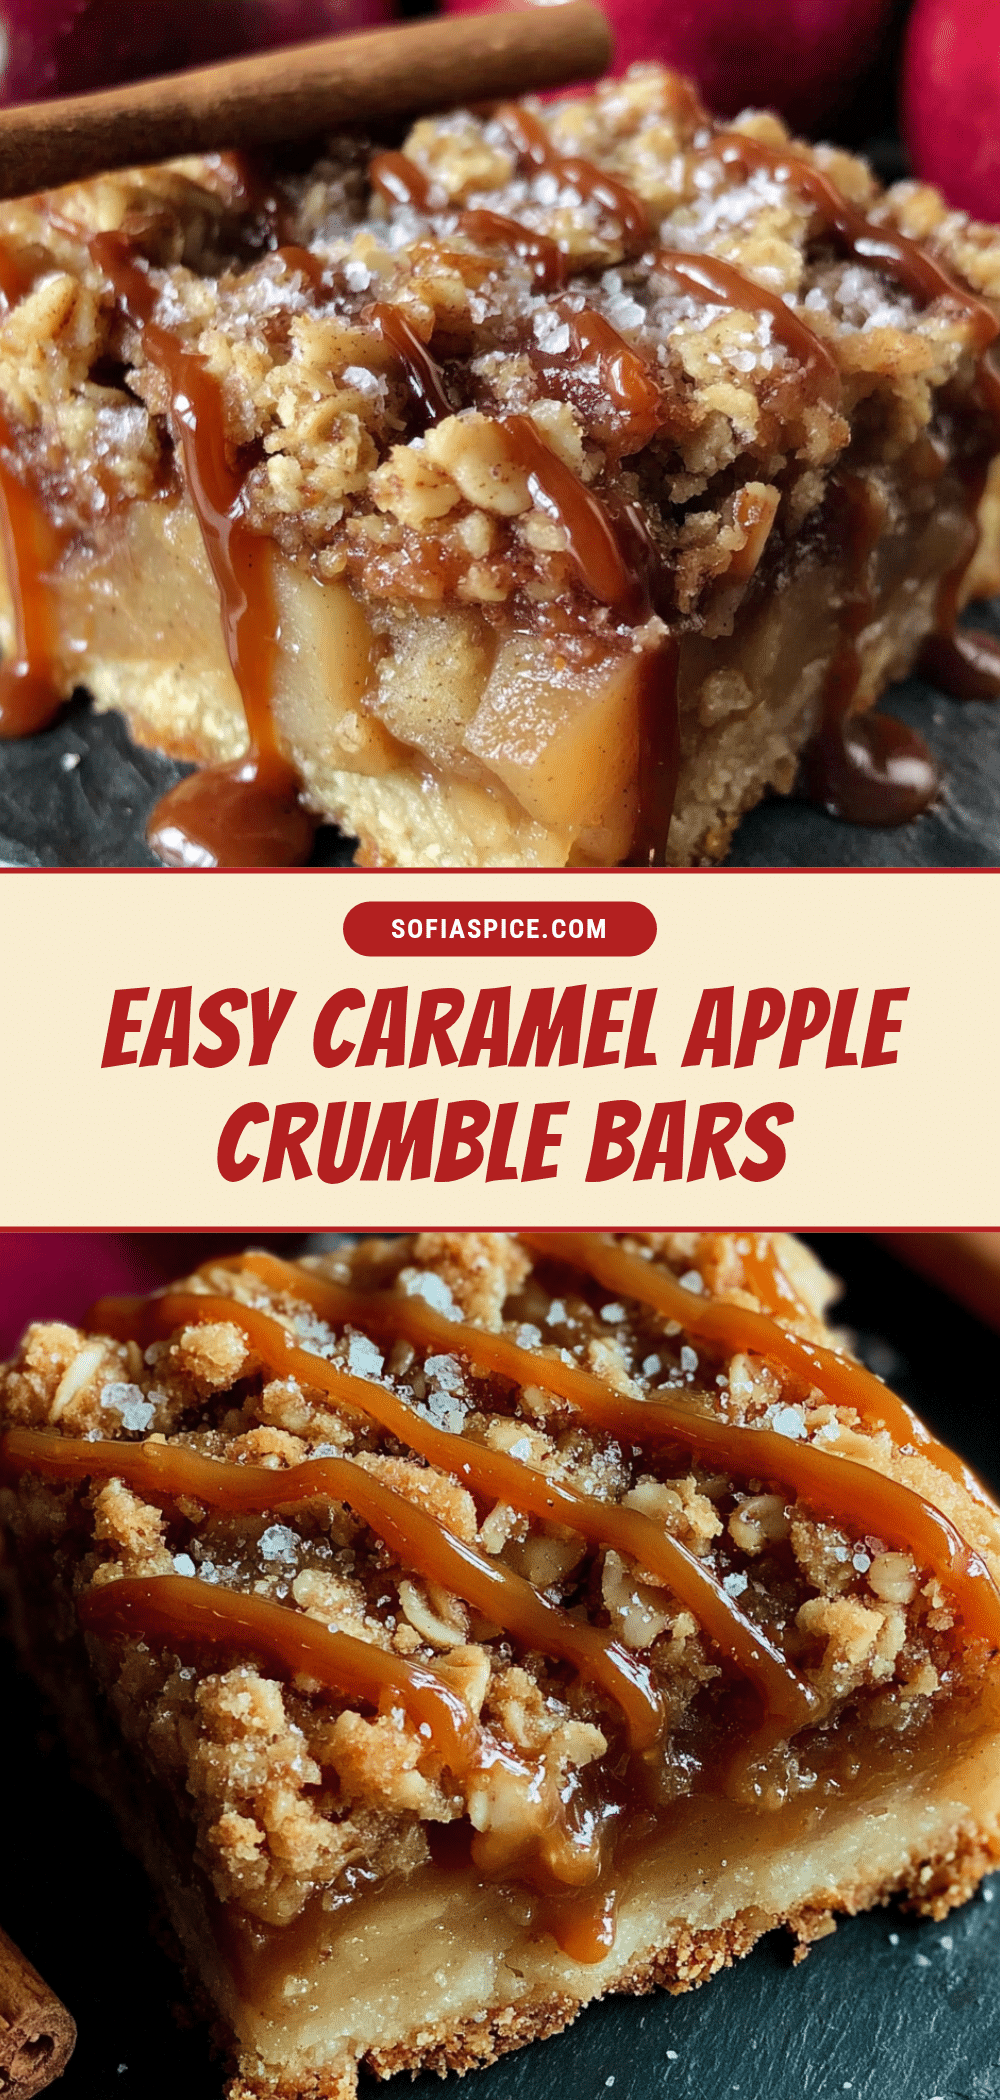
Easy Caramel Apple Crumble Bars: The Best Fall Dessert
These Easy Caramel Apple Crumble Bars feature layers of buttery oat crumble, tender spiced apples, and gooey caramel. They are simple enough for a weeknight, special enough for holidays, and budget-friendly for fall baking.
- Prep Time: 15 minutes
- Cook Time: 35-40 minutes
- Total Time: 2 hours 50 minutes (includes cooling)
- Yield: 16 servings 1x
- Category: Dessert
- Cuisine: American
Ingredients
- 2 cups (240g) all-purpose flour
- 1½ cups (150g) old-fashioned rolled oats
- 1 cup (200g) packed light brown sugar
- 1 cup (226g) unsalted butter, cold and cubed
- 1½ teaspoons ground cinnamon
- ½ teaspoon salt
- 4 medium (about 600g) apples (Granny Smith, Honeycrisp, or Braeburn), peeled and diced into ½-inch cubes
- ¼ cup (50g) granulated sugar
- 2 tablespoons (15g) all-purpose flour
- 1 tablespoon lemon juice
- 1 teaspoon vanilla extract
- 1 cup (about 20-25) soft caramel candies, unwrapped
- 3 tablespoons heavy cream
Instructions
- Preheat oven to 375°F (190°C). Line a 9×13-inch baking pan with parchment paper, leaving 2 inches overhang on the long sides. Lightly grease the parchment.
- In a large bowl, whisk together 2 cups flour, 1½ cups oats, 1 cup brown sugar, 1½ teaspoons cinnamon, and ½ teaspoon salt. Add cold cubed butter. Using a pastry cutter or fingers, work butter into dry ingredients until mixture resembles coarse meal with some pea-sized butter pieces.
- Transfer about half of the crumb mixture (roughly 2½ cups) into the prepared pan. Press firmly and evenly into the bottom. Bake for 12 minutes until just set and lightly golden around the edges. Set remaining crumb mixture aside.
- While crust bakes, peel and core apples. Dice into ½-inch cubes. In a medium bowl, toss apples with ¼ cup granulated sugar, 2 tablespoons flour, 1 tablespoon lemon juice, and 1 teaspoon vanilla until coated.
- In a small saucepan over low heat, combine unwrapped caramel candies and 3 tablespoons heavy cream. Stir constantly until completely melted and smooth (about 5 minutes). Alternatively, microwave in 20-second bursts, stirring between each.
- Spread apple mixture evenly over pre-baked crust. Drizzle melted caramel over apples. Sprinkle remaining crumb mixture over the top, pressing down gently.
- Bake for 35-40 minutes until top is golden brown and filling is bubbly around the edges. If top browns too fast after 25 minutes, tent loosely with foil.
- Cool completely in the pan on a wire rack for at least 2 hours (or overnight). Use parchment overhang to lift slab onto a cutting board. Slice into squares with a sharp knife, wiping blade clean between cuts.
Notes
Keep butter cold for flaky texture. Pre-bake crust to avoid sogginess. Let bars cool completely before cutting for clean slices. For gluten-free, use 1:1 gluten-free flour blend and certified gluten-free oats. For dairy-free, use plant-based butter and coconut cream.
Nutrition
- Serving Size: 1 bar
- Calories: 320
- Sugar: 30
- Fat: 14
- Saturated Fat: 8
- Carbohydrates: 48
- Fiber: 3
- Protein: 4
Keywords: caramel apple crumble bars, apple dessert, fall dessert, crumble bars, easy apple bars, caramel apple bars


