There used to be a tiny candy shop tucked between a dry cleaner and a used bookstore on Main Street in my old town. They made this incredible candy corn bark every October, layering it in big glass jars by the register. When they closed suddenly two winters ago—just a handwritten sign on the door saying “Thanks for the sweet years”—I honestly felt a little lost. That first fall without their bark, I tried recreating it from memory. After seven tries—some too crumbly, one that seized into a grainy mess—I finally got it. This easy candy corn bark with white chocolate is exactly what I was chasing. It’s the kind of treat that makes people stop mid-conversation and just reach for another piece.
Let me tell you, there’s something about this bark that feels like a party in a pan. It’s ridiculously simple—like, embarrassingly simple—but the way the white chocolate sets around those little candy corn pieces? Pure magic. I brought a batch to a friend’s Halloween gathering last year, and someone actually asked if I’d taken a class. A class! For melting chocolate and sprinkling candy. I just smiled and said it was a secret family recipe. Which, honestly, it is now.
Maybe you’ve been there—standing in the snack aisle before a get-together, grabbing bags of chips because you don’t have time to make something impressive. This bark is your answer. It takes about 15 minutes of active work, looks like you spent hours, and disappears faster than you’d believe. I keep a stash in my freezer for those “oh no, guests are coming in an hour” moments. And honestly? It’s saved me more times than I can count.
Why You’ll Love This Recipe
This isn’t just another candy bark recipe. It’s the one that’ll have your friends texting you for the details before they’ve even left your house. Here’s why it works so well for hosting:
- Incredibly Quick: From start to finish, you’re looking at about 15 minutes of hands-on time. The rest is just waiting for the chocolate to set. Perfect for those last-minute hosting emergencies.
- Simple Ingredients: You only need three main ingredients—white chocolate, candy corn, and a pinch of salt. No fancy baking supplies required.
- Perfect for Fall Gatherings: This bark screams autumn. Halloween parties, Thanksgiving dessert tables, cozy bonfire nights—it fits everywhere.
- Crowd-Pleaser: I’ve served this to kids, grandparents, and everyone in between. It’s always the first thing to disappear from the dessert table.
- Unbelievably Delicious: The creamy white chocolate paired with that chewy, slightly waxy candy corn texture creates something unexpectedly addictive. You’ll see what I mean after one bite.
What makes this recipe different from all the other bark recipes out there? It’s the technique. Most recipes just tell you to melt chocolate and sprinkle candy on top. But I’ve learned that the way you temper the white chocolate—even just a little—makes a huge difference in how it sets and snaps. Plus, I add a tiny trick that keeps the candy corn from bleeding its color into the chocolate. That’s the kind of detail that makes this version stand out.
This recipe isn’t just good—it’s the kind that makes you close your eyes after the first bite. It’s comfort food reimagined for the fall season. Perfect for impressing guests without stress, or turning a simple get-together into something memorable. And let’s be honest, anything that makes you look like a baking pro with almost no effort is a winner in my book.
What Ingredients You Will Need
This recipe uses simple, everyday ingredients to create something that looks and tastes far more impressive than its parts would suggest. Most of these are pantry staples during the fall season.
- White chocolate chips or bars (16 ounces) – I prefer Ghirardelli white chocolate chips for their smooth melting quality. If using bars, chop them into small, even pieces for consistent melting. (Avoid white melting wafers—they don’t have the same creamy flavor.)
- Candy corn (1 ½ cups) – The star of the show! Brach’s is the classic choice, but any brand works. I like to use a mix of regular candy corn and the autumn-colored harvest mix for visual variety.
- Coconut oil or vegetable shortening (1 teaspoon) – This is my secret weapon. It helps the white chocolate melt more smoothly and gives the bark a beautiful shine. (Use refined coconut oil if you don’t want any coconut flavor.)
- Flaky sea salt (¼ teaspoon) – A light sprinkle on top balances the sweetness perfectly. Maldon sea salt is my go-to for that delicate crunch.
- Optional: Fall-themed sprinkles (2 tablespoons) – These add extra color and texture. Look for mixes with orange, brown, and yellow shapes.
- Optional: Chopped pecans or almonds (¼ cup) – For a nutty crunch that contrasts nicely with the chewy candy corn. Toast them lightly first for more flavor.
Ingredient Selection Tips: When buying candy corn, check the package date. Fresher candy corn is softer and chewier—older candy corn can be hard and brittle. For the white chocolate, look for real cocoa butter in the ingredients list. That’s what gives it that rich, creamy texture. If you’re dairy-free, there are good plant-based white chocolate options available, though they melt a bit differently.
Substitution Guidance: If you can’t find candy corn, try candy pumpkin pieces or even chopped peanut butter cups for a different flavor profile. For a nut-free version, skip the pecans and add more sprinkles. You can also use dark chocolate instead of white for a less sweet version—just adjust the melting time.
Equipment Needed
You don’t need much for this recipe, which is part of its beauty. Here’s what you’ll want on hand:
- Baking sheet (11×17 inches) – A rimmed baking sheet works best to contain the melted chocolate. I’ve used everything from a fancy Nordic Ware pan to a beat-up old cookie sheet—they all work.
- Parchment paper or silicone baking mat – Absolutely essential for easy removal. Parchment paper is cheaper and disposable; silicone mats are reusable and eco-friendly. Both work great.
- Medium microwave-safe bowl – Glass or ceramic works best. Avoid plastic bowls—they can retain odors and don’t heat evenly.
- Spatula or offset spatula – For spreading the melted chocolate into an even layer. A regular spatula works fine, but an offset one gives you more control.
- Sharp knife – For cutting the bark into pieces once it’s set. A chef’s knife or a large serrated knife both work well.
- Optional: Double boiler – If you prefer stovetop melting over the microwave. I use this when I’m making multiple batches at once.
Budget-Friendly Tips: Don’t own a double boiler? No problem. A heatproof bowl set over a saucepan of simmering water works perfectly. And if you don’t have an offset spatula, the back of a spoon does the job—it just takes a little more patience.
Preparation Method
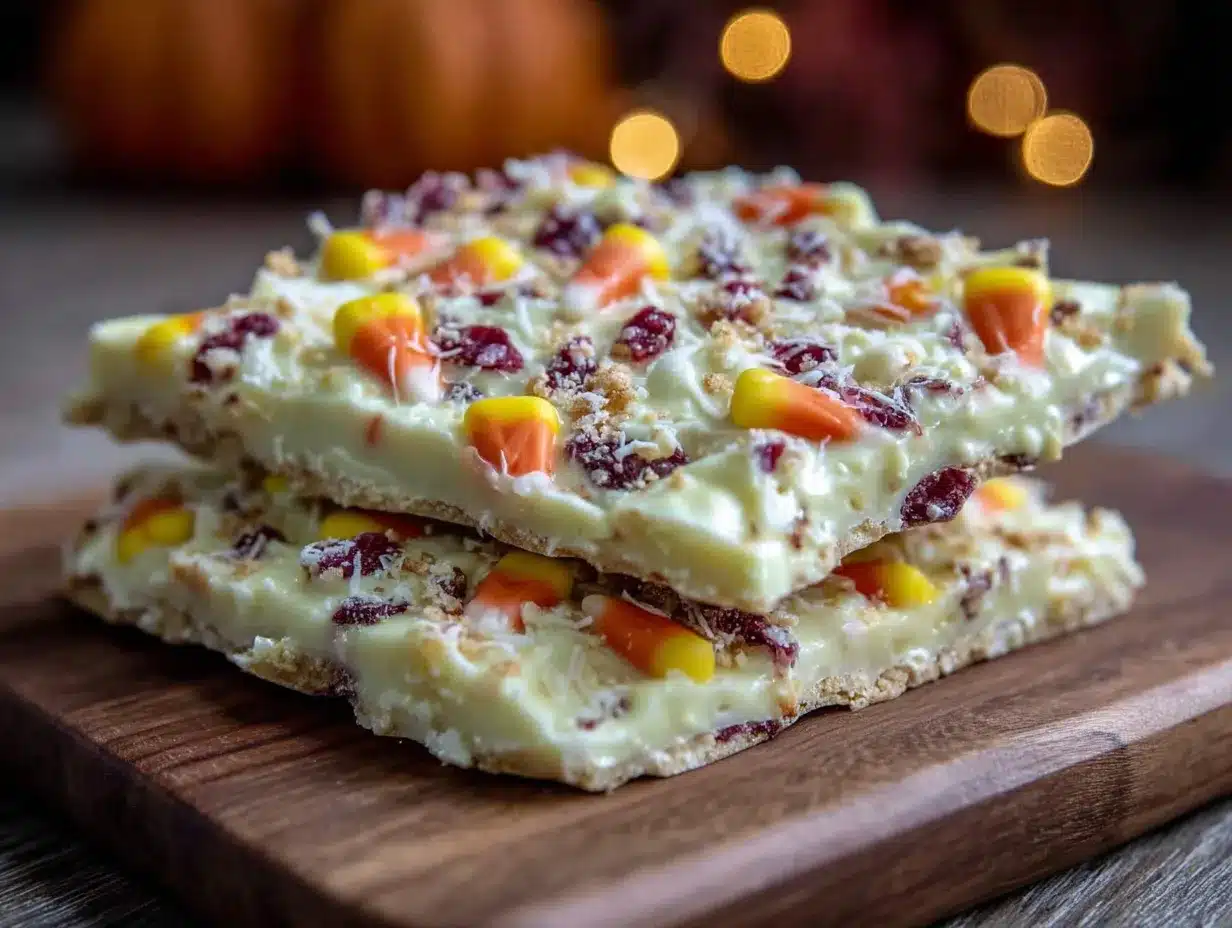
Let’s walk through this step by step. Trust me, it’s easier than you think.
- Prep your pan (2 minutes) – Line your baking sheet with parchment paper or a silicone mat. Make sure the paper extends slightly over the edges—this gives you handles to lift the bark out later. Set the pan aside.
- Melt the white chocolate (3-4 minutes) – Place the white chocolate chips (or chopped bars) in a medium microwave-safe bowl. Add the teaspoon of coconut oil or shortening. Microwave in 30-second intervals at 50% power, stirring well after each interval. This gentle approach prevents the chocolate from burning or seizing. It usually takes about 2-3 intervals for the chocolate to be mostly melted. Continue stirring until the residual heat melts the remaining pieces.
- Check the consistency (30 seconds) – The melted chocolate should be smooth, glossy, and thin enough to pour easily. If it’s too thick, add another ½ teaspoon of coconut oil and stir. If you see any lumps, the chocolate has seized—you’ll need to start over with fresh chocolate. (This happened to me once when I got distracted by a phone call. Learn from my mistake!)
- Pour and spread (2 minutes) – Pour the melted white chocolate onto the prepared baking sheet. Use your spatula to spread it into an even rectangle, about ¼-inch thick. Don’t worry about making it perfect—rustic edges are part of the charm. Aim for a shape that’s roughly 9×13 inches.
- Add the candy corn (2 minutes) – While the chocolate is still wet, scatter the candy corn evenly over the surface. Press each piece gently into the chocolate so they stick. Don’t just dump them all on—take a moment to arrange them so every piece of bark gets some candy corn. I like to press them in a slight pattern, but random works beautifully too.
- Add toppings (1 minute) – If using, sprinkle the flaky sea salt, fall sprinkles, or chopped nuts over the top. The salt is non-negotiable in my opinion—it really balances the sweetness. Do this while the chocolate is still tacky so everything sticks.
- Set the bark (30-60 minutes) – Place the baking sheet in the refrigerator for at least 30 minutes, or until the chocolate is completely firm and no longer sticky to the touch. If you’re in a hurry, the freezer works too—check after 15 minutes. The bark should lift easily from the parchment paper when it’s ready.
- Break into pieces (5 minutes) – Once set, lift the bark from the pan using the parchment paper handles. Place it on a cutting board. Use a sharp knife to cut it into irregular pieces, or simply break it with your hands for a more rustic look. I prefer the hand-breaking method—it gives that homemade, artisanal feel.
- Serve or store (2 minutes) – Arrange the pieces on a serving platter or store them in an airtight container. That’s it! You’ve just made candy corn bark that looks like it came from a fancy bakery.
Sensory Cues: When the chocolate is perfectly melted, it should look like thick, flowing cream—no lumps, no graininess. When you press the candy corn in, you should feel it sink slightly into the warm chocolate. The finished bark should snap cleanly when broken, with no bending or soft spots.
Cooking Tips & Techniques
I’ve made this bark more times than I can count, and I’ve learned a few things the hard way. Here are my best tips for success:
Don’t rush the melting process. White chocolate is more delicate than dark or milk chocolate. It burns easily and seizes when exposed to even a drop of water. That’s why I always use 50% power in the microwave and stir frequently. If you’re using a double boiler, make sure the bowl doesn’t touch the water. A friend of mine once got a single steam droplet in her chocolate, and it turned into a grainy mess instantly.
Room temperature ingredients matter. Cold candy corn can cause the chocolate to seize when you press it in. Let your candy corn sit at room temperature for about 10 minutes before using. Same goes for any nuts or sprinkles you’re adding.
Watch for color bleeding. Candy corn can sometimes bleed its orange and yellow colors into the white chocolate, especially if the chocolate is too hot when you add the candy. Let the melted chocolate cool for about 2 minutes after melting before pressing in the candy corn. This little pause makes a huge difference in keeping that pristine white look.
Timing strategy for hosting. Make this bark the day before your gathering. It actually tastes better after sitting overnight—the flavors meld together. Plus, it’s one less thing to worry about on party day. I usually make a double batch on Friday night for weekend events.
Consistency is key. If your bark is too thick, it’s hard to bite into. If it’s too thin, it breaks into tiny shards. Aim for that ¼-inch thickness. I use the edge of my hand as a rough guide—it’s about the same thickness as my pinky finger.
Variations & Adaptations
This recipe is incredibly versatile. Here are some of my favorite ways to change it up:
Chocolate Lover’s Version: Swap half the white chocolate for dark or milk chocolate. Swirl the two together for a marbled effect before adding the candy corn. The contrast is stunning, and it cuts the sweetness a bit.
Nutty Autumn Bark: Add ¼ cup of toasted pecans or walnuts along with the candy corn. The nutty crunch pairs beautifully with the chewy candy corn. I made this version for a Thanksgiving potluck, and it was gone in 20 minutes.
Vegan-Friendly Option: Use dairy-free white chocolate and skip the coconut oil if your chocolate already melts smoothly. Most candy corn is naturally vegan, but double-check the label. This version works great for plant-based gatherings.
Spiced Fall Bark: Sprinkle ½ teaspoon of pumpkin pie spice or cinnamon over the wet chocolate before adding the candy corn. The warm spices complement the sweetness perfectly. This is my go-to for cozy fall movie nights.
Halloween Party Bark: Add orange and black sprinkles, plus some chopped pretzels for salty crunch. The pretzels add that sweet-salty combo that people can’t resist. I’ve also added mini marshmallows for extra texture.
Low-Sugar Option: Use sugar-free white chocolate and pair it with a smaller amount of candy corn. The bark will be less sweet but still satisfying. Just note that sugar-free chocolate melts differently—watch it carefully.
Serving & Storage Suggestions
This bark is perfect for so many occasions. Here’s how to serve and store it like a pro:
Serving Temperature: Serve the bark at room temperature for the best texture. If it’s been in the fridge, let it sit out for about 10 minutes before serving. The chocolate softens slightly, making it easier to bite into without being messy.
Presentation Ideas: Arrange the pieces on a wooden board or a white platter for maximum visual impact. Sprinkle a few extra candy corn pieces around the edges for color. For Halloween parties, I like to serve it in a glass jar or a decorative tin—it looks like a gift. For Thanksgiving, I arrange it on a rustic slate board with some dried orange slices.
What to Serve Alongside: This bark pairs beautifully with hot apple cider, pumpkin spice lattes, or even a glass of cold milk. For dessert tables, place it near other fall treats like pumpkin cookies or caramel apples. The sweetness of the bark balances well with tart flavors.
Storage Instructions: Store the bark in an airtight container at room temperature for up to 1 week. If your kitchen is warm, refrigerate it to prevent the chocolate from softening. Layer pieces between sheets of parchment paper to prevent sticking. For longer storage, freeze the bark in a freezer-safe bag for up to 3 months. Thaw at room temperature for about 15 minutes before serving.
Flavor Development: The bark actually tastes better after a day or two. The flavors meld together, and the texture becomes perfectly balanced. I’ve found that day-old bark is always the most popular at gatherings. Something magical happens overnight.
Nutritional Information & Benefits
Let’s be honest—this is a treat, not a health food. But here’s what you should know:
Estimated Nutritional Values (per 1-ounce serving):
- Calories: 150-170
- Fat: 8-10g
- Carbohydrates: 20-22g
- Sugar: 18-20g
- Protein: 1-2g
Health Highlights: White chocolate contains calcium from milk solids, which supports bone health. Candy corn is low in fat and contains small amounts of iron. The flaky sea salt adds trace minerals. That said, this is definitely an “in moderation” treat—perfect for special occasions and holiday gatherings.
Dietary Considerations: This recipe is vegetarian. For a vegan version, use plant-based white chocolate. It contains dairy and may contain traces of nuts depending on the chocolate brand. Always check labels if serving to guests with allergies.
My Personal Perspective: I believe in balance. This bark is a celebration treat—it’s not something you eat every day. But when you do have it, enjoy every single bite. Life’s too short to skip the good stuff.
Conclusion
This easy candy corn bark with white chocolate is more than just a recipe—it’s a little piece of fall magic that you can create in your own kitchen. It’s the treat that makes people smile, that sparks conversations, that disappears before you’ve had a chance to grab a second piece. And honestly? That’s exactly what I was chasing when I first tried to recreate that candy shop’s version.
I love this recipe because it reminds me that sometimes the simplest things are the most memorable. You don’t need complicated techniques or fancy ingredients to create something that brings people together. Just good chocolate, some candy corn, and a little bit of love. That’s all it takes.
Now I want to hear from you! Have you tried making this bark? Did you add your own twist? Drop a comment below and let me know how it turned out. And if you’re looking for more fall dessert ideas, don’t forget to share this recipe with your friends—they’ll thank you for it. Happy baking, friends!
Frequently Asked Questions
Can I use milk chocolate instead of white chocolate?
Absolutely! Milk chocolate works wonderfully in this recipe. It creates a richer, less sweet bark that pairs beautifully with the candy corn. Just follow the same melting instructions—milk chocolate is more forgiving than white chocolate.
Why did my white chocolate seize up?
White chocolate seizes when it comes into contact with even a tiny amount of water. This can happen from steam, a wet bowl, or humid conditions. To prevent this, make sure all your equipment is completely dry and avoid getting any moisture near the melting chocolate. If it does seize, unfortunately you’ll need to start over with fresh chocolate.
How far in advance can I make this bark?
You can make this bark up to 1 week ahead if stored properly in an airtight container at room temperature. For longer storage, freeze it for up to 3 months. I actually prefer making it a day or two ahead—the flavors seem to meld together better.
Can I add other candies besides candy corn?
Definitely! This recipe is very adaptable. Try adding candy pumpkins, chopped peanut butter cups, or even crushed pretzels for a sweet-salty twist. Just make sure any added candies are at room temperature so they don’t cause the chocolate to seize.
Is this recipe safe for kids to help with?
Yes, with adult supervision for the melting step. Kids love pressing the candy corn into the chocolate and sprinkling the toppings. It’s a great way to get them involved in holiday baking. Just handle the melting yourself to avoid any burns.
Pin This Recipe!
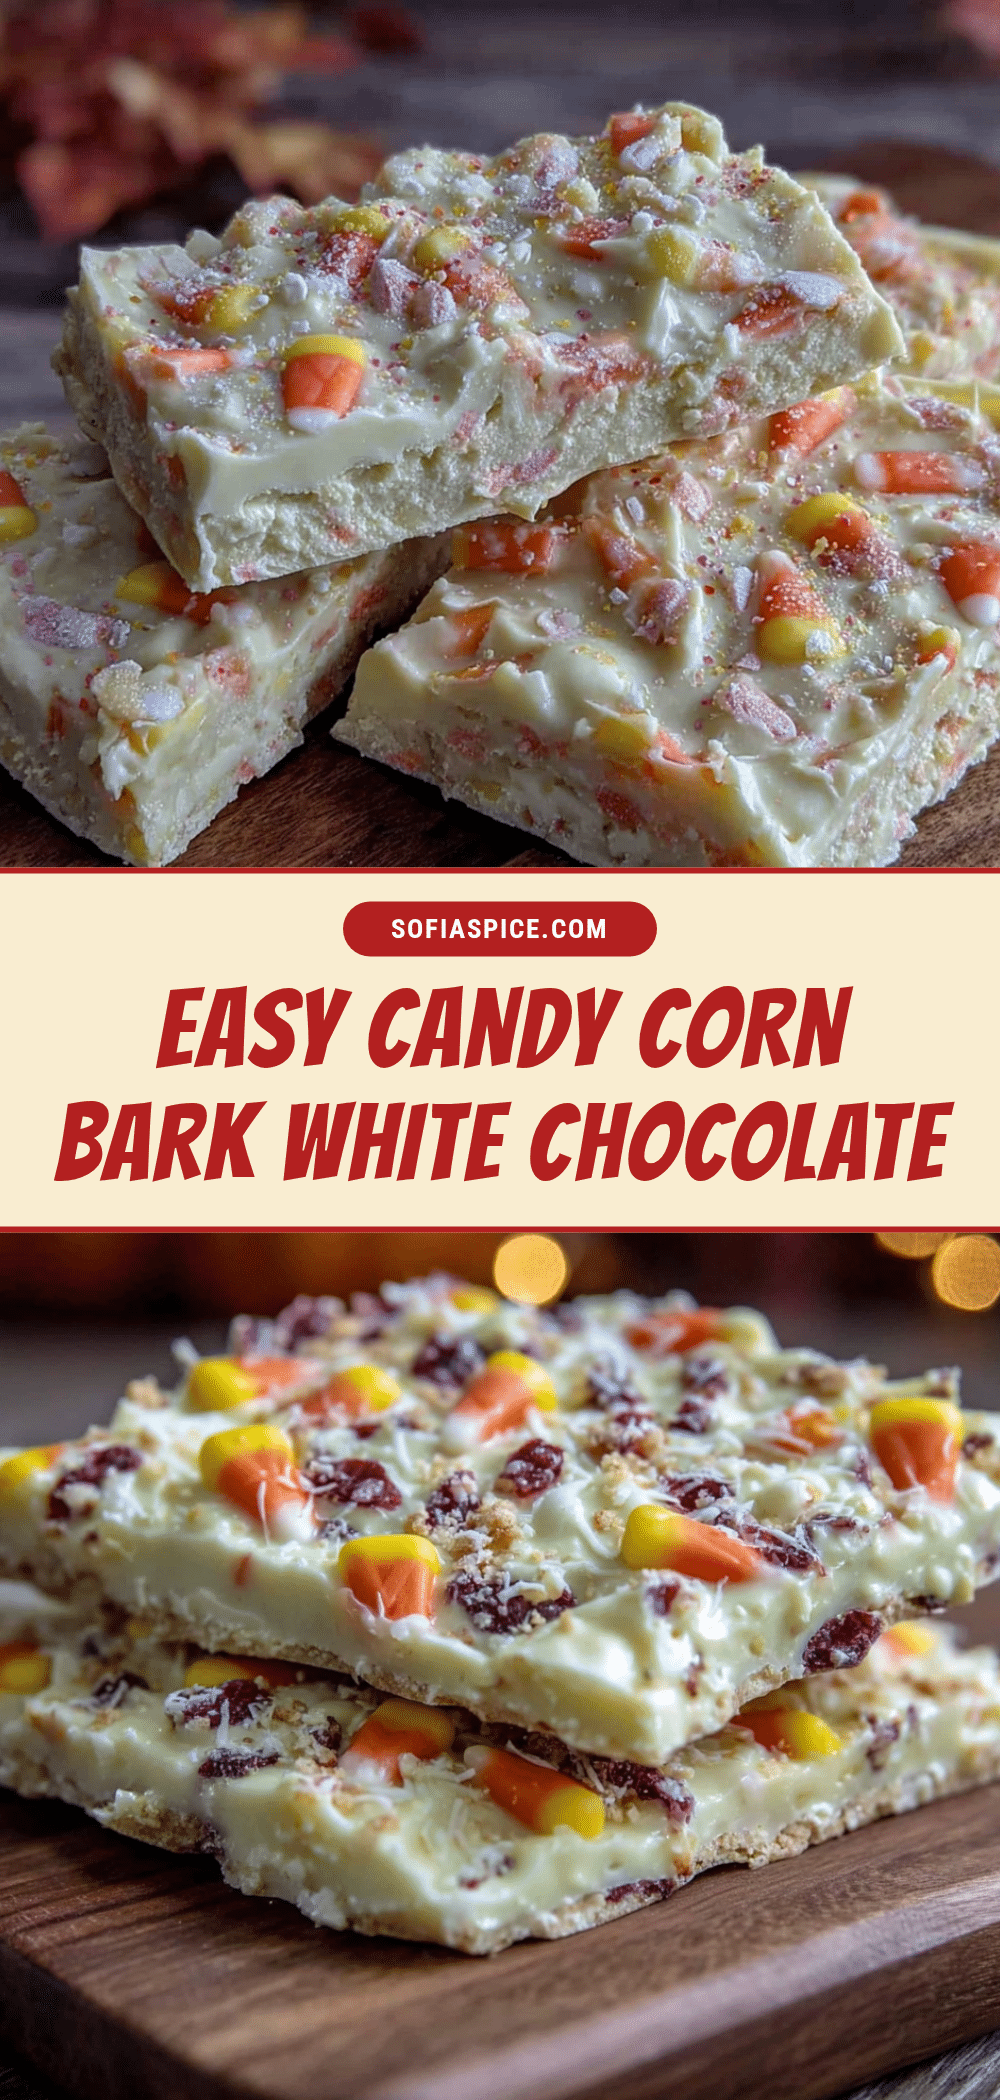
Easy Candy Corn Bark with White Chocolate – Best Fall Dessert

This easy candy corn bark with white chocolate is a quick, crowd-pleasing fall treat that looks impressive with minimal effort. Creamy white chocolate is studded with chewy candy corn and a sprinkle of flaky sea salt for a perfectly balanced sweet-and-salty snack.
- Prep Time: 15 minutes
- Cook Time: 0 minutes
- Total Time: 45 minutes (includes setting time)
- Yield: 16 servings 1x
- Category: Dessert
- Cuisine: American
Ingredients
- 16 ounces white chocolate chips or bars (preferably Ghirardelli)
- 1 ½ cups candy corn (or autumn-colored harvest mix)
- 1 teaspoon coconut oil or vegetable shortening
- ¼ teaspoon flaky sea salt (e.g., Maldon)
- 2 tablespoons fall-themed sprinkles (optional)
- ¼ cup chopped pecans or almonds, lightly toasted (optional)
Instructions
- Line an 11×17-inch baking sheet with parchment paper or a silicone mat, letting the paper extend over the edges for easy removal. Set aside.
- Place the white chocolate chips (or chopped bars) and coconut oil/shortening in a medium microwave-safe bowl. Microwave in 30-second intervals at 50% power, stirring well after each interval, until mostly melted (about 2-3 intervals). Continue stirring until residual heat melts the remaining pieces. The chocolate should be smooth and glossy.
- Pour the melted white chocolate onto the prepared baking sheet. Use a spatula or offset spatula to spread it into an even rectangle about ¼-inch thick (roughly 9×13 inches).
- While the chocolate is still wet, scatter the candy corn evenly over the surface. Gently press each piece into the chocolate so they adhere.
- If using, sprinkle the flaky sea salt, fall sprinkles, and/or chopped nuts over the top while the chocolate is still tacky.
- Refrigerate the baking sheet for at least 30 minutes, or until the chocolate is completely firm and no longer sticky. (For faster setting, freeze for 15 minutes.)
- Once set, lift the bark from the pan using the parchment paper handles. Place on a cutting board and break into irregular pieces with your hands or cut with a sharp knife.
- Serve immediately or store in an airtight container.
Notes
For best results, let candy corn sit at room temperature for 10 minutes before using to prevent chocolate from seizing. To avoid color bleeding from the candy corn, let melted chocolate cool for about 2 minutes before pressing in the candy. The bark tastes even better after sitting overnight. Store in an airtight container at room temperature for up to 1 week, or freeze for up to 3 months.
Nutrition
- Serving Size: 1 ounce (about 1 pie
- Calories: 160
- Sugar: 19
- Sodium: 60
- Fat: 9
- Saturated Fat: 5
- Carbohydrates: 21
- Protein: 1.5
Keywords: candy corn bark, white chocolate bark, fall dessert, Halloween treat, easy candy recipe, no-bake dessert


