My neighbor, Maria, watched me struggling with a wobbly, cracked springform pan one October afternoon. She didn’t say anything at first. Then she just shook her head, smiled, and disappeared back into her house. A few minutes later, she came back holding a small baking dish lined with foil and a handwritten recipe card that was smudged and folded at the corners. “No springform,” she said simply. “No cracks. Just bars.”
I have to admit, I was skeptical at first. I mean, cheesecake is supposed to be this tall, elegant, almost intimidating dessert, right? The kind you serve on a fancy cake stand and slice with a knife dipped in hot water? But Maria’s approach was different. It was practical. It was forgiving. And honestly, it was so much smarter for the kind of cooking I actually do—feeding a crowd of people who just want a good dessert without all the fuss.
That afternoon, we stood in her tiny kitchen, and she walked me through her method. She didn’t measure anything precisely—she just scooped and poured and tasted. She told me about growing up in a big family where desserts had to feed twelve people without causing a meltdown in the kitchen. Her pumpkin pie spice cheesecake bars were her go-to for every potluck, every holiday dinner, every “I need to bring something” moment. And let me tell you, after one bite, I understood why.
The thing that got me, and honestly still gets me every time I make these, is how they manage to be both impressive and completely stress-free. You get that rich, creamy, tangy cheesecake filling that everyone loves. You get that warm, cozy pumpkin pie spice flavor that just screams fall. But instead of a water bath and a finicky crust that crumbles everywhere, you get a simple press-in crust and a filling that bakes up perfectly in a regular baking dish. No cracks. No fuss. Just pure, crowd-pleasing deliciousness.
Maybe you’ve been there—standing in the grocery store aisle, a pumpkin in one hand and cream cheese in the other, wondering if you have the energy for a full-blown cheesecake production. I get it. I’ve been there too. That’s why these bars have become my secret weapon for every gathering. They’re the dessert that makes people close their eyes and sigh, but they don’t make you want to pull your hair out. And honestly, isn’t that the best kind of recipe to have in your back pocket?
Over the years, I’ve tweaked Maria’s original recipe just a little—added a bit more spice, perfected the crust-to-filling ratio, and figured out the best way to get those clean, beautiful slices. But the heart of it is still hers. It’s still that moment in her kitchen, with the afternoon light streaming through the window, watching someone share a recipe the way you share a good story—casually, generously, and without any pretense. That’s what makes these bars so special. They come from a place of real cooking, real sharing, and real love for feeding the people around you.
Why You’ll Love This Recipe
Let me tell you why these pumpkin pie spice cheesecake bars have earned a permanent spot in my recipe rotation. I’ve tested this recipe more times than I can count—for Thanksgiving dinner, for casual fall brunches, for those “I need to bring dessert to a party tonight” panic moments. And every single time, they deliver.
- No Water Bath Needed: This is the game-changer right here. Traditional cheesecake requires a fussy water bath that can leak, cause soggy crusts, and honestly, just stress you out. These bars bake up perfectly creamy without any of that nonsense.
- Simple Ingredients: You probably have most of these in your kitchen right now. Cream cheese, butter, sugar, eggs, and pumpkin puree. The only special item is the pumpkin pie spice, and honestly, you can make your own if you don’t have it.
- Perfect for Hosting: These bars are designed for a crowd. They cut cleanly, they travel well, and they look gorgeous on a dessert table. Plus, you can make them a day ahead—which is basically a superpower when you’re hosting.
- Crowd-Pleaser: I’ve served these to kids, adults, picky eaters, and dessert snobs. The reaction is always the same. People take one bite, their eyes go wide, and they ask for the recipe before they’ve even finished the first bar.
- Unbelievably Delicious: The combination of the buttery, slightly crunchy crust, the silky cream cheese filling, and that warm, aromatic pumpkin pie spice is just perfection. It’s comfort food in bar form.
What makes this recipe different from all the other pumpkin cheesecake recipes out there? It’s the texture. The filling is dense and creamy without being heavy. The crust stays crisp without getting soggy. And the spice blend is perfectly balanced—warm and aromatic without being overpowering. I’ve spent a lot of time tweaking the ratios to get that ideal balance, and I’m confident this is the best version you’ll find.
This isn’t just another pumpkin dessert. It’s the kind that makes you close your eyes after the first bite. It’s comfort food reimagined—faster, easier, and more reliable than a traditional cheesecake, but with the same soul-soothing satisfaction. Perfect for impressing guests without stress, or turning a simple fall gathering into something memorable.
What Ingredients You Will Need
This recipe uses simple, wholesome ingredients to deliver bold flavor and satisfying texture without the fuss. Most of these are pantry staples, especially during the fall baking season, and I’ve included notes on substitutions where they work well.
For the Crust
- 1 ½ cups (150g) graham cracker crumbs (about 12 full sheets) — I prefer Honey Maid brand for consistent texture
- ¼ cup (50g) granulated sugar
- 6 tablespoons (85g) unsalted butter, melted — use salted butter and reduce the added salt if that’s all you have
- ¼ teaspoon salt — just a pinch to balance the sweetness
For the Cheesecake Filling
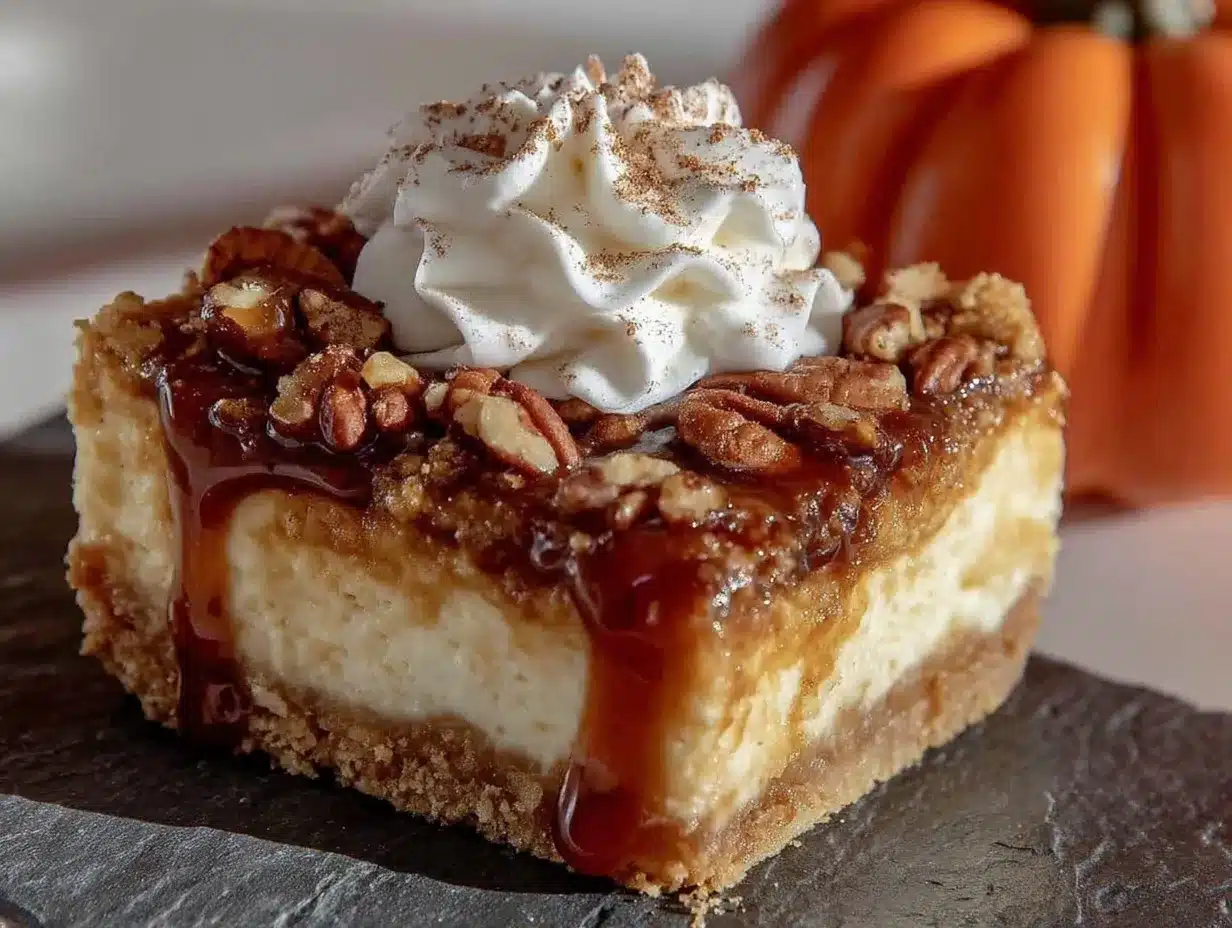
- 16 ounces (452g) full-fat cream cheese, softened to room temperature — this is crucial for a smooth filling, don’t rush it
- ¾ cup (150g) granulated sugar
- ¼ cup (55g) packed light brown sugar — adds depth and a hint of molasses flavor
- 3 large eggs, room temperature — cold eggs can cause the filling to curdle
- 1 cup (245g) pumpkin puree — not pumpkin pie filling, just pure pumpkin (Libby’s is my go-to)
- 1 tablespoon pumpkin pie spice — store-bought or homemade (see note below)
- 1 teaspoon vanilla extract
- ¼ cup (60ml) heavy cream — adds richness and helps create that silky texture
For the Topping (Optional but Recommended)
- ½ cup (120ml) heavy cream, cold
- 2 tablespoons powdered sugar
- ½ teaspoon vanilla extract
- ¼ teaspoon pumpkin pie spice, for dusting
Ingredient Notes: If you want to make your own pumpkin pie spice, combine 2 teaspoons cinnamon, 1 teaspoon ginger, ½ teaspoon nutmeg, ½ teaspoon allspice, and ¼ teaspoon cloves. This makes more than you need for this recipe, but it keeps well in a sealed jar for months.
Substitution Guidance: For a gluten-free version, use gluten-free graham crackers or crushed gluten-free cookies. For a dairy-free option, use dairy-free cream cheese and a plant-based butter substitute—just note that the texture will be slightly less creamy. If you don’t have heavy cream for the filling, you can substitute full-fat sour cream or Greek yogurt for a slightly tangier result.
I recommend using full-fat cream cheese for the best texture. Low-fat versions contain more water and can make the filling runny or cause cracking. Trust me on this one—I learned the hard way when I tried to “lighten up” the recipe for a friend and ended up with a soupy mess.
Equipment Needed
You don’t need a lot of fancy equipment for these bars, which is part of what makes them so great for hosting. Here’s what you’ll need:
- 9×13-inch Baking Dish: This is the sweet spot for these bars. You get enough to feed a crowd, and the bars are thick enough to feel substantial without being overwhelming. A glass or ceramic dish works best for even baking.
- Electric Mixer: A hand mixer or stand mixer works perfectly. You need to beat the cream cheese until it’s completely smooth, and doing that by hand is a workout I don’t recommend.
- Mixing Bowls: You’ll need a medium bowl for the crust and a large bowl for the filling.
- Measuring Cups and Spoons: For accuracy, especially with the spices.
- Spatula: A rubber spatula is essential for scraping down the sides of the bowl and smoothing the filling.
- Parchment Paper: This is my secret weapon for easy removal. Leave an overhang on two sides to create “handles” that let you lift the whole block of bars out of the dish.
- Sharp Knife: For clean slices. Run it under hot water and wipe it clean between cuts for the best results.
If you don’t have a 9×13 dish, you can use two 8×8 pans instead—just reduce the baking time by about 5-7 minutes and check for doneness earlier. I’ve also made these in a 9-inch square pan for a thicker bar, but you’ll need to increase the baking time by about 10 minutes.
One tip I learned from Maria: line your dish with parchment paper that hangs over the sides. It makes lifting the entire block of cheesecake bars out so much easier, and you get cleaner slices. It’s one of those little tricks that makes a huge difference.
Preparation Method
Let me walk you through this step by step. I’ve included all the little details I’ve learned over the years to help you get perfect results every time.
Step 1: Prep Your Pan and Preheat
Preheat your oven to 325°F (163°C). Line your 9×13-inch baking dish with parchment paper, leaving about 2 inches of overhang on the long sides. These will be your handles for lifting the bars out later. Lightly spray the parchment with non-stick cooking spray for extra insurance.
Step 2: Make the Crust
In a medium bowl, combine the graham cracker crumbs, sugar, and salt. Pour in the melted butter and stir with a fork until all the crumbs are evenly moistened. They should look like wet sand. Press the mixture firmly into the bottom of your prepared pan. I use the bottom of a measuring cup to really pack it down—this helps prevent a crumbly crust later. Bake the crust for 10 minutes, then set it aside to cool slightly while you make the filling.
Step 3: Prepare the Cream Cheese
In a large bowl, beat the softened cream cheese with an electric mixer on medium speed until it’s completely smooth and creamy. This should take about 2 minutes. Scrape down the sides and bottom of the bowl with a spatula. This step is crucial—any lumps in the cream cheese will show up in your finished bars.
Step 4: Add the Sugars
Add the granulated sugar and brown sugar to the cream cheese and beat on medium speed until well combined, about 1 minute. Scrape the bowl again. Don’t overmix at this stage—you don’t want to incorporate too much air, which can cause cracks.
Step 5: Add the Eggs One at a Time
Add the eggs one at a time, beating on low speed just until each one is incorporated. Scrape the bowl after each addition. The key here is to mix gently. Overbeating the eggs incorporates too much air, which can cause the cheesecake to puff up and then crack as it cools.
Step 6: Add the Pumpkin and Spices
Add the pumpkin puree, pumpkin pie spice, and vanilla extract. Beat on low speed just until combined. The mixture should be smooth and a beautiful pale orange color. Scrape the bowl one more time.
Step 7: Add the Heavy Cream
Pour in the heavy cream and mix on low speed just until it disappears into the batter. This adds richness and helps create that silky, melt-in-your-mouth texture.
Step 8: Assemble and Bake
Pour the filling over the pre-baked crust and spread it evenly with a spatula. Give the pan a gentle tap on the counter to release any air bubbles. Bake at 325°F (163°C) for 35-40 minutes. The edges should be set and slightly puffed, but the center should still jiggle slightly when you gently shake the pan. This is the sweet spot—baking until just set ensures a creamy texture.
Step 9: Cool and Chill
Let the bars cool completely on a wire rack, about 1 hour. Then transfer them to the refrigerator and chill for at least 4 hours, but overnight is better. This step is non-negotiable. The bars need time to set up properly, and the flavor actually improves as they chill.
Step 10: Slice and Serve
Once chilled, use the parchment handles to lift the entire block of cheesecake bars out of the pan. Place it on a cutting board. Use a sharp knife to slice into bars—I usually get 24 from a 9×13 pan. For clean slices, run the knife under hot water and wipe it clean between cuts. Serve cold or at room temperature.
Cooking Tips & Techniques
Over the years, I’ve made these bars more times than I can count, and I’ve learned a few things the hard way. Here are my best tips to help you avoid my mistakes and get perfect results every time.
Room Temperature Ingredients Are Not Optional: I know, I know, everyone says this. But seriously, cold cream cheese and cold eggs will give you a lumpy filling that no amount of beating can fix. Take the cream cheese out of the fridge at least an hour before you start baking. Let the eggs sit in a bowl of warm water for 5 minutes if you’re in a hurry.
Don’t Overmix the Filling: This is probably the most common mistake I see. Once you add the eggs, mix on low speed and stop as soon as everything is combined. Overmixing incorporates too much air, which causes the cheesecake to puff up during baking and then collapse and crack as it cools. A few gentle streaks are better than a perfectly smooth batter that’s been overbeaten.
The Jiggle Test: You want the center of the cheesecake to jiggle slightly when you shake the pan. If it’s completely firm, it’s overbaked. If it’s still liquidy, it needs more time. That gentle jiggle in the center means the edges are set and the center will finish cooking as it cools. This is how you get that creamy, not dry, texture.
Patience with Chilling: I know it’s hard to wait, but chilling for at least 4 hours is essential. The bars need time to firm up so they cut cleanly. If you try to cut them too soon, you’ll end up with a mess. Trust me, I’ve been there. The bars actually taste better the next day anyway—the flavors have time to meld and deepen.
Use Parchment Handles: This was a game-changer for me. Leaving an overhang of parchment on the long sides of the pan means you can lift the entire block of cheesecake bars out in one piece. This makes cutting so much easier, and you don’t have to worry about scratching your pan.
Variations & Adaptations
One of the best things about this recipe is how adaptable it is. Here are some of my favorite variations, all tested and approved.
Gingersnap Crust: Swap the graham crackers for crushed gingersnap cookies. The spicy, molasses flavor of the cookies pairs beautifully with the pumpkin pie spice. I made this version for a holiday party last year, and it was gone in 20 minutes.
Chocolate Swirl: Melt ¼ cup of semi-sweet chocolate chips and drizzle it over the filling before baking. Use a knife to swirl it gently into the top layer. The chocolate adds a rich, decadent element that’s perfect for chocolate lovers.
Maple Pecan Topping: After the bars are chilled and sliced, drizzle them with maple syrup and sprinkle with toasted pecans. This adds a lovely crunch and a deeper, more complex sweetness. It’s my go-to for Thanksgiving.
Gluten-Free Option: Use gluten-free graham crackers or shortbread cookies for the crust. Everything else in the recipe is naturally gluten-free, so this is an easy swap that doesn’t compromise on flavor or texture.
Vegan Version: Use dairy-free cream cheese and a plant-based butter substitute. For the eggs, use 3 tablespoons of cornstarch mixed with 9 tablespoons of water (this replaces the binding power of the eggs). The texture will be slightly different—a bit denser and less creamy—but still delicious.
Mini Bars: Make these in a mini muffin tin for bite-sized treats. Press a small amount of crust into each cup, fill with the cheesecake mixture, and bake for about 15-18 minutes. These are perfect for parties where people want to graze.
Serving & Storage Suggestions
These bars are incredibly versatile when it comes to serving. Here’s how I like to present them and keep them fresh.
Serving Temperature: I prefer these bars cold, straight from the fridge. The texture is firmer and the flavors are more pronounced. But they’re also wonderful at room temperature—the filling softens slightly and becomes even creamier. For a dinner party, I’ll take them out of the fridge about 15 minutes before serving to take the chill off.
Presentation: Arrange the bars on a platter and dust them lightly with pumpkin pie spice or cinnamon for a beautiful finish. A dollop of whipped cream on top of each bar adds a lovely contrast in texture and flavor. For a more elegant presentation, drizzle with caramel sauce and sprinkle with toasted pecans.
What to Serve Alongside: These bars pair beautifully with a cup of hot coffee or spiced apple cider. For a dessert spread, serve them alongside apple crisp, pecan pie, or pumpkin roll. They also work well as part of a brunch buffet—the richness of the cheesecake balances nicely with lighter fare like fruit salad and quiche.
Storage Instructions: Store the bars in an airtight container in the refrigerator for up to 5 days. I usually layer them with parchment paper between the layers to prevent sticking. The flavor actually improves after a day or two as the spices meld with the cream cheese.
Freezing: These bars freeze beautifully. Wrap individual bars tightly in plastic wrap, then place them in a freezer-safe bag or container. They’ll keep for up to 3 months. To thaw, transfer them to the refrigerator overnight. I love having a stash in the freezer for unexpected guests or late-night cravings.
Reheating: Honestly, I don’t recommend reheating these bars. They’re meant to be served cold or at room temperature. If you want a warm dessert, try serving them with a warm caramel sauce or hot fudge on top—the contrast between the cold cheesecake and the warm sauce is divine.
Nutritional Information & Benefits
Let’s be real—these are a treat, not a health food. But that doesn’t mean they can’t fit into a balanced diet. Here’s the estimated nutritional breakdown for one bar (based on 24 servings):
- Calories: 215
- Total Fat: 15g
- Saturated Fat: 9g
- Cholesterol: 65mg
- Sodium: 180mg
- Total Carbohydrates: 18g
- Dietary Fiber: 1g
- Sugars: 14g
- Protein: 4g
Health Benefits: Pumpkin is a nutritional powerhouse—it’s rich in vitamin A, which supports eye health, and fiber, which aids digestion. The pumpkin pie spice blend contains cinnamon, which may help regulate blood sugar levels, and ginger, which has anti-inflammatory properties. Cream cheese provides calcium and protein, though it’s also high in saturated fat, so moderation is key.
Dietary Considerations: This recipe contains dairy, eggs, and gluten (from the graham crackers). It can be made gluten-free with the substitution mentioned above. It’s not suitable for a vegan diet without significant modifications, but the vegan version I described earlier works well.
My Perspective: I believe in enjoying treats in moderation. These bars are a special occasion dessert for me—something I make for holidays, parties, and gatherings. I don’t worry about the nutritional content when I’m sharing them with loved ones. Food is about connection and joy, and these bars deliver both in spades.
Conclusion
These crowd-pleasing pumpkin pie spice cheesecake bars are everything I want in a dessert. They’re impressive enough for a holiday table, but simple enough for a Tuesday night craving. They’re rich and creamy without being heavy, and that warm, aromatic spice blend just hits different when the weather turns cool.
What I love most about this recipe is how it brings people together. Every time I make these bars, I think of Maria and that afternoon in her kitchen. I think about how a simple recipe shared between neighbors can become a tradition, a comfort, a way of saying “I care about you” without using words. That’s the power of food, and that’s what makes these bars so special.
I encourage you to make this recipe your own. Add a chocolate swirl if that’s your thing. Top them with pecans and caramel. Experiment with different crusts. The beauty of this recipe is that it’s forgiving and flexible—it wants you to succeed.
So go ahead, give these bars a try. I promise they’ll become a staple in your fall baking rotation. And when you make them, I’d love to hear about it. Leave a comment below and tell me how they turned out, what variations you tried, or just share your favorite fall memory. Let’s keep this conversation going—because the best recipes are the ones we share.
Happy baking, friends. Your kitchen is about to smell amazing.
Frequently Asked Questions
Can I use a different size pan?
Yes, you can use an 8×8 or 9×9 square pan, but the bars will be thicker and you’ll need to increase the baking time by about 10 minutes. A 9×13 pan gives the best results for even baking and clean slices.
Why did my cheesecake bars crack on top?
Cracks usually happen from overmixing the batter (too much air) or overbaking. Make sure your ingredients are at room temperature, mix on low speed, and stop baking when the center still jiggles slightly. The residual heat will finish cooking the center.
Can I make these bars ahead of time?
Absolutely! These bars actually taste better the next day. You can make them up to 3 days in advance and store them in the refrigerator. They also freeze well for up to 3 months.
Do I have to use pumpkin pie spice?
No, you can make your own blend with cinnamon, ginger, nutmeg, and allspice. Or you can use just cinnamon for a simpler flavor. The pumpkin pie spice just adds that classic fall flavor profile.
Can I use low-fat cream cheese?
I don’t recommend it. Low-fat cream cheese has more water and less fat, which can make the filling runny and cause cracking. Full-fat cream cheese gives the best texture and flavor for these bars.
Pin This Recipe!
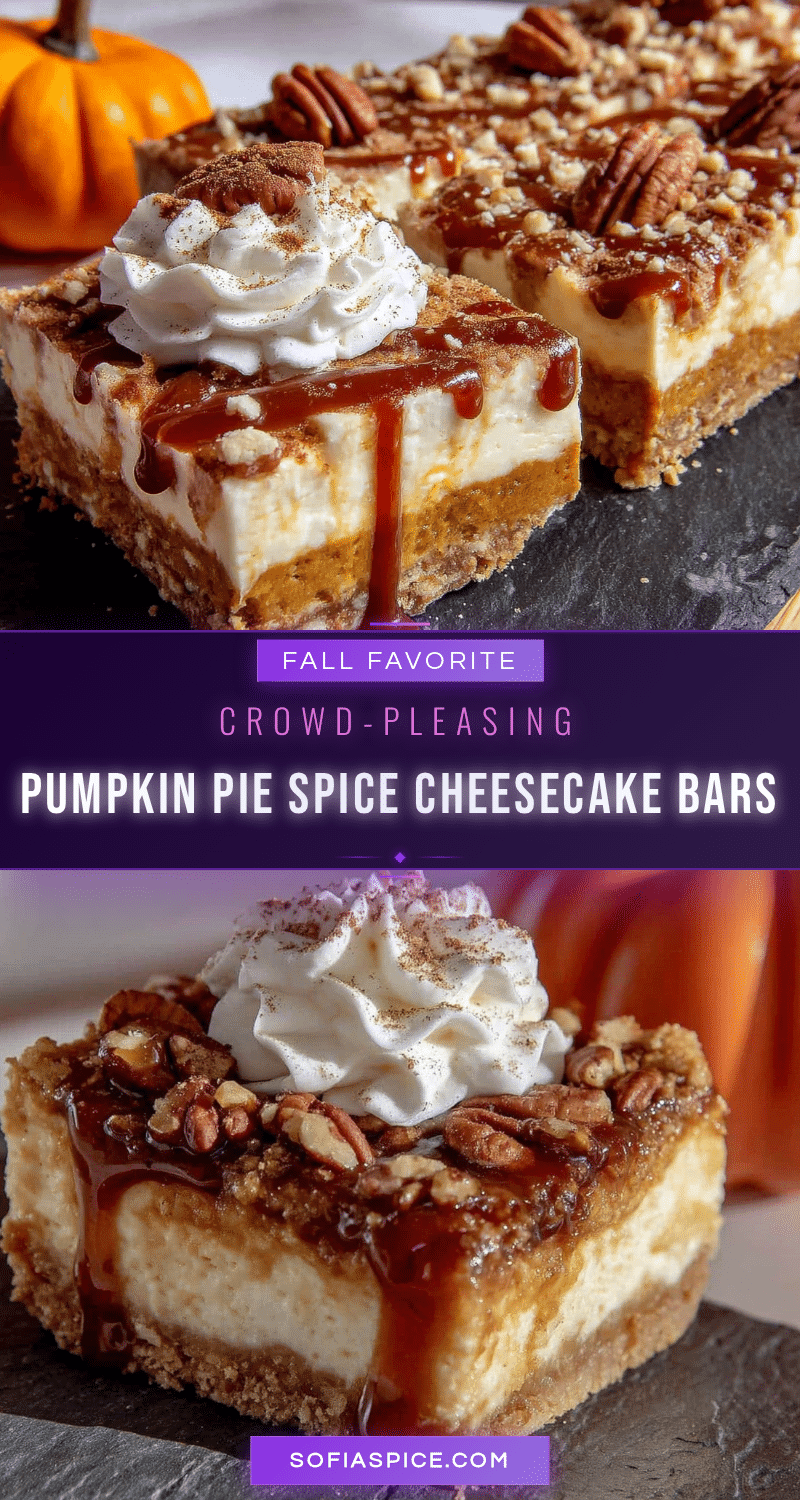
Crowd-Pleasing Pumpkin Pie Spice Cheesecake Bars
These pumpkin pie spice cheesecake bars are rich, creamy, and stress-free—no water bath needed. Perfect for feeding a crowd, they combine a buttery graham cracker crust with a silky pumpkin cheesecake filling, all baked in a simple 9×13 dish.
- Prep Time: 20 minutes
- Cook Time: 35-40 minutes
- Total Time: 4 hours 55 minutes (includes chilling)
- Yield: 24 servings 1x
- Category: Dessert
- Cuisine: American
Ingredients
- 1 ½ cups (150g) graham cracker crumbs (about 12 full sheets)
- ¼ cup (50g) granulated sugar
- 6 tablespoons (85g) unsalted butter, melted
- ¼ teaspoon salt
- 16 ounces (452g) full-fat cream cheese, softened to room temperature
- ¾ cup (150g) granulated sugar
- ¼ cup (55g) packed light brown sugar
- 3 large eggs, room temperature
- 1 cup (245g) pumpkin puree
- 1 tablespoon pumpkin pie spice
- 1 teaspoon vanilla extract
- ¼ cup (60ml) heavy cream
- ½ cup (120ml) heavy cream, cold (for topping)
- 2 tablespoons powdered sugar (for topping)
- ½ teaspoon vanilla extract (for topping)
- ¼ teaspoon pumpkin pie spice, for dusting (for topping)
Instructions
- Preheat oven to 325°F (163°C). Line a 9×13-inch baking dish with parchment paper, leaving overhang on the long sides. Lightly spray with non-stick cooking spray.
- In a medium bowl, combine graham cracker crumbs, ¼ cup sugar, and salt. Pour in melted butter and stir with a fork until evenly moistened. Press firmly into the bottom of the prepared pan. Bake for 10 minutes, then set aside to cool slightly.
- In a large bowl, beat softened cream cheese with an electric mixer on medium speed until smooth and creamy, about 2 minutes. Scrape down sides and bottom of bowl.
- Add ¾ cup granulated sugar and brown sugar to the cream cheese. Beat on medium speed until well combined, about 1 minute. Scrape bowl again.
- Add eggs one at a time, beating on low speed just until each is incorporated. Scrape bowl after each addition.
- Add pumpkin puree, 1 tablespoon pumpkin pie spice, and 1 teaspoon vanilla extract. Beat on low speed just until combined. Scrape bowl.
- Add ¼ cup heavy cream and mix on low speed until just incorporated.
- Pour filling over pre-baked crust and spread evenly. Tap pan gently on counter to release air bubbles. Bake for 35-40 minutes, until edges are set and center jiggles slightly.
- Cool completely on a wire rack, about 1 hour. Then refrigerate for at least 4 hours, preferably overnight.
- Once chilled, use parchment handles to lift the block out of the pan. Slice into bars using a sharp knife (run under hot water and wipe clean between cuts). Serve cold or at room temperature.
- For optional topping: In a medium bowl, beat ½ cup cold heavy cream, 2 tablespoons powdered sugar, and ½ teaspoon vanilla extract until stiff peaks form. Dollop on bars and dust with ¼ teaspoon pumpkin pie spice.
Notes
Room temperature ingredients are crucial for a smooth filling. Don’t overmix once eggs are added to avoid cracks. The jiggle test is key: center should jiggle slightly when done. Chill at least 4 hours for clean slices. Bars can be made up to 3 days ahead and freeze well for up to 3 months.
Nutrition
- Serving Size: 1 bar
- Calories: 215
- Sugar: 14
- Sodium: 180
- Fat: 15
- Saturated Fat: 9
- Carbohydrates: 18
- Fiber: 1
- Protein: 4
Keywords: pumpkin cheesecake bars, pumpkin pie spice, fall dessert, cheesecake bars, no water bath, crowd-pleasing


