My husband looked up from his plate on a random Tuesday night and said, “Okay, these might be the best chicken thighs you’ve ever made.” And he wasn’t even trying to be sweet—he was just stating a fact mid-chew, which honestly means more than any compliment delivered with eye contact. I had been testing air fryer chicken recipes for weeks, trying to nail that elusive combo of ultra-crispy skin and juicy meat without the mess of shallow frying. This batch of crispy garlic parmesan chicken thighs was supposed to be just another test run. Instead, it became the one I kept coming back to.
The thing about air fryer chicken thighs is that they can go so wrong so fast. Too dry. Too greasy. The breading slides off like a bad toupee. But these? The skin shatters when you bite into it, and the garlic parmesan crust clings to every ridge and crevice like it was born there. I remember pulling the basket out and just staring at them for a second—golden brown, craggly, flecked with dark bits of roasted garlic and melted parmesan. My kitchen smelled like a trattoria crossed with a backyard cookout.
I didn’t grow up making anything like this. My mom was more of a baked chicken breast with a shake of seasoned salt kind of cook. But somewhere along the way, I became the person who obsesses over getting that perfect crust on a piece of chicken. These thighs are the result of that obsession. They’re proof that you don’t need a vat of oil or a deep fryer to get restaurant-quality crunch. You just need a good air fryer, a little patience, and the right combination of ingredients. Trust me on this one.
Why You’ll Love This Recipe
Let me tell you why these crispy garlic parmesan chicken thighs have earned a permanent spot in my weekly dinner rotation. I’ve made them for picky kids, for friends who claim they don’t like dark meat, and for my own late-night cravings when I need something that feels indulgent but doesn’t take forever.
- Quick & Easy: From fridge to table in about 30 minutes. No marinating overnight, no complicated steps. Just simple prep and the air fryer does the heavy lifting.
- Simple Ingredients: You probably have most of this in your kitchen right now. Chicken thighs, garlic, parmesan, breadcrumbs, and a few pantry staples. No fancy grocery runs required.
- Perfect for Busy Weeknights: This is the kind of dinner that saves you on nights when you’re tired and hungry and tempted to order takeout. It comes together faster than delivery.
- Crowd-Pleaser: I’ve served these to kids who normally pick at their food and adults who go back for seconds. The crispy coating and juicy meat win everyone over.
- Unbelievably Delicious: The garlic parmesan crust is everything. It’s savory, nutty, slightly sharp from the cheese, and perfectly crunchy. The chicken stays moist and tender inside.
What makes this recipe different from all the other air fryer chicken recipes out there? It’s the technique. I don’t just toss the thighs in breadcrumbs and hope for the best. I use a two-step coating method that locks in moisture and creates a crust that actually stays crispy, not soggy. Plus, I grate my own parmesan from a block instead of using the pre-shredded stuff (it melts better and doesn’t burn as fast). These small choices add up to a big difference.
Honestly, this is the kind of recipe that makes you close your eyes after the first bite. It’s comfort food that feels a little special but doesn’t require a special occasion. And when you realize how easy it is, you’ll wonder why you ever bothered with takeout.
What Ingredients You Will Need
This recipe uses simple, wholesome ingredients to deliver bold flavor and satisfying texture without the fuss. Most of these are pantry staples you probably already have on hand, which makes this recipe perfect for spontaneous cooking.
- Chicken Thighs (boneless, skinless or bone-in, skin-on): I prefer boneless, skinless thighs for faster cooking and easier eating, but bone-in works beautifully too. If using bone-in, add about 5-7 minutes to the cooking time. Look for thighs that are similar in size so they cook evenly.
- Parmesan Cheese (freshly grated): This is non-negotiable. The pre-shredded stuff in a bag has anti-caking agents that prevent it from melting properly. Grate it yourself from a block of Parmigiano-Reggiano for the best flavor and texture. It makes a huge difference in the crust.
- Panko Breadcrumbs: Regular breadcrumbs work in a pinch, but panko gives you that extra-crispy, shattery texture. They stay crunchier because they’re larger and flakier. I use plain panko and season them myself.
- Garlic (fresh, minced): Please don’t use the jarred stuff. Fresh garlic cloves, minced finely, release oils that infuse the coating with that pungent, sweet aroma. I use about 4-5 cloves for a good punch.
- Olive Oil or Avocado Oil Spray: You need a little fat to help the coating brown and crisp up. A light spray of oil on the outside of the breaded thighs is key. Avocado oil has a higher smoke point, but olive oil works great.
- Eggs: The egg wash helps the breadcrumb mixture stick to the chicken. Use large eggs, beaten until frothy.
- All-Purpose Flour: A light dusting of flour before the egg wash creates a dry surface that helps the coating adhere better. It’s a simple step that prevents the breading from sliding off.
- Italian Seasoning: A blend of dried herbs like oregano, basil, rosemary, and thyme. It adds depth and a familiar Italian flavor profile. You can make your own or use a store-bought blend.
- Garlic Powder: Not to be confused with fresh garlic. Garlic powder adds a savory, slightly sweet background note that rounds out the fresh garlic flavor.
- Salt and Black Pepper: Essential for seasoning the chicken itself and the breadcrumb mixture. I use kosher salt for its clean flavor and easy pinchability.
- Red Pepper Flakes (optional): A pinch of heat cuts through the richness of the parmesan and chicken. Totally optional, but I love the little kick.
- Fresh Parsley (for garnish): Not just for looks. A sprinkle of fresh parsley adds a bright, herbaceous finish that balances the savory, cheesy crust.
For the best results, I recommend using Parmigiano-Reggiano if you can find it. It has a nutty, crystalline texture that melts beautifully into the crust. And always check the expiration date on your panko—stale breadcrumbs won’t crisp up properly.
Equipment Needed
You don’t need a ton of fancy equipment for this recipe, which is part of why I love it. Here’s what you’ll need:
- Air Fryer: Any model will work. I use a 5.8-quart basket-style air fryer, but a toaster oven-style or even a larger family-size model works too. Just make sure not to overcrowd the basket—cook in batches if needed.
- Mixing Bowls: You’ll need three shallow bowls for the breading station: one for flour, one for egg wash, and one for the panko-parmesan mixture.
- Tongs: For handling the chicken without getting your hands too messy. Silicone-tipped tongs are great because they won’t scratch the air fryer basket.
- Microplane or Box Grater: For grating the parmesan cheese. A microplane gives you super fine, fluffy shreds that coat the chicken evenly.
- Meat Thermometer: This is my secret weapon for perfect chicken every time. An instant-read thermometer takes the guesswork out of cooking. Chicken thighs are safe at 165°F, but I pull them at 170-175°F for the juiciest results.
- Spray Bottle or Oil Mister: For applying a light, even coating of oil to the breaded chicken. Aerosol cooking sprays can leave a residue on your air fryer basket over time.
- Cutting Board and Sharp Knife: For mincing garlic and chopping parsley. A sharp knife makes prep faster and safer.
- Paper Towels: For patting the chicken thighs dry before breading. This step is crucial for helping the coating stick.
If you don’t have an air fryer yet, I honestly think this recipe is worth getting one for. But you can also bake these thighs in a conventional oven at 425°F for about 25-30 minutes, flipping halfway through. They won’t be quite as crispy, but they’ll still be delicious.
Preparation Method
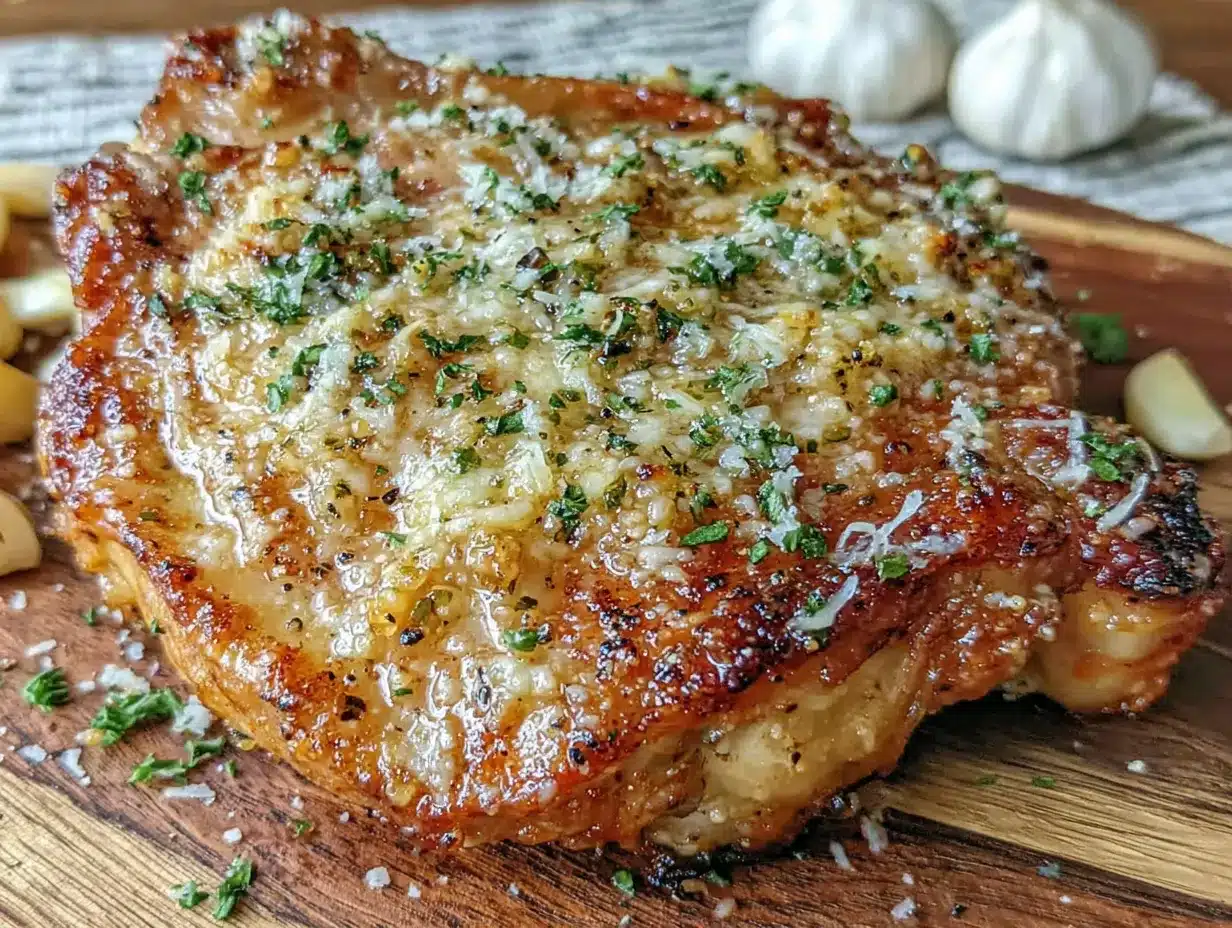
Let’s get cooking. Follow these steps carefully, and you’ll have the crispiest, most flavorful chicken thighs of your life.
- Prep the chicken. Start by patting your chicken thighs dry with paper towels. This removes excess moisture, which is the enemy of a crispy crust. If using boneless, skinless thighs, trim off any excess fat. Season both sides generously with salt and pepper. Let them sit at room temperature for about 10 minutes while you set up the breading station.
- Set up the breading station. Grab three shallow bowls. In the first bowl, add 1/2 cup of all-purpose flour. In the second bowl, beat 2 large eggs with a tablespoon of water until frothy. In the third bowl, combine 1 cup of panko breadcrumbs, 1/2 cup of freshly grated parmesan cheese, 4-5 minced garlic cloves, 1 teaspoon of Italian seasoning, 1/2 teaspoon of garlic powder, 1/2 teaspoon of salt, 1/4 teaspoon of black pepper, and a pinch of red pepper flakes if using. Mix everything together with a fork until well combined.
- Coat the thighs. Working one at a time, take a chicken thigh and dredge it in the flour, shaking off any excess. Then dip it into the egg wash, letting any excess drip off. Finally, press it firmly into the panko-parmesan mixture, making sure the coating sticks to all sides. Don’t be shy—really press it in. Place the breaded thigh on a plate or baking sheet. Repeat with the remaining thighs.
- Preheat the air fryer. Set your air fryer to 400°F (200°C) and let it preheat for 3-5 minutes. Preheating ensures the chicken starts cooking immediately, which helps the crust set and become crispy.
- Spray with oil. Lightly spray the air fryer basket with oil to prevent sticking. Place the breaded chicken thighs in the basket in a single layer, making sure they’re not touching. You may need to cook in batches depending on the size of your air fryer. Spray the tops of the chicken thighs lightly with oil. This is what gives them that golden, crispy finish.
- Air fry. Cook the chicken thighs at 400°F for 12 minutes. Then, carefully flip each thigh using tongs. Spray the other side lightly with oil. Cook for another 10-12 minutes, or until the internal temperature reaches 170-175°F (77-80°C) when measured with a meat thermometer at the thickest part. The coating should be deep golden brown and crispy.
- Rest and garnish. Remove the chicken thighs from the air fryer and let them rest on a wire rack or a plate for 5 minutes. This allows the juices to redistribute, keeping the meat moist. Sprinkle with freshly chopped parsley and a little extra grated parmesan if you’re feeling fancy.
Pro tip: If your air fryer runs hot, check the chicken at the 20-minute mark. Every air fryer is a little different, and you don’t want to overcook the thighs. The coating should be golden and crunchy, and the chicken should feel firm to the touch but still have a little give.
Cooking Tips & Techniques
I’ve made this recipe more times than I can count, and I’ve learned a few things the hard way. Here are my best tips for guaranteed success.
- Don’t skip the drying step. Wet chicken is the number one reason breading falls off. Pat those thighs dry like your dinner depends on it. I use three or four paper towels per batch and really press them into the skin.
- Let the breaded chicken rest. After you bread all the thighs, let them sit on a plate for 5-10 minutes before air frying. This helps the coating set and adhere better. It’s a small step that makes a big difference.
- Don’t overcrowd the basket. I know it’s tempting to cram as many thighs in as possible to save time, but overcrowding traps steam and makes the coating soggy. Cook in batches if you need to. The extra few minutes are worth it for that perfect crunch.
- Use a meat thermometer. I cannot stress this enough. Chicken thighs are forgiving, but they can still dry out if overcooked. An instant-read thermometer takes the guesswork out. Insert it into the thickest part of the thigh, avoiding the bone if using bone-in.
- Experiment with the coating. Once you master the basic recipe, try adding different herbs or spices to the panko mixture. Smoked paprika, dried thyme, or even a little lemon zest can change the flavor profile completely. I once added a teaspoon of onion powder and it was fantastic.
- Flip carefully. When you flip the thighs halfway through cooking, be gentle. The coating is delicate at this stage. Use tongs and a light touch to avoid tearing the crust.
I remember one time I forgot to spray the chicken with oil before cooking. The coating came out pale and powdery—still edible, but not the golden, crispy masterpiece I was going for. A light spray of oil is non-negotiable for that restaurant-quality finish.
Variations & Adaptations
One of the best things about this recipe is how adaptable it is. Here are some of my favorite variations.
- Spicy Buffalo Version: After air frying, toss the crispy thighs in your favorite buffalo sauce. Serve with blue cheese or ranch dressing and celery sticks. It’s a game-day winner. I like to use Frank’s RedHot mixed with a little melted butter for the classic flavor.
- Gluten-Free Option: Substitute the all-purpose flour with a gluten-free all-purpose blend (like Bob’s Red Mill 1-to-1) and use gluten-free panko breadcrumbs. The rest of the ingredients are naturally gluten-free. The texture is slightly different but still deliciously crispy.
- Lemon Herb Twist: Add the zest of one lemon and a tablespoon of fresh chopped rosemary to the panko-parmesan mixture. Squeeze a little lemon juice over the cooked thighs just before serving. The bright citrus cuts through the richness beautifully.
- Dairy-Free Adaptation: Use nutritional yeast in place of parmesan cheese for a dairy-free version that still gives you that savory, umami kick. You can also use vegan parmesan if you can find a good one. The texture won’t be exactly the same, but the flavor is still great.
- Oven-Baked Method: If you don’t have an air fryer, bake the breaded thighs on a wire rack set over a baking sheet at 425°F (220°C) for 25-30 minutes, flipping halfway through. The wire rack allows hot air to circulate around the chicken, helping it get crispy without turning the bottom soggy.
I personally love the lemon herb variation. It’s a little unexpected with the parmesan, but the combination is bright, savory, and totally addictive. I serve it with a side of roasted asparagus or a simple arugula salad.
Serving & Storage Suggestions
These crispy garlic parmesan chicken thighs are incredibly versatile. Here’s how to serve and store them for the best experience.
- Serving Temperature: Serve the chicken thighs hot out of the air fryer for maximum crispiness. They’re best within 10 minutes of cooking. If you need to hold them, keep them in a warm oven (200°F) on a wire rack, uncovered, for up to 30 minutes.
- Presentation: Arrange the thighs on a platter and sprinkle with fresh parsley and a little extra grated parmesan. A squeeze of lemon juice over the top brightens everything up. Serve with lemon wedges on the side.
- Complementary Dishes: These thighs pair beautifully with a simple side salad (try a Caesar or a lemon vinaigrette), roasted vegetables like broccoli or asparagus, mashed potatoes, or a light pasta with olive oil and garlic. For a low-carb meal, serve them over a bed of sautéed spinach or zucchini noodles.
- Storage: Store leftover chicken thighs in an airtight container in the refrigerator for up to 4 days. The coating will soften over time, but they’ll still be delicious. To reheat, I recommend using the air fryer again at 375°F for 3-5 minutes to revive the crunch. You can also reheat them in a 350°F oven for about 10 minutes.
- Freezing: You can freeze the cooked chicken thighs for up to 3 months. Let them cool completely, then place them in a single layer on a baking sheet and freeze until solid. Transfer to a freezer-safe bag or container. To reheat, thaw overnight in the refrigerator and then air fry at 375°F for 5-7 minutes.
The flavors actually develop nicely overnight. I sometimes make a double batch on purpose, just so I can have leftovers for lunch the next day. They’re amazing cold, sliced over a salad, or reheated and tucked into a sandwich with some arugula and roasted red peppers.
Nutritional Information & Benefits
While this isn’t a health food recipe, it does have some redeeming qualities. Here’s a rough breakdown per serving (based on 4 servings, using boneless, skinless thighs).
| Nutrient | Amount Per Serving |
|---|---|
| Calories | 420-480 |
| Protein | 35-40g |
| Fat | 22-28g |
| Carbohydrates | 18-22g |
| Fiber | 1-2g |
| Sugar | 1-2g |
| Sodium | 600-800mg |
- High in Protein: Chicken thighs are an excellent source of lean protein, which is essential for muscle repair and keeping you full and satisfied.
- Good Source of Calcium: Parmesan cheese adds a decent amount of calcium, which is important for bone health.
- Lower in Carbs: Compared to fried chicken with a thick batter, this air fryer version is relatively low in carbohydrates, making it suitable for moderate low-carb diets.
- Dietary Considerations: This recipe can easily be made gluten-free and dairy-free (with the substitutions mentioned above). It’s naturally nut-free.
- Potential Allergens: Contains dairy (parmesan), eggs, and gluten (breadcrumbs and flour). Adjust accordingly for your dietary needs.
I’m not a nutritionist, but I do believe in balance. This recipe gives you a satisfying, protein-packed meal that feels indulgent without being over-the-top. Pair it with a big vegetable side, and you’ve got a well-rounded dinner that doesn’t leave you feeling heavy.
Conclusion
These crispy garlic parmesan chicken thighs are the kind of recipe that makes you feel like a kitchen rockstar with minimal effort. They’re fast, forgiving, and ridiculously delicious. The air fryer does all the heavy lifting, and you get golden, crunchy, juicy chicken that rivals anything from a restaurant.
I love this recipe because it’s become my go-to for those nights when I need a win. A bad day? These thighs fix it. A busy weeknight? They save it. A dinner guest to impress? They crush it. The combination of nutty parmesan, fragrant garlic, and that satisfying crunch is just unbeatable.
I encourage you to make this recipe your own. Play with the seasonings, try the variations, and don’t be afraid to double the batch. And when you do make them, I’d love to hear how they turned out. Drop a comment below and let me know if you added your own twist, or tag me in your photos on social media. Happy cooking, friend!
Frequently Asked Questions
Can I use chicken breasts instead of thighs?
Absolutely. Chicken breasts will work, but they cook faster and can dry out more easily. Pound them to an even thickness (about 1/2 inch) and reduce the cooking time to about 10-12 minutes total, flipping halfway. Check the internal temperature and pull them at 160°F (71°C)—they’ll carry over to 165°F while resting.
Why is my breading not sticking to the chicken?
This usually happens for one of three reasons: the chicken wasn’t patted dry enough, the flour coating was too thick, or the egg wash was too thin. Make sure you shake off excess flour, and let the breaded chicken rest for 5-10 minutes before cooking to help the coating set.
Can I make these ahead of time for a party?
You can bread the chicken thighs up to a day in advance and keep them covered in the refrigerator. When you’re ready to cook, just pop them in the air fryer straight from the fridge—you may need to add 1-2 minutes to the cooking time. I don’t recommend cooking them fully ahead of time, as the coating will lose its crispiness.
How do I keep the chicken from getting soggy?
The key is not overcrowding the air fryer basket. Steam is the enemy of crispiness. Cook in batches if needed, and always let the chicken rest on a wire rack instead of a plate after cooking. A wire rack allows air to circulate underneath, preventing condensation from making the bottom soggy.
Can I use pre-shredded parmesan cheese?
You can, but I really don’t recommend it. Pre-shredded parmesan is coated with anti-caking agents that prevent it from melting properly. It tends to burn faster and doesn’t give you that same nutty, creamy flavor. Freshly grated parmesan from a block melts into the breading and creates a much better crust. Trust me on this one—it’s worth the extra 30 seconds.
Pin This Recipe!
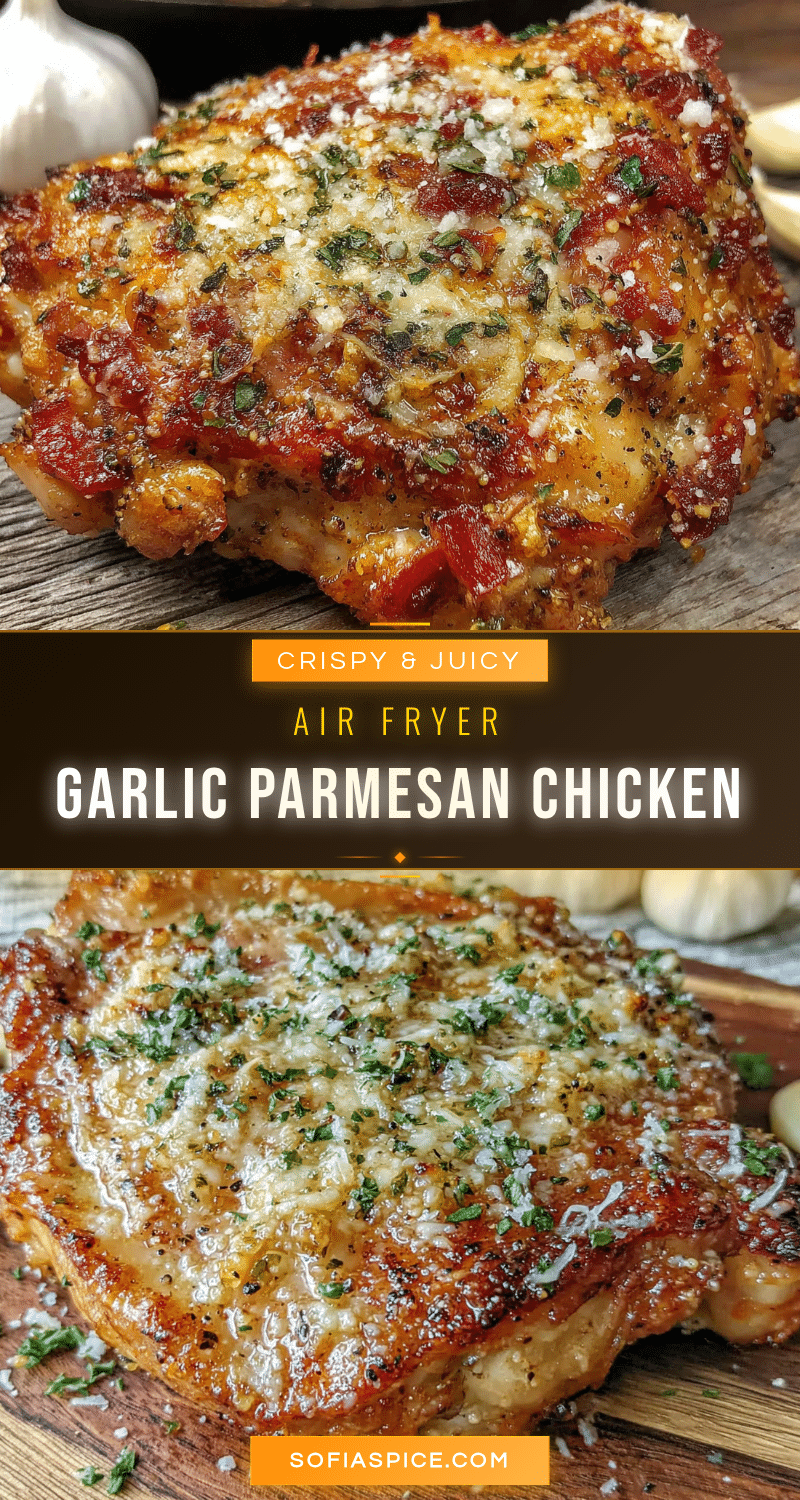
Crispy Garlic Parmesan Chicken Thighs (Easy Air Fryer Recipe)

These crispy garlic parmesan chicken thighs are ultra-crispy on the outside and juicy on the inside, made easily in an air fryer. A quick and delicious weeknight dinner that rivals restaurant-quality crunch without the mess of shallow frying.
- Prep Time: 15 minutes
- Cook Time: 22-24 minutes
- Total Time: 37-39 minutes
- Yield: 4 servings 1x
- Category: Main Course
- Cuisine: Italian-American
Ingredients
- 1.5 lbs boneless, skinless chicken thighs (about 4–6 thighs)
- 1/2 cup freshly grated Parmesan cheese
- 1 cup panko breadcrumbs
- 4–5 cloves garlic, minced
- 1/2 cup all-purpose flour
- 2 large eggs
- 1 tablespoon water
- 1 teaspoon Italian seasoning
- 1/2 teaspoon garlic powder
- 1/2 teaspoon salt
- 1/4 teaspoon black pepper
- Pinch of red pepper flakes (optional)
- Olive oil or avocado oil spray
- Fresh parsley, chopped (for garnish)
Instructions
- Pat the chicken thighs dry with paper towels. Trim excess fat if using boneless, skinless thighs. Season both sides generously with salt and pepper. Let sit at room temperature for 10 minutes.
- Set up a breading station with three shallow bowls. In the first bowl, add 1/2 cup all-purpose flour. In the second bowl, beat 2 large eggs with 1 tablespoon water until frothy. In the third bowl, combine 1 cup panko breadcrumbs, 1/2 cup freshly grated Parmesan cheese, 4-5 minced garlic cloves, 1 teaspoon Italian seasoning, 1/2 teaspoon garlic powder, 1/2 teaspoon salt, 1/4 teaspoon black pepper, and a pinch of red pepper flakes (if using). Mix well.
- Working one at a time, dredge a chicken thigh in the flour, shaking off excess. Dip into the egg wash, letting excess drip off. Press firmly into the panko-Parmesan mixture, coating all sides. Place on a plate or baking sheet. Repeat with remaining thighs.
- Preheat the air fryer to 400°F (200°C) for 3-5 minutes.
- Lightly spray the air fryer basket with oil. Place the breaded chicken thighs in a single layer in the basket, ensuring they are not touching (cook in batches if needed). Spray the tops lightly with oil.
- Air fry at 400°F for 12 minutes. Carefully flip each thigh using tongs, then spray the other side lightly with oil. Cook for another 10-12 minutes, or until the internal temperature reaches 170-175°F (77-80°C) and the coating is deep golden brown and crispy.
- Remove from the air fryer and let rest on a wire rack or plate for 5 minutes. Sprinkle with fresh chopped parsley and extra grated Parmesan if desired.
Notes
For best results, use freshly grated Parmesan from a block (not pre-shredded). Pat chicken dry thoroughly to help breading stick. Let breaded chicken rest for 5-10 minutes before air frying to set the coating. Do not overcrowd the air fryer basket; cook in batches if needed. Use a meat thermometer to ensure chicken reaches 170-175°F for juiciest results. If your air fryer runs hot, check at 20 minutes.
Nutrition
- Serving Size: 1 chicken thigh
- Calories: 420480
- Sugar: 12
- Sodium: 600800
- Fat: 2228
- Saturated Fat: 68
- Carbohydrates: 1822
- Fiber: 12
- Protein: 3540
Keywords: air fryer chicken thighs, crispy chicken thighs, garlic parmesan chicken, easy air fryer recipe, weeknight dinner, chicken recipe


