My husband took one bite of these Creamy Hatch Green Chile Chicken Enchiladas and just stopped talking. He didn’t say “these are good” or “nice job”—he just kept eating, and I knew we had something real. That’s usually how it goes with the recipes that end up sticking around in our house. Not the ones I spend hours styling and photographing, but the ones where someone forgets to compliment because they’re too busy going back for thirds.
I’d been playing around with Hatch chiles all season, roasting them on the grill until the skins blistered and the whole backyard smelled like fall in New Mexico. I made a batch of that creamy roasted hatch green chili enchiladas a few weeks back, and it was good—but something was missing. I wanted more. More creaminess, more heat, more of that tangy-savory thing that happens when green chiles meet sour cream and melty cheese. So I started over.
These enchiladas came together on a random Tuesday when I had leftover rotisserie chicken and a bag of roasted Hatch chiles in the freezer. I wasn’t trying to create a masterpiece. I was just trying to get dinner on the table without anyone complaining. But then my husband went silent, and my kid asked for them again the next day—completely unprompted. That’s when I knew this recipe was different.
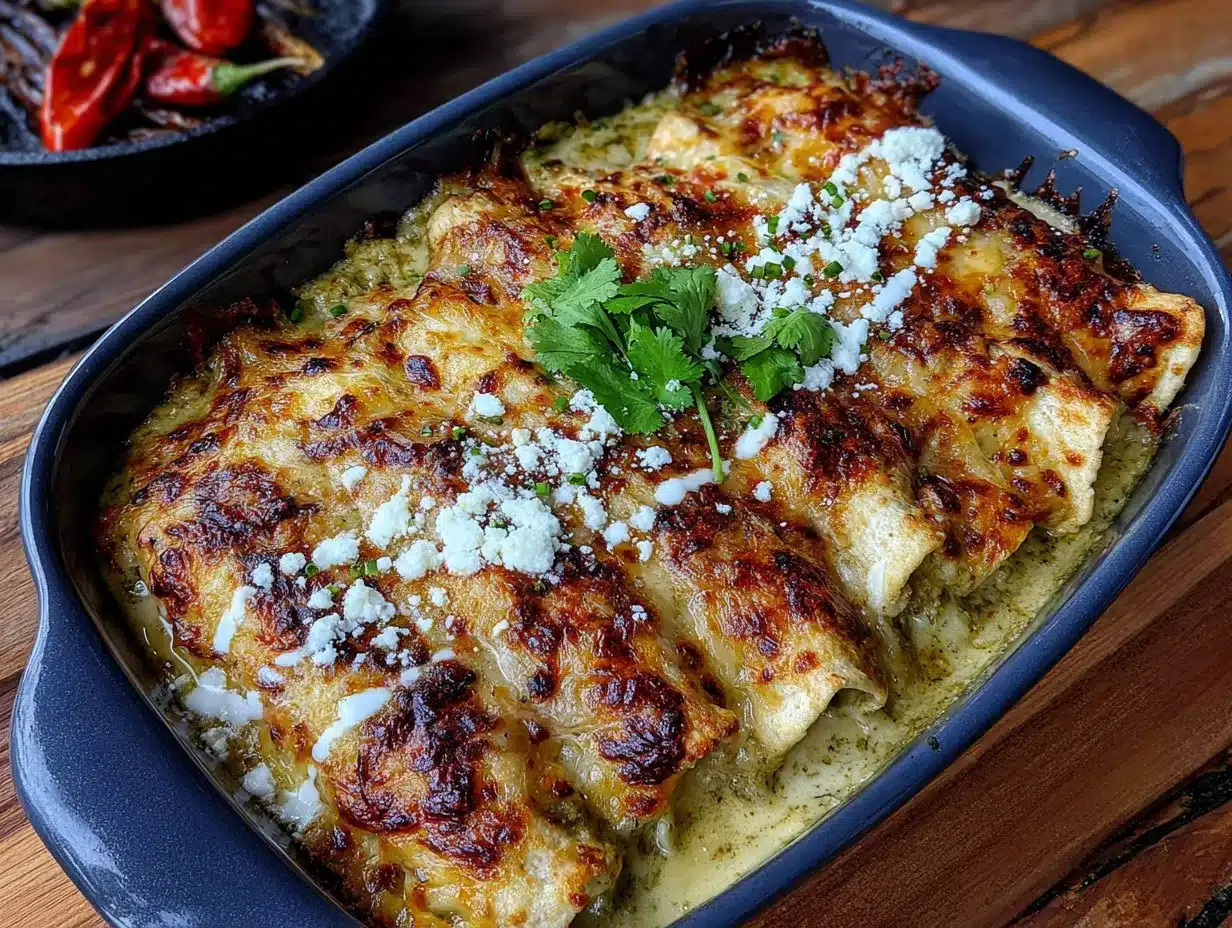
The creamy sauce is the real star here. It’s not a heavy, gloppy situation. It’s silky, a little tangy, and just spicy enough to make you pay attention. The chicken stays tender, the tortillas soak up all that goodness without turning to mush, and the cheese on top gets all bubbly and golden in spots. Honestly, it’s the kind of dinner that makes you feel like you’ve got your act together, even if you’re barely holding on.
So if you’ve been looking for a Hatch chile recipe that delivers on flavor without demanding a whole afternoon in the kitchen, this is it.
Why You’ll Love This Recipe
I’ve tested this recipe about six times now, and each round taught me something new. The first batch was too watery. The second needed more salt. The third—well, the third was the one where my husband stopped talking. That’s the version I’m sharing here.
- Quick & Easy: These come together in about 40 minutes, start to finish. Perfect for a weeknight when you want something that feels special but doesn’t require a culinary degree.
- Simple Ingredients: No weird specialty items here. You’ll find everything at a regular grocery store, especially if you live somewhere that stocks roasted Hatch chiles in the freezer section.
- Perfect for Entertaining: Make it ahead, pop it in the oven when guests arrive, and watch everyone go quiet. It’s that kind of dish.
- Crowd-Pleaser: My kids devour these, my in-laws ask for the recipe, and even my friend who “doesn’t really like enchiladas” ate three.
- Unbelievably Creamy: The sauce is a blend of sour cream, cream cheese, and green chiles that creates this luscious, velvety texture without feeling heavy. It’s comfort food that still feels light.
What makes this recipe different from the others out there? It’s the balance. Some enchilada recipes are too saucy, some are too dry, and some rely on canned soup that leaves a weird aftertaste. This one uses real ingredients, real Hatch chiles, and a technique that keeps everything creamy without separating or getting greasy. I’ve tested it with different cheeses, different tortillas, and different chile heat levels—and this version is the one I keep coming back to.
It’s the kind of meal that makes you close your eyes after the first bite. Not because it’s fancy, but because it tastes like someone actually cared about how it turned out.
What Ingredients You Will Need
This recipe uses simple, wholesome ingredients that come together to create something truly special. Most of these are pantry staples or easy to find at any grocery store, especially during Hatch chile season.
For the Creamy Green Chile Sauce
- Unsalted butter, 3 tablespoons (adds richness and helps thicken the roux)
- All-purpose flour, 3 tablespoons (creates the base for a smooth, thick sauce)
- Chicken broth, 2 cups (use low-sodium so you can control the salt level)
- Sour cream, 1 cup (full-fat works best for creaminess; Greek yogurt works in a pinch)
- Cream cheese, 4 ounces, softened (adds that velvety texture and tang)
- Roasted Hatch green chiles, 1 cup, chopped (mild or hot—your choice. I use medium for balanced heat)
- Garlic powder, 1 teaspoon
- Cumin, 1 teaspoon (adds warmth and depth)
- Salt, 1/2 teaspoon, plus more to taste
- Black pepper, 1/4 teaspoon
For the Enchilada Filling
- Cooked chicken, 3 cups, shredded (rotisserie chicken is perfect here—I use it all the time)
- Roasted Hatch green chiles, 1/2 cup, chopped (extra for the filling)
- Cream cheese, 2 ounces, softened (helps bind the filling and keeps it moist)
- Monterey Jack cheese, 1 cup, shredded (melts beautifully and adds mild flavor)
- Salt and pepper, to taste
For Assembly
- Flour tortillas, 8-10, medium size (corn tortillas work too, but flour holds up better with the creamy sauce)
- Monterey Jack cheese, 1 1/2 cups, shredded (for topping)
- Fresh cilantro, chopped, for garnish (optional, but highly recommended)
- Green onions, sliced, for garnish
A few notes on ingredients: I prefer Hatch chiles from New Mexico—they have that distinct earthy, slightly smoky flavor that you just can’t replicate. If you can’t find fresh or frozen Hatch chiles, look for canned Hatch chiles in the Mexican food aisle. They’re not quite the same, but they’ll work. I’ve also made this with Anaheim chiles in a pinch, and it was still delicious—just milder.
For the cheese, I really recommend shredding your own. Pre-shredded cheese has anti-caking agents that prevent it from melting as smoothly. It’s a small extra step that makes a big difference in the final texture. And if you’re feeling adventurous, try mixing in some pepper jack for extra heat.
Equipment Needed
You don’t need a fancy kitchen to make these enchiladas. Here’s what I use:
- 9×13-inch baking dish (glass or ceramic works best—metal can react with the acidic chiles)
- Large skillet or saucepan (for making the creamy sauce)
- Whisk (to keep the sauce smooth and lump-free)
- Mixing bowls (one for the filling, one for shredded cheese)
- Cutting board and knife (for chopping chiles and garnishes)
- Spatula or wooden spoon
- Measuring cups and spoons
- Tongs (for handling the tortillas if you warm them first)
If you don’t have a 9×13 dish, you can use two smaller dishes or even a cast-iron skillet. I’ve made these in an 8×8 dish before—just layer them like a casserole instead of rolling individual enchiladas. It’s not as pretty, but it tastes just as good.
One tip: if you’re using a glass dish, let it come to room temperature before putting it in the oven. Glass can shatter if it goes from cold to hot too quickly. Learned that one the hard way.
Preparation Method
Let’s get to the fun part. Here’s how to make these Creamy Hatch Green Chile Chicken Enchiladas step by step.
- Preheat your oven to 375°F (190°C). Lightly grease your 9×13 baking dish with butter or non-stick spray. Set it aside while you make the sauce.
- Make the creamy green chile sauce. In a large skillet or saucepan over medium heat, melt the butter. Once it’s bubbling, whisk in the flour and cook for about 1 minute, stirring constantly. This gets rid of the raw flour taste. The mixture should look like a thick paste—that’s your roux.
- Slowly pour in the chicken broth while whisking continuously. Keep whisking until the mixture is smooth and starts to thicken, about 2-3 minutes. It should coat the back of a spoon.
- Reduce the heat to low and stir in the sour cream, softened cream cheese, chopped Hatch chiles, garlic powder, cumin, salt, and pepper. Whisk until everything is melted and smooth. Taste it—yes, you’re allowed to do that. Adjust the salt or heat level if needed. Remove from heat and set aside.
- Prepare the filling. In a medium mixing bowl, combine the shredded chicken, remaining 1/2 cup chopped Hatch chiles, 2 ounces softened cream cheese, and 1 cup shredded Monterey Jack cheese. Mix until everything is well combined. Season with a pinch of salt and pepper.
- Warm the tortillas. This step matters more than you think. Cold tortillas crack when you try to roll them. I warm mine in the microwave for about 30 seconds, wrapped in a damp paper towel. You can also warm them one by one in a dry skillet for about 15 seconds per side.
- Assemble the enchiladas. Spread about 1/2 cup of the creamy sauce on the bottom of your prepared baking dish. This prevents the enchiladas from sticking and adds flavor to the bottom layer. Take a warm tortilla, spoon about 1/4 cup of the chicken filling down the center, and roll it up tightly. Place it seam-side down in the dish. Repeat with the remaining tortillas and filling.
- Pour the remaining sauce over the top of the rolled enchiladas. Use a spatula to spread it evenly, making sure every tortilla gets some sauce on it. Sprinkle the remaining 1 1/2 cups of Monterey Jack cheese over the top.
- Bake for 20-25 minutes, until the cheese is melted and bubbly and the edges are just starting to brown. If you want extra color on top, switch the oven to broil for the last 2 minutes—but watch it closely so it doesn’t burn.
- Let the enchiladas rest for 5-10 minutes before serving. This is important—it lets the sauce set up so you get clean slices instead of a saucy mess. Garnish with fresh cilantro and sliced green onions.
A few things I’ve learned along the way: if your sauce looks a little thin at first, don’t panic. It will thicken as it bakes. And if you’re short on time, you can skip rolling individual enchiladas and just layer everything like a lasagna. It’s faster and honestly, sometimes even better because every bite has all the components.
Cooking Tips & Techniques
Over the years, I’ve made enough mistakes in the kitchen to fill a cookbook. Here are the ones I made so you don’t have to.
Don’t overfill the tortillas. I know it’s tempting to stuff them to the brim, but less is more here. Too much filling makes it hard to roll, and the tortillas can split open during baking. About 1/4 cup per tortilla is the sweet spot.
Toast your spices. This is a pro tip I picked up from a chef friend. Before adding the garlic powder and cumin to the sauce, toast them in the dry skillet for about 30 seconds. It wakes up the flavors and adds a depth you just can’t get otherwise. Just be careful not to burn them—they go from fragrant to bitter really fast.
Room temperature ingredients matter. I know, I know—who has time to let cream cheese sit out? But cold cream cheese creates lumps in the sauce that are nearly impossible to whisk out. Take it out of the fridge 20 minutes before you start cooking. Same goes for the sour cream.
Let the sauce simmer. After you add the sour cream and cream cheese, let the sauce simmer on low for a few minutes. This helps it thicken and allows the flavors to meld. If you rush this step, the sauce can taste a little flat.
Watch the broiler. I once walked away for “just a second” and came back to blackened cheese. The broiler works fast, especially with a creamy sauce that can burn easily. Set a timer for 2 minutes and stay nearby.
One more thing—if you’re making these for a crowd, you can assemble them a day ahead. Just cover the dish with foil and refrigerate. Add about 10 minutes to the baking time since you’re starting from cold. It’s a lifesaver for holiday dinners or dinner parties.
Variations & Adaptations
This recipe is pretty flexible, and I’ve tried a few different versions over the months. Here are some of my favorites.
Make it spicier: Use hot Hatch chiles instead of mild or medium. You can also add a diced jalapeño to the filling or a pinch of cayenne pepper to the sauce. My husband likes it hot, so I sometimes stir in a teaspoon of chipotle in adobo for smoky heat.
Make it milder: If you’re cooking for kids or spice-sensitive folks, use mild Hatch chiles and skip the cumin (it can be a little strong for some palates). You can also substitute half the Hatch chiles with diced green bell peppers for color and texture without the heat.
Make it vegetarian: Swap the chicken for black beans, pinto beans, or roasted sweet potatoes. I’ve made this with a mix of black beans and corn, and it was fantastic. Just make sure to season the filling well since beans need more flavor help than chicken does.
Make it low-carb: Use low-carb tortillas or even large collard green leaves for wrapping. The collard green version is surprisingly good—just blanch them first so they’re pliable. I’ve also made this as a casserole without any tortillas at all, and it’s basically a creamy Hatch chile chicken bake.
Make it gluten-free: Use corn tortillas instead of flour, and substitute the all-purpose flour with a gluten-free blend or cornstarch. If using cornstarch, mix 2 tablespoons with 2 tablespoons of cold water to make a slurry, then whisk it into the broth instead of making a roux.
My personal favorite variation? I made a batch with smoked chicken once, using the leftover meat from a whole chicken I’d smoked on the grill. The smokiness paired with the Hatch chiles was absolutely incredible. It’s a little extra work, but if you have a smoker, it’s worth trying.
Serving & Storage Suggestions
These enchiladas are best served hot, straight out of the oven, with all that cheese still bubbling. Let them rest for 5-10 minutes first, though—I promise it’s worth the wait. The sauce sets up, the flavors settle, and you get cleaner portions.
I like to serve these with a simple side of Mexican rice, refried beans, or a crisp green salad with lime vinaigrette. A dollop of sour cream and a spoonful of fresh pico de gallo on the side never hurts either. For something heartier, try them alongside that cheesy hatch green chili cornbread casserole—it’s like a double dose of Hatch chile goodness.
For drinks, a cold Mexican beer or a tart margarita pairs beautifully with the creamy, spicy flavors. If you’re keeping it non-alcoholic, a glass of horchata or even a cold limeade works great.
Storage: Leftover enchiladas keep well in the fridge for up to 4 days. Store them in an airtight container. The flavors actually get better after a day or two as everything melds together.
Freezing: These freeze beautifully. Assemble the enchiladas in a freezer-safe dish, but don’t bake them. Cover tightly with foil and freeze for up to 3 months. When you’re ready to eat, thaw overnight in the fridge, then bake as directed, adding about 10 minutes to the cooking time.
Reheating: The microwave works in a pinch, but the oven is better. Reheat at 350°F for about 15 minutes, covered with foil so the cheese doesn’t dry out. If you’re in a hurry, the microwave is fine—just know the tortillas won’t be as firm.
One thing I’ve noticed: these enchiladas are even better the next day for lunch. The sauce soaks into the tortillas overnight, and every bite is just… perfect. Don’t tell anyone, but I’ve been known to eat them cold straight from the fridge.
Nutritional Information & Benefits
Here’s an approximate nutritional breakdown per serving (2 enchiladas):
- Calories: 520
- Protein: 32g
- Fat: 28g
- Carbohydrates: 34g
- Fiber: 3g
- Sugar: 4g
- Sodium: 780mg
These numbers will vary depending on the specific ingredients you use—especially the tortillas and cheese. If you’re watching sodium, use low-sodium chicken broth and go easy on the added salt.
From a health perspective, this dish has some real benefits. Hatch green chiles are packed with vitamin C and capsaicin, which can boost metabolism and reduce inflammation. Chicken provides lean protein, and the calcium from the cheese and sour cream supports bone health. It’s not exactly a health food, but it’s a balanced meal that satisfies without leaving you feeling heavy.
If you’re looking for a lighter option, try using Greek yogurt instead of sour cream, reduced-fat cream cheese, and low-fat cheese. You’ll save some calories without sacrificing too much flavor. I’ve tested it, and while it’s not quite as luxurious, it’s still really good.
For those with dietary restrictions, this recipe can be adapted: gluten-free with corn tortillas and cornstarch, lower-carb with low-carb tortillas or no tortillas at all, and vegetarian with beans or sweet potatoes. It’s pretty versatile.
Conclusion
These Creamy Hatch Green Chile Chicken Enchiladas have become a staple in my kitchen for good reason. They’re the kind of recipe that feels special enough for company but simple enough for a Tuesday night when you’re tired and just want something good to eat. The creamy sauce, the tender chicken, the kick of Hatch chiles—it all comes together in a way that’s greater than the sum of its parts.
What I love most about this recipe is how forgiving it is. You can swap ingredients, adjust the heat, change up the fillings, and it still turns out delicious. It’s a recipe that works with you, not against you. And honestly, that’s the kind of cooking I want more of in my life.
If you make these, I’d love to hear how they turn out. Leave a comment below and let me know what variations you tried, or tag me in your photos if you share them online. There’s nothing better than seeing someone else enjoy a recipe that’s become a favorite in my own home.
And if you’re looking for more Hatch chile inspiration, don’t miss that creamy hatch chili chicken soup with corn and potato—it’s another one of those recipes that just works. Or try the savory hatch chili cheddar cornbread muffins on the side. Trust me, your kitchen is about to smell amazing.
Happy cooking, friends. Go make something that makes someone stop talking.
Frequently Asked Questions
Can I use canned Hatch chiles instead of fresh or frozen?
Absolutely. Canned Hatch chiles are a great alternative when fresh ones aren’t in season. Just drain them well before using so you don’t add extra liquid to the sauce. The flavor won’t be quite as vibrant, but it’s still really good.
Why did my sauce turn out lumpy?
Lumpy sauce usually happens when the cream cheese or sour cream is too cold. Make sure both are at room temperature before adding them. If you’re in a hurry, cut the cream cheese into small cubes and let it sit for 10 minutes. Also, whisk constantly while adding the dairy—it helps everything stay smooth.
Can I make this recipe dairy-free?
Yes, with a few swaps. Use dairy-free butter, a plant-based cream cheese, and a dairy-free sour cream. For the cheese topping, look for a dairy-free Monterey Jack-style shred. The sauce might be a little thinner, but the flavor will still be there.
How do I keep the enchiladas from getting soggy?
The key is not over-saucing and letting them rest after baking. Also, warming the tortillas before rolling helps them hold up better. If you’re using corn tortillas, lightly fry them in oil first—it creates a barrier that prevents sogginess.
Can I double this recipe?
Definitely. Use two 9×13 dishes or one larger baking dish. You might need to increase the baking time by 5-10 minutes since there’s more mass to heat through. Just check that the center is hot and bubbly before serving.
Pin This Recipe!
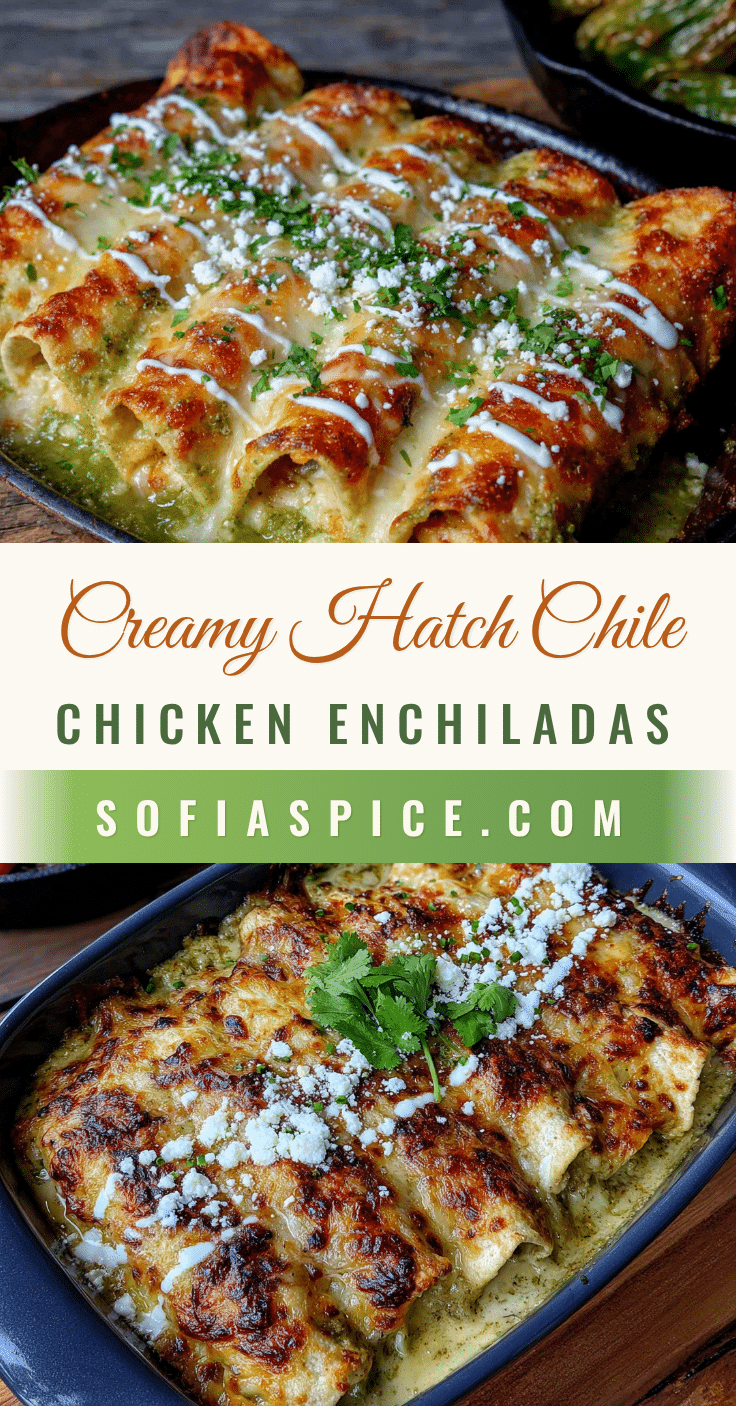
Creamy Hatch Green Chile Chicken Enchiladas: Easy Recipe

These Creamy Hatch Green Chile Chicken Enchiladas are a quick and easy weeknight dinner featuring a silky, tangy sauce with roasted Hatch chiles, tender chicken, and melty cheese. Perfect for entertaining or a comforting family meal.
- Prep Time: 15 minutes
- Cook Time: 25 minutes
- Total Time: 40 minutes
- Yield: 4 servings 1x
- Category: Main Course
- Cuisine: Mexican
Ingredients
- 3 tablespoons unsalted butter
- 3 tablespoons all-purpose flour
- 2 cups low-sodium chicken broth
- 1 cup sour cream (full-fat)
- 4 ounces cream cheese, softened
- 1 cup roasted Hatch green chiles, chopped
- 1 teaspoon garlic powder
- 1 teaspoon cumin
- 1/2 teaspoon salt, plus more to taste
- 1/4 teaspoon black pepper
- 3 cups cooked chicken, shredded (rotisserie chicken works well)
- 1/2 cup roasted Hatch green chiles, chopped (for filling)
- 2 ounces cream cheese, softened (for filling)
- 1 cup Monterey Jack cheese, shredded (for filling)
- Salt and pepper to taste (for filling)
- 8–10 medium flour tortillas
- 1 1/2 cups Monterey Jack cheese, shredded (for topping)
- Fresh cilantro, chopped (for garnish, optional)
- Green onions, sliced (for garnish)
Instructions
- Preheat your oven to 375°F (190°C). Lightly grease a 9×13-inch baking dish with butter or non-stick spray.
- Make the creamy green chile sauce: In a large skillet or saucepan over medium heat, melt the butter. Whisk in the flour and cook for about 1 minute, stirring constantly, until it forms a thick paste (roux).
- Slowly pour in the chicken broth while whisking continuously. Keep whisking until the mixture is smooth and starts to thicken, about 2-3 minutes.
- Reduce heat to low and stir in the sour cream, 4 ounces softened cream cheese, 1 cup chopped Hatch chiles, garlic powder, cumin, salt, and pepper. Whisk until melted and smooth. Taste and adjust seasoning if needed. Remove from heat and set aside.
- Prepare the filling: In a medium mixing bowl, combine the shredded chicken, 1/2 cup chopped Hatch chiles, 2 ounces softened cream cheese, and 1 cup shredded Monterey Jack cheese. Mix well and season with salt and pepper.
- Warm the tortillas: Microwave them wrapped in a damp paper towel for about 30 seconds, or warm them one by one in a dry skillet for about 15 seconds per side.
- Assemble the enchiladas: Spread about 1/2 cup of the creamy sauce on the bottom of the prepared baking dish. Take a warm tortilla, spoon about 1/4 cup of the chicken filling down the center, and roll it up tightly. Place seam-side down in the dish. Repeat with remaining tortillas and filling.
- Pour the remaining sauce over the top of the rolled enchiladas, spreading evenly. Sprinkle the remaining 1 1/2 cups of Monterey Jack cheese over the top.
- Bake for 20-25 minutes, until the cheese is melted and bubbly and the edges are just starting to brown. For extra color, broil for the last 2 minutes, watching closely.
- Let the enchiladas rest for 5-10 minutes before serving. Garnish with fresh cilantro and sliced green onions.
Notes
For best results, use room temperature cream cheese and sour cream to avoid lumps. Warm tortillas before rolling to prevent cracking. Let enchiladas rest after baking for cleaner slices. Can be assembled a day ahead and refrigerated; add 10 minutes to baking time.
Nutrition
- Serving Size: 2 enchiladas
- Calories: 520
- Sugar: 4
- Sodium: 780
- Fat: 28
- Saturated Fat: 16
- Carbohydrates: 34
- Fiber: 3
- Protein: 32
Keywords: Hatch green chile, chicken enchiladas, creamy enchiladas, easy dinner, weeknight meal, New Mexican cuisine


