It was 10:47 PM on a Tuesday in late October, and I was hit with the most ridiculous craving for something chocolatey, something festive, and something I absolutely did not have the energy to go to the store for. I had promised myself I’d make those elaborate witch hat cookies I’d seen all over Pinterest—you know, the ones with the perfectly piped frosting and the fancy chocolate curls? Yeah, that wasn’t happening. I didn’t have the fancy frosting tips. I didn’t have the special candy melts. But I did have a box of brownie mix that was about to expire, a bag of Hershey’s Kisses I’d bought for a baking project I never actually started, and a half-eaten bag of candy corn from my neighbor’s Halloween party. That’s when the idea arrived: what if I just made tiny brownie bites, stuck a chocolate kiss on top, and called them witch hats? I mean, honestly, it was either that or eat the candy corn straight from the bag while scrolling through TikTok, and let’s face it, I’ve been there too many times to count.
I remember standing in my kitchen in my pajamas, the only light coming from the stove hood, thinking about how sometimes the best recipes come from a place of desperation—or maybe just laziness disguised as creativity. The brownie mix was for a 9×13 pan, but I only had a mini muffin tin that I’d bought at a garage sale for two dollars. The chocolate kisses were slightly melted from sitting too close to the radiator. And the candy corn? Well, let’s just say it added a certain… rustic charm. I’m not going to pretend I didn’t burn my fingers trying to press the kisses into the hot brownies. I’m not going to pretend the first batch didn’t look more like sad, squashed spiders than elegant witch hats. But somewhere around midnight, with chocolate on my chin and a genuine smile on my face, I bit into one of these little guys and honestly, it was perfect. Not perfect looking—but perfect tasting. And isn’t that what matters?
These cozy witch hat brownie bites have become my go-to Halloween treat ever since. They’re the kind of recipe you make when you want to feel festive but don’t want to spend three hours in the kitchen. They’re for the nights when you just need something sweet, something fun, and something that doesn’t require a trip to the craft store. Maybe you’ve been there—standing in your kitchen at a weird hour, craving something specific, and having to make do with what you’ve got. If so, this recipe is for you. Let me show you how to turn a few simple ingredients into the coziest little Halloween treats that actually taste like a hug in chocolate form.
Why You’ll Love This Recipe
Listen, I’ve tested a lot of Halloween treats over the years. Some are too complicated. Some look amazing but taste like cardboard. And some just take forever. These witch hat brownie bites hit that sweet spot where cute meets delicious meets actually doable on a Tuesday night. Here’s why I keep coming back to them year after year:
- Quick & Easy: From start to finish, you’re looking at about 30 minutes. That’s faster than ordering takeout and way more satisfying.
- Simple Ingredients: Brownie mix, chocolate kisses, candy corn, and a few pantry staples. No weird ingredients you’ll never use again.
- Perfect for Halloween Parties: They’re bite-sized, they’re adorable, and they disappear faster than you’d expect. I brought them to a potluck last year and they were gone in ten minutes.
- Crowd-Pleaser: Kids love them. Adults love them. Even my friend who “doesn’t do Halloween” ate four of them without admitting it.
- Unbelievably Delicious: The fudgy brownie base with the creamy chocolate kiss on top? It’s a texture and flavor combo that just works. Add a hint of salt from the candy corn and you’ve got something special.
What makes this recipe different from all those other witch hat cookies out there? It’s the texture. Instead of a dry cookie base, you get a soft, fudgy brownie bite that stays moist for days. And instead of piping frosting for the hat brim, you use a simple ring of chocolate frosting that takes about ten seconds per brownie. It’s genius in its simplicity—no piping bags, no fancy tips, no stress. Just pure, cozy Halloween fun.
This recipe isn’t just good—it’s the kind that makes you close your eyes after the first bite. It’s comfort food reimagined for the spooky season. Healthier? Not really. But faster, easier, and with the same soul-soothing satisfaction that makes you feel like everything’s going to be okay. Perfect for impressing guests without stress, or turning a simple Tuesday night into something memorable.
What Ingredients You Will Need
This recipe uses simple, pantry-friendly ingredients to deliver maximum flavor with minimum fuss. Most of these are things you probably already have in your kitchen, especially if you’re the kind of person who keeps chocolate on hand for emergencies (which, let’s be honest, is all of us).
For the Brownie Bites
- 1 box (18 oz) brownie mix – I recommend Ghirardelli or Duncan Hines for the fudgiest texture. The box mix saves time and honestly, the results are just as good as homemade.
- 1/2 cup vegetable oil – Canola or avocado oil works too. Avoid olive oil—it has too strong a flavor.
- 2 large eggs – Room temperature works best for even mixing.
- 1/4 cup water – Or swap with strong brewed coffee for a deeper chocolate flavor (trust me on this one).
For the Witch Hats
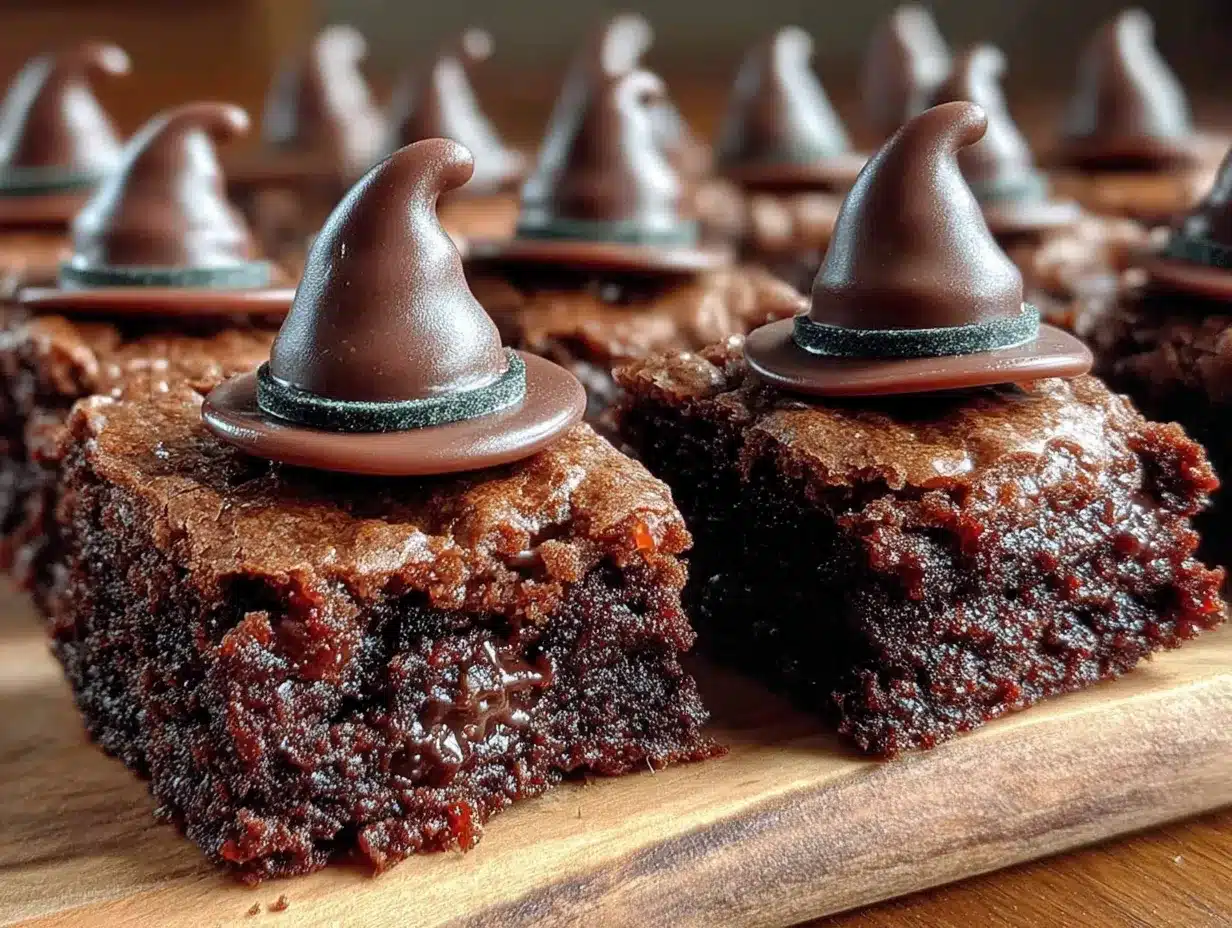
- 24 Hershey’s Kisses – Unwrapped and ready to go. I prefer milk chocolate, but dark chocolate or caramel-filled work beautifully too.
- 1/2 cup chocolate frosting – Store-bought is fine! I use Betty Crocker’s Rich & Creamy. It’s stable enough to hold the hats in place.
- 24 pieces candy corn – For the hatband. If you’re not a candy corn fan (I get it, they’re divisive), you can use orange M&Ms or small orange sprinkles instead.
Optional Decorations
- Green or orange sprinkles – For a festive touch.
- Edible glitter – Because why not? It’s Halloween.
- Pretzel sticks – If you want to make broomsticks to go alongside the hats.
A few ingredient notes from my years of testing: For the brownie mix, go with the “fudge” variety rather than “original” or “walnut.” The fudge version gives you that dense, chewy texture that holds up better when you press the kiss into it. And for the chocolate kisses, make sure they’re at room temperature. Cold kisses straight from the fridge will cause the brownie to crack when you press them in. I learned this the hard way—my first batch looked like a chocolate crime scene.
If you’re looking for substitutions, here’s what I’ve tried and tested: Use a gluten-free brownie mix if needed—just make sure it’s one that produces a fudgy rather than cakey texture. For a dairy-free version, use dairy-free chocolate kisses and frosting. And if you absolutely cannot find candy corn (which would be a travesty in October, but okay), small orange jelly beans work in a pinch.
Equipment Needed
You don’t need a fancy kitchen to make these witch hat brownie bites. Here’s what you’ll need:
- Mini muffin tin – This is non-negotiable. A standard 24-cup mini muffin tin is perfect. If you only have a 12-cup, you’ll need to bake in batches.
- Mixing bowl – Any medium bowl works. I use a glass one because it’s easy to see when everything’s combined.
- Whisk or spatula – For mixing the brownie batter. A whisk works faster, but a spatula is easier to scrape the sides.
- Small cookie scoop – This makes filling the muffin cups so much easier and less messy. A tablespoon works too.
- Cooling rack – Essential for letting the brownies cool evenly. If you don’t have one, a clean kitchen towel works in a pinch.
- Butter knife or offset spatula – For spreading the frosting. Nothing fancy needed.
- Piping bag or zip-top bag – For the frosting. I just use a zip-top bag with the corner snipped off. No need to buy special equipment.
A quick tip on the mini muffin tin: I’ve tried non-stick and regular, and honestly, both work fine as long as you grease them well. I use baking spray with flour—it’s my secret weapon against stuck brownies. If you’re using a silicone mini muffin pan, place it on a baking sheet first for stability. Silicone pans can be wobbly, and nobody wants lopsided witch hats.
Preparation Method
Alright, let’s make some witch hats! This is where the magic happens. I’ve broken it down into simple steps so you can follow along without stress. Put on some spooky music, pour yourself a warm drink, and let’s get baking.
Step 1: Preheat and Prep
Preheat your oven to 350°F (175°C). While it’s heating up, grease your mini muffin tin generously with baking spray or butter. I can’t stress this enough—don’t skimp on the greasing. Brownies have a tendency to stick, and you don’t want your witch hats falling apart when you try to remove them.
Step 2: Make the Brownie Batter
In a medium bowl, combine the brownie mix, vegetable oil, eggs, and water. Stir until just combined—about 30-40 strokes. Don’t overmix! Overmixing develops the gluten and makes the brownies tough instead of fudgy. You want to see a few tiny lumps in the batter. That’s a good sign. The batter should be thick and glossy, like a rich chocolate pudding.
Step 3: Fill the Muffin Cups
Using your cookie scoop or a tablespoon, fill each mini muffin cup about 3/4 full. This is important—if you fill them too full, they’ll dome over the top and you won’t have a flat surface for the hat. I usually use about 1 tablespoon of batter per cup. Don’t worry if they look small; they’ll puff up slightly as they bake.
Step 4: Bake the Brownie Bites
Bake for 10-12 minutes, or until the edges are set and a toothpick inserted in the center comes out with a few moist crumbs. The centers should look slightly underdone—they’ll continue cooking as they cool. Overbaking is the enemy of fudgy brownies. Trust me, I’ve made that mistake more times than I’d like to admit. The first time I made these, I left them in for 15 minutes and ended up with brownie hockey pucks.
Step 5: Create the Hat Shape
Here’s the crucial step: Immediately after removing the brownies from the oven, while they’re still hot, gently press a Hershey’s Kiss into the center of each brownie bite. The kiss should be pointed side up, flat base down. Press just until the base is level with the top of the brownie. Be careful—the brownies are hot! I use a clean kitchen towel to hold the kisses. If the brownies have domed too much, use the back of a spoon to gently flatten them before adding the kiss.
Step 6: Cool Completely
Let the brownie bites cool in the pan for 10 minutes, then transfer them to a cooling rack. They need to cool completely before you add the frosting—about 30 minutes. If you try to frost them while they’re warm, the frosting will melt into a gooey mess. I learned this the hard way during a late-night baking session when I was too impatient to wait.
Step 7: Add the Hatband
Once the brownies are completely cool, it’s time to decorate. Spoon the chocolate frosting into a small zip-top bag and snip off a tiny corner. Pipe a ring of frosting around the base of each chocolate kiss, right where it meets the brownie. This creates the “brim” of the witch hat. Don’t worry about being perfect—the slightly messy look adds to the charm.
Step 8: Attach the Candy Corn
While the frosting is still wet, press a piece of candy corn onto the frosting ring. Position it so the white tip points to the left or right, like a buckle on a hat. Press gently so it stays in place. Let the frosting set for about 10 minutes before serving.
Step 9: Serve and Enjoy
Arrange your witch hat brownie bites on a festive plate or platter. They’re best enjoyed the same day, but they’ll keep for up to 3 days in an airtight container. I like to serve them with a glass of cold milk or a warm cup of coffee—the contrast is perfect.
Cooking Tips & Techniques
Over the years, I’ve made these witch hat brownie bites more times than I can count, and I’ve picked up a few tricks along the way. Here are my best tips for getting perfect results every time:
Don’t overbake. This is the number one mistake I see people make. Brownie bites continue to cook from residual heat after you take them out of the oven. Pull them when they still look slightly underdone in the center. The toothpick test should show moist crumbs, not wet batter, but definitely not clean either.
Use a timer. I know this sounds obvious, but I’ve lost count of how many times I’ve gotten distracted by my phone or a podcast and let the brownies bake too long. Set a timer for 10 minutes and check them. Every oven runs differently, so adjust accordingly.
Work quickly with the kisses. You have about 2-3 minutes after the brownies come out of the oven to press in the kisses before the brownies start to set. If you wait too long, the kisses won’t stick and will just fall off. If you’re making a large batch, do it in stages—bake one pan, add kisses, then bake the next pan.
Let them cool properly. I know it’s tempting to rush this step, but patience pays off. If you try to remove the brownie bites from the pan too early, they’ll fall apart. If you try to frost them while they’re warm, you’ll end up with a mess. Trust the process.
Prep your kisses beforehand. Unwrap all 24 Hershey’s Kisses before you start baking. There’s nothing worse than fumbling with foil wrappers while your brownies are cooling and the window for adding kisses is closing. I learned this the hard way during a particularly ambitious Halloween baking session.
Use room temperature ingredients. Cold eggs and cold oil can make the batter lumpy and affect the texture. If you forgot to take your eggs out of the fridge, place them in a bowl of warm water for 5 minutes before using.
Variations & Adaptations
One of the things I love about this recipe is how easy it is to customize. Here are some variations I’ve tried and loved:
Peanut Butter Witch Hats
Swap the chocolate kisses for Reese’s Peanut Butter Cups Miniatures. Press them in the same way, flat side down. The combination of chocolate brownie and peanut butter is absolutely divine. I made these for a Halloween party last year and they were the first thing to disappear.
White Chocolate Witches
Use white chocolate kisses instead of milk chocolate. The white chocolate against the dark brownie creates a striking contrast. Add a drop of orange food coloring to the frosting for a festive orange brim. These look especially magical on a dark plate.
Gluten-Free Version
Use your favorite gluten-free brownie mix. I’ve tested this with King Arthur’s Gluten-Free Brownie Mix and the results were fantastic. Just make sure to check that your chocolate kisses and frosting are also gluten-free. Most are, but it’s always worth double-checking.
Vegan Option
Use a vegan brownie mix (like Duncan Hines Simple Mornings) and replace the eggs with flax eggs (1 tablespoon ground flaxseed + 3 tablespoons water per egg). Use dairy-free chocolate kisses and frosting. I’ve made these for a vegan friend and she said they were the best Halloween treats she’d had in years.
Spooky Spider Version
Instead of witch hats, turn these into spiders! Skip the candy corn and use eight pretzel sticks for legs (four on each side). Use a dab of frosting to attach two candy eyes. My nephew went crazy for these last Halloween—he said they were “spooky but not too spooky.”
Serving & Storage Suggestions
These witch hat brownie bites are best served at room temperature. The brownie is soft and fudgy, the chocolate kiss is creamy, and the candy corn adds a satisfying crunch. I like to arrange them on a black or orange platter for maximum Halloween vibes. Add a few plastic spiders or fake cobwebs around the platter for extra flair.
For beverages, these pair beautifully with:
- Cold milk – The classic choice. The creaminess of the milk balances the rich chocolate.
- Hot coffee – The bitterness of coffee cuts through the sweetness perfectly.
- Hot chocolate – For the ultimate cozy Halloween experience. Add a dollop of whipped cream and some orange sprinkles.
- Apple cider – The tartness of the cider complements the chocolate in a surprising way.
For storage, place the brownie bites in an airtight container at room temperature. They’ll keep for up to 3 days, though honestly, they rarely last that long in my house. If you need to stack them, place a sheet of wax paper between layers to prevent the kisses from getting smushed. Do not refrigerate them—the cold temperature will dry out the brownies and make the kisses lose their shine.
These also freeze beautifully! Place the undecorated brownie bites (without the kisses and frosting) in a freezer-safe container for up to 3 months. When you’re ready to serve, thaw them at room temperature, then add the kisses and decorations. This is a great time-saver if you’re planning ahead for a Halloween party.
One thing I’ve noticed: the flavors actually get better after a day. The chocolate kiss and the brownie sort of meld together, creating this unified chocolate experience. So if you can resist eating them all immediately, they’re even better the next day.
Nutritional Information & Benefits
Let’s be real—these are a treat, not a health food. But that doesn’t mean we can’t talk about what’s in them. Here’s the estimated nutritional breakdown per brownie bite (based on 24 servings):
- Calories: 145
- Total Fat: 7g
- Saturated Fat: 3g
- Cholesterol: 15mg
- Sodium: 95mg
- Total Carbohydrates: 20g
- Dietary Fiber: 1g
- Sugars: 14g
- Protein: 2g
Now, for the silver lining: dark chocolate (which is what’s in most brownie mixes and chocolate kisses) contains antioxidants called flavonoids that may support heart health. Cocoa also contains compounds that can improve mood—which is probably why I always feel better after eating one of these. The candy corn? Well, it’s mostly sugar, but hey, it’s Halloween. Everything in moderation, right?
If you’re watching your sugar intake, you can use a sugar-free brownie mix and sugar-free chocolate kisses. The texture will be slightly different, but the taste is still great. For a lower-fat option, replace the oil with unsweetened applesauce—though I’ll warn you, the texture will be more cake-like than fudgy.
These brownie bites are vegetarian-friendly but not vegan (unless you make the substitutions mentioned above). They contain wheat, dairy, and eggs, so they’re not suitable for those with allergies to those ingredients. Always check labels if you’re serving people with dietary restrictions.
Conclusion
Look, I know there are a million Halloween treat recipes out there. Some are fancier. Some are more elaborate. Some require piping skills I’ll never have. But these cozy witch hat brownie bites? They’re the ones I keep coming back to year after year. They’re the ones I make when I want to feel festive without the stress. They’re the ones that make my kitchen smell like chocolate and my heart feel full.
What I love most about this recipe is how forgiving it is. You don’t need perfect technique. You don’t need expensive ingredients. You just need a little time, a little chocolate, and a willingness to have fun. The first time I made these, they were lopsided and messy and absolutely perfect. And every time I make them since, they remind me of that late-night kitchen session where I improvised my way to something wonderful.
So go ahead—give these a try. Make them for your Halloween party. Make them for your kids. Make them for yourself on a quiet Tuesday night when you need a little comfort. And when you do, I’d love to hear about it. Leave a comment below and tell me how yours turned out. Did you try any variations? Did your kids help decorate? Did you eat three before they made it to the platter? (No judgment here—I’ve been there.)
Happy Halloween, friends. May your brownies be fudgy, your kisses be chocolatey, and your witch hats be delightfully imperfect.
Frequently Asked Questions
Can I use homemade brownie batter instead of a box mix?
Absolutely! If you have a favorite homemade brownie recipe, go for it. Just make sure it’s a fudgy recipe rather than a cakey one. The fudgy texture holds the chocolate kiss better and doesn’t crumble when you bite into it. My favorite homemade version uses melted butter and cocoa powder for that rich, dense texture.
Why did my chocolate kisses fall off the brownies?
This usually happens for one of two reasons: either the brownies had cooled too much before you added the kisses, or you didn’t press them in firmly enough. The kisses need to be added while the brownies are still hot so they can sink into the surface slightly. If you missed that window, you can use a dab of frosting as “glue” to hold them in place.
Can I make these ahead of time for a party?
Yes! You have two options. You can make the brownie bites up to 3 days in advance and store them in an airtight container at room temperature. Add the kisses and decorations the day of the party for the freshest look. Or you can freeze the undecorated brownie bites for up to 3 months and decorate them after thawing.
My brownie bites came out too cakey. What went wrong?
You likely overbaked them or overmixed the batter. Brownie bites should be pulled from the oven when the edges are set but the center still looks slightly underdone. They’ll continue cooking as they cool. Also, be gentle when mixing the batter—overmixing incorporates too much air and creates a cake-like texture.
Can I use something other than candy corn for the hatband?
Of course! While candy corn is traditional for witch hats, you can use orange M&Ms, small orange jelly beans, or even a strip of orange fruit leather cut into small pieces. For a non-candy option, try using orange sprinkles or a small dot of orange frosting. Get creative—that’s half the fun of Halloween baking!
Pin This Recipe!
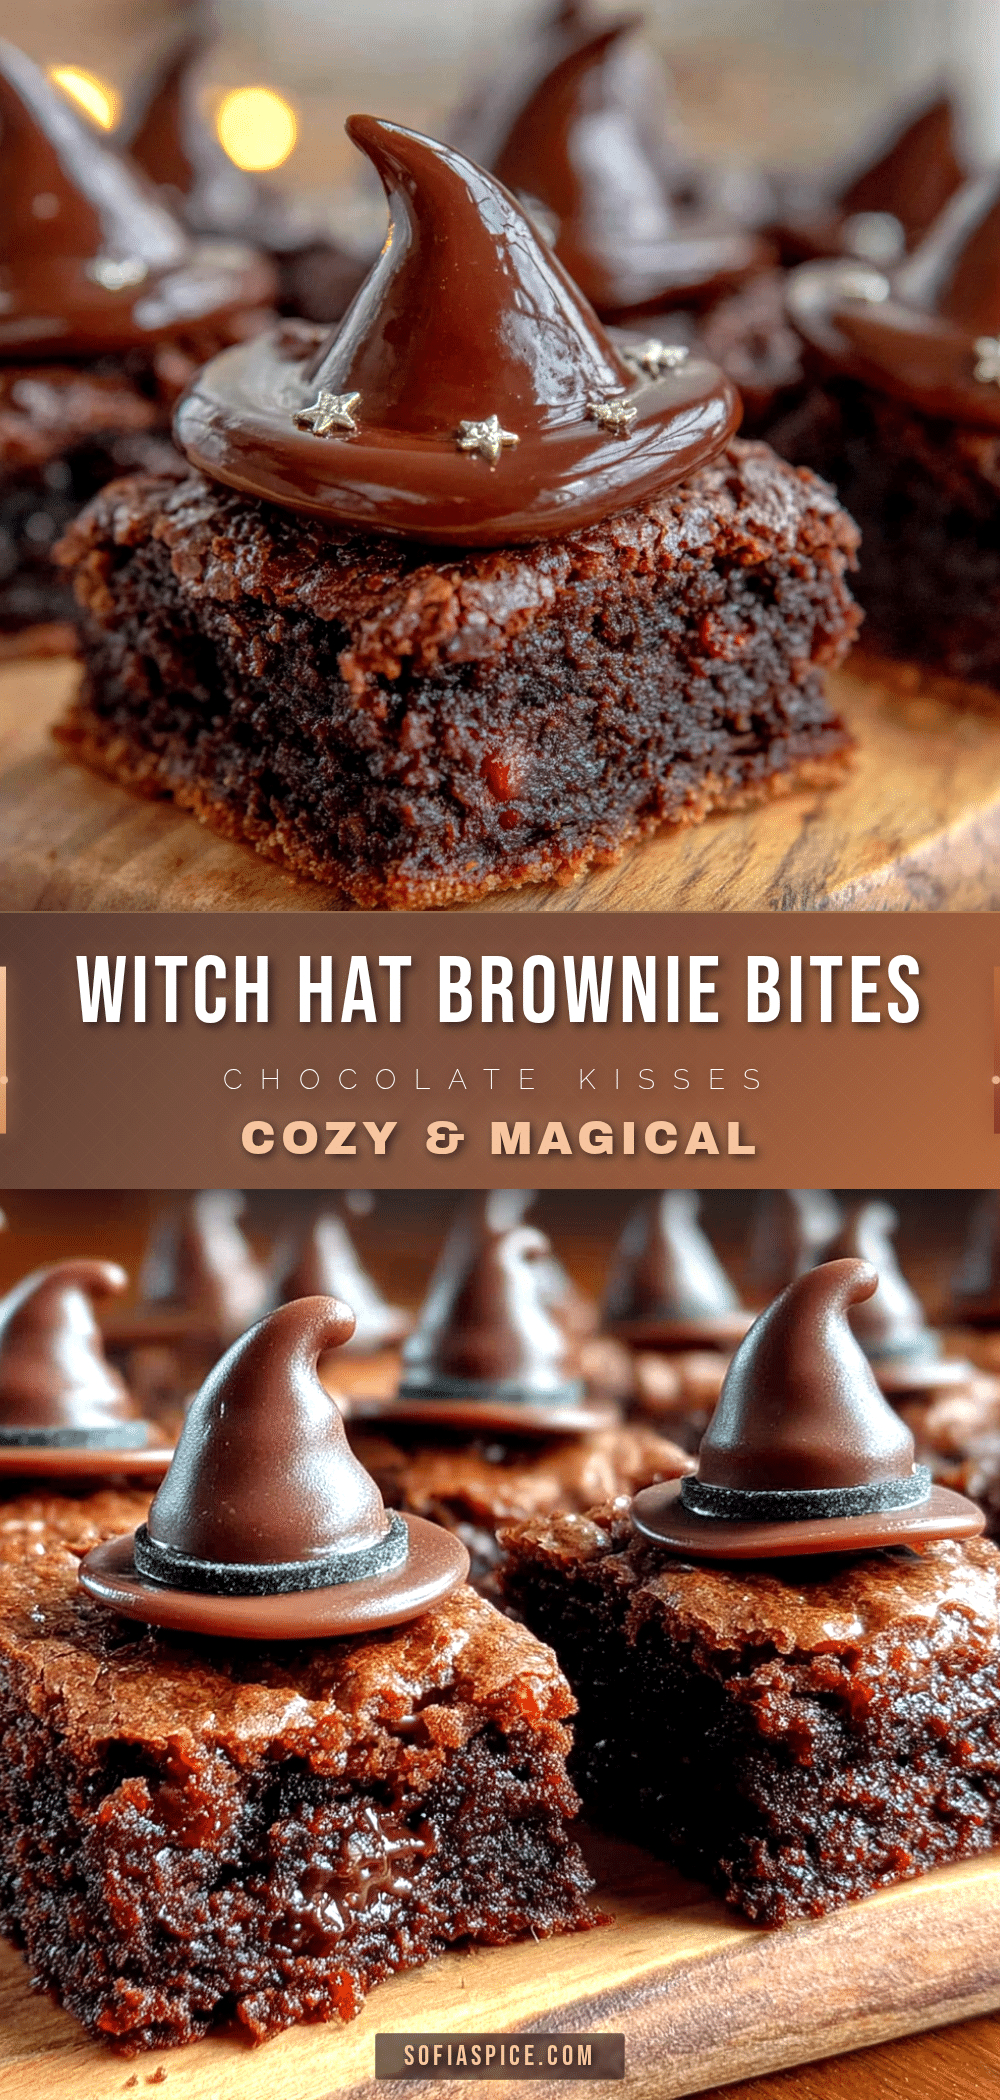
Cozy Witch Hat Brownie Bites: Easy Halloween Treat with Chocolate Kisses
These fudgy brownie bites topped with a chocolate kiss and candy corn hatband are the perfect easy Halloween treat. Ready in about 30 minutes with simple ingredients, they’re a festive and delicious crowd-pleaser.
- Prep Time: 15 minutes
- Cook Time: 12 minutes
- Total Time: 30 minutes
- Yield: 24 servings 1x
- Category: Dessert
- Cuisine: American
Ingredients
- 1 box (18 oz) brownie mix (fudge variety recommended)
- 1/2 cup vegetable oil (canola or avocado oil work too)
- 2 large eggs (room temperature)
- 1/4 cup water (or strong brewed coffee for deeper flavor)
- 24 Hershey’s Kisses (milk chocolate, dark chocolate, or caramel-filled; room temperature)
- 1/2 cup chocolate frosting (store-bought, like Betty Crocker Rich & Creamy)
- 24 pieces candy corn (or orange M&Ms, small orange jelly beans, or orange sprinkles)
Instructions
- Preheat oven to 350°F (175°C). Generously grease a 24-cup mini muffin tin with baking spray or butter.
- In a medium bowl, combine brownie mix, vegetable oil, eggs, and water. Stir until just combined (about 30-40 strokes). Do not overmix; a few tiny lumps are fine.
- Using a small cookie scoop or tablespoon, fill each mini muffin cup about 3/4 full (about 1 tablespoon of batter per cup).
- Bake for 10-12 minutes, or until edges are set and a toothpick inserted in the center comes out with a few moist crumbs. Do not overbake.
- Immediately after removing from the oven, while brownies are still hot, gently press a Hershey’s Kiss into the center of each brownie bite, pointed side up, flat base down, until level with the top. Use a clean kitchen towel to hold the kisses if needed.
- Let brownie bites cool in the pan for 10 minutes, then transfer to a cooling rack to cool completely (about 30 minutes).
- Once completely cool, spoon chocolate frosting into a small zip-top bag and snip off a tiny corner. Pipe a ring of frosting around the base of each chocolate kiss where it meets the brownie to create the hat brim.
- While frosting is still wet, press a piece of candy corn onto the frosting ring, white tip pointing to the side like a buckle. Let frosting set for about 10 minutes before serving.
- Arrange on a festive plate and serve. Best enjoyed the same day, but can be stored in an airtight container at room temperature for up to 3 days.
Notes
Don’t overbake; brownies continue to cook from residual heat. Work quickly when adding kisses—you have about 2-3 minutes before brownies set. Unwrap all kisses before baking. Use room temperature ingredients for best texture. For a gluten-free version, use a gluten-free brownie mix. For a dairy-free version, use dairy-free chocolate kisses and frosting. For a vegan option, use a vegan brownie mix, flax eggs, and dairy-free chocolate.
Nutrition
- Serving Size: 1 brownie bite
- Calories: 145
- Sugar: 14
- Sodium: 95
- Fat: 7
- Saturated Fat: 3
- Carbohydrates: 20
- Fiber: 1
- Protein: 2
Keywords: witch hat brownie bites, Halloween treats, easy Halloween dessert, brownie bites with chocolate kisses, fudgy brownie bites, no-bake Halloween treat, quick Halloween recipe


