Third batch in three days, and this time I let the butter go a shade darker than I usually dare. The kitchen smelled like toasted hazelnuts and something almost caramel-like, which is funny because there isn’t a drop of sugar in this soup that isn’t coming from the squash itself. I stood there stirring, watching the color shift from pale gold to deep amber, and I realized I’d been holding my breath. That’s the thing about brown butter—it demands your full attention, and it rewards you in ways that feel almost unfair for something so simple.
I didn’t set out to make this soup three times in one week. The first batch was supposed to be a quick lunch, something to use up the butternut squash sitting on my counter that I’d bought on a whim at the farmers market. But after that first spoonful, I couldn’t stop thinking about it. The second batch, I added more garlic. The third batch, I played with the brown butter timing. And somewhere between the second and third roasting trays, I realized this wasn’t just a good soup—it was the kind of recipe that makes you understand why some dishes become fall traditions.
This Cozy Roasted Butternut Squash Soup with Brown Butter has that rare quality where every element works in harmony. The squash gets caramelized in the oven until it’s sweet and almost jammy. The aromatics soften and fill your kitchen with that unmistakable cozy scent. And then there’s the brown butter, drizzled on top at the very end, adding this nutty, toasty depth that makes the whole thing feel special without trying too hard. It’s the soup I kept coming back to, and I think you will too.
Why You’ll Love This Recipe
Let me be honest with you—I’ve tested a lot of butternut squash soup recipes over the years. Some were too watery. Others relied on heavy cream to cover up bland flavor. This one is different because it lets the ingredients do the heavy lifting.
- Roasting is the secret weapon : Instead of boiling the squash (which dilutes flavor), we roast it until the edges caramelize. This concentrates the natural sweetness and adds a depth you just can’t get any other way.
- Brown butter changes everything : A few minutes of patience transforms ordinary butter into liquid gold. It adds a nutty, toasty complexity that makes this soup taste like it simmered for hours—even though it comes together in under an hour.
- Simple ingredients, big payoff : You don’t need a specialty grocery store for this one. Butternut squash, onion, garlic, broth, butter, and a few pantry spices are all it takes.
- Perfect for meal prep : This soup tastes even better the next day, and it freezes beautifully. Make a big batch on Sunday and you’ve got cozy lunches or quick dinners all week.
- Naturally creamy without cream : The roasted squash blends into the silkiest texture all on its own. No heavy cream needed—just a good blender and a little patience.
This isn’t just another fall soup recipe. It’s the one I’ve made three times in a week because I couldn’t stop tweaking it, and now I’m confident it’s exactly right. The kind of soup that makes you close your eyes on that first bite.
What Ingredients You Will Need
This recipe relies on simple, wholesome ingredients that work together to create something far greater than the sum of their parts. Most of these are pantry staples or easy to find at any grocery store.
- Butternut squash (1 large, about 3 pounds) : Look for one that feels heavy for its size with a matte, beige-colored skin. You’ll peel, seed, and cube it into 1-inch pieces. For convenience, many stores sell pre-cut butternut squash cubes, which work perfectly here.
- Yellow onion (1 medium, roughly chopped) : Adds a savory base note. A sweet onion like Vidalia works too if you have one on hand.
- Garlic cloves (4-5, smashed) : Roasting garlic mellows its sharpness and brings out a sweet, almost buttery flavor. Don’t skip this—it’s essential.
- Olive oil (2 tablespoons) : For roasting the vegetables. Use a good-quality extra virgin olive oil for best flavor.
- Vegetable broth (4 cups) : Use a low-sodium brand so you can control the salt level. Chicken broth works great too if you’re not keeping it vegetarian.
- Unsalted butter (4 tablespoons) : This is for the brown butter finish. Use unsalted so you can season the soup to your taste. I recommend a European-style butter like Kerrygold for the richest flavor.
- Fresh thyme (3-4 sprigs) : Adds an earthy, slightly floral note that pairs beautifully with the squash. Dried thyme works in a pinch—use about 1 teaspoon.
- Maple syrup (1 tablespoon, optional) : A tiny touch of sweetness enhances the squash’s natural flavor. Leave it out if you prefer a more savory soup.
- Salt and black pepper (to taste) : Simple seasonings that let the main ingredients shine.
- Optional garnishes : Toasted pumpkin seeds, a swirl of heavy cream or coconut milk, fresh thyme leaves, or a sprinkle of red pepper flakes for heat.
Ingredient swap notes : If butternut squash isn’t available, you can substitute with honeynut squash, buttercup squash, or even sugar pumpkin. For a dairy-free version, use a high-quality vegan butter for the brown butter finish—just watch it carefully as it can burn faster than dairy butter.
Equipment Needed
You don’t need a fancy kitchen to make this soup. Here’s what you’ll actually use:
- Large baking sheet : A rimmed sheet pan works best to catch any juices from the roasting vegetables. Line it with parchment paper for easier cleanup.
- Chef’s knife and cutting board : A sharp knife makes quick work of peeling and cubing the squash. If your knife is dull, this step becomes frustrating fast—trust me on this one.
- Vegetable peeler : A Y-shaped peeler is my favorite for butternut squash because it glides around the curves more easily than a standard straight peeler.
- Large pot or Dutch oven : A 5- to 6-quart pot is ideal for simmering the soup. A Dutch oven works beautifully because it retains heat evenly.
- Immersion blender or countertop blender : An immersion blender lets you blend the soup right in the pot, which means less cleanup. A countertop blender works too—just blend in batches and be careful with hot liquids.
- Small skillet : For browning the butter. A light-colored skillet helps you see the color change more easily.
- Measuring cups and spoons : Accuracy matters, especially with the broth ratio.
If you don’t have an immersion blender, no worries. A regular blender works perfectly—just let the soup cool slightly before blending, and never fill the blender more than halfway with hot liquid. Remove the center cap from the lid and cover it with a kitchen towel to let steam escape safely.
Preparation Method

This soup comes together in about 45 minutes from start to finish, and most of that time is hands-off roasting. Here’s how to do it.
- Preheat your oven to 400°F (200°C) . Line a large baking sheet with parchment paper for easy cleanup.
- Prepare the butternut squash : Using a sharp vegetable peeler, remove the skin from the squash. Cut off the stem end and the bottom. Slice the squash in half lengthwise and scoop out the seeds with a spoon. Cut the flesh into 1-inch cubes. You should end up with about 6 cups of cubed squash.
- Roast the vegetables : On the prepared baking sheet, toss the cubed squash, chopped onion, and smashed garlic cloves with olive oil, salt, and pepper. Spread everything in a single layer—crowding the pan will steam the vegetables instead of roasting them. Roast for 25-30 minutes, flipping halfway through, until the squash is tender and the edges are starting to caramelize.
- Simmer the soup base : While the vegetables roast, bring the vegetable broth to a gentle simmer in your large pot or Dutch oven. Add the fresh thyme sprigs and let them infuse the broth for about 10 minutes. Remove the thyme sprigs before adding the roasted vegetables.
- Combine and blend : Add the roasted squash, onion, and garlic to the pot with the broth. Use an immersion blender directly in the pot to blend until completely smooth. If using a countertop blender, work in batches and hold the lid firmly with a kitchen towel. The soup should be velvety and thick but still pourable. If it’s too thick, add more broth or water a quarter-cup at a time until it reaches your desired consistency.
- Season and finish : Stir in the maple syrup if using. Taste and adjust salt and pepper. Keep the soup warm over low heat while you make the brown butter.
- Make the brown butter : In a small skillet over medium heat, melt the butter. Swirl the pan occasionally as it melts. The butter will foam up, then the foam will subside, and you’ll see small brown specks forming at the bottom. This happens quickly—about 3-4 minutes total. The moment the butter smells nutty and turns a deep amber color, remove it from the heat immediately. Pour it into a heat-safe bowl to stop the cooking process.
- Serve : Ladle the soup into bowls. Drizzle each serving with about a tablespoon of brown butter. Garnish with toasted pumpkin seeds, fresh thyme leaves, or a swirl of cream if you like.
Sensory cues to watch for : When the squash is done roasting, it should be fork-tender and the edges should look slightly browned and caramelized. The kitchen will smell sweet and savory at the same time. When the brown butter is ready, the color should be the shade of a well-worn penny—not dark brown, but definitely not pale yellow anymore. And the smell? It’s unmistakable. Toasty, nutty, almost like shortbread cookies baking.
Cooking Tips & Techniques
I learned a few things from making this soup three times in one week, and I want to share them so you don’t make the same mistakes I did.
Don’t rush the roasting step. The first time I made this, I pulled the squash out of the oven as soon as it was fork-tender. The soup was good, but it wasn’t great. The second time, I let the squash roast an extra five minutes until the edges were truly caramelized—and the difference was night and day. That extra time concentrates the sugars and adds a depth of flavor that makes the soup taste like it’s been simmering all afternoon.
Watch the brown butter like a hawk. Brown butter goes from perfect to burnt in about 15 seconds. I learned this the hard way when I walked away to answer a text message. The butter was fine one minute, and the next, it was smoking and smelled bitter. Stay at the stove, swirl the pan constantly, and remove it from heat the second it turns amber. Pour it into a separate bowl immediately—the residual heat from the pan will keep cooking it if you leave it in there.
Season in layers. Add a pinch of salt to the vegetables before roasting, then season the soup again after blending. This builds flavor gradually rather than dumping it all in at the end. I like to finish with a tiny pinch of flaky sea salt right before serving—it makes the flavors pop.
If your soup is too thick, don’t panic. Just add more broth or water a little at a time until it reaches the consistency you want. If it’s too thin, let it simmer uncovered for a few minutes to reduce and concentrate the flavor.
Multitasking tip : While the squash roasts, you can prep your garnishes, set the table, or make a batch of easy no-knead sourdough discard focaccia bread for dipping. That’s my favorite way to serve this soup—the focaccia soaks up every last drop of the brown butter.
Variations & Adaptations
This soup is incredibly flexible. Here are some ways to make it your own.
Spicy version : Add a pinch of red pepper flakes or a diced jalapeño to the roasting pan with the vegetables. The heat cuts through the sweetness beautifully. I tried this with the second batch and it was fantastic—just enough warmth to keep things interesting without overwhelming the squash.
Coconut curry twist : Swap one cup of the vegetable broth for full-fat coconut milk, and add 1 tablespoon of curry powder to the roasting vegetables. The coconut milk makes the soup extra creamy, and the curry powder adds warmth and complexity. This version is my go-to when I want something a little more exotic.
Dairy-free option : Use a high-quality vegan butter for the brown butter finish. I’ve tested this with Miyoko’s European-style cultured vegan butter, and it browns beautifully. The flavor is slightly different but still delicious.
Slow cooker method : Toss the cubed squash, onion, garlic, and olive oil in your slow cooker. Cook on low for 6-7 hours or high for 3-4 hours, then transfer everything to a pot and blend with the broth. Make the brown butter right before serving.
Add some protein : Top each bowl with crispy bacon bits or shredded rotisserie chicken for a heartier meal. The salty, savory elements balance the sweetness of the soup perfectly.
If you’re looking for more fall-inspired recipes, try these easy soft pumpkin spice snickerdoodle cookies for dessert—they pair beautifully with the cozy vibes of this soup.
Serving & Storage Suggestions
This soup is best served hot, right after you’ve drizzled the brown butter on top. The contrast between the warm, silky soup and the nutty butter is something you have to experience fresh.
Serving ideas : Ladle the soup into wide, shallow bowls so you can see the brown butter swirling on top. Garnish with toasted pumpkin seeds for crunch, a few fresh thyme leaves for color, and a crack of black pepper. A swirl of heavy cream or coconut milk adds a beautiful marbled effect if you’re feeling fancy.
What to serve alongside : A crusty baguette or easy no-knead sourdough discard focaccia bread is perfect for dipping. A simple green salad with a tangy vinaigrette balances the richness of the soup. For a complete fall meal, serve it alongside a pumpkin pie cheesecake bar with pecan crust for dessert—trust me, it’s a winning combo.
Storage instructions : Let the soup cool completely before transferring it to an airtight container. It will keep in the refrigerator for up to 5 days. The flavors actually deepen and meld together overnight, so it often tastes even better the next day.
Freezing instructions : This soup freezes beautifully. Pour cooled soup into freezer-safe containers or zip-top bags, leaving about an inch of headroom for expansion. It will keep for up to 3 months. Thaw overnight in the refrigerator before reheating.
Reheating tips : Reheat the soup gently on the stovetop over medium-low heat, stirring occasionally. If it thickens too much after storage, add a splash of broth or water to thin it out. Make fresh brown butter for serving—it only takes a few minutes and makes a huge difference.
Nutritional Information & Benefits
This soup is as nourishing as it is delicious. Here’s what you’re getting in each serving (approximate values based on 6 servings):
- Calories : 210 per serving
- Fat : 12g (mostly from the olive oil and brown butter)
- Carbohydrates : 26g
- Fiber : 5g
- Protein : 3g
- Vitamin A : Over 300% of your daily value (from the butternut squash)
- Vitamin C : 35% of your daily value
- Potassium : 15% of your daily value
Butternut squash is packed with beta-carotene, which your body converts into vitamin A for healthy vision and immune function. The fiber content helps keep you full and supports digestive health. And here’s a fun fact—roasting the squash actually makes some of its antioxidants more bioavailable, so your body can absorb them more easily.
Dietary considerations : This recipe is naturally vegetarian and gluten-free. To make it vegan, use a vegan butter for the brown butter finish. It’s also relatively low in added sugar—just a touch of maple syrup that you can leave out if you prefer.
Conclusion
This Cozy Roasted Butternut Squash Soup with Brown Butter is the kind of recipe that becomes a fall staple the moment you make it. It’s simple enough for a busy weeknight but impressive enough for company. The roasting brings out the squash’s natural sweetness, the blending makes it silky smooth, and that brown butter on top? It’s the finishing touch that turns a good soup into something you’ll crave all season long.
I made this soup three times in one week because I couldn’t stop tweaking it—and now I’m confident it’s exactly right. But here’s the thing: you should make it your own. Add more garlic if you love garlic. Throw in a pinch of cayenne if you want heat. Swap the thyme for sage. This recipe is a starting point, and I hope you’ll use it as a jumping-off point for your own cozy creations.
If you make this soup, I’d love to hear about it. Leave a comment below and let me know how it turned out—did you add any twists? What did you serve alongside it? Your feedback helps other readers and inspires me to keep creating recipes for you. Until next time, happy cooking, and may your kitchen always smell like brown butter.
Frequently Asked Questions
Can I use pre-cut butternut squash from the store?
Absolutely. Pre-cut squash cubes save time and work perfectly in this recipe. Just keep in mind that pre-cut squash can dry out faster than whole squash, so check it a few minutes early when roasting.
How do I peel butternut squash without hurting myself?
Use a sharp Y-shaped vegetable peeler—it glides around the curves much better than a standard peeler. If the squash is very hard, microwave it whole for 2-3 minutes to soften the skin slightly. Let it cool before peeling.
Can I make this soup ahead of time?
Yes, and it actually tastes better the next day. Make the soup up to 5 days ahead and store it in the refrigerator. Make the brown butter fresh right before serving for the best flavor.
My soup turned out too thin. How do I fix it?
Let it simmer uncovered over medium-low heat for 10-15 minutes. The liquid will evaporate and the soup will thicken naturally. Stir occasionally to prevent sticking.
Can I freeze this soup with the brown butter already on top?
I don’t recommend it. The brown butter can separate and become grainy when frozen and reheated. Instead, freeze the soup on its own and make fresh brown butter when you’re ready to serve. It only takes 3-4 minutes and makes a huge difference in flavor and texture.
Pin This Recipe!
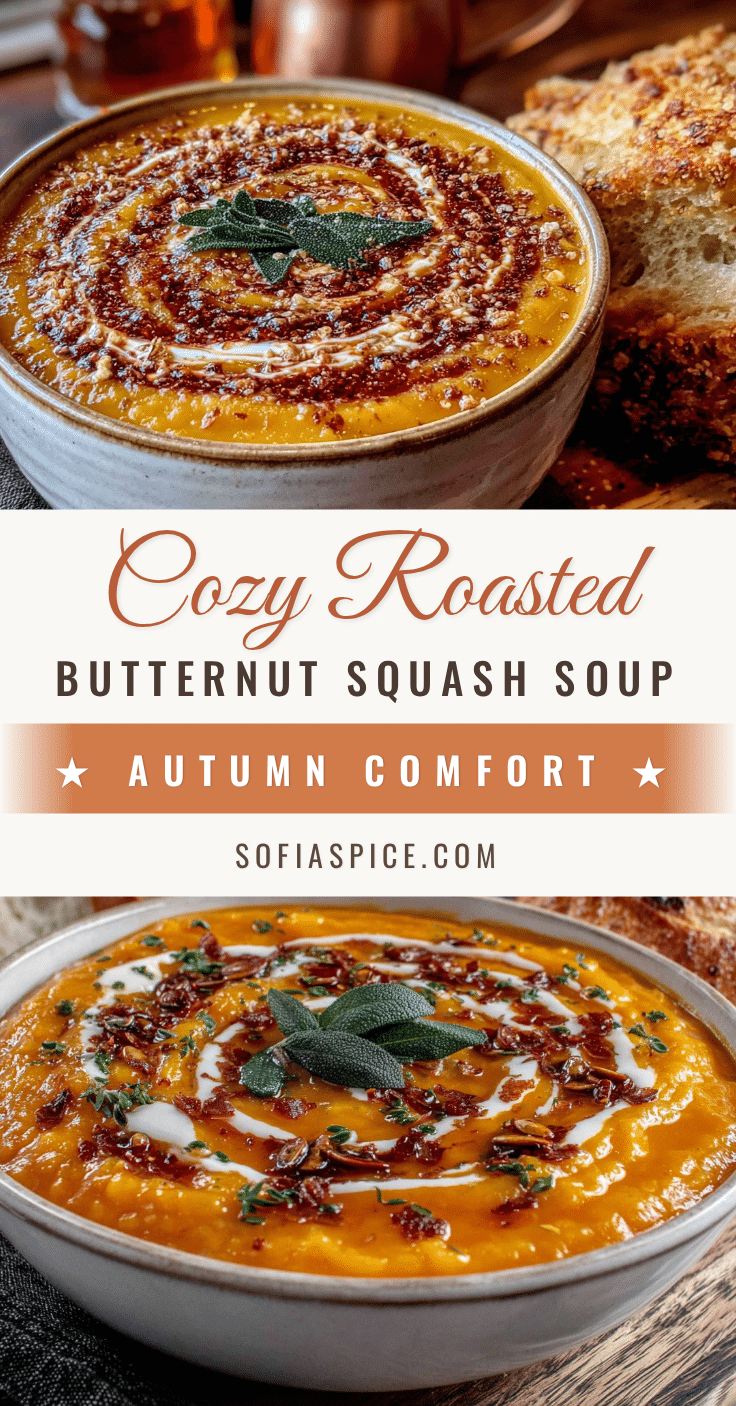
Cozy Roasted Butternut Squash Soup with Brown Butter

This velvety roasted butternut squash soup is elevated with a nutty brown butter drizzle. Roasting the squash caramelizes its natural sugars, creating a deeply flavorful soup that’s naturally creamy without any heavy cream.
- Prep Time: 15 minutes
- Cook Time: 30 minutes
- Total Time: 45 minutes
- Yield: 6 servings 1x
- Category: Soup
- Cuisine: American
Ingredients
- 1 large butternut squash (about 3 pounds), peeled, seeded, and cubed into 1-inch pieces
- 1 medium yellow onion, roughly chopped
- 4–5 garlic cloves, smashed
- 2 tablespoons olive oil
- 4 cups low-sodium vegetable broth
- 4 tablespoons unsalted butter (preferably European-style)
- 3–4 sprigs fresh thyme (or 1 teaspoon dried thyme)
- 1 tablespoon maple syrup (optional)
- Salt and black pepper to taste
- Optional garnishes: toasted pumpkin seeds, heavy cream or coconut milk, fresh thyme leaves, red pepper flakes
Instructions
- Preheat your oven to 400°F (200°C). Line a large baking sheet with parchment paper.
- Prepare the butternut squash: Using a sharp vegetable peeler, remove the skin. Cut off the stem end and the bottom. Slice the squash in half lengthwise and scoop out the seeds. Cut the flesh into 1-inch cubes (about 6 cups).
- On the prepared baking sheet, toss the cubed squash, chopped onion, and smashed garlic cloves with olive oil, salt, and pepper. Spread in a single layer. Roast for 25-30 minutes, flipping halfway, until the squash is tender and edges are caramelized.
- While the vegetables roast, bring the vegetable broth to a gentle simmer in a large pot or Dutch oven. Add the fresh thyme sprigs and let them infuse for about 10 minutes. Remove the thyme sprigs.
- Add the roasted squash, onion, and garlic to the pot with the broth. Use an immersion blender to blend until completely smooth. If using a countertop blender, work in batches and hold the lid firmly with a kitchen towel. If the soup is too thick, add more broth or water a quarter-cup at a time.
- Stir in the maple syrup if using. Taste and adjust salt and pepper. Keep warm over low heat.
- Make the brown butter: In a small skillet over medium heat, melt the butter. Swirl the pan occasionally. The butter will foam, then the foam will subside, and small brown specks will form at the bottom. After about 3-4 minutes, when the butter smells nutty and turns a deep amber color, remove from heat immediately. Pour into a heat-safe bowl to stop cooking.
- Ladle the soup into bowls. Drizzle each serving with about a tablespoon of brown butter. Garnish with toasted pumpkin seeds, fresh thyme leaves, or a swirl of cream if desired.
Notes
Don’t rush the roasting step; let the squash caramelize for deeper flavor. Watch the brown butter carefully—it goes from perfect to burnt in about 15 seconds. Season in layers: add salt before roasting and adjust after blending. If the soup is too thick, add more broth; if too thin, simmer uncovered to reduce. The soup tastes even better the next day and freezes well for up to 3 months. Make fresh brown butter when reheating.
Nutrition
- Serving Size: 1 bowl (about 1.5 cu
- Calories: 210
- Sugar: 8
- Sodium: 480
- Fat: 12
- Saturated Fat: 6
- Carbohydrates: 26
- Fiber: 5
- Protein: 3
Keywords: butternut squash soup, roasted butternut squash soup, brown butter, fall soup, creamy soup, vegetarian soup, gluten-free soup


