The man at the community garden stand watched me staring at his pile of overripe bananas for a solid minute before he said anything. “You’re one of those people who waits for them to get ugly, aren’t you?” I laughed and admitted he was right. I’d passed by his stall three weeks in a row, and every time, those spotty bananas called to me like an old friend. He handed me a bunch for free and said his wife made the best banana bread with bananas that looked “half-dead.” I thanked him, took them home, and promptly forgot about them for another four days. Honestly, that’s when banana bread magic really happens—when you’ve waited just a little too long.
That first loaf I made with those garden-stand bananas was a mess. I used a recipe I found online, didn’t have walnuts, and ended up with something that tasted fine but felt like it was missing something. It was good, but it was not that good—you know the kind I mean. The kind that makes you close your eyes after the first bite. The kind that fills your whole kitchen with a smell that says, “Everything is going to be okay.” So I kept tinkering. I tried different ratios of butter to oil. I experimented with sour cream and yogurt. I burned three loaves in a row because I got distracted by a phone call (maybe you’ve been there).
Then one rainy Sunday afternoon, it all came together. The butter was perfectly softened. The bananas were practically liquid inside their skins. The walnuts were toasted just right. And when I pulled that loaf out of the oven, golden and cracked across the top, I knew I’d finally found it. This is the recipe I’ve made for sick friends, for neighbors who needed cheering up, and for myself on days when only a slice of something warm and familiar would do. It’s the recipe that started with a stranger’s kindness and ended up becoming a staple in my kitchen—and I hope it becomes one in yours too.
Why You’ll Love This Recipe
This isn’t just another banana bread recipe floating around the internet. I’ve tested this version more times than I care to count, and every single time, it delivers the same cozy, soul-warming result. Let me tell you why this one is different.
- Perfectly Moist Every Time: The combination of melted butter and Greek yogurt creates a crumb that’s tender without being gummy. No dry corners, no sad slices.
- Simple Pantry Ingredients: You probably have everything you need right now. No fancy extracts, no specialty flours—just real, honest ingredients.
- Walnuts Add the Perfect Crunch: Toasting them first makes all the difference. They add texture and a nutty warmth that plain walnuts just can’t match.
- Forgiving and Flexible: Slightly under-ripe bananas? Over-ripe to the point of no return? This recipe works with both. It’s practically foolproof.
- Freezes Like a Dream: Make two loaves and freeze one. You’ll thank yourself on a busy Tuesday morning when you need something good.
What really sets this banana bread apart is the little things. The way the sugar caramelizes on the edges. The tender, almost custard-like center. The way each bite has just enough walnut crunch to keep things interesting. I’ve had people tell me this is the best banana bread they’ve ever eaten, and I’m not saying that to brag—I’m saying it because I spent months getting it right so you don’t have to.
This is the recipe you turn to when you need comfort. When the weather turns cold, or the day has been long, or you just want to fill your home with something that smells like love. It’s simple enough for a Tuesday night and special enough for a holiday brunch. Trust me on this one.
What Ingredients You Will Need
This recipe uses simple, honest ingredients that work together to create something truly special. Most of these are pantry staples, which is exactly how banana bread should be.
- Unsalted Butter (½ cup, melted) – I use unsalted so I can control the salt level. Melting the butter instead of creaming it gives the bread a denser, more tender crumb. I prefer Kerrygold or any European-style butter for extra richness.
- Granulated Sugar (¾ cup) – Regular white sugar adds sweetness and helps create that beautiful golden crust. You can reduce it to ½ cup if your bananas are very sweet.
- Light Brown Sugar (¼ cup, packed) – This adds a subtle molasses flavor and extra moisture. Don’t skip it—it makes a real difference.
- Large Eggs (2, at room temperature) – Room-temperature eggs blend more evenly into the batter. If you forgot to take them out, place them in a bowl of warm water for 5 minutes.
- Plain Greek Yogurt (⅓ cup) – This is my secret ingredient. It adds moisture and a slight tang that balances the sweetness. Sour cream works perfectly too.
- Vanilla Extract (1 teaspoon) – Pure vanilla extract is worth the splurge here. Imitation vanilla can taste artificial in baked goods.
- Ripe Bananas (3 medium, mashed) – The riper, the better. You want them spotty and soft—almost black is ideal. They should mash easily with a fork. This gives you about 1½ cups of mashed banana.
- All-Purpose Flour (1¾ cups) – Spoon and level your flour for the most accurate measurement. Scooping directly from the bag can pack in too much flour and make your bread dry.
- Baking Soda (1 teaspoon) – This is the main leavening agent. Make sure it’s fresh—if it doesn’t fizz when mixed with vinegar, it’s time to buy a new box.
- Salt (½ teaspoon) – Fine sea salt works best. It enhances all the flavors without making the bread taste salty.
- Ground Cinnamon (1 teaspoon) – This adds warmth and depth. Fresh cinnamon makes a noticeable difference.
- Ground Nutmeg (¼ teaspoon) – Just a pinch adds a cozy, almost floral note. Freshly grated nutmeg is amazing if you have it.
- Chopped Walnuts (¾ cup, toasted) – Toasting brings out their natural oils and makes them crunchier. I like to chop them roughly so you get good chunks in every slice.
Ingredient Selection Tips
For the best results, use bananas that are heavily speckled with brown spots. The sugars have fully developed at this stage, giving you maximum sweetness and banana flavor. If your bananas aren’t ripe enough, you can place them on a baking sheet in a 300°F oven for 15-20 minutes until the skins blacken. Let them cool before mashing.
When it comes to walnuts, buy them raw and toast them yourself. Pre-toasted walnuts can taste stale. Spread them on a baking sheet and toast at 350°F for 5-7 minutes, shaking the pan halfway through. You’ll know they’re done when they smell nutty and look slightly darker.
Equipment Needed
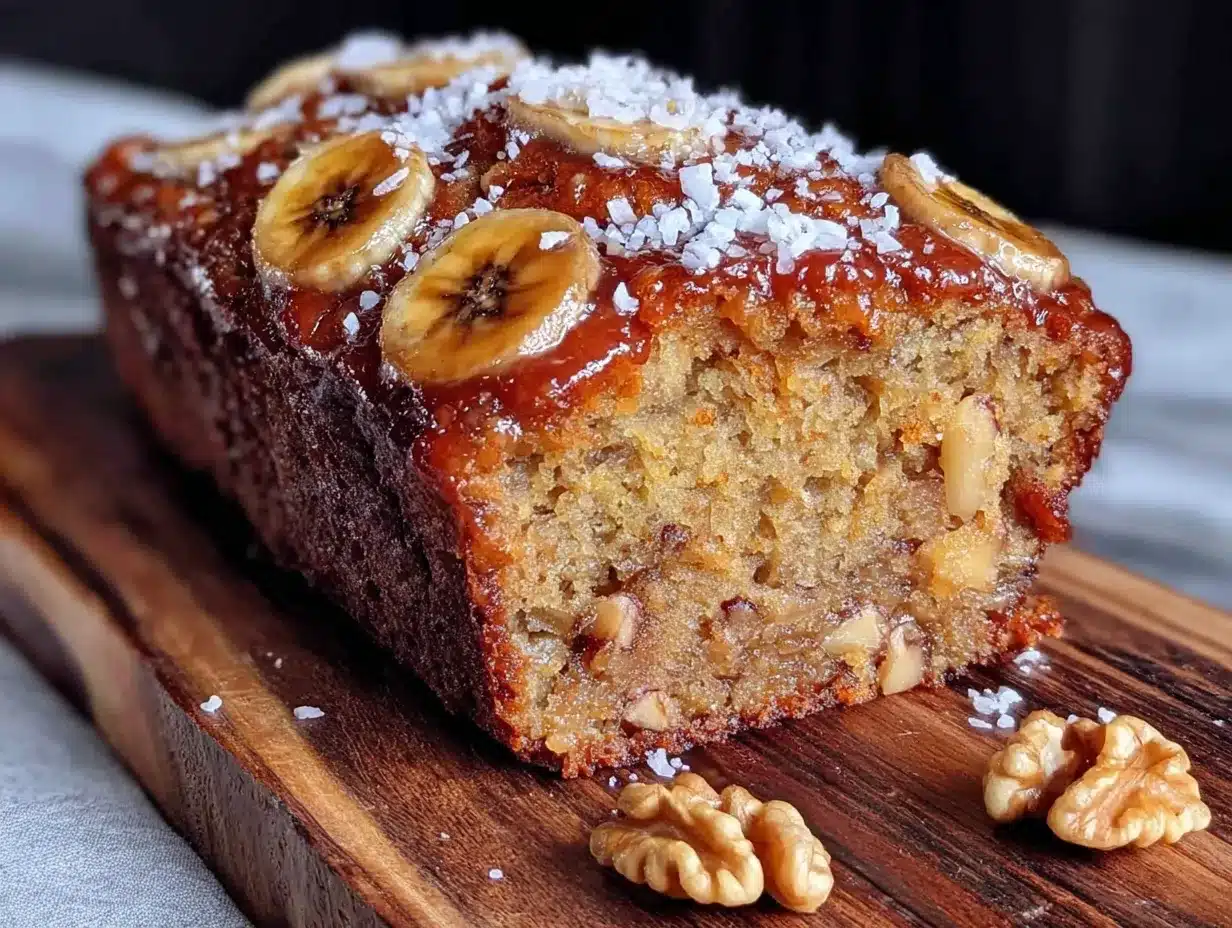
You don’t need a fancy kitchen to make this banana bread. Here’s what you’ll need:
- 9×5-inch Loaf Pan – A standard metal or glass loaf pan works perfectly. If using glass, reduce the oven temperature by 25°F to prevent over-browning.
- Mixing Bowls – One large bowl for the wet ingredients and one medium bowl for the dry ingredients.
- Whisk – For combining the dry ingredients evenly.
- Rubber Spatula – For folding everything together without overmixing. I love the GIR brand spatulas—they’re heat-resistant and easy to clean.
- Parchment Paper – Lining the pan makes removal effortless. Leave an overhang on two sides for easy lifting.
- Cooling Rack – Essential for even cooling. If you don’t have one, you can use the grates from your oven (just make sure they’re clean).
- Fork or Potato Masher – For mashing the bananas. A fork works fine, but a potato masher gets the job done faster.
- Measuring Cups and Spoons – Accurate measurements matter in baking. Use dry measuring cups for flour and sugar, and liquid measuring cups for the yogurt and vanilla.
If you don’t have a loaf pan, you can bake this in an 8×8-inch square pan and adjust the baking time to 35-40 minutes. The slices will be shorter but just as delicious.
Preparation Method
- Preheat your oven to 350°F (175°C). Position the rack in the center of the oven. Line your 9×5-inch loaf pan with parchment paper, leaving about 2 inches of overhang on the long sides. Lightly grease the exposed ends with butter or non-stick spray.
- Toast the walnuts. Spread the chopped walnuts on a small baking sheet and toast for 5-7 minutes, until fragrant. Keep an eye on them—they burn quickly. Set aside to cool while you prepare the batter.
- Mash the bananas. In a large bowl, mash the ripe bananas with a fork or potato masher until mostly smooth. A few small lumps are fine—they add texture. You should have about 1½ cups of mashed banana.
- Melt the butter. In a small saucepan or microwave-safe bowl, melt the butter until just liquid. Let it cool for a minute or two—you don’t want it hot enough to cook the eggs.
- Combine the wet ingredients. To the mashed bananas, add the melted butter, granulated sugar, brown sugar, eggs, Greek yogurt, and vanilla extract. Whisk until smooth and well combined. The mixture should look glossy and smell amazing already.
- Mix the dry ingredients. In a separate medium bowl, whisk together the flour, baking soda, salt, cinnamon, and nutmeg. Whisking aerates the flour and ensures the leavening agents are evenly distributed.
- Combine wet and dry. Pour the dry ingredients into the wet ingredients. Use a rubber spatula to fold gently—just until you no longer see streaks of flour. Do not overmix! Overmixing develops gluten and makes the bread tough. A few small lumps are perfectly fine.
- Fold in the walnuts. Gently fold in the toasted walnuts, reserving about 2 tablespoons to sprinkle on top. The batter will be thick and slightly lumpy—that’s exactly what you want.
- Transfer to the pan. Pour the batter into the prepared loaf pan and spread it evenly with the spatula. Sprinkle the reserved walnuts on top, pressing them gently into the batter so they stick.
- Bake for 55-65 minutes. Place the pan on the center rack and bake until a toothpick inserted into the center comes out clean or with just a few moist crumbs. The top should be deep golden brown and cracked. If the top is browning too quickly after 40 minutes, tent loosely with aluminum foil.
- Cool in the pan. Let the banana bread cool in the pan for 15 minutes. Then use the parchment overhang to lift it out and transfer to a wire rack. Let it cool completely before slicing—about 1 hour. I know it’s hard to wait, but slicing too early makes the bread crumbly.
Troubleshooting Tips
If your banana bread is browning too fast on top but still raw in the middle, your oven might be running hot. An oven thermometer is a cheap investment that solves this problem. Also, check that your baking soda is fresh—old baking soda won’t give you the rise you need.
If the bread sinks in the middle after baking, it might be slightly underbaked, or you may have overmixed the batter. Next time, try reducing the mixing time by a few strokes.
Cooking Tips & Techniques
After making this recipe more times than I can count, I’ve learned a few things the hard way. Let me save you some trouble.
Don’t overmix the batter. This is the number one mistake people make with banana bread. Mix until the flour just disappears. A few streaks of flour are better than a tough, dense loaf. I speak from experience—I ruined a perfectly good batch of bananas by being too aggressive with my spatula.
Use room temperature ingredients. Cold eggs and cold yogurt can seize the melted butter and create a lumpy batter. Take everything out of the fridge 30 minutes before you start. If you’re in a hurry, place the eggs in a bowl of warm water for 5 minutes.
Toast your walnuts. I cannot stress this enough. Raw walnuts are fine, but toasted walnuts are transformative. The heat releases their natural oils and deepens their flavor. It takes five minutes and makes a world of difference.
Check for doneness properly. A toothpick test is reliable, but also look for visual cues. The bread should be pulling away from the sides of the pan slightly. The top should be a deep golden brown with a crack down the center. If you press gently on the top, it should spring back.
Let it cool completely. I know the smell is intoxicating. I know you want a slice with butter melting into it right now. But cutting into warm banana bread makes it crumble and fall apart. Trust me, the wait is worth it. If you absolutely must have it warm, let it cool for at least 30 minutes before slicing.
One more thing—I once forgot the sugar entirely. I was distracted by a phone call and didn’t realize until I took the first bite. It was… not good. So double-check your ingredients before you start. It sounds silly, but we’ve all been there.
Variations & Adaptations
This recipe is wonderfully adaptable. Here are some of my favorite variations:
Chocolate Chip Banana Bread
Swap the walnuts for ¾ cup of semi-sweet chocolate chips. The combination of banana and chocolate is a classic for a reason. I like to use mini chocolate chips so they distribute more evenly.
Gluten-Free Version
Substitute the all-purpose flour with a 1:1 gluten-free baking flour blend. I’ve had great results with King Arthur Measure for Measure. Add an extra tablespoon of yogurt to help with moisture. The texture will be slightly more delicate, but it’s still delicious.
Vegan Banana Bread
Replace the eggs with two flax eggs (2 tablespoons ground flaxseed mixed with 6 tablespoons water, let sit for 5 minutes). Use melted coconut oil or vegan butter instead of regular butter, and use a plant-based yogurt. The bread will be slightly denser but still moist and flavorful.
Spiced Banana Bread
Add an extra teaspoon of cinnamon, ½ teaspoon of ground ginger, and ¼ teaspoon of ground cloves. This version tastes like autumn in a slice. I make this one when the leaves start changing color.
Nut-Free Option
If you’re serving someone with nut allergies, simply omit the walnuts. You can add ¾ cup of dried cranberries, raisins, or even shredded coconut for texture. Or just leave it plain—it’s still wonderful.
Serving & Storage Suggestions
This banana bread is best served at room temperature or slightly warm. For the ultimate experience, toast a slice and spread it with a pat of salted butter. The contrast of warm, tender bread with cold butter melting into it is pure comfort.
It’s wonderful for breakfast with a cup of coffee or tea. It also makes a great afternoon snack or a simple dessert with a dollop of whipped cream. For a special treat, serve it alongside a scoop of vanilla ice cream and a drizzle of caramel sauce.
Storage Instructions: Store the banana bread in an airtight container at room temperature for up to 4 days. The flavor actually improves after the first day as the banana flavor deepens. If your kitchen is warm, you can store it in the refrigerator, but let slices come to room temperature before serving for the best texture.
Freezing Instructions: This bread freezes beautifully. Wrap the cooled loaf tightly in plastic wrap, then in a layer of aluminum foil. Freeze for up to 3 months. To thaw, leave it on the counter overnight, or unwrap and warm slices in the microwave for 15-20 seconds. You can also freeze individual slices for quick grab-and-go breakfasts.
Reheating Tips: For the best texture, reheat slices in a toaster or toaster oven at 350°F for 3-5 minutes. This crisps the edges slightly while keeping the inside soft. Avoid microwaving for too long, as it can make the bread rubbery.
Nutritional Information & Benefits
Here’s the approximate nutritional breakdown for one slice (based on 10 slices per loaf):
| Nutrient | Amount per Slice |
|---|---|
| Calories | 285 |
| Total Fat | 14g |
| Saturated Fat | 6g |
| Cholesterol | 55mg |
| Sodium | 220mg |
| Total Carbohydrates | 37g |
| Dietary Fiber | 2g |
| Sugars | 19g |
| Protein | 5g |
Bananas are a great source of potassium, vitamin B6, and vitamin C. They also contain fiber, which aids digestion. Walnuts are rich in omega-3 fatty acids and antioxidants, making this bread a surprisingly wholesome treat.
This recipe is vegetarian and can easily be made dairy-free or vegan with the substitutions mentioned above. It contains gluten, eggs, and nuts (walnuts), so please adjust accordingly for dietary needs.
Conclusion
This cozy classic banana bread with walnuts is more than just a recipe—it’s a warm hug on a cool day, a slice of comfort when you need it most, and a way to turn overripe bananas into something truly special. It’s the kind of bread that makes your kitchen smell like home and your heart feel full.
I hope you give this recipe a try and make it your own. Add extra cinnamon if that’s your thing. Throw in some chocolate chips if you’re feeling indulgent. Leave out the walnuts if that’s what you have on hand. The beauty of this recipe is that it’s forgiving, flexible, and always delicious.
I’d love to hear how it turns out for you. Did you make any fun variations? Did it remind you of something from your childhood? Drop a comment below and share your banana bread story. And if you loved this recipe, please share it with someone who needs a little comfort today. Happy baking, friends!
Frequently Asked Questions
Can I use frozen bananas for this recipe?
Absolutely! Frozen bananas work wonderfully. Thaw them completely at room temperature, then drain off any excess liquid before mashing. The thawing process actually makes them even sweeter and more flavorful.
Why did my banana bread sink in the middle?
This usually happens for one of three reasons: the bread was underbaked, the batter was overmixed, or your baking soda was old. Make sure your baking soda is fresh (less than 6 months old) and mix just until combined.
Can I make this recipe without walnuts?
Yes, absolutely. Simply omit the walnuts for a plain banana bread. You can also substitute them with chocolate chips, dried fruit, or leave the bread plain. The recipe works perfectly either way.
How do I know when the banana bread is done baking?
Insert a toothpick into the center of the loaf. If it comes out clean or with just a few moist crumbs, it’s done. The top should be golden brown and cracked, and the edges should be pulling away from the pan slightly.
Can I double this recipe?
Yes, this recipe doubles beautifully. Use two loaf pans and bake them at the same time. You may need to add 5-10 minutes to the baking time. Alternatively, you can bake one loaf and freeze the other for later.
Pin This Recipe!
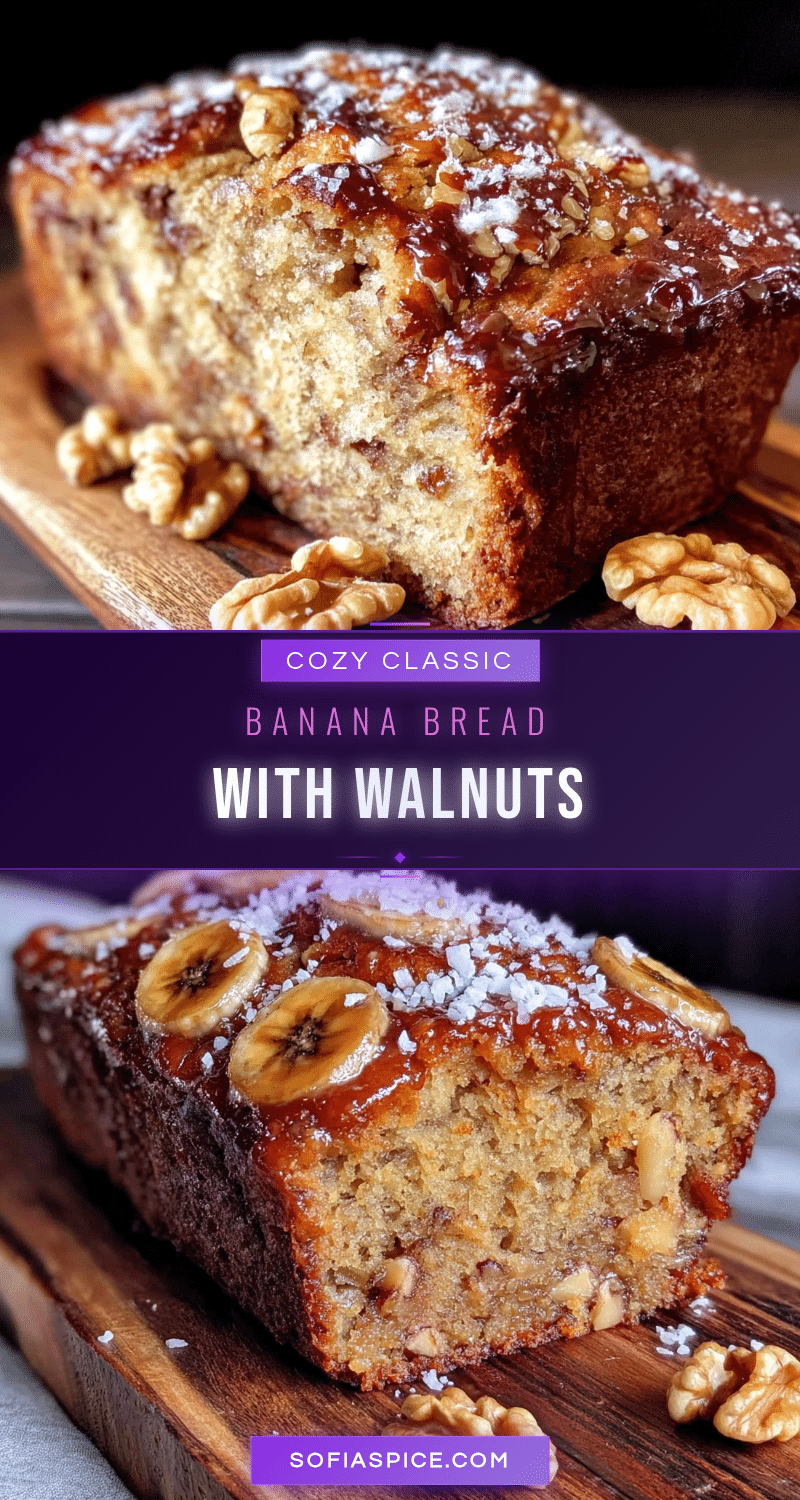
Cozy Classic Banana Bread with Walnuts – Best Homemade Recipe
This perfectly moist banana bread with toasted walnuts is the ultimate comfort food. Made with simple pantry ingredients and Greek yogurt for a tender crumb, it’s a foolproof recipe that delivers a soul-warming slice every time.
- Prep Time: 15 minutes
- Cook Time: 55-65 minutes
- Total Time: 1 hour 15 minutes
- Yield: 10 servings 1x
- Category: Dessert
- Cuisine: American
Ingredients
- ½ cup unsalted butter, melted
- ¾ cup granulated sugar
- ¼ cup light brown sugar, packed
- 2 large eggs, at room temperature
- ⅓ cup plain Greek yogurt
- 1 teaspoon vanilla extract
- 3 medium ripe bananas, mashed (about 1½ cups)
- 1¾ cups all-purpose flour
- 1 teaspoon baking soda
- ½ teaspoon fine sea salt
- 1 teaspoon ground cinnamon
- ¼ teaspoon ground nutmeg
- ¾ cup chopped walnuts, toasted
Instructions
- Preheat your oven to 350°F (175°C). Position the rack in the center of the oven. Line your 9×5-inch loaf pan with parchment paper, leaving about 2 inches of overhang on the long sides. Lightly grease the exposed ends with butter or non-stick spray.
- Toast the walnuts: Spread the chopped walnuts on a small baking sheet and toast for 5-7 minutes, until fragrant. Set aside to cool.
- Mash the bananas: In a large bowl, mash the ripe bananas with a fork or potato masher until mostly smooth. A few small lumps are fine.
- Melt the butter: In a small saucepan or microwave-safe bowl, melt the butter until just liquid. Let it cool for a minute or two.
- Combine the wet ingredients: To the mashed bananas, add the melted butter, granulated sugar, brown sugar, eggs, Greek yogurt, and vanilla extract. Whisk until smooth and well combined.
- Mix the dry ingredients: In a separate medium bowl, whisk together the flour, baking soda, salt, cinnamon, and nutmeg.
- Combine wet and dry: Pour the dry ingredients into the wet ingredients. Use a rubber spatula to fold gently—just until you no longer see streaks of flour. Do not overmix.
- Fold in the walnuts: Gently fold in the toasted walnuts, reserving about 2 tablespoons to sprinkle on top.
- Transfer to the pan: Pour the batter into the prepared loaf pan and spread it evenly with the spatula. Sprinkle the reserved walnuts on top, pressing them gently into the batter.
- Bake for 55-65 minutes: Place the pan on the center rack and bake until a toothpick inserted into the center comes out clean or with just a few moist crumbs. If the top is browning too quickly after 40 minutes, tent loosely with aluminum foil.
- Cool in the pan: Let the banana bread cool in the pan for 15 minutes. Then use the parchment overhang to lift it out and transfer to a wire rack. Let it cool completely before slicing—about 1 hour.
Notes
For the best results, use bananas that are heavily speckled with brown spots. If your bananas aren’t ripe enough, place them on a baking sheet in a 300°F oven for 15-20 minutes until the skins blacken. Let them cool before mashing. To toast walnuts, spread them on a baking sheet and toast at 350°F for 5-7 minutes, shaking the pan halfway through. Don’t overmix the batter—mix until the flour just disappears. Let the bread cool completely before slicing to prevent crumbling. Store in an airtight container at room temperature for up to 4 days. Freezes well for up to 3 months.
Nutrition
- Serving Size: 1 slice
- Calories: 285
- Sugar: 19
- Sodium: 220
- Fat: 14
- Saturated Fat: 6
- Carbohydrates: 37
- Fiber: 2
- Protein: 5
Keywords: banana bread, walnut banana bread, homemade banana bread, moist banana bread, easy banana bread, classic banana bread


