The PTA fall festival was in three days and I’d completely forgotten I’d signed up for the dessert table. Everyone else would be bringing those beautiful, tiered cakes with perfect buttercream rosettes and cookies that looked like they belonged in a bakery window. I had a bag of popcorn, a block of white chocolate, and honestly? A mild sense of panic.
I stood in my kitchen on a Tuesday night, staring at the pantry like it might offer a solution. My neighbor had just dropped off her famous caramel apples—the ones she spends all weekend making—and I felt that familiar twinge of “I should’ve planned better.” But here’s the thing about being an accidental overachiever: sometimes the best stuff comes from having zero time and just making do.
That’s how this Candy Corn Popcorn Bark was born. I threw together what I had, crossed my fingers, and showed up to that table feeling a little sheepish. By the end of the night, people were asking for the recipe—meanwhile, half the fancy desserts were still sitting there untouched. I mean, who saw that coming? Certainly not me.
Maybe you’ve been there—the scramble, the last-minute dash, the feeling that everyone else has it together. Let me tell you, this recipe became my secret weapon for every gathering since. It’s the kind of thing that looks like you spent hours on it, but honestly? It comes together in about fifteen minutes. And that’s the kind of magic I can get behind.
Why You’ll Love This Recipe
Let’s be real for a second. You want something that looks impressive but doesn’t have you sweating in the kitchen while your guests are having fun. This Candy Corn Popcorn Bark delivers on both fronts. I’ve tested this at least a dozen times (my family has been very patient), and it’s foolproof every single time.
- Quick & Easy: From start to finish, you’re looking at about 15 minutes of active time. That’s it. No complicated steps, no tempering chocolate, no fuss.
- Simple Ingredients: You probably already have the popcorn and white chocolate in your pantry. The candy corn is seasonal, but honestly, it’s everywhere come September.
- Perfect for Fall Gatherings: This is the ultimate potluck hero. It travels well, doesn’t need refrigeration, and everyone can grab a piece without needing a plate or fork.
- Crowd-Pleaser: I’ve watched kids and adults alike hover around this bowl. There’s something about that sweet-salty-crunchy combo that just hits different.
- Unbelievably Delicious: The texture is what gets people. You’ve got the airy crunch of popcorn, the creamy snap of white chocolate, and those chewy little candy corn pieces. It’s a party in your mouth, honestly.
What makes this different from every other popcorn bark out there? It’s the ratio. I spent way too long figuring out the perfect balance of popcorn to chocolate to candy corn. Too much chocolate and it’s a sticky mess. Too little and it doesn’t hold together. This version? It’s the Goldilocks of popcorn treats.
This isn’t just good—it’s the kind of snack that makes you close your eyes after the first bite and go “ohhh.” It’s comfort food for the fall season, but faster and way more fun. Perfect for impressing guests without breaking a sweat.
What Ingredients You Will Need
This recipe uses simple, mostly pantry-friendly ingredients to create something that tastes way more complicated than it actually is. Here’s what you’ll need and why each one matters.
- 8 cups popped popcorn (plain, lightly salted) — You want the kind that’s already popped and ready to go. I usually grab a bag of pre-popped from the store, but you can absolutely pop your own. Just make sure it’s not buttered or flavored, because that throws off the whole balance. The saltiness is key for cutting through the sweet white chocolate.
- 12 ounces white chocolate melting wafers — I recommend Ghirardelli or Wilton for best results. These melt smoother than regular white chocolate chips, which sometimes have stabilizers that make them seize up. Trust me on this one—I learned the hard way after a few lumpy batches.
- 1 ½ cups candy corn — The classic Brach’s brand works perfectly. You can also find seasonal variations like harvest mix or autumn blend if you want to get fancy. Just make sure it’s fresh—stale candy corn gets hard and loses that chewy texture we’re going for.
- ½ cup salted peanuts (optional but highly recommended) — This adds that savory crunch that makes people go back for seconds. If you’re serving this at a nut-free event, you can leave them out or substitute with pretzel pieces.
- ¼ teaspoon salt (flaky sea salt if you have it) — A little sprinkle on top right before the chocolate sets makes a huge difference. It’s that sweet-salty thing that keeps your hand reaching for “just one more piece.”
For the popcorn, look for kernels that are fully popped and not stale. If you’re popping your own, let them cool completely before using—warm popcorn will melt the chocolate and make everything a sad, soggy mess. Yes, I’ve done that too.
You can swap the white chocolate for vanilla candy coating or almond bark if that’s what you have. The texture will be slightly different, but it still works. For a dairy-free version, use dairy-free white chocolate chips—just add a teaspoon of coconut oil to help them melt smoothly.
The candy corn is non-negotiable here. I mean, it’s in the name. But if you really can’t find it, you could try candy pumpkins or autumn mix. The colors won’t be as classic, but the flavor will still be there.
Equipment Needed
You don’t need any fancy gadgets for this one, which is part of the appeal. Here’s what you’ll need:
- Large baking sheet (half-sheet size works great) — Line it with parchment paper or a silicone baking mat. Don’t skip the lining, or you’ll be chiseling chocolate off your pan for days.
- Microwave-safe bowl — For melting the white chocolate. A glass measuring cup works well because the spout makes pouring easier.
- Spatula — For spreading the chocolate mixture. A rubber or silicone spatula is best for getting every last bit.
- Large mixing bowl — To toss the popcorn with the chocolate. You want something big enough to give everything room to mix without spilling.
- Parchment paper — Essential for easy cleanup and preventing stuck-on bark.
If you don’t have a microwave, you can melt the white chocolate in a double boiler on the stovetop. Just be careful not to get any water in the chocolate, or it will seize up and turn into a grainy mess. I speak from experience on that one—it’s heartbreaking.
For a budget-friendly option, skip the silicone mat and just use parchment paper. It works just as well and you can toss it when you’re done. No scrubbing required.
Preparation Method
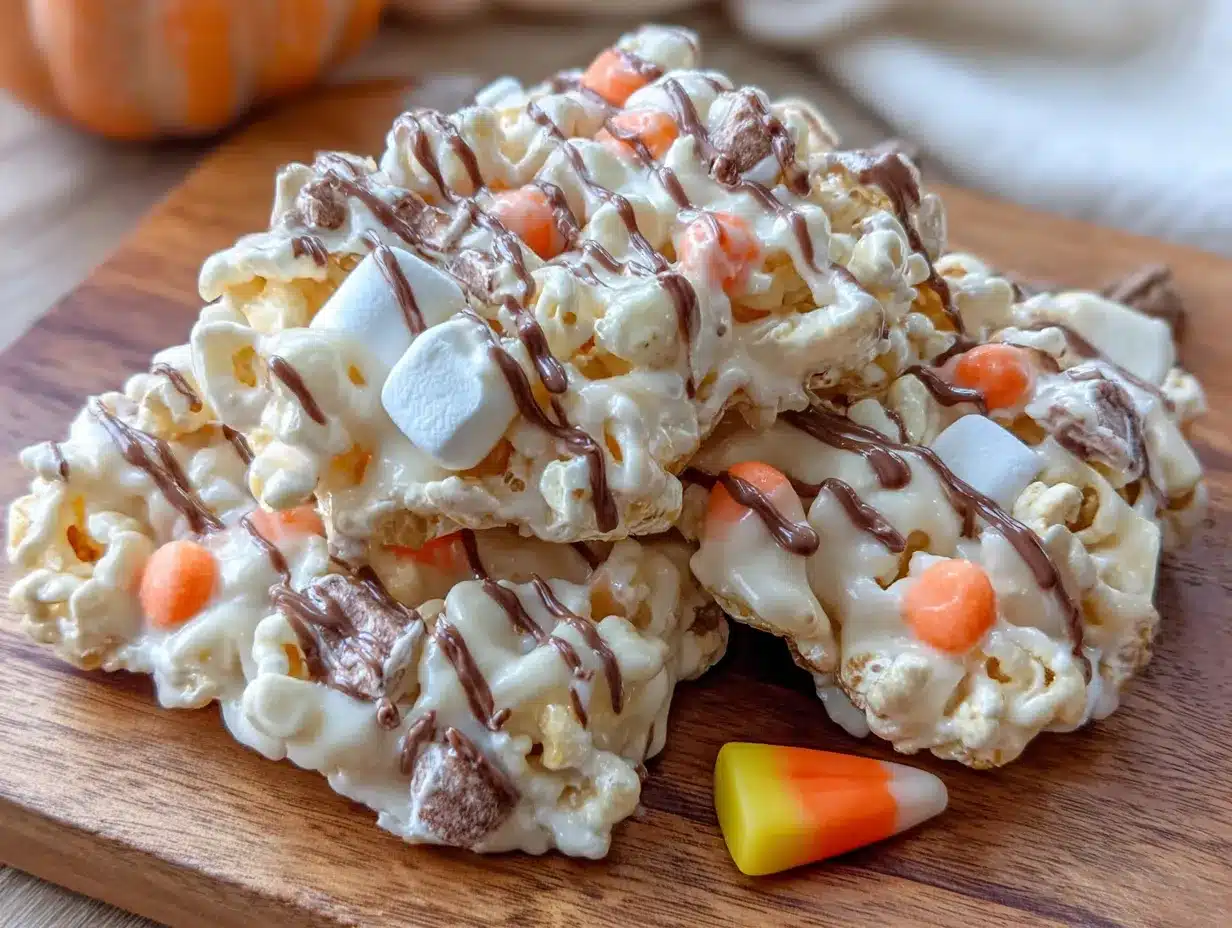
- Prep your baking sheet. Line a large baking sheet with parchment paper. Make sure the paper extends up the sides a bit—this makes it way easier to lift the bark out later. Set this aside while you work on the rest.
- Spread the popcorn. Pour your 8 cups of popped popcorn onto the prepared baking sheet in an even layer. Remove any unpopped kernels you find—nobody wants to crack a tooth on their fall treat. Spread it out so it’s not too thick in any one spot.
- Melt the white chocolate. Place the 12 ounces of white chocolate melting wafers in a microwave-safe bowl. Microwave in 30-second intervals, stirring well after each one. It usually takes about 1 ½ to 2 minutes total. Stop heating when most of the wafers are melted and just a few small lumps remain—the residual heat will finish the job as you stir. Do not overheat, or the chocolate will get thick and grainy.
- Combine and coat. Pour the melted white chocolate over the popcorn on the baking sheet. Use your spatula to gently fold and toss until every piece of popcorn is coated. Work quickly here—the chocolate starts setting as it cools. You want an even coating, not clumps of chocolate in some spots and bare popcorn in others.
- Add the mix-ins. Sprinkle the 1 ½ cups of candy corn and ½ cup of salted peanuts (if using) evenly over the chocolate-coated popcorn. Gently press them into the chocolate with your spatula so they stick. Don’t stir too aggressively, or you’ll crush the popcorn.
- Shape the bark. Using your spatula, spread the mixture into an even layer on the baking sheet. It doesn’t need to be perfect—the rustic look is part of the charm. Aim for about ½-inch thickness. Some pieces will stick up, and that’s fine.
- Finish with salt. Sprinkle the ¼ teaspoon of flaky sea salt over the top. This is that little touch that makes people say “what’s in this? it’s so good!” Don’t skip it.
- Let it set. Place the baking sheet in the refrigerator for about 20-30 minutes, or until the chocolate is completely firm. You’ll know it’s ready when the bark lifts easily from the parchment and doesn’t feel sticky. If you’re in a hurry, the freezer works too—just check it after 10 minutes.
- Break into pieces. Once set, lift the parchment paper off the baking sheet. Break the bark into irregular pieces with your hands. Don’t use a knife—the jagged, rustic edges look better and feel more homemade. Aim for pieces about 2-3 inches across.
Your kitchen should smell like sweet white chocolate and popcorn at this point. The candy corn will be visible throughout, creating those beautiful orange and yellow pops of color. The bark should be crunchy but not hard, with the chocolate coating every kernel evenly.
Cooking Tips & Techniques
Here’s the thing I wish someone had told me the first time I made this: white chocolate is finicky. It doesn’t like heat, it doesn’t like water, and it definitely doesn’t like being rushed. I ruined my first batch by cranking the microwave too high and ended up with a thick, lumpy mess that looked nothing like the smooth coating I wanted.
So here’s my golden rule: low and slow. Use 50% power on your microwave if you can. It takes an extra minute, but you won’t end up with seized chocolate. And if you do accidentally overheat it? Stir in a teaspoon of coconut oil or vegetable shortening. It won’t fix everything, but it helps smooth things out.
Another mistake I’ve made? Using warm popcorn. I was in a hurry once and dumped freshly popped kernels right into the chocolate. The steam from the popcorn made the chocolate seize up almost instantly. Let your popcorn cool completely before you start—spread it on a baking sheet and let it sit for 10 minutes if you just popped it.
For the best texture, make sure your candy corn is fresh. I bought a bag from a discount store once and it was rock hard. Nobody wants to bite into a piece of bark and feel like they’re chewing on pebbles. If your candy corn is stale, it won’t soften up in the chocolate, so just get a fresh bag.
Here’s a multitasking tip: while the bark is setting in the fridge, clean up your dishes. The chocolate residue is way easier to wipe off when it’s still warm. Once it hardens, you’re looking at a serious scrub session.
Variations & Adaptations
One of the best things about this recipe is how easy it is to switch things up. Here are some variations I’ve tried and loved:
Chocolate Lover’s Version: Swap half the white chocolate for milk chocolate or dark chocolate. The combo creates a beautiful marbled effect and adds another layer of flavor. Just melt them separately and drizzle one over the other before adding the candy corn.
Fall Harvest Mix: Replace the peanuts with dried cranberries and pumpkin seeds. The tartness of the cranberries cuts through the sweetness beautifully, and the pumpkin seeds add that seasonal crunch. This version is always a hit at Thanksgiving gatherings.
Spiced Version: Add ½ teaspoon of pumpkin pie spice or cinnamon to the melted white chocolate before pouring it over the popcorn. It gives the whole thing a warm, cozy fall flavor that pairs perfectly with the candy corn. I made this for a Friendsgiving once and people couldn’t stop eating it.
Nut-Free Adaptation: Simply leave out the peanuts and add crushed pretzel sticks instead. The saltiness still balances the sweet, and the crunch is just as satisfying. Perfect for school events or nut-free gatherings.
Halloween Twist: Swap the candy corn for candy pumpkins and add some orange and black sprinkles on top. It’s festive without being over-the-top, and kids absolutely love it.
Dairy-Free Option: Use dairy-free white chocolate chips and add a tablespoon of coconut oil to help them melt smoothly. The texture is slightly different—a bit softer—but the flavor is still spot on.
I personally love the spiced version the most. There’s something about that warm cinnamon aroma that just feels like fall in a bowl. Plus, it makes your kitchen smell incredible while you’re making it.
Serving & Storage Suggestions
This bark is best served at room temperature. The chocolate is firm but not hard, and the popcorn stays crunchy. If you’ve refrigerated it, let it sit out for about 5-10 minutes before serving—it takes the edge off the chill and brings back that perfect texture.
For presentation, pile the pieces in a large wooden bowl or on a platter. The orange and yellow candy corn against the white chocolate makes for a gorgeous display. I like to add a few extra candy corn pieces on top for visual pop. It’s the kind of thing that makes people say “wait, you made this?” before they even taste it.
This bark is perfect alongside a warm mug of apple cider or a pumpkin spice latte. It also pairs surprisingly well with a glass of cold milk—the sweetness balances out perfectly. If you’re serving it at a party, set it out next to some caramel apples or pumpkin bread for a full fall spread.
Storage Instructions: Keep the bark in an airtight container at room temperature for up to 5 days. Do not refrigerate it long-term, because the popcorn will absorb moisture and get chewy. If you live in a humid climate, add a silica gel packet to the container—it really helps maintain that crunch.
For longer storage, you can freeze the bark for up to 2 months. Place it in a single layer in a freezer-safe container with parchment paper between layers. Thaw at room temperature for about 15 minutes before serving. The texture holds up surprisingly well, though it’s best within the first week.
One thing I’ve noticed: the flavors actually get better after a day or two. The white chocolate seems to meld with the candy corn, and everything becomes more cohesive. So if you’re making this for a party, feel free to make it a day ahead.
Nutritional Information & Benefits
Let’s be honest—this is a treat, not a health food. But here’s the nutritional breakdown for a typical serving (about ½ cup of bark):
| Nutrient | Amount per Serving |
|---|---|
| Calories | 180-200 |
| Total Fat | 8-10g |
| Saturated Fat | 5-6g |
| Carbohydrates | 25-28g |
| Sugar | 18-20g |
| Protein | 2-3g |
| Sodium | 80-100mg |
On the bright side, popcorn is a whole grain, so you’re getting some fiber. The white chocolate provides calcium, and the peanuts (if you use them) add protein and healthy fats. It’s not going to replace your salad, but as far as treats go, it could be worse.
This recipe contains dairy (white chocolate), peanuts (if using), and may contain traces of other allergens depending on your ingredients. For a nut-free version, skip the peanuts and check your white chocolate label for cross-contamination warnings. For a dairy-free option, use dairy-free white chocolate as mentioned above.
From a wellness perspective, I believe in balance. This bark is for celebrations, gatherings, and those moments when you just want something fun. It’s not an everyday snack, and that’s okay. Sometimes the best thing you can do for your soul is enjoy a piece of candy corn popcorn bark with the people you love.
Conclusion
This Candy Corn Popcorn Bark has become my go-to for every fall gathering, and I think it’s going to become yours too. It’s the recipe that proves you don’t need hours in the kitchen or a list of fancy ingredients to make something people genuinely love. Sometimes the simplest things are the ones that steal the show.
I love that this recipe lets me show up to a party feeling prepared without spending my whole weekend prepping. It’s forgiving, flexible, and always gets the same reaction: “Wait, this is so good. Can I have the recipe?” And honestly? That never gets old.
So go ahead and make this your own. Add your favorite mix-ins, play with the spices, or keep it classic. However you make it, it’s going to be a hit. And when someone asks you how you made it look so easy? Just smile and say it’s your secret weapon.
I’d love to hear how yours turns out! Drop a comment below and let me know what variations you tried, or tag me in your photos on social media. Happy fall baking, friends!
Frequently Asked Questions
Can I use microwave popcorn for this recipe?
You can, but I don’t recommend it. Most microwave popcorn has butter flavoring and extra salt that can make the bark taste greasy. Plain air-popped or store-bought plain popcorn works much better. If you only have microwave popcorn, look for the lightly salted or natural variety.
Why did my white chocolate seize up?
White chocolate is sensitive to heat and moisture. If you overheated it in the microwave or got even a drop of water in the bowl, it can seize into a thick, grainy mess. To fix it, try stirring in a teaspoon of coconut oil or vegetable shortening. If that doesn’t work, you’ll need to start over with fresh chocolate.
Can I make this recipe ahead of time?
Absolutely! This bark actually tastes better after a day or two. Make it up to 3 days in advance and store it in an airtight container at room temperature. Just keep it away from heat and humidity to maintain that perfect crunch.
How do I keep the popcorn from getting soggy?
The key is making sure every piece of popcorn is fully coated in chocolate. The chocolate acts as a barrier against moisture. Also, store the bark in an airtight container at room temperature—not in the fridge, where condensation can make it soft. If you live in a humid area, add a silica gel packet to the container.
Can I use other types of chocolate?
Yes! Milk chocolate, dark chocolate, or even caramel-flavored candy coating all work great. If you use dark chocolate, consider adding a little extra salt on top to balance the bitterness. For a fun twist, try using half white and half dark chocolate for a marbled effect.
Pin This Recipe!
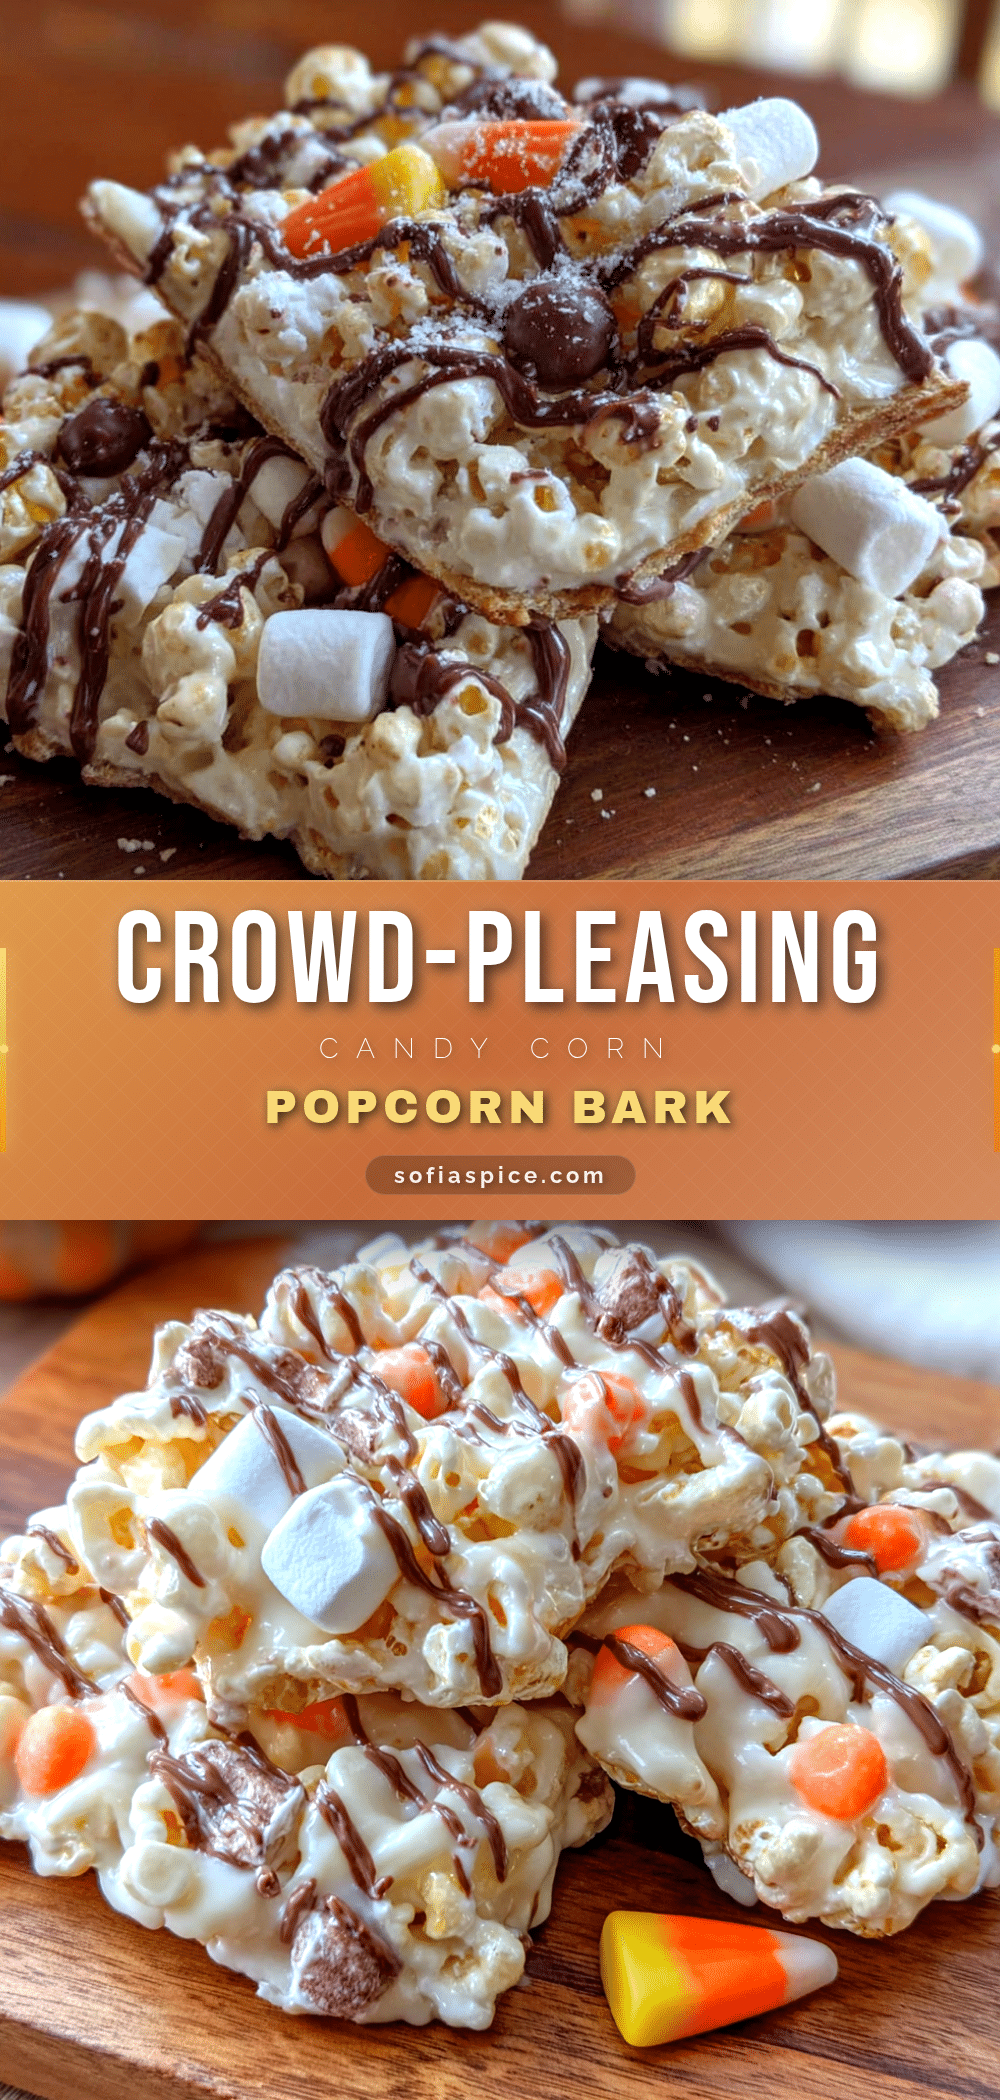
Candy Corn Popcorn Bark Easy Fall Treat

This Candy Corn Popcorn Bark is a quick and easy fall treat that looks impressive but comes together in about 15 minutes. It’s the perfect potluck hero with a sweet-salty-crunchy combo that everyone loves.
- Prep Time: 15 minutes
- Cook Time: 0 minutes
- Total Time: 45 minutes (including setting time)
- Yield: 8 servings 1x
- Category: Dessert
- Cuisine: American
Ingredients
- 8 cups popped popcorn (plain, lightly salted)
- 12 ounces white chocolate melting wafers (Ghirardelli or Wilton recommended)
- 1 ½ cups candy corn (Brach’s brand recommended)
- ½ cup salted peanuts (optional but highly recommended)
- ¼ teaspoon flaky sea salt
Instructions
- Line a large baking sheet with parchment paper, extending up the sides for easy removal.
- Spread 8 cups of popped popcorn in an even layer on the prepared baking sheet. Remove any unpopped kernels.
- Place 12 ounces of white chocolate melting wafers in a microwave-safe bowl. Microwave in 30-second intervals, stirring well after each, until mostly melted (about 1 ½ to 2 minutes total). Let residual heat finish melting.
- Pour melted white chocolate over the popcorn on the baking sheet. Gently fold and toss with a spatula until every piece is evenly coated.
- Sprinkle 1 ½ cups of candy corn and ½ cup of salted peanuts (if using) evenly over the chocolate-coated popcorn. Gently press them into the chocolate with the spatula.
- Spread the mixture into an even layer about ½-inch thick on the baking sheet. It doesn’t need to be perfect.
- Sprinkle ¼ teaspoon of flaky sea salt over the top.
- Refrigerate for 20-30 minutes until the chocolate is completely firm. Alternatively, freeze for 10 minutes.
- Once set, lift the parchment paper off the baking sheet and break the bark into irregular pieces with your hands. Aim for pieces about 2-3 inches across.
Notes
White chocolate is sensitive to heat and moisture. Use 50% power on microwave to avoid seizing. Let popcorn cool completely before using to prevent chocolate from seizing. For best texture, use fresh candy corn. Store in an airtight container at room temperature for up to 5 days. Can be frozen for up to 2 months.
Nutrition
- Serving Size: ½ cup
- Calories: 190
- Sugar: 19
- Sodium: 90
- Fat: 9
- Saturated Fat: 5.5
- Carbohydrates: 26.5
- Fiber: 1
- Protein: 2.5
Keywords: candy corn, popcorn bark, fall treat, easy dessert, white chocolate, Halloween, potluck


