Karen wasn’t trying to show off. I’d stopped by her place on a rainy Tuesday to pick up a book I’d lent her, and the smell hit me before I even got through the screen door. It was warm and sweet, like baked apples and brown sugar, but there was something else in there too — a hint of maple that made me stop mid-step on her porch. She just shrugged when I asked what she was making. “Oh, it’s nothing fancy. Just some bread I threw together.” Let me tell you, that “nothing fancy” bread ruined me for every other quick bread I’d ever made.
I stood in her kitchen watching her pull this golden loaf out of the pan, and I honestly forgot why I’d come over in the first place. The top was all crackled and glossy, with these little pools of maple glaze settling into the crevices. She sliced it while it was still warm, and I could see actual chunks of apple suspended in the tender crumb. She handed me a piece on a napkin like it was no big deal, like she hadn’t just created something that would haunt my dreams for weeks. I mean, the casualness of it all was almost insulting.
Maybe you’ve been there — you taste something at a friend’s house and you know you’ll be thinking about it for days. That was me with this maple glazed apple fritter bread. I asked for the recipe, and she scribbled it on a sticky note while I finished my slice. The directions were vague at best, but I’ve spent the last year perfecting it. This version is the one I now bring to every potluck and family gathering. It’s the bread that makes people close their eyes when they take a bite, and honestly, that never gets old.
Why You’ll Love This Recipe
This isn’t just another apple bread recipe. This is the one that combines the cozy, spiced interior of a classic apple fritter with the tender, sliceable crumb of a loaf cake — all topped with a maple glaze that soaks into every nook and cranny. I’ve tested this recipe more times than I care to admit, and I can tell you with confidence that it delivers every single time.
- Incredibly Moist: Thanks to a combination of buttermilk and oil, this bread stays soft for days. No dry, crumbly slices here.
- Loaded with Real Apples: We’re not using apple flavoring. Fresh, tart apples are folded right into the batter for juicy pockets in every bite.
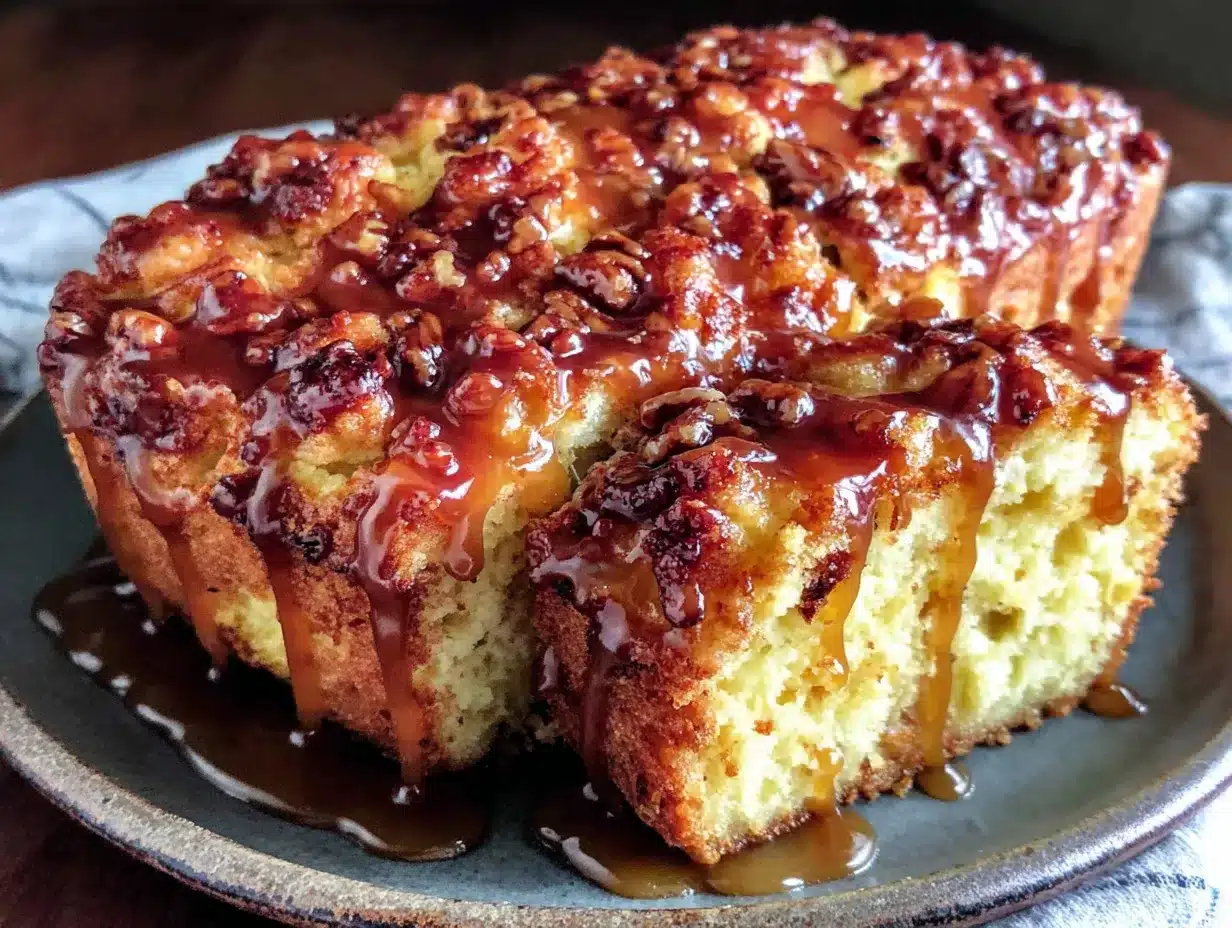
- That Maple Glaze Though: The glaze isn’t just a drizzle — it’s a thick, buttery maple blanket that seeps into the warm bread and creates a crackly top.
- Perfect for Entertaining: This bread looks impressive on a cake stand, slices beautifully, and makes your whole house smell like fall. Guests will think you spent hours on it.
- Simple Ingredients: You probably have most of these in your pantry right now. No specialty flours or hard-to-find extracts.
What makes this version different from the dozens of apple breads out there? It’s the texture. The outside has that slightly crisp, almost fried-dough feel you get from an actual fritter, but the inside is tender and almost custard-like. The apples soften as they bake, creating little pockets of jammy sweetness. And that glaze — it’s the kind of thing you want to eat with a spoon. Trust me, I’ve done it.
This is the bread you make when you want to impress people without breaking a sweat. It’s the kind of recipe that makes people ask for the recipe. And the best part? It comes together in about 15 minutes of active work. The oven does the rest.
What Ingredients You Will Need
This recipe uses simple, wholesome ingredients to create something truly special. Most of these are pantry staples, which means you can whip this up on a whim. Let me walk you through each one and why it matters.
For the Apple Fritter Bread
- All-purpose flour (2 cups / 240g): Spoon and level your flour for the best results. Too much flour makes the bread dense.
- Granulated sugar (¾ cup / 150g): Adds sweetness and helps create that tender crumb.
- Light brown sugar (½ cup / 100g, packed): This adds moisture and a subtle molasses flavor that pairs beautifully with apples and maple.
- Baking powder (1½ teaspoons): The main leavening agent. Make sure it’s fresh for a good rise.
- Baking soda (½ teaspoon): Helps with browning and lift.
- Salt (½ teaspoon): Balances the sweetness and enhances all the flavors.
- Ground cinnamon (1½ teaspoons): The backbone of the spice profile. I prefer Saigon cinnamon for its warmth.
- Ground nutmeg (¼ teaspoon): Just a pinch for depth. Freshly grated is best if you have it.
- Large eggs (2, room temperature): Room temperature eggs incorporate more air, giving you a lighter texture.
- Buttermilk (½ cup / 120ml): The acidity tenderizes the gluten and keeps the bread moist. No buttermilk? Use ½ cup milk + 1½ teaspoons lemon juice, let sit 5 minutes.
- Vegetable oil (½ cup / 120ml): Keeps the bread tender and moist for days. I use canola or avocado oil for a neutral flavor.
- Vanilla extract (1 teaspoon): Pure vanilla makes a difference here.
- Apples (2 medium, about 300g): I use Granny Smith for their tartness and firm texture. Honeycrisp or Fuji work too if you prefer a sweeter bread.
- Unsalted butter (3 tablespoons, melted): For the apple layer — it helps the cinnamon sugar coating stick.
- Cinnamon sugar mixture (¼ cup sugar + 1 teaspoon cinnamon): This gets tossed with the apples and layered into the batter for that classic fritter swirl.
For the Maple Glaze
- Powdered sugar (1 cup / 120g): Sifted for a smooth glaze.
- Pure maple syrup (3 tablespoons): Not pancake syrup — use the real stuff. Grade A dark amber has the best flavor here.
- Unsalted butter (2 tablespoons, melted): Adds richness and helps the glaze set with a slight sheen.
- Vanilla extract (½ teaspoon): Just to round out the flavors.
- Milk (1-2 teaspoons, as needed): To thin the glaze to your desired consistency.
I like to use King Arthur Flour for consistent results, and I always keep a bottle of real maple syrup from a local farm in my pantry for recipes like this. The difference in flavor is night and day. If you can only find imitation maple syrup, you’re better off using maple extract instead — just use ½ teaspoon mixed with 3 tablespoons of simple syrup.
Equipment Needed
You don’t need a fancy kitchen to make this bread. Here’s what you’ll need:
- 9×5-inch loaf pan: The standard size. If you use an 8×4-inch pan, you’ll need to increase the bake time by about 10 minutes.
- Mixing bowls: One large bowl for dry ingredients, one medium for wet ingredients.
- Whisk: For combining dry ingredients and smoothing out the batter.
- Rubber spatula: For folding in the apples and scraping every last bit of batter into the pan.
- Parchment paper: Line your loaf pan with a sling for easy removal. I learned this the hard way after a stuck loaf tragedy.
- Cooling rack: Essential for even cooling and preventing a soggy bottom.
- Small saucepan: For melting butter and making the glaze.
- Chef’s knife and cutting board: For dicing the apples.
- Measuring cups and spoons: For accuracy, especially with the flour.
If you don’t have a loaf pan, you can bake this in an 8×8-inch square pan — just reduce the baking time to about 35-40 minutes and check for doneness. A kitchen scale is nice to have for measuring flour, but measuring cups work just fine. My favorite loaf pan is a USA Pan — it’s sturdy and distributes heat evenly without burning the edges.
Preparation Method
Preheat your oven to 350°F (175°C). Line a 9×5-inch loaf pan with parchment paper, leaving some overhang on the long sides. This makes lifting the bread out so much easier. Lightly grease the parchment and any exposed pan with non-stick spray.
- Prepare the apples: Peel, core, and dice your apples into ½-inch cubes. You want them small enough to distribute evenly through the batter but large enough that you can actually taste them. In a small bowl, toss the diced apples with 1 tablespoon of the melted butter. In a separate small bowl, mix ¼ cup sugar with 1 teaspoon cinnamon. Add this to the buttered apples and toss to coat. Set aside while you make the batter.
- Mix the dry ingredients: In a large bowl, whisk together 2 cups all-purpose flour, ¾ cup granulated sugar, ½ cup packed brown sugar, 1½ teaspoons baking powder, ½ teaspoon baking soda, ½ teaspoon salt, 1½ teaspoons cinnamon, and ¼ teaspoon nutmeg. Make sure everything is evenly distributed. I like to use my fingers to break up any clumps of brown sugar.
- Mix the wet ingredients: In a separate medium bowl, whisk together 2 large eggs, ½ cup buttermilk, ½ cup vegetable oil, and 1 teaspoon vanilla extract. Whisk until smooth and slightly frothy — about 30 seconds. The mixture should be pale yellow and well combined.
- Combine wet and dry: Pour the wet ingredients into the dry ingredients. Stir with a rubber spatula until just combined. A few streaks of flour are okay — overmixing will make the bread tough. The batter will be thick, almost like a muffin batter. That’s exactly what we want.
- Layer the batter and apples: Pour half of the batter into the prepared loaf pan and spread it evenly. Sprinkle half of the cinnamon-sugar apples over the batter. Pour the remaining batter on top and spread gently. Arrange the remaining apples on top, pressing them slightly into the batter. Don’t worry if some are poking out — they’ll caramelize beautifully as they bake.
- Bake: Place the pan in the center of the oven and bake for 55-65 minutes. At the 30-minute mark, check the bread. If the top is browning too quickly, tent it loosely with aluminum foil. The bread is done when a toothpick inserted in the center comes out clean or with just a few moist crumbs. If you hit a pocket of apple, test in another spot.
- Cool: Let the bread cool in the pan for 15 minutes. Then, using the parchment sling, lift it out and transfer to a wire rack. Cool completely before glazing — about 1 hour. I know it’s tempting to glaze it warm, but the glaze will just slide right off.
- Make the glaze: While the bread cools, make the maple glaze. In a small bowl, whisk together 1 cup sifted powdered sugar, 3 tablespoons pure maple syrup, 2 tablespoons melted butter, and ½ teaspoon vanilla extract. Whisk until smooth. If it’s too thick, add milk 1 teaspoon at a time until it reaches a pourable consistency. The glaze should be thick enough to coat the back of a spoon but thin enough to drizzle.
- Glaze and serve: Once the bread is completely cool, drizzle the glaze over the top. Let it set for about 10 minutes before slicing. The glaze will form a crackly, slightly firm layer that shatters when you cut into it. Pure magic.
A quick note on timing: The active prep time is about 15 minutes, but the total time including cooling is around 2 hours. If you’re making this for a gathering, bake it the night before and glaze it the next morning. The flavors actually get better overnight.
Cooking Tips & Techniques
I’ve made this bread at least a dozen times, and I’ve learned a few things along the way. Here are my best tips for getting it right every time.
Don’t overmix the batter. I cannot stress this enough. Stir just until the flour disappears. Overmixing develops the gluten, which gives you a tough, dense bread instead of a tender, fluffy one. A few lumps are totally fine — they’ll bake out.
Use room temperature ingredients. Cold eggs and cold buttermilk won’t emulsify properly with the oil, which can lead to a greasy texture. Leave your eggs and buttermilk on the counter for 30 minutes before you start. In a pinch, you can warm the buttermilk in the microwave for 10 seconds and place the eggs in a bowl of warm water for 5 minutes.
Choose the right apple. I’ve tested this with Gala, Fuji, and Honeycrisp, and while they all work, Granny Smith is my favorite. The tartness cuts through the sweetness of the batter and glaze, and they hold their shape better during baking. If you use a softer apple like McIntosh, it will break down into applesauce — which isn’t bad, but you won’t get those distinct apple chunks.
Check for doneness properly. The toothpick test is reliable, but make sure you’re testing the bread part, not a pocket of apple. A wet apple will make the toothpick look underdone even when the bread is perfectly baked. Test in at least two spots. If the top springs back when lightly pressed, it’s done.
Let it cool completely. I know the smell is intoxicating, and you want to dive in immediately. But slicing warm bread will give you crumbly, messy slices, and the glaze will just melt into a puddle. Patience pays off here. I once glazed a slightly warm loaf, and the glaze soaked right in instead of forming that beautiful crackly top. Learn from my mistake.
Make a double batch. This bread freezes beautifully, and it makes a fantastic gift. I always make two loaves — one for now, one for later. Wrap the unglazed loaf tightly in plastic wrap, then foil, and freeze for up to 3 months. Thaw overnight in the fridge, then glaze before serving.
Variations & Adaptations
One of the things I love about this recipe is how adaptable it is. Here are some of my favorite variations:
Gluten-Free Version: Substitute the all-purpose flour with a 1:1 gluten-free baking flour blend that contains xanthan gum. I’ve had great results with Bob’s Red Mill 1-to-1 Baking Flour. The texture is slightly more delicate, so handle the batter gently. Everything else stays the same.
Dairy-Free Version: Use a plant-based buttermilk made by mixing ½ cup unsweetened almond or oat milk with 1½ teaspoons lemon juice. Replace the melted butter in the apple layer with coconut oil, and use vegan butter in the glaze. It works perfectly.
Apple Pear Fritter Bread: Swap one of the apples for a ripe but firm pear, like Bosc or Anjou. The pear adds a subtle honeyed sweetness that pairs beautifully with the maple glaze. Dice it the same size as the apples and toss it in the cinnamon sugar mixture.
Caramel Apple Version: Skip the maple glaze and make a caramel sauce instead. Melt ½ cup butter with 1 cup brown sugar and ¼ cup heavy cream, simmer for 5 minutes, and pour over the cooled bread. It’s decadent and absolutely worth the extra calories.
Spiced Walnut Variation: Add ½ cup toasted, chopped walnuts to the batter along with the apples. The crunch adds a lovely contrast to the tender crumb. Toast the walnuts first for the best flavor — just 5 minutes in a 350°F oven will do it.
I once made a version with fresh cranberries and orange zest for a holiday brunch, and it was a hit. Just fold in ½ cup fresh or frozen cranberries (no need to thaw) and 1 tablespoon orange zest with the apples. The tartness of the cranberries against the sweet maple glaze is incredible.
Serving & Storage Suggestions
This bread is versatile enough for breakfast, brunch, dessert, or an afternoon snack with coffee. Here’s how to serve and store it for the best experience.
Serving: Serve at room temperature or slightly warm. If you want to warm individual slices, pop them in the microwave for 15 seconds or in a 300°F oven for 5 minutes. The glaze softens slightly but stays intact. For a truly indulgent treat, serve a slice with a scoop of vanilla ice cream or a dollop of lightly sweetened whipped cream. A drizzle of extra maple syrup over the top never hurts either.
What to serve alongside: This bread is wonderful on its own, but it pairs beautifully with a hot cup of coffee, chai latte, or spiced apple cider. For a brunch spread, serve it alongside a frittata or scrambled eggs and fresh fruit. The sweetness of the bread balances the savory elements perfectly.
Storage: Store the glazed bread in an airtight container at room temperature for up to 3 days. If you live in a humid climate, the glaze may get slightly sticky — that’s normal. For longer storage, refrigerate the bread for up to 5 days, but let it come to room temperature before serving for the best texture.
Freezing: As I mentioned, this bread freezes beautifully. Freeze it unglazed for the best results. Wrap the cooled loaf tightly in plastic wrap, then a layer of aluminum foil, and freeze for up to 3 months. When you’re ready to serve, thaw overnight in the refrigerator, then make the glaze fresh and drizzle it over the top. The glaze does not freeze well, so always add it after thawing.
Flavor development: Here’s a little secret — this bread actually tastes better on day two. The flavors meld together, and the texture becomes even more moist and tender. If you can resist eating it right away, wrap it tightly and let it sit at room temperature overnight before glazing. You won’t regret it.
Nutritional Information & Benefits
While this bread is definitely a treat, it does have some redeeming qualities. Here’s the estimated nutritional breakdown per slice (based on 10 slices):
| Nutrient | Amount per Slice |
|---|---|
| Calories | 345 |
| Total Fat | 15g |
| Saturated Fat | 4g |
| Cholesterol | 45mg |
| Sodium | 210mg |
| Total Carbohydrates | 51g |
| Dietary Fiber | 2g |
| Sugars | 32g |
| Protein | 4g |
Apples are a good source of dietary fiber and vitamin C, and they contain antioxidants that support heart health. Cinnamon has anti-inflammatory properties and may help regulate blood sugar levels. The buttermilk adds calcium and probiotics (if using traditional cultured buttermilk).
This recipe contains gluten, dairy, and eggs. For those with dietary restrictions, the variations section above offers suitable alternatives. I personally love that this bread feels indulgent but uses real, recognizable ingredients — no preservatives, no artificial flavors, just honest food that makes you feel good.
Conclusion
This maple glazed apple fritter bread is the kind of recipe that becomes a staple. It’s the one you make for Thanksgiving brunch, for a neighbor who just had a baby, for a rainy Sunday when you need something warm and comforting. It’s simple enough for a beginner baker but impressive enough to steal the show at any gathering.
What I love most about this recipe is how forgiving it is. You don’t need to be a pastry chef to nail it. The apples do most of the work, adding moisture and flavor that makes you look like a pro. And that maple glaze — honestly, I sometimes make extra just to have on hand for drizzling over pancakes or yogurt.
I’d love to hear how yours turns out. Did you try a variation? Did you use a different apple? Drop a comment below and let me know. And if you share a photo on Pinterest, tag me — I love seeing your baking adventures. Happy baking, friends. This one’s a keeper.
Frequently Asked Questions
Can I use whole wheat flour instead of all-purpose flour?
You can substitute up to half of the all-purpose flour with whole wheat flour without drastically changing the texture. Using 100% whole wheat will make the bread denser and more nutty in flavor. If you try it, add an extra 2 tablespoons of buttermilk to compensate for the whole wheat’s absorbency.
Why did my bread sink in the middle?
A sunken middle usually means the bread was underbaked or the oven temperature was too low. Make sure your oven is properly preheated to 350°F, and always test for doneness with a toothpick. Opening the oven door too early can also cause the bread to collapse — wait until at least the 30-minute mark before checking.
Can I make this recipe into muffins instead of a loaf?
Absolutely. Grease a 12-cup muffin tin and divide the batter evenly. Bake at 350°F for 18-22 minutes, or until a toothpick comes out clean. You’ll get about 12 muffins. Drizzle the maple glaze over the cooled muffins just like you would the loaf. They’re perfect for grab-and-go breakfasts.
How do I prevent the apples from sinking to the bottom?
Tossing the diced apples in the cinnamon sugar mixture and a tablespoon of flour before adding them to the batter helps them stay suspended. Also, layering the batter and apples as directed in the recipe creates structure that holds everything in place. Don’t skip the layering step.
Can I use frozen apples?
I don’t recommend using frozen apples for this recipe. Frozen apples release too much moisture as they thaw, which can make the batter watery and lead to a gummy texture. Stick with fresh apples for the best results. If you only have frozen, thaw and drain them thoroughly, then pat dry with paper towels before using.
Pin This Recipe!
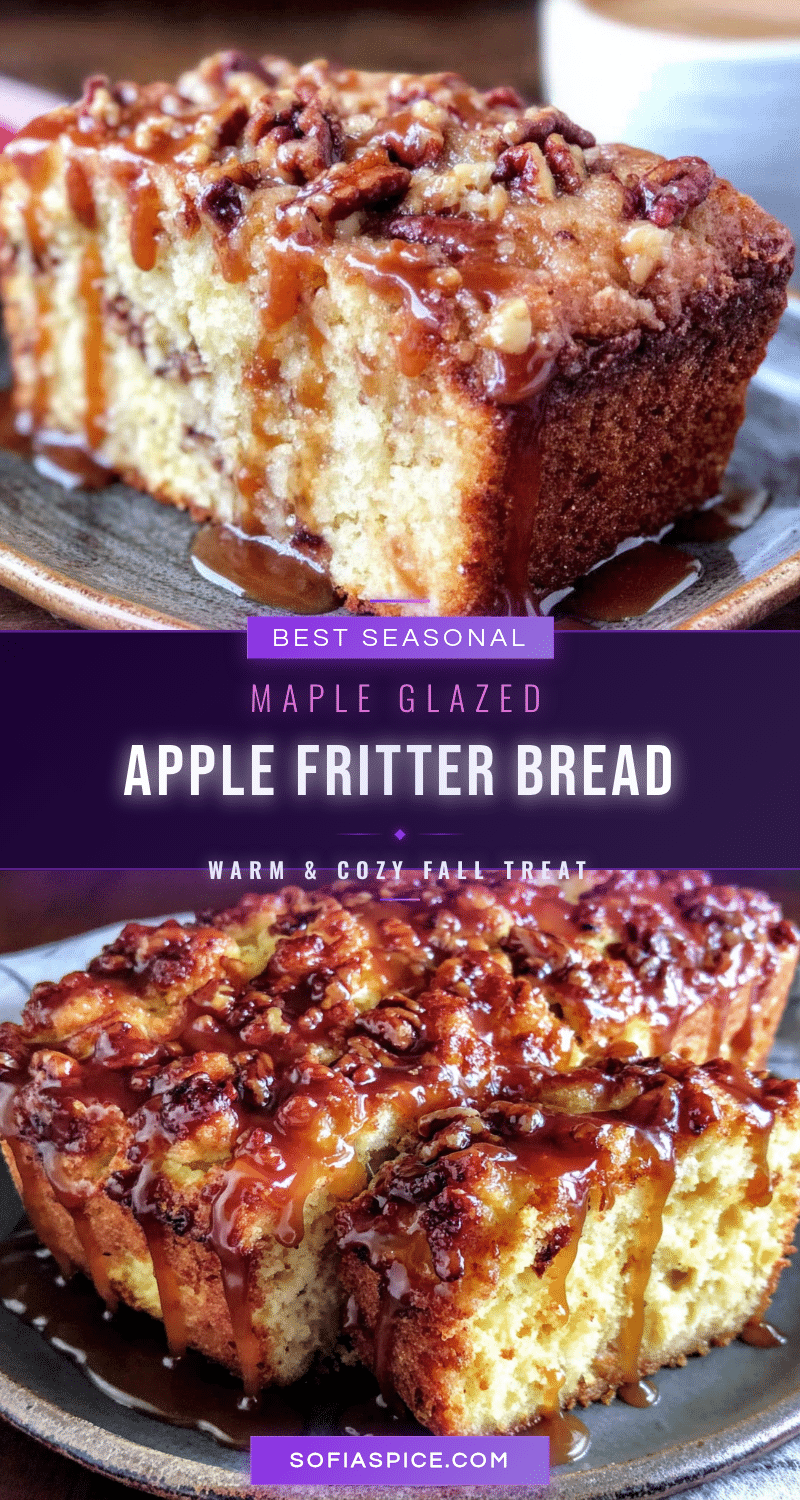
Best Maple Glazed Apple Fritter Bread (Easy Homemade)
This maple glazed apple fritter bread combines the cozy, spiced interior of a classic apple fritter with the tender, sliceable crumb of a loaf cake, all topped with a maple glaze that soaks into every nook and cranny.
- Prep Time: 15 minutes
- Cook Time: 55-65 minutes
- Total Time: 2 hours (including cooling)
- Yield: 10 servings 1x
- Category: Dessert
- Cuisine: American
Ingredients
- 2 cups all-purpose flour (240g)
- 3/4 cup granulated sugar (150g)
- 1/2 cup light brown sugar, packed (100g)
- 1 1/2 teaspoons baking powder
- 1/2 teaspoon baking soda
- 1/2 teaspoon salt
- 1 1/2 teaspoons ground cinnamon
- 1/4 teaspoon ground nutmeg
- 2 large eggs, room temperature
- 1/2 cup buttermilk (120ml)
- 1/2 cup vegetable oil (120ml)
- 1 teaspoon vanilla extract
- 2 medium apples (about 300g), peeled, cored, and diced into 1/2-inch cubes
- 3 tablespoons unsalted butter, melted
- 1/4 cup granulated sugar
- 1 teaspoon ground cinnamon
- 1 cup powdered sugar (120g), sifted
- 3 tablespoons pure maple syrup
- 2 tablespoons unsalted butter, melted
- 1/2 teaspoon vanilla extract
- 1–2 teaspoons milk, as needed
Instructions
- Preheat oven to 350°F (175°C). Line a 9×5-inch loaf pan with parchment paper, leaving overhang on the long sides. Lightly grease parchment and exposed pan with non-stick spray.
- Prepare the apples: In a small bowl, toss diced apples with 1 tablespoon melted butter. In another small bowl, mix 1/4 cup sugar with 1 teaspoon cinnamon. Add to buttered apples and toss to coat. Set aside.
- Mix dry ingredients: In a large bowl, whisk together flour, 3/4 cup granulated sugar, brown sugar, baking powder, baking soda, salt, 1 1/2 teaspoons cinnamon, and nutmeg.
- Mix wet ingredients: In a medium bowl, whisk together eggs, buttermilk, vegetable oil, and 1 teaspoon vanilla extract until smooth and slightly frothy.
- Combine wet and dry: Pour wet ingredients into dry ingredients. Stir with a rubber spatula until just combined (a few streaks of flour are okay).
- Layer batter and apples: Pour half the batter into prepared pan and spread evenly. Sprinkle half the cinnamon-sugar apples over batter. Pour remaining batter on top and spread gently. Arrange remaining apples on top, pressing slightly into batter.
- Bake: Place pan in center of oven and bake for 55-65 minutes. At 30 minutes, check bread; if top is browning too quickly, tent loosely with foil. Bread is done when a toothpick inserted in center comes out clean or with a few moist crumbs.
- Cool: Let bread cool in pan for 15 minutes. Using parchment sling, lift out and transfer to a wire rack. Cool completely before glazing (about 1 hour).
- Make glaze: In a small bowl, whisk together sifted powdered sugar, maple syrup, 2 tablespoons melted butter, and 1/2 teaspoon vanilla extract until smooth. If too thick, add milk 1 teaspoon at a time until pourable.
- Glaze and serve: Once bread is completely cool, drizzle glaze over top. Let set for about 10 minutes before slicing.
Notes
Don’t overmix the batter. Use room temperature ingredients. Choose Granny Smith apples for best results. Let bread cool completely before glazing. Bread tastes even better on day two. Freeze unglazed for up to 3 months.
Nutrition
- Serving Size: 1 slice
- Calories: 345
- Sugar: 32
- Sodium: 210
- Fat: 15
- Saturated Fat: 4
- Carbohydrates: 51
- Fiber: 2
- Protein: 4
Keywords: apple fritter bread, maple glazed apple bread, apple loaf cake, fall baking, apple bread recipe, easy apple bread, maple glaze


