My neighbor, Linda, watched me wrestling with a massive pumpkin pie crust on a Tuesday afternoon. I was sweating, covered in flour, and muttering about how I’d never get the lattice top right before the Halloween party that night. She didn’t say anything at first. Then she just walked over, gently nudged me aside, and pulled two pre-made pie crusts from my fridge. “We’re making hand pies,” she said, like it was the most obvious thing in the world. “Tiny ones. Your guests won’t have to fight with a fork, and you won’t have to cry over a soggy bottom.”
I have to admit, I was skeptical. Hand pies felt like something you’d find at a fancy bakery, not something you’d throw together on a frantic Tuesday afternoon. But Linda had this quiet confidence that made you want to trust her. She showed me how to use a biscuit cutter to punch out perfect little circles, filled them with canned pumpkin that I’d doctored up, and crimped the edges with a fork. Honestly, the whole thing took maybe 20 minutes of active work. I mean, I’d spent more time that morning just trying to roll out my dough without it cracking.
That night, those mini pumpkin hand pies disappeared faster than the candy bowl. People kept walking by the dessert table and grabbing another one, and another one. They’re just the right size—not a commitment, you know? You can eat three and still feel fine about it. And the best part? Not a single person asked for a plate or a fork. They just picked them up, took a bite, and smiled. Maybe you’ve been there, standing in a kitchen full of half-finished projects, wondering why you always make things so complicated. This recipe is for that moment. It’s the shortcut that actually tastes like you tried, the one that lets you actually enjoy your own party.
Why You’ll Love This Recipe
Let me tell you why these little pies have become my go-to for every Halloween party, potluck, and fall gathering. I’ve tested this recipe about a dozen times now, tweaking the filling, adjusting the bake time, and even trying different crust brands. This version is the one that works every single time.
- Quick & Easy: These come together in about 30 minutes total. No chilling dough, no rolling out a giant crust, no fussing with a lattice top. You can literally make these in the time it takes to watch one episode of your favorite show.
- Simple Ingredients: You probably already have most of this stuff in your kitchen. Canned pumpkin, a few warm spices, some sugar, and store-bought pie crust. No special trip to the fancy grocery store required.
- Perfect for Halloween Parties: They’re portable, they’re bite-sized, and they look adorable on a platter. Your guests can grab one and keep mingling without needing a plate or a fork. Total game-changer for party hosting.
- Crowd-Pleaser: I’ve served these to kids, adults, pumpkin lovers, and pumpkin skeptics. They always get rave reviews. There’s something about that flaky crust and warm, spiced filling that just works for everyone.
- Unbelievably Delicious: The filling is perfectly spiced—not too sweet, not too heavy. And that flaky crust? It’s the kind that shatters when you bite into it, in the best possible way.
What makes this recipe different from all the other pumpkin hand pie recipes out there? It’s the balance. I’ve tested the spice ratios until they’re just right—enough cinnamon and ginger to taste warm and cozy, but not so much that it overpowers the pumpkin. Plus, I’ve figured out the trick to preventing soggy bottoms, which is honestly the biggest challenge with any hand pie. A little egg wash and the right bake time make all the difference.
This recipe isn’t just good—it’s the kind that makes you close your eyes after the first bite. It’s comfort food reimagined for a busy weeknight or a party where you want to actually talk to your guests instead of hovering over the oven. Perfect for impressing people without any stress, or turning a simple Tuesday into something a little special.
What Ingredients You Will Need
This recipe uses simple, wholesome ingredients to deliver that classic pumpkin pie flavor without any fuss. Most of these are pantry staples, especially if you do any fall baking at all.
For the Filling
- 1 cup canned pumpkin puree (not pumpkin pie filling—make sure you grab the plain stuff. I prefer Libby’s for its consistent texture)
- 1/3 cup granulated sugar (adds just the right sweetness without being cloying)
- 1 large egg yolk (helps bind the filling and gives it a silky texture. Save the white for the egg wash)
- 1 teaspoon ground cinnamon (the backbone of pumpkin spice. I use McCormick, but any brand works)
- 1/2 teaspoon ground ginger (adds a little warmth and zing)
- 1/4 teaspoon ground nutmeg (freshly grated is amazing, but pre-ground is totally fine)
- 1/4 teaspoon ground cloves (just a pinch—these are potent)
- 1/4 teaspoon salt (don’t skip this—it balances the sweetness and brings out the pumpkin flavor)
- 1 teaspoon vanilla extract (adds depth and rounds out the spices)
For the Crust
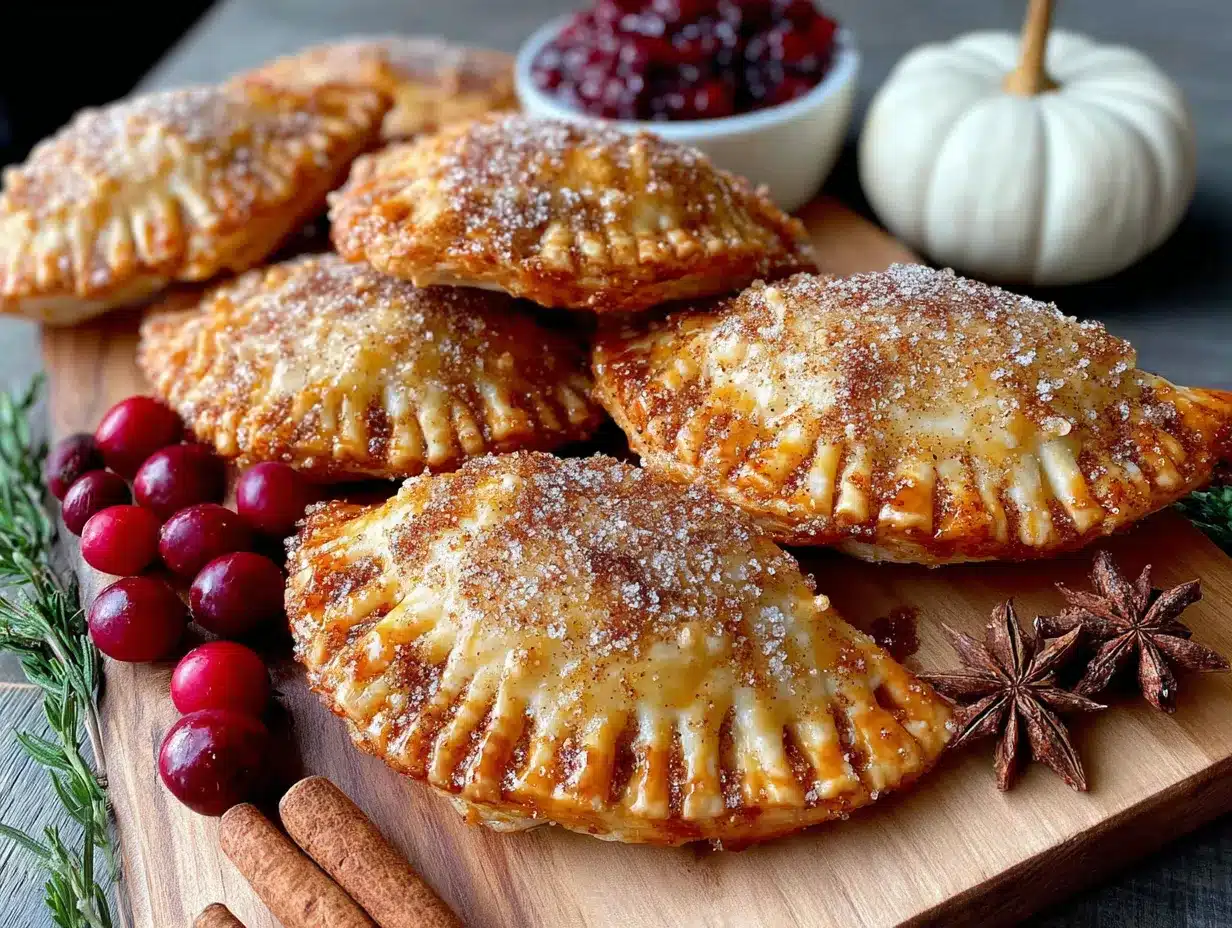
- 2 refrigerated pie crusts (about 14-15 ounces total. I recommend Pillsbury for consistent results, but any brand works. You can also use homemade if you’re feeling ambitious—just make sure it’s rolled to about 1/8-inch thickness)
- 1 large egg (for the egg wash—this gives the pies that beautiful golden-brown sheen)
- 1 tablespoon water (to thin the egg wash)
- Coarse sugar or sanding sugar (optional, for sprinkling on top. It adds a lovely crunch and a little sparkle)
Ingredient Tips: If you can’t find canned pumpkin puree, you can substitute with roasted and mashed butternut squash—it has a similar texture and sweetness. For a dairy-free option, all the ingredients here are naturally dairy-free except the egg wash, which you can replace with a splash of milk or plant-based milk. And if you want to make these gluten-free, use gluten-free pie crust. I’ve tried the Wholly Gluten Free brand and it works beautifully.
Equipment Needed
You don’t need much fancy equipment for these hand pies, which is honestly one of the best things about them. Here’s what you’ll need:
- Baking sheet (a standard half-sheet pan works perfectly. Line it with parchment paper for easy cleanup)
- Parchment paper (non-negotiable for preventing sticking and making cleanup a breeze)
- 3-inch round biscuit cutter or cookie cutter (this is the perfect size for mini hand pies. If you don’t have one, you can use a drinking glass with a thin rim—just make sure it’s about 3 inches in diameter)
- Rolling pin (even if you’re using pre-made crusts, you might need to roll them out just a tiny bit to get enough circles)
- Small bowl (for mixing the egg wash)
- Pastry brush (for applying the egg wash. A silicone one is easiest to clean, but any brush works)
- Fork (for crimping the edges and creating steam vents)
- Spatula (for transferring the pies to the baking sheet)
Budget-Friendly Options: Don’t have a biscuit cutter? Use a clean, empty can (like a tuna can or tomato paste can) with both ends removed. It works just as well. No pastry brush? Use a clean, unused paintbrush from the hardware store, or just dab the egg wash on with your finger—it’s not as neat, but it gets the job done.
Preparation Method
Alright, let’s get to the good part. Here’s how to make these little beauties, step by step.
- Preheat your oven to 375°F (190°C). Line a baking sheet with parchment paper and set it aside. Getting the oven hot first means you won’t be waiting around later.
- Make the filling. In a medium bowl, combine 1 cup canned pumpkin puree, 1/3 cup granulated sugar, 1 large egg yolk, 1 teaspoon cinnamon, 1/2 teaspoon ginger, 1/4 teaspoon nutmeg, 1/4 teaspoon cloves, 1/4 teaspoon salt, and 1 teaspoon vanilla extract. Whisk everything together until smooth and well combined. Give it a taste—it should be sweet and spiced, but not overpowering. Adjust the spices if you like things more or less intense. Set the filling aside while you prepare the crust.
- Prepare the crust. Take one pie crust out of the refrigerator and let it sit at room temperature for about 5 minutes—this makes it easier to handle without cracking. Unroll it onto a lightly floured surface. If the dough feels too soft, pop it back in the fridge for 5 minutes. You want it cold but pliable.
- Cut out the circles. Using your 3-inch biscuit cutter, cut out as many circles as you can from the first crust. You should get about 6 to 8 circles, depending on how close you cut them. Gently press the scraps together, reroll them, and cut out more circles. Repeat with the second crust. You should end up with 12 to 16 circles total—enough for 6 to 8 hand pies (two circles per pie).
- Fill the pies. Place half of the circles on your prepared baking sheet, spacing them about 2 inches apart. Spoon about 1 tablespoon of the pumpkin filling into the center of each circle. Be careful not to overfill—you need room to seal the edges. Leave about a 1/2-inch border around the filling.
- Top and seal. Place the remaining circles on top of the filled ones. Gently press the edges together with your fingers to seal. Then, use a fork to crimp the edges all the way around—this not only looks pretty but also creates a tight seal so the filling doesn’t leak out during baking.
- Add steam vents. Use a sharp knife or a small paring knife to cut 2 or 3 small slits on top of each pie. This lets steam escape and prevents the pies from bursting open in the oven. Don’t skip this step—I learned the hard way when my first batch turned into little pumpkin volcanoes.
- Apply the egg wash. In a small bowl, whisk together 1 large egg and 1 tablespoon of water until smooth. Brush this mixture over the top of each pie. If you’re using coarse sugar, sprinkle it on now while the egg wash is still wet. The egg wash is what gives the pies that gorgeous golden-brown color and a little shine.
- Bake. Place the baking sheet in the preheated oven and bake for 15 to 18 minutes, or until the pies are golden brown and the filling is bubbly. Keep an eye on them after the 15-minute mark—ovens vary, and you don’t want them to get too dark. The pies should look like little golden pillows when they’re done.
- Cool. Let the pies cool on the baking sheet for about 5 minutes, then transfer them to a wire rack to cool completely. The filling will be extremely hot right out of the oven, so resist the urge to bite into one immediately. Trust me on this.
Pro Tip: If you want to make these ahead of time, you can assemble the pies, place them on the baking sheet, and refrigerate them for up to 4 hours before baking. Just add an extra minute or two to the bake time since they’ll be going into the oven cold.
Cooking Tips & Techniques
I’ve made these hand pies more times than I can count, and I’ve definitely learned a few things along the way. Here are my best tips for getting perfect results every time.
Don’t overfill the pies. I know it’s tempting to pile on the pumpkin filling, but trust me—less is more here. A generous tablespoon is plenty. If you overfill, the pies will leak during baking, and you’ll end up with a sticky mess on your baking sheet. Plus, the filling needs room to expand as it heats up.
Keep the dough cold. Warm dough is sticky dough, and sticky dough is impossible to work with. If your dough starts feeling soft or greasy, pop it in the fridge for 10 minutes. Cold dough holds its shape better and gives you a flakier crust. This is one of those tips that sounds fussy but actually saves you time in the long run.
Seal those edges well. I cannot stress this enough. If you don’t crimp the edges properly, the filling will leak out and burn on the baking sheet. Use a fork and press down firmly, making sure the two layers of dough are completely sealed together. Run your finger along the edge to check for any gaps before baking.
Watch the bake time. Every oven runs a little differently. My old oven used to run hot, and I’d burn the bottoms of my pies before the tops were even golden. If you have an oven thermometer, use it. And if you notice the pies browning unevenly, rotate the baking sheet halfway through the bake time.
Let them cool completely. I know it’s hard to wait, but these pies really need to cool before you eat them. The filling sets as it cools, so if you bite into a hot pie, the filling will just run out. Plus, the crust needs time to crisp up. Give them at least 15 minutes on a wire rack before serving.
One more thing: If your pies leak a little during baking, don’t panic. It happens to the best of us. Just let them cool completely, then gently trim off any burnt filling bits with a knife. No one will ever know.
Variations & Adaptations
One of the best things about this recipe is how easy it is to adapt. Here are some of my favorite variations.
Spice it up. If you like things a little more adventurous, add a pinch of cayenne pepper or a dash of chili powder to the filling. The heat pairs surprisingly well with the sweet pumpkin and warm spices. I tried this on a whim last year, and it was a huge hit at the party.
Make it vegan. Swap the egg yolk in the filling for a tablespoon of cornstarch mixed with 2 tablespoons of water. Use a plant-based milk or melted vegan butter for the egg wash. And make sure your pie crust is vegan-friendly—many store-bought brands are. The texture will be slightly different, but still delicious.
Add some texture. Stir in 1/4 cup of chopped pecans or walnuts to the filling for a little crunch. Or sprinkle some toasted pumpkin seeds on top before baking for a festive touch. I love the contrast of the soft filling and the crunchy nuts.
Switch up the shape. Use Halloween-themed cookie cutters instead of round ones. Ghosts, bats, and pumpkins are all great options. Just make sure the cutters are about the same size as your biscuit cutter—3 inches is ideal. You’ll need to cut two matching shapes for each pie, so choose a shape that’s easy to align.
Make them savory. Skip the sugar and add some sage, thyme, and a pinch of black pepper to the filling. Top with a sprinkle of flaky salt instead of coarse sugar. These savory hand pies are amazing with a bowl of soup or as a Thanksgiving appetizer. I’ve even made them with a little crumbled sausage mixed in—total comfort food.
Serving & Storage Suggestions
These mini pumpkin hand pies are incredibly versatile when it comes to serving. Here’s how I like to do it.
Serving: These are best served at room temperature, which makes them perfect for parties. Arrange them on a platter and let guests grab as many as they want. If you want to get fancy, dust them with a little powdered sugar just before serving or drizzle with a simple glaze made from powdered sugar and milk. For a truly decadent treat, serve them warm with a scoop of vanilla ice cream or a dollop of whipped cream.
What to serve with them: These hand pies pair beautifully with a hot cup of coffee, a spiced chai latte, or a glass of cold apple cider. If you’re serving them as part of a Halloween spread, they go great with other finger foods like mini quiches, stuffed mushrooms, or a cheese board.
Storage: Store any leftover hand pies in an airtight container at room temperature for up to 3 days. If you stack them, place a layer of parchment paper between each layer to prevent sticking. Do not refrigerate them—the fridge will make the crust soggy.
Freezing: These pies freeze beautifully. Place the cooled, unbaked pies on a baking sheet and freeze until solid, about 2 hours. Then transfer them to a freezer-safe bag or container. They’ll keep for up to 3 months. When you’re ready to bake, just pop them straight from the freezer into the oven, adding 3 to 5 minutes to the bake time.
Reheating: If you want to reheat leftover pies, pop them in a 350°F oven for about 5 minutes. This crisps up the crust and warms the filling without making it soggy. The microwave works in a pinch, but the crust will be soft rather than flaky.
Flavor development: Honestly, these pies taste even better the next day. The flavors have time to meld together, and the filling gets a little thicker and more luxurious. So if you can resist eating them all right away, you’re in for a treat.
Nutritional Information & Benefits
Here’s the nutritional breakdown for one mini hand pie (based on 8 servings):
- Calories: 180-200
- Total Fat: 9g
- Saturated Fat: 3g
- Carbohydrates: 24g
- Fiber: 2g
- Sugar: 11g
- Protein: 3g
- Sodium: 200mg
Health Benefits: Pumpkin is packed with vitamin A, which is great for your eyes and immune system. It’s also a good source of fiber, which helps keep you feeling full and satisfied. The cinnamon in the filling has anti-inflammatory properties and can help regulate blood sugar levels. And let’s be honest—these hand pies are a much better option than a candy bar when you’re craving something sweet.
Dietary Considerations: This recipe can be made gluten-free by using a gluten-free pie crust. It’s naturally nut-free and soy-free if you check your pie crust ingredients. To make it vegan, follow the substitutions I mentioned in the variations section.
Potential Allergens: This recipe contains wheat (in the pie crust) and eggs. If you have allergies, make sure to check your pie crust label carefully—some brands may contain soy or dairy.
Conclusion
I know I might sound biased, but these mini pumpkin hand pies really are the perfect Halloween party treat. They’re quick enough to make on a busy weeknight, simple enough that you don’t need any special skills, and delicious enough that everyone will ask you for the recipe. Plus, they’re just so darn cute sitting on a platter, all golden and shiny.
I love that this recipe lets me actually enjoy my own party instead of spending the whole time in the kitchen. I can make them ahead of time, set them out on a platter, and actually sit down and talk to my guests. That’s the kind of cooking I want to do more of—the kind that brings people together without stressing me out.
So go ahead and give these a try. Make them your own—add some extra spice, change up the shape, or experiment with different fillings. And when you do, I’d love to hear about it. Drop a comment below and let me know how they turned out, or share a photo of your hand pies on social media. Happy Halloween, and happy baking!
Frequently Asked Questions
Can I use homemade pie crust instead of store-bought?
Absolutely! Homemade pie crust works perfectly in this recipe. Just make sure it’s rolled to about 1/8-inch thickness so you can cut out enough circles. The bake time should be the same.
Can I make these hand pies ahead of time for a party?
Yes, you have two options. You can assemble the pies, refrigerate them unbaked for up to 4 hours, then bake just before serving. Or you can bake them completely, let them cool, and store them at room temperature for up to 3 days.
Why did my hand pies leak in the oven?
Leaking usually happens for two reasons: either you overfilled the pies, or you didn’t seal the edges properly. Next time, use just 1 tablespoon of filling and press the edges firmly with a fork to create a tight seal.
Can I freeze these hand pies?
Yes! Freeze the unbaked pies on a baking sheet until solid, then transfer to a freezer bag. They’ll keep for up to 3 months. Bake straight from frozen, adding 3 to 5 minutes to the bake time.
How do I prevent the bottom crust from getting soggy?
Baking the pies on a preheated baking sheet helps. You can also brush the bottom crust with a thin layer of egg wash before adding the filling. And make sure your filling isn’t too wet—if it seems runny, cook it on the stove for a few minutes to thicken it.
Pin This Recipe!

Best Easy Mini Pumpkin Hand Pies for Halloween

These mini pumpkin hand pies are quick, easy, and perfect for Halloween parties. Made with simple ingredients like canned pumpkin and store-bought pie crust, they’re portable, bite-sized, and disappear fast.
- Prep Time: 20 minutes
- Cook Time: 15-18 minutes
- Total Time: 35-38 minutes
- Yield: 8 servings 1x
- Category: Dessert
- Cuisine: American
Ingredients
- 1 cup canned pumpkin puree (not pumpkin pie filling)
- 1/3 cup granulated sugar
- 1 large egg yolk
- 1 teaspoon ground cinnamon
- 1/2 teaspoon ground ginger
- 1/4 teaspoon ground nutmeg
- 1/4 teaspoon ground cloves
- 1/4 teaspoon salt
- 1 teaspoon vanilla extract
- 2 refrigerated pie crusts (about 14–15 ounces total)
- 1 large egg (for egg wash)
- 1 tablespoon water (for egg wash)
- Coarse sugar or sanding sugar (optional, for sprinkling)
Instructions
- Preheat your oven to 375°F (190°C). Line a baking sheet with parchment paper and set aside.
- Make the filling: In a medium bowl, combine 1 cup canned pumpkin puree, 1/3 cup granulated sugar, 1 large egg yolk, 1 teaspoon cinnamon, 1/2 teaspoon ginger, 1/4 teaspoon nutmeg, 1/4 teaspoon cloves, 1/4 teaspoon salt, and 1 teaspoon vanilla extract. Whisk until smooth and well combined. Set aside.
- Prepare the crust: Take one pie crust out of the refrigerator and let it sit at room temperature for about 5 minutes. Unroll it onto a lightly floured surface.
- Cut out the circles: Using a 3-inch biscuit cutter, cut out as many circles as you can from the first crust (about 6 to 8). Gently press the scraps together, reroll, and cut out more circles. Repeat with the second crust. You should have 12 to 16 circles total.
- Fill the pies: Place half of the circles on the prepared baking sheet, spacing them about 2 inches apart. Spoon about 1 tablespoon of the pumpkin filling into the center of each circle, leaving a 1/2-inch border.
- Top and seal: Place the remaining circles on top of the filled ones. Gently press the edges together with your fingers, then use a fork to crimp the edges all the way around.
- Add steam vents: Use a sharp knife to cut 2 or 3 small slits on top of each pie.
- Apply the egg wash: In a small bowl, whisk together 1 large egg and 1 tablespoon of water until smooth. Brush this mixture over the top of each pie. If using, sprinkle coarse sugar on top while the egg wash is still wet.
- Bake: Place the baking sheet in the preheated oven and bake for 15 to 18 minutes, or until the pies are golden brown and the filling is bubbly.
- Cool: Let the pies cool on the baking sheet for about 5 minutes, then transfer them to a wire rack to cool completely.
Notes
Don’t overfill the pies to prevent leaking. Keep the dough cold for a flakier crust. Seal edges well to avoid filling leakage. Let pies cool completely before serving to allow the filling to set. For make-ahead, assemble pies and refrigerate unbaked for up to 4 hours before baking. Freeze unbaked pies for up to 3 months.
Nutrition
- Serving Size: 1 mini hand pie
- Calories: 190
- Sugar: 11
- Sodium: 200
- Fat: 9
- Saturated Fat: 3
- Carbohydrates: 24
- Fiber: 2
- Protein: 3
Keywords: mini pumpkin hand pies, Halloween dessert, easy pumpkin hand pies, mini hand pies, pumpkin hand pies


