You know that moment when you realize the school Halloween party is in two days and you signed up to bring treats? That was me last October, staring at a grocery list that kept getting longer and a schedule that had zero room for complicated baking projects. I had been looking for a Halloween treat that actually looked festive without requiring fondant skills I definitely don’t possess. The gap was real — cute Halloween desserts that a regular person could pull off on a Tuesday night after work.
I tried the store-bought route once. Those pre-packaged cupcakes with plastic rings on top? They tasted like cardboard and disappointment. My kids looked at me like I’d betrayed them. So I went back to basics — a solid vanilla cupcake recipe I’d been tweaking for years, and a buttercream that pipes like a dream. The ghost part came from a happy accident. I overfilled a piping bag and squeezed too hard, and suddenly I had this lopsided little ghost staring back at me. My daughter laughed so hard she snorted.
That accident turned into a tradition. These Halloween ghost cupcakes aren’t fancy. They’re the kind of thing you can make with a four-year-old “helping” you, and they’ll still turn out adorable. The buttercream is stable enough to hold its shape but soft enough that it feels like a real treat. I’ve made them for three Halloween parties now, and they disappear faster than the candy corn every single time.
Honestly, this recipe stuck because it solved a real problem. I needed something that looked special but didn’t require a pastry degree. Something my kids could help with. Something that didn’t make me want to throw a piping bag across the kitchen. These ghost cupcakes check every box. And once you see how easy the decorating is, you’ll wonder why you ever bought the boxed stuff.
Why You’ll Love This Recipe
I’ve tested this recipe more times than I care to admit. The first batch was good. The third batch was better. By batch number seven, I had it down to a science that even beginner bakers can nail on the first try. Here’s what makes these ghost cupcakes stand out from the crowd of Halloween desserts:
- Quick & Easy : From start to finish, you’re looking at about 45 minutes. The cupcakes bake in 18 minutes flat, and the buttercream comes together in under 10. Perfect for last-minute Halloween plans or when your kid announces the school party is tomorrow.
- Simple Ingredients : Butter, sugar, eggs, flour, vanilla — you probably have most of this in your pantry right now. No specialty extracts, no weird stabilizers, no trips to three different stores.
- Perfect for Halloween Parties : Whether it’s a classroom celebration, a trunk-or-treat event, or just a spooky movie night at home, these cupcakes fit the bill. They’re cute without being creepy, which means little kids love them.
- Crowd-Pleaser : I’ve served these to kids, adults, and that one aunt who “doesn’t do sweets.” Every single person went back for seconds. The vanilla flavor is classic and comforting — nobody’s scared of vanilla.
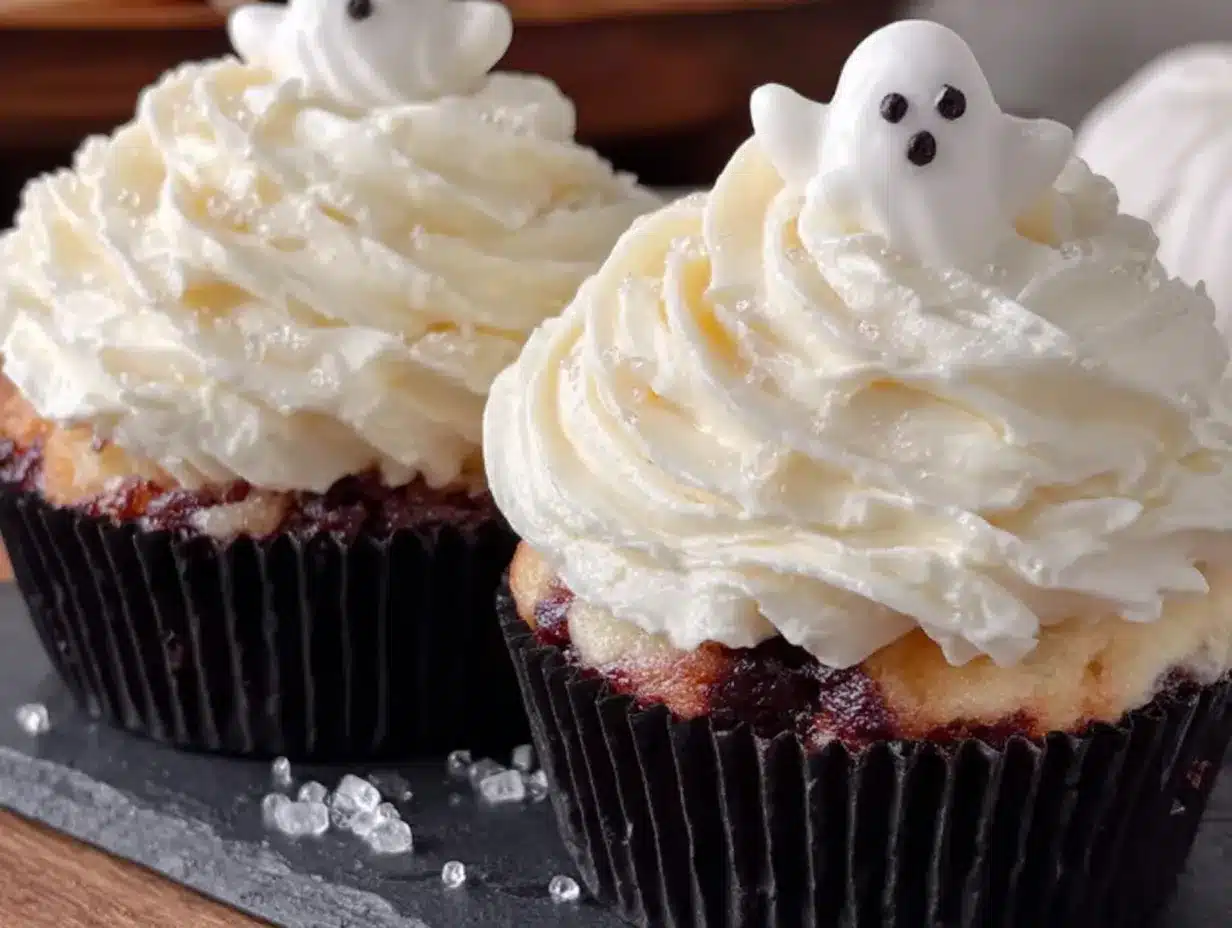
- Unbelievably Adorable : The ghost design is deceptively simple. You don’t need special tips or steady hands. Just a piping bag, some chocolate chips, and a little bit of confidence. The result is genuinely cute enough to make people smile.
What makes this recipe different from every other ghost cupcake out there? It’s the buttercream. Most recipes use a crusting buttercream that gets stiff and weird. Mine stays silky and soft, but it still holds those ghost peaks perfectly. The secret is the ratio of butter to powdered sugar — I landed on 1:1.5 by weight, which gives you structure without sacrificing that melt-in-your-mouth texture. It’s the kind of frosting that makes you close your eyes after the first bite.
This isn’t just another Halloween dessert. It’s the one that makes people ask for the recipe. It’s the one your kids will remember when they’re grown. And honestly? It’s the one that makes you feel like a baking rockstar with minimal effort.
What Ingredients You Will Need
This recipe uses simple, everyday ingredients to create something that looks anything but ordinary. The magic is in the technique, not the grocery list. Here’s everything you’ll need, broken down by component so nothing gets missed.
For the Vanilla Cupcakes
- 1 ½ cups (190g) all-purpose flour — Spoon and level your flour. Scooping directly from the bag packs it down and gives you dry, dense cupcakes. I use Gold Medal or King Arthur for consistent results.
- 1 cup (200g) granulated sugar — Regular white sugar works perfectly. Don’t substitute brown sugar here — it changes the texture and color.
- ½ cup (113g) unsalted butter, softened to room temperature — This is important. Cold butter won’t cream properly. Leave it on the counter for about an hour before you start. If you’re in a hurry, cut it into small cubes and let it sit for 20 minutes.
- 2 large eggs, room temperature — Cold eggs seize up the batter. Place them in a bowl of warm water for 5 minutes if you forgot to take them out ahead of time.
- 2 teaspoons vanilla extract — Use real vanilla, not imitation. The flavor difference is noticeable in a simple cupcake like this. I prefer Nielsen-Massey, but any pure vanilla works.
- ½ cup (120ml) whole milk, room temperature — Whole milk gives the richest texture. You can use 2% in a pinch, but skip skim — the cupcakes will be drier.
- 1 ½ teaspoons baking powder — Make sure it’s fresh. Baking powder loses potency after about 6 months. Test it by dropping a pinch into hot water — if it fizzes, it’s good.
- ¼ teaspoon salt — Fine sea salt or table salt. Salt balances the sweetness and enhances the vanilla flavor.
For the Vanilla Buttercream Frosting
- 1 cup (226g) unsalted butter, softened to room temperature — Same deal as the cupcakes. Soft butter is non-negotiable for smooth buttercream. I recommend using a high-fat European-style butter like Kerrygold for extra richness.
- 3 cups (360g) powdered sugar, sifted — Sifting removes lumps and gives you silky frosting. If you skip this step, you’ll be picking lumps out of your buttercream later. Trust me on this.
- 2 tablespoons heavy cream or whole milk — Heavy cream makes the frosting richer, but milk works fine. Add one tablespoon at a time until you reach your desired consistency.
- 1 ½ teaspoons vanilla extract — Same rule applies. Real vanilla only.
- Pinch of salt — Just a tiny pinch. It cuts the sweetness and makes the vanilla pop.
For Decorating
- Mini chocolate chips — For the ghost eyes. Regular mini chips work great. If you want bigger eyes, use regular chocolate chips cut in half.
- Black decorating gel or edible marker — For drawing mouths. I prefer decorating gel because it’s easier to control, but edible markers work well if you have a steady hand.
- Orange and black sprinkles (optional) — For adding a little extra Halloween flair to the base of the ghosts.
Equipment Needed
You don’t need a fully stocked bakery to make these ghost cupcakes. Here’s what you’ll actually use:
- Standard 12-cup muffin tin — Any non-stick pan works. If yours is dark-colored, reduce the baking temperature by 25°F to prevent over-browning.
- Paper cupcake liners — I like using white or black liners for Halloween. Orange works too. Avoid the super thin cheap ones — they peel off the cupcakes.
- Electric hand mixer or stand mixer — You can cream butter and sugar by hand, but it takes forever and your arm will hate you. A mixer makes this recipe genuinely easy.
- Mixing bowls — You’ll need at least two: one for dry ingredients, one for wet. Glass or stainless steel works best.
- Piping bags — Disposable piping bags are cheap and save you from washing. Get a pack of 12-inch bags. No piping tip needed for the ghosts — just snip the end.
- Rubber spatula — For scraping down the bowl and folding ingredients. A silicone spatula is worth the investment.
- Cooling rack — Absolutely necessary. If you let cupcakes cool in the pan, the bottoms get soggy.
- Wire whisk — For sifting dry ingredients together. Or just use a fork if you’re lazy like me sometimes.
Budget-friendly tip: Skip the expensive piping bags and use a sturdy zip-top bag instead. Snip off a corner and it works exactly the same. I’ve done this more times than I care to count.
Preparation Method
Step 1: Preheat and Prep
Preheat your oven to 350°F (175°C). Line your muffin tin with 12 paper liners. This is non-negotiable — these cupcakes are tender and will stick to an unlined pan. Set the pan aside while you make the batter.
Step 2: Mix the Dry Ingredients
In a medium bowl, whisk together the flour, baking powder, and salt. Whisk for about 20 seconds to aerate and distribute the leavening evenly. Set this aside. Don’t skip the whisking — it’s the difference between even-rising cupcakes and ones with random tunnels.
Step 3: Cream the Butter and Sugar
In a large mixing bowl, beat the softened butter on medium speed for about 2 minutes until it’s smooth and pale. Add the sugar and beat for another 3 to 4 minutes. The mixture should look light, fluffy, and almost white. Scrape down the sides of the bowl halfway through. This step is where the texture of your cupcakes is decided. Don’t rush it.
Step 4: Add the Eggs and Vanilla
Add the eggs one at a time, beating well after each addition — about 30 seconds per egg. The batter might look a little curdled at this point. That’s normal. Add the vanilla extract and beat for another 15 seconds. Scrape the bowl again.
Step 5: Alternate Dry and Wet Ingredients
With the mixer on low speed, add about one-third of the flour mixture. Mix until just combined — about 10 seconds. Add half the milk, mix again. Another third of the flour, mix. The rest of the milk, mix. Finish with the last of the flour. Stop mixing as soon as the flour disappears. Overmixing at this stage develops gluten and gives you tough, dense cupcakes. The batter should be thick but scoopable.
Step 6: Fill and Bake
Divide the batter evenly among the 12 liners. Fill each about two-thirds full. I use a cookie scoop for this — it’s faster and gives you equal portions. Bake for 18 to 20 minutes, or until a toothpick inserted in the center comes out clean or with a few moist crumbs. The tops should be lightly golden and spring back when touched. Let the cupcakes cool in the pan for 5 minutes, then transfer them to a cooling rack. Cool completely before frosting. I mean completely. Warm cupcakes turn buttercream into a melty disaster.
Step 7: Make the Buttercream
While the cupcakes cool, make the frosting. Beat the softened butter on medium speed for 5 minutes. Yes, 5 full minutes. It should look pale, fluffy, and almost doubled in volume. This long beating time is what makes the frosting silky instead of greasy. Reduce the speed to low and gradually add the sifted powdered sugar, about ½ cup at a time. Add the vanilla and salt, then beat on medium-high for 2 more minutes. Add the heavy cream one tablespoon at a time until you reach a pipeable consistency. The frosting should hold a peak when you lift the beater but still look soft and spreadable.
Step 8: Assemble the Ghosts
Fit a piping bag with no tip — just snip about ½ inch off the end. Fill the bag with buttercream. Hold the bag straight up over each cupcake and pipe a tall, fat dollop. Don’t move the bag — just let the frosting pile up. When you have a nice mound about 2 inches tall, stop squeezing and lift the bag straight up quickly. This creates the ghost’s peak. Repeat for all 12 cupcakes. Press two mini chocolate chips into each ghost for eyes. Use the black decorating gel to draw a small wavy mouth. If you’re adding sprinkles, scatter them around the base of the ghost before the frosting sets.
Cooking Tips & Techniques
I’ve made these ghost cupcakes about a dozen times now, and I’ve learned a few things the hard way. Here’s what I wish someone had told me the first time.
Room temperature ingredients matter more than you think. The first time I made these, I used cold eggs and cold milk straight from the fridge. The batter looked curdled and the cupcakes came out dense. Room temperature ingredients emulsify properly, which gives you a tender crumb. Set everything out on the counter an hour before you start. It makes a genuine difference.
Don’t overfill the cupcake liners. I know it’s tempting to fill them higher to get domed tops, but these cupcakes rise beautifully on their own. Fill to two-thirds full max. Overfilled liners spill over the edges and create a weird mushroom shape that’s hard to frost cleanly.
The buttercream needs patience. I ruined my first batch by not beating the butter long enough. It tasted fine but looked greasy and separated slightly. Give it the full 5 minutes at the start and 2 minutes at the end. Your arm won’t thank you, but your cupcakes will.
Pipe with confidence. The ghost shape works because you commit to the motion. If you hesitate or try to shape the frosting after piping, you’ll lose the peak. Just squeeze, pile, and pull away. Imperfect ghosts are actually cuter than perfect ones. My lopsided ghost from the first batch is still my favorite.
Chill the frosting if it gets too soft. If your kitchen is warm, the buttercream might get too runny to hold the ghost shape. Pop the piping bag in the fridge for 10 minutes. It’ll firm up enough to hold those peaks without getting stiff.
Make ahead tip: You can bake the cupcakes a day ahead and store them in an airtight container at room temperature. Frost them the day you plan to serve them. The buttercream is best fresh, but frosted cupcakes keep in the fridge for up to 3 days. Let them sit at room temperature for 30 minutes before serving.
Variations & Adaptations
One of the best things about this recipe is how easy it is to adapt. Here are some variations I’ve tried and loved.
Gluten-Free Version : Substitute the all-purpose flour with a 1:1 gluten-free baking flour. I’ve had good results with Bob’s Red Mill. Add an extra tablespoon of milk to the batter since gluten-free flours absorb more liquid. The texture is slightly more tender, but the taste is spot-on.
Dairy-Free Version : Use vegan butter sticks (not margarine) and oat milk or almond milk. Miyoko’s European Style Cultured Vegan Butter works beautifully in the frosting. The buttercream will be slightly softer, so chill the piped ghosts for 15 minutes before serving.
Chocolate Ghost Cupcakes : Replace ¼ cup of the flour with unsweetened cocoa powder. Reduce the vanilla to 1 teaspoon. The dark chocolate ghosts look amazing against white buttercream — or you can make the frosting chocolate too by adding ¼ cup cocoa powder with the powdered sugar.
Pumpkin Spice Ghost Cupcakes : Add ½ teaspoon pumpkin pie spice and ¼ cup pumpkin puree to the batter. Reduce the milk to ¼ cup. These are perfect for fall parties where you want a seasonal twist. They pair beautifully with the pumpkin chocolate chip cookies I make every October.
Mini Ghost Cupcakes : Use a mini muffin tin and bake for 10 to 12 minutes. You’ll get about 36 mini ghosts. These are perfect for classroom parties where kids want to grab and go. Pipe smaller ghosts using the same technique — just use less frosting.
Colorful Ghosts : Tint the buttercream with gel food coloring. Pastel purple, green, or orange ghosts are adorable for non-Halloween spooky parties. My daughter requested pink ghosts last year, and honestly? They were the cutest batch yet.
Serving & Storage Suggestions
These ghost cupcakes are best served at room temperature. The buttercream softens slightly and the cake stays tender. If you’ve refrigerated them, let them sit out for about 30 minutes before serving.
For presentation, arrange them on a black or orange platter. Add some fake spiderwebs or plastic spiders around the base for extra Halloween vibes. I like to dust the platter with a little powdered sugar to look like ghostly dust. It’s a small touch that gets noticed.
These pair beautifully with warm apple cider or a pumpkin spice cold foam iced coffee for an adult Halloween treat. For kids, serve with cold milk or hot chocolate. The combination of tender vanilla cake and silky buttercream is comfort food at its finest.
Storage: Keep frosted cupcakes in an airtight container in the refrigerator for up to 3 days. The buttercream holds up well, but the cake can dry out if left uncovered. If you’re storing unfrosted cupcakes, wrap them individually in plastic wrap and keep at room temperature for up to 2 days.
Freezing: Unfrosted cupcakes freeze beautifully for up to 3 months. Wrap each one in plastic wrap, then place in a freezer bag. Thaw at room temperature for about an hour before frosting. I don’t recommend freezing frosted cupcakes — the buttercream texture changes when thawed.
Reheating: Pop an unfrosted cupcake in the microwave for 10 seconds to bring back that fresh-from-the-oven softness. Don’t microwave frosted cupcakes unless you want a ghost puddle.
Nutritional Information & Benefits
Let’s be real — these are Halloween treats, not health food. But here’s the estimated breakdown per cupcake (based on 12 servings):
- Calories: Approximately 380
- Fat: 22g (14g saturated)
- Carbohydrates: 45g (34g sugar)
- Protein: 3g
- Fiber: 0.5g
- Sodium: 180mg
These numbers will vary based on your specific ingredients and portion sizes. If you’re watching sugar intake, you can reduce the powdered sugar in the buttercream by ¼ cup — the frosting will be slightly less sweet but still delicious.
The butter in these cupcakes provides a small amount of vitamin A and healthy fats. The eggs add protein and B vitamins. Honestly though, these are about joy, not nutrition. They’re a once-a-year treat that brings smiles to faces both young and old. There’s value in that too.
For a slightly lighter option, serve these alongside some frozen yogurt-dipped strawberry bites for a balanced Halloween spread. The fruit adds freshness against the rich cupcakes.
Conclusion
These Halloween ghost cupcakes have become a staple in our house for good reason. They’re genuinely easy to make, the ingredients are things you probably already have, and the result is adorable enough to impress even the pickiest little goblins. The vanilla buttercream is the star — silky, sweet, and stable enough to hold those perfect ghost peaks.
I love that this recipe doesn’t require any special skills or expensive tools. It’s the kind of baking project that brings people together. My kids fight over who gets to place the chocolate chip eyes. My husband has perfected his ghost piping technique. It’s become our little Halloween tradition, and I hope it becomes yours too.
Don’t be afraid to make these your own. Add sprinkles, change the color, make them mini — the base recipe is forgiving and flexible. If you try them, I’d love to hear how they turn out. Drop a comment below or tag me in your photos. And if you’re looking for more Halloween inspiration, check out these spooky mummy hot dogs for a savory option that balances out all the sugar.
Happy Halloween, and happy baking! These ghosts are waiting to come to life in your kitchen.
Frequently Asked Questions
Can I make these ghost cupcakes ahead of time?
Absolutely. Bake the cupcakes up to 2 days in advance and store them in an airtight container at room temperature. Make the buttercream up to 3 days ahead and keep it in the refrigerator. When you’re ready to serve, let the buttercream come to room temperature, re-whip it for a minute, and pipe the ghosts. The decorating is quick enough to do right before your party.
Why did my buttercream turn out greasy?
This usually happens when the butter is too soft or you didn’t beat it long enough. Make sure your butter is softened but still cool to the touch — it should give slightly when pressed but not feel oily. Beat the butter alone for the full 5 minutes before adding sugar. If your frosting still seems greasy, pop the bowl in the fridge for 15 minutes, then re-whip.
Can I use a different frosting for the ghosts?
You can, but the texture matters. A crusting buttercream or royal icing will hold the ghost shape well. Cream cheese frosting is too soft and will melt into a blob. Whipped cream won’t hold its shape at all. Stick with a sturdy buttercream for best results. The vanilla buttercream in this recipe is specifically designed to hold those ghost peaks.
How do I get the ghost shape perfect every time?
The trick is in the piping motion. Hold the bag straight up, not at an angle. Squeeze firmly and let the frosting pile up in one spot. Don’t move the bag around. When you have a tall mound, stop squeezing and pull the bag straight up quickly. The upward motion creates that cute peak. Practice on a piece of parchment paper first if you’re nervous. And remember — imperfect ghosts are actually cuter.
Can I freeze these ghost cupcakes?
I recommend freezing unfrosted cupcakes only. Wrap each one individually in plastic wrap, place them in a freezer bag, and freeze for up to 3 months. Thaw at room temperature, then make fresh buttercream and decorate. Frozen frosted cupcakes develop condensation when thawed, which makes the buttercream look wet and the ghost shape lose its definition.
Pin This Recipe!
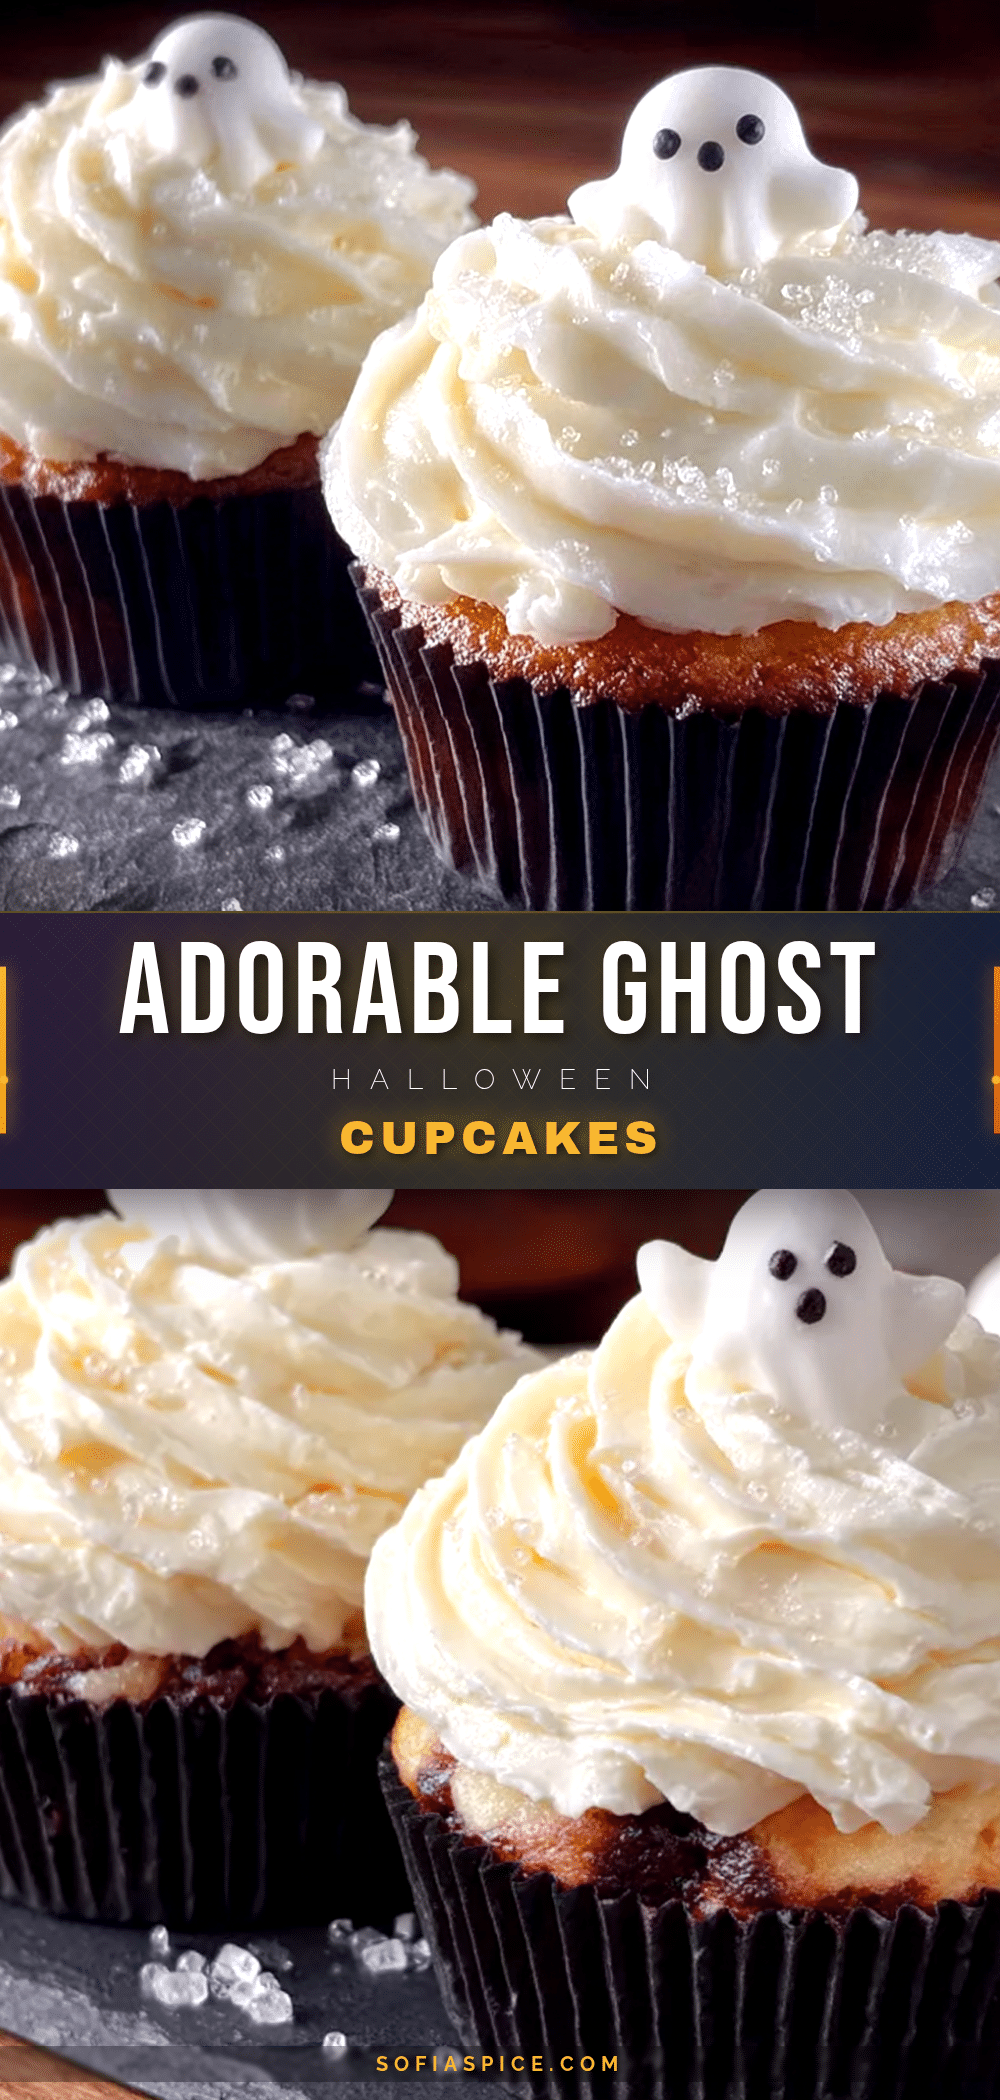
Adorable Halloween Ghost Cupcakes: Easy Vanilla Buttercream Recipe
These easy Halloween ghost cupcakes feature tender vanilla cake and silky buttercream that pipes into adorable ghost shapes. Perfect for last-minute school parties, they use simple ingredients and come together in about 45 minutes.
- Prep Time: 25 minutes
- Cook Time: 18 minutes
- Total Time: 45 minutes
- Yield: 12 servings 1x
- Category: Dessert
- Cuisine: American
Ingredients
- 1 ½ cups (190g) all-purpose flour
- 1 cup (200g) granulated sugar
- ½ cup (113g) unsalted butter, softened to room temperature
- 2 large eggs, room temperature
- 2 teaspoons vanilla extract
- ½ cup (120ml) whole milk, room temperature
- 1 ½ teaspoons baking powder
- ¼ teaspoon salt
- 1 cup (226g) unsalted butter, softened to room temperature (for frosting)
- 3 cups (360g) powdered sugar, sifted
- 2 tablespoons heavy cream or whole milk
- 1 ½ teaspoons vanilla extract (for frosting)
- Pinch of salt (for frosting)
- Mini chocolate chips (for decorating)
- Black decorating gel or edible marker (for decorating)
- Orange and black sprinkles (optional, for decorating)
Instructions
- Preheat oven to 350°F (175°C). Line a 12-cup muffin tin with paper liners.
- In a medium bowl, whisk together flour, baking powder, and salt for about 20 seconds.
- In a large bowl, beat softened butter on medium speed for 2 minutes until smooth and pale. Add sugar and beat for 3-4 minutes until light and fluffy.
- Add eggs one at a time, beating well after each addition. Add vanilla extract and beat for 15 seconds. Scrape down the bowl.
- With mixer on low, add one-third of the flour mixture, mixing until just combined. Add half the milk, mix. Repeat with remaining flour and milk, ending with flour. Do not overmix.
- Divide batter evenly among 12 liners, filling each about two-thirds full. Bake for 18-20 minutes until a toothpick inserted in center comes out clean. Cool in pan for 5 minutes, then transfer to a cooling rack to cool completely.
- For buttercream: Beat softened butter on medium speed for 5 minutes until pale and fluffy. Gradually add sifted powdered sugar on low speed. Add vanilla and salt, then beat on medium-high for 2 minutes. Add heavy cream one tablespoon at a time until pipeable consistency.
- Snip ½ inch off the end of a piping bag (no tip needed). Fill with buttercream. Hold bag straight up over each cupcake and pipe a tall, fat dollop. Stop squeezing and lift bag straight up quickly to create a ghost peak.
- Press two mini chocolate chips into each ghost for eyes. Use black decorating gel to draw a small wavy mouth. Add sprinkles around the base if desired.
Notes
Room temperature ingredients are crucial for best texture. Don’t overfill cupcake liners (fill two-thirds full). Beat buttercream for full 5 minutes for silky texture. Pipe ghosts with confidence—imperfect ghosts are cuter. Chill frosting if it gets too soft. Cupcakes can be baked a day ahead; frost day of serving. Store frosted cupcakes in refrigerator up to 3 days; let sit at room temperature 30 minutes before serving.
Nutrition
- Serving Size: 1 cupcake
- Calories: 380
- Sugar: 34
- Sodium: 180
- Fat: 22
- Saturated Fat: 14
- Carbohydrates: 45
- Fiber: 0.5
- Protein: 3
Keywords: Halloween cupcakes, ghost cupcakes, vanilla cupcakes, buttercream frosting, easy Halloween dessert, spooky treats, kid-friendly baking


