The casserole dish came back to the kitchen empty. Not just scraped clean—I mean, someone had actually taken a piece of bread to soak up the last bit of creamy sauce from the corners. My sister-in-law texted me the next morning asking if I’d “make that green bean thing again for Thanksgiving.” Not the turkey, not the mashed potatoes. The green bean thing.
I stood there holding the empty dish and honestly felt a little confused. Because this wasn’t my grandmother’s recipe, the one with the canned soup and those crispy onions that get sort of soggy after twenty minutes. This was my version—the one I’d thrown together on a random Tuesday because I had a bag of green beans I needed to use before they went bad. I’d roasted garlic that morning for something else and figured, why not toss it in?
That’s the thing about this homemade roasted garlic green bean casserole. It doesn’t start with a family heirloom or a fancy cooking class. It starts with a clove of garlic roasting in the oven and the smell filling up your kitchen like something good is about to happen. And then it just… works. The creamy sauce, the tender beans, that golden crust on top—it all comes together in a way that feels intentional, even if you’re just winging it like I was.
I’ve made this for Thanksgiving three years running now, and nobody has ever asked for the old version back. That’s not me bragging—that’s just what happens when you swap out the processed stuff for real ingredients and let roasted garlic do its thing. It’s the kind of recipe that makes you look like you tried way harder than you actually did.
And honestly? That’s my favorite kind of recipe.
Why You’ll Love This Recipe
Let me tell you why this homemade roasted garlic green bean casserole has earned a permanent spot in my recipe rotation. I’ve tested this about seven times to get the balance just right, and I can say with confidence—this is the version you want for your holiday table or your Sunday dinner.
- Made From Scratch, But Easy: No canned soups, no mystery ingredients. You control what goes in, and it still comes together faster than you’d think. The roasted garlic does the heavy lifting for flavor.
- That Roasted Garlic Magic: Roasting garlic transforms it into something buttery, sweet, and mellow. It blends into the cream sauce so smoothly that even people who “don’t like garlic” will ask for seconds. Trust me on this one.
- Perfect for Holidays and Weeknights: This dish looks impressive enough for Thanksgiving but is simple enough for a Tuesday. I’ve brought it to potlucks and served it alongside a simple roast chicken. Works every time.
- Crowd-Pleaser Guaranteed: Kids eat it. Adults ask for the recipe. The crunchy topping stays crispy because we make our own. No sad, soggy onions here.
- Make-Ahead Friendly: You can prep this the day before and just pop it in the oven when you’re ready. That’s a lifesaver when you’re juggling a dozen other dishes.
What sets this apart from every other green bean casserole recipe out there is the roasted garlic cream sauce. It’s silky, rich, and deeply savory without being heavy. I’ve seen versions that use cream of mushroom soup and call it a day, but this one actually tastes like something. It’s comfort food that doesn’t make you feel like you’re eating from a can.
I still remember the first time I made this for a family gathering. My uncle, who never compliments food, looked at me and said, “This is the best thing on the table.” That’s the kind of reaction that keeps me coming back to this recipe. It’s not just good—it’s the kind of good that makes people pause mid-bite.
What Ingredients You Will Need
This homemade roasted garlic green bean casserole uses simple, wholesome ingredients to deliver bold flavor and satisfying texture. Most of these are pantry staples or easy to find at any grocery store. The star of the show is the roasted garlic, which takes a little time but makes everything worth it.
For the Roasted Garlic
- 1 whole head of garlic – Look for firm, plump heads with no soft spots. The fresher, the better.
- 1 teaspoon olive oil – Just enough to coat the garlic. Extra virgin works fine here.
- Pinch of salt – Helps draw out moisture and enhances the garlic’s natural sweetness.
For the Green Beans
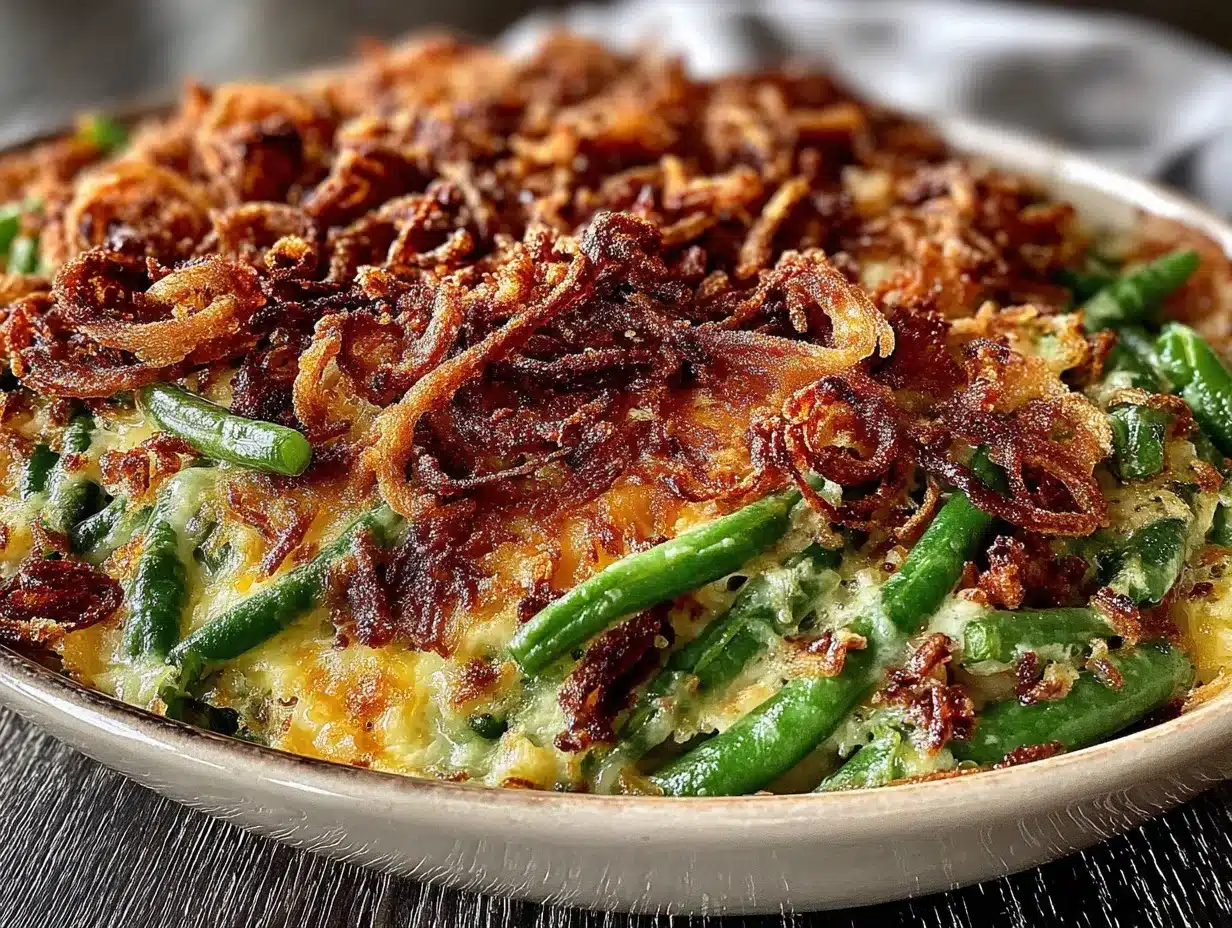
- 1 ½ pounds fresh green beans – Trim the ends and cut into bite-sized pieces. I prefer haricots verts (thin French green beans) when I can find them—they’re more tender. But regular green beans work great too.
- 1 tablespoon salt – For blanching the beans. Don’t skip this—it seasons the beans from the inside out.
- Ice water bath – To stop the cooking and keep that bright green color.
For the Roasted Garlic Cream Sauce
- 2 tablespoons unsalted butter – I use Kerrygold for the richness, but any good butter works.
- 8 ounces cremini mushrooms, sliced – Baby bellas add earthy depth. White mushrooms are fine too, but creminis give more flavor.
- 1 small yellow onion, finely diced – About ½ cup. Shallots work in a pinch.
- 3 tablespoons all-purpose flour – This thickens the sauce. For gluten-free, use a 1:1 gluten-free flour blend.
- 1 ½ cups whole milk – Full-fat gives the creamiest result. You can use 2% but the sauce won’t be as luxurious.
- 1 cup low-sodium chicken or vegetable broth – Low-sodium is key so you control the salt level.
- ½ cup heavy cream – Adds richness. Half-and-half works if you’re watching calories.
- 1 teaspoon fresh thyme leaves – Or ½ teaspoon dried. Thyme and green beans are best friends.
- ½ teaspoon black pepper – Freshly ground, please.
- ½ teaspoon salt, plus more to taste – Adjust at the end.
- All the roasted garlic cloves – Mashed into a paste. This is non-negotiable.
For the Crispy Topping
- 1 cup panko breadcrumbs – They stay crunchier than regular breadcrumbs. I prefer Japanese panko for the texture.
- 2 tablespoons unsalted butter, melted – Helps the panko toast evenly.
- ¼ cup grated Parmesan cheese – Adds saltiness and helps the topping brown. Skip this if you want it dairy-free, but you’ll miss the flavor.
- ¼ teaspoon garlic powder – For extra garlic oomph. Because why not?
Ingredient Tips and Substitutions
If you’re short on time, you can use frozen green beans—just thaw and pat them dry before using. They won’t have the same snap as fresh, but they’ll still taste good. For a dairy-free version, substitute the butter with vegan butter or olive oil, use unsweetened oat milk or cashew milk, and skip the Parmesan or use a dairy-free alternative. I’ve tested this with oat milk and it worked surprisingly well, though the sauce is slightly thinner.
I recommend using low-sodium broth so you can season to your taste. Some brands of broth are saltier than others, and it’s easier to add salt than to take it away. For the mushrooms, I’ve used creminis from my local farmer’s market and they made a noticeable difference in depth of flavor. But honestly, whatever you have on hand will work.
Equipment Needed
You don’t need a fancy kitchen to make this homemade roasted garlic green bean casserole. Here’s what you’ll want to have ready:
- Baking sheet – For roasting the garlic. A small rimmed sheet works best.
- Large pot – For blanching the green beans. You need enough water to cover them.
- Large bowl with ice water – For shocking the beans after blanching.
- Large skillet or sauté pan – For making the cream sauce. A 12-inch pan gives you room to work.
- 9×13-inch baking dish – The standard size for this casserole. An 8×8 works if you want a smaller batch.
- Chef’s knife and cutting board – For trimming beans and chopping veggies.
- Wooden spoon or silicone spatula – For stirring the sauce without scratching your pan.
- Small bowl – For mixing the topping.
- Aluminum foil – For covering the casserole if the top browns too quickly.
If you don’t have a 9×13 dish, you can use a 10-inch cast iron skillet for everything—just sauté the mushrooms and onions, make the sauce, stir in the beans, and top with the panko mixture. It goes straight from stovetop to oven, which means one less dish to wash. I do this when I’m feeling lazy and it works beautifully.
Preparation Method
Step 1: Roast the Garlic
Preheat your oven to 400°F (200°C). Cut the top off the head of garlic to expose the cloves. Place it on a piece of aluminum foil, drizzle with olive oil, and sprinkle with a pinch of salt. Wrap the foil tightly around the garlic and roast for 40-45 minutes, until the cloves are soft and golden. Let it cool slightly, then squeeze the cloves out into a small bowl. Mash them with a fork into a paste. You can do this up to three days ahead and store it in the fridge.
Step 2: Blanch the Green Beans
Bring a large pot of water to a rolling boil and add 1 tablespoon of salt. Drop in the trimmed green beans and cook for 3-4 minutes—they should be bright green and tender-crisp. Don’t overcook them or they’ll turn mushy in the casserole. Immediately transfer the beans to a bowl of ice water using a slotted spoon or strainer. Let them sit for 2 minutes, then drain well and pat dry with a clean kitchen towel. Set aside.
Step 3: Sauté the Mushrooms and Onions
In a large skillet over medium-high heat, melt 2 tablespoons of butter. Add the sliced mushrooms in a single layer—don’t crowd the pan. Let them cook without stirring for 3-4 minutes until they’re golden brown on one side. Then stir and cook for another 2-3 minutes until all the mushrooms are browned. Add the diced onion and cook for 3-4 minutes until softened and translucent. The mushrooms should smell nutty and the onions should be sweet.
Step 4: Make the Cream Sauce
Sprinkle the flour over the mushroom mixture and stir constantly for 1 minute. This cooks out the raw flour taste. Slowly pour in the milk while whisking to prevent lumps. Then add the broth, heavy cream, mashed roasted garlic, thyme, salt, and pepper. Bring the sauce to a gentle simmer, stirring often. It will thicken in about 3-4 minutes. Taste it and adjust the seasoning. The sauce should be creamy, savory, and just a little bit garlicky without being overwhelming.
Step 5: Combine and Assemble
Preheat your oven to 375°F (190°C). Add the blanched green beans to the skillet with the sauce and stir until everything is coated. Pour the mixture into your greased 9×13 baking dish and spread it into an even layer.
Step 6: Make the Topping
In a small bowl, combine the panko breadcrumbs, melted butter, grated Parmesan, and garlic powder. Stir until the breadcrumbs are evenly coated. Sprinkle this mixture over the green bean casserole in an even layer.
Step 7: Bake
Bake the casserole for 20-25 minutes, until the sauce is bubbly around the edges and the topping is golden brown. If the topping starts browning too quickly, tent the dish with aluminum foil for the last 10 minutes. Let it rest for 5 minutes before serving—this helps the sauce set so it doesn’t run all over the plate.
Cooking Tips & Techniques
After making this homemade roasted garlic green bean casserole more times than I can count, I’ve picked up a few tricks that make a real difference. Here’s what I wish someone had told me the first time.
Don’t skip the blanching step. I know it seems like extra work, but blanching the green beans sets their color and partially cooks them so they finish perfectly in the oven. If you skip this, the beans will be undercooked and the casserole will need more baking time, which can dry out the sauce. I learned this the hard way when I made it for a Friendsgiving and ended up with crunchy beans and a curdled sauce. Not my finest moment.
Toast the panko separately if you want extra crunch. Sometimes I toss the panko mixture in a dry skillet over medium heat for 2-3 minutes before sprinkling it on the casserole. This guarantees a crispy topping even if the casserole needs a little extra time in the oven. It’s a game-changer, especially if you’re making this ahead and reheating it.
Let the sauce simmer long enough. The flour needs a full minute to cook, and the sauce needs to thicken before you add the beans. If you rush this step, your casserole will be watery. You want the sauce to coat the back of a spoon—that’s your visual cue that it’s ready.
Use room temperature dairy. Cold milk or cream can cause the sauce to seize up or get grainy. Let them sit on the counter for 15 minutes before you start cooking. I usually pull mine out when I start trimming the green beans, and by the time I need them, they’re perfect.
Multitask wisely. While the garlic is roasting, you can trim the green beans and chop the mushrooms and onions. While the beans are blanching, set up your ice bath. The whole process flows smoothly if you plan ahead a little. I like to listen to a podcast while I prep—it makes the time fly.
Variations & Adaptations
This homemade roasted garlic green bean casserole is flexible, and I’ve tried several variations depending on what I have in the fridge or who I’m cooking for.
Add bacon. Cook 4 slices of bacon until crispy, crumble them, and stir half into the sauce before baking. Sprinkle the rest on top with the panko. The smoky saltiness pairs beautifully with the roasted garlic. I did this for a potluck and the dish was empty in fifteen minutes.
Make it vegetarian-friendly. Use vegetable broth instead of chicken broth, and you’re good to go. The roasted garlic and mushrooms provide plenty of savory depth. If you want to add protein, toss in a can of drained chickpeas—they roast nicely and add texture.
Go dairy-free. Substitute the butter with olive oil or vegan butter, use unsweetened oat milk or cashew milk for the sauce, and skip the Parmesan or use a dairy-free alternative. The sauce will be slightly thinner, but the flavor is still fantastic. I tested this with oat milk and my dairy-loving family didn’t even notice the difference.
Add more veggies. Toss in a cup of sliced bell peppers or a handful of cherry tomatoes with the mushrooms. I’ve also added sautéed leeks when I had them on hand, and they added a lovely mild onion flavor. This is a great way to clean out your vegetable drawer.
Spice it up. Add a pinch of red pepper flakes or a dash of smoked paprika to the sauce. The heat cuts through the creaminess and adds another layer of flavor. I do this when I’m serving it alongside something spicy, like these crockpot buffalo chicken sliders.
Serving & Storage Suggestions
This homemade roasted garlic green bean casserole is best served hot, straight out of the oven. Let it rest for 5 minutes so the sauce sets, then scoop it onto plates. The topping should be crispy and golden, and the beans should be tender but still have a little bite.
I love serving this alongside a roast turkey or a simple roasted chicken. It also pairs beautifully with smothered pork chops with rich onion gravy for a cozy Sunday dinner. For a holiday spread, I add a make-ahead creamy green bean casserole to the menu so I have options. And if I’m feeding a crowd, I’ll throw together some loaded sheet pan nachos for the folks who want something a little different.
For storage, let the casserole cool completely, then cover it tightly with plastic wrap or aluminum foil. It will keep in the refrigerator for up to 4 days. The topping will lose some of its crunch, but the flavor will still be fantastic.
To reheat, place the casserole in a 350°F oven for 15-20 minutes, until warmed through. If the topping looks pale, pop it under the broiler for 1-2 minutes to crisp it up. You can also reheat individual portions in the microwave, but the topping won’t be as crispy.
This casserole freezes well, too. Assemble it completely but don’t bake it. Cover tightly with foil and freeze for up to 3 months. When you’re ready to bake, thaw it in the refrigerator overnight, then bake as directed, adding 10-15 minutes to the cooking time. I’ve done this for Thanksgiving prep and it saves so much stress on the big day.
Nutritional Information & Benefits
Here’s the estimated nutritional breakdown for one serving of this homemade roasted garlic green bean casserole (based on 8 servings):
| Nutrient | Amount Per Serving |
|---|---|
| Calories | 220 |
| Total Fat | 14g |
| Saturated Fat | 8g |
| Cholesterol | 40mg |
| Sodium | 480mg |
| Total Carbohydrates | 18g |
| Dietary Fiber | 4g |
| Sugars | 6g |
| Protein | 6g |
Green beans are a great source of fiber, vitamin C, and vitamin K. They’re low in calories but high in nutrients, which makes this casserole a relatively guilt-free indulgence. The roasted garlic adds antioxidants and anti-inflammatory compounds, while the mushrooms provide B vitamins and selenium. This dish is not low-carb, but it’s a balanced side that fits into most diets.
If you’re watching your sodium, use low-sodium broth and skip the added salt in the topping. You can also reduce the Parmesan or leave it out entirely. For a lighter version, substitute the heavy cream with half-and-half or whole milk, and use less butter in the topping.
Conclusion
This homemade roasted garlic green bean casserole is the kind of recipe that makes you wonder why you ever settled for the canned version. It’s creamy, savory, and topped with the crunchiest golden crust. The roasted garlic transforms the sauce into something deeply flavorful, and the fresh green beans keep their texture instead of turning into mush.
I love that this recipe is flexible enough for a holiday feast or a random Tuesday dinner. You can make it ahead, adapt it to your dietary needs, and it always delivers. That empty casserole dish I mentioned at the beginning? It happens every single time I make this. And honestly, that never gets old.
I’d love to hear how yours turns out. Did you add bacon? Swap the mushrooms for something else? Serve it at a potluck and watch it disappear? Drop a comment below and let me know. And if you’re looking for more side dish inspiration, check out my maple brown sugar roasted sweet potatoes for another holiday favorite.
Happy cooking, friends. And don’t forget to roast that garlic—it changes everything.
Frequently Asked Questions
Can I use frozen green beans instead of fresh?
Yes, you can. Thaw them completely and pat them dry with a paper towel to remove excess moisture. Skip the blanching step since frozen beans are already partially cooked. Just add them directly to the sauce and proceed with the recipe. They won’t have the same snap as fresh, but the casserole will still taste great.
Can I make this casserole ahead of time?
Absolutely. Assemble the casserole completely but don’t add the topping. Cover and refrigerate for up to 24 hours. When you’re ready to bake, add the panko topping and bake as directed, adding 10-15 minutes to the cooking time since the casserole will be cold from the fridge. You can also roast the garlic and blanch the beans up to three days ahead.
Why is my sauce watery?
This usually happens if the sauce didn’t simmer long enough to thicken, or if the green beans released too much water. Make sure you pat the blanched beans dry before adding them to the sauce. Also, let the sauce simmer until it coats the back of a spoon—about 3-4 minutes. If your casserole is already baked and watery, try letting it rest for 10 minutes before serving so the sauce has time to set.
Can I freeze this casserole?
Yes, this freezes beautifully. Assemble the casserole completely but don’t bake it. Cover tightly with foil and freeze for up to 3 months. Thaw overnight in the refrigerator, then bake as directed, adding 10-15 minutes to the cooking time. The topping may not be as crispy after freezing, so I recommend making the topping fresh when you’re ready to bake.
How do I make the topping extra crispy?
Toast the panko mixture in a dry skillet over medium heat for 2-3 minutes before sprinkling it on the casserole. This gives the breadcrumbs a head start on browning and ensures they stay crunchy even if the casserole needs extra baking time. You can also add an extra tablespoon of melted butter to the topping for more golden color.
Pin This Recipe!
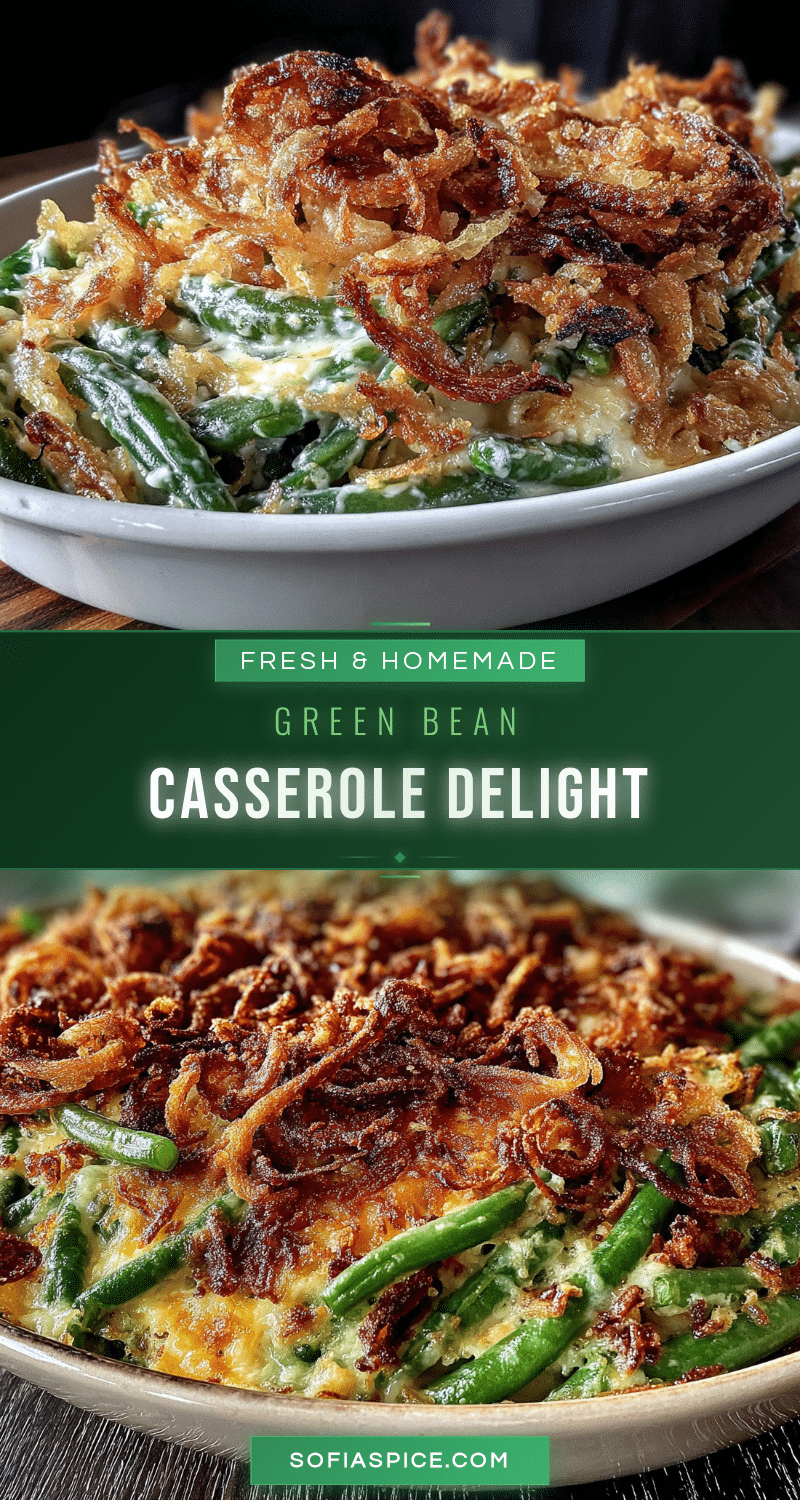
Easy Homemade Roasted Garlic Green Bean Casserole Best Recipe
This homemade roasted garlic green bean casserole is creamy, savory, and topped with a golden crispy crust. Made from scratch with fresh ingredients, it’s a crowd-pleasing side dish perfect for holidays or weeknight dinners.
- Prep Time: 20 minutes
- Cook Time: 45 minutes
- Total Time: 1 hour 5 minutes
- Yield: 8 servings 1x
- Category: Side Dish
- Cuisine: American
Ingredients
- 1 whole head of garlic
- 1 teaspoon olive oil
- Pinch of salt
- 1 ½ pounds fresh green beans, trimmed and cut into bite-sized pieces
- 1 tablespoon salt (for blanching)
- Ice water bath
- 2 tablespoons unsalted butter
- 8 ounces cremini mushrooms, sliced
- 1 small yellow onion, finely diced (about ½ cup)
- 3 tablespoons all-purpose flour
- 1 ½ cups whole milk
- 1 cup low-sodium chicken or vegetable broth
- ½ cup heavy cream
- 1 teaspoon fresh thyme leaves (or ½ teaspoon dried)
- ½ teaspoon black pepper, freshly ground
- ½ teaspoon salt, plus more to taste
- All the roasted garlic cloves, mashed into a paste
- 1 cup panko breadcrumbs
- 2 tablespoons unsalted butter, melted
- ¼ cup grated Parmesan cheese
- ¼ teaspoon garlic powder
Instructions
- Preheat oven to 400°F (200°C). Cut the top off the head of garlic to expose the cloves. Place on a piece of aluminum foil, drizzle with olive oil, and sprinkle with a pinch of salt. Wrap tightly and roast for 40-45 minutes until soft and golden. Let cool slightly, then squeeze cloves into a small bowl and mash into a paste.
- Bring a large pot of water to a rolling boil and add 1 tablespoon salt. Drop in trimmed green beans and cook for 3-4 minutes until bright green and tender-crisp. Immediately transfer to a bowl of ice water for 2 minutes, then drain well and pat dry.
- In a large skillet over medium-high heat, melt 2 tablespoons butter. Add sliced mushrooms in a single layer and cook without stirring for 3-4 minutes until golden brown. Stir and cook for another 2-3 minutes. Add diced onion and cook for 3-4 minutes until softened.
- Sprinkle flour over the mushroom mixture and stir constantly for 1 minute. Slowly pour in milk while whisking, then add broth, heavy cream, mashed roasted garlic, thyme, salt, and pepper. Bring to a gentle simmer, stirring often, until thickened (about 3-4 minutes). Taste and adjust seasoning.
- Preheat oven to 375°F (190°C). Add blanched green beans to the skillet with the sauce and stir to coat. Pour into a greased 9×13-inch baking dish and spread evenly.
- In a small bowl, combine panko breadcrumbs, melted butter, grated Parmesan, and garlic powder. Stir until evenly coated. Sprinkle over the casserole.
- Bake for 20-25 minutes until sauce is bubbly and topping is golden brown. If topping browns too quickly, tent with foil for the last 10 minutes. Let rest for 5 minutes before serving.
Notes
For extra crispy topping, toast the panko mixture in a dry skillet for 2-3 minutes before sprinkling on the casserole. Use room temperature dairy to prevent sauce from seizing. Let the sauce simmer until it coats the back of a spoon to avoid a watery casserole. This dish can be assembled a day ahead (without topping) and refrigerated; add topping and bake, adding 10-15 minutes to cooking time.
Nutrition
- Serving Size: 1 serving (about 1 c
- Calories: 220
- Sugar: 6
- Sodium: 480
- Fat: 14
- Saturated Fat: 8
- Carbohydrates: 18
- Fiber: 4
- Protein: 6
Keywords: green bean casserole, roasted garlic, homemade, Thanksgiving side dish, creamy casserole, holiday recipe, easy side dish


