Late October, the kitchen still dark at 6:30 AM, and the only thing I want is these pumpkin cinnamon rolls. Not coffee first. Not even my slippers. Just the smell of yeast waking up in warm milk, the quiet thump of a knife cutting through a sugar pie pumpkin. That’s how this recipe started, really—standing in my kitchen before the sun came up, needing something that felt like a hug but tasted like fall had finally arrived.
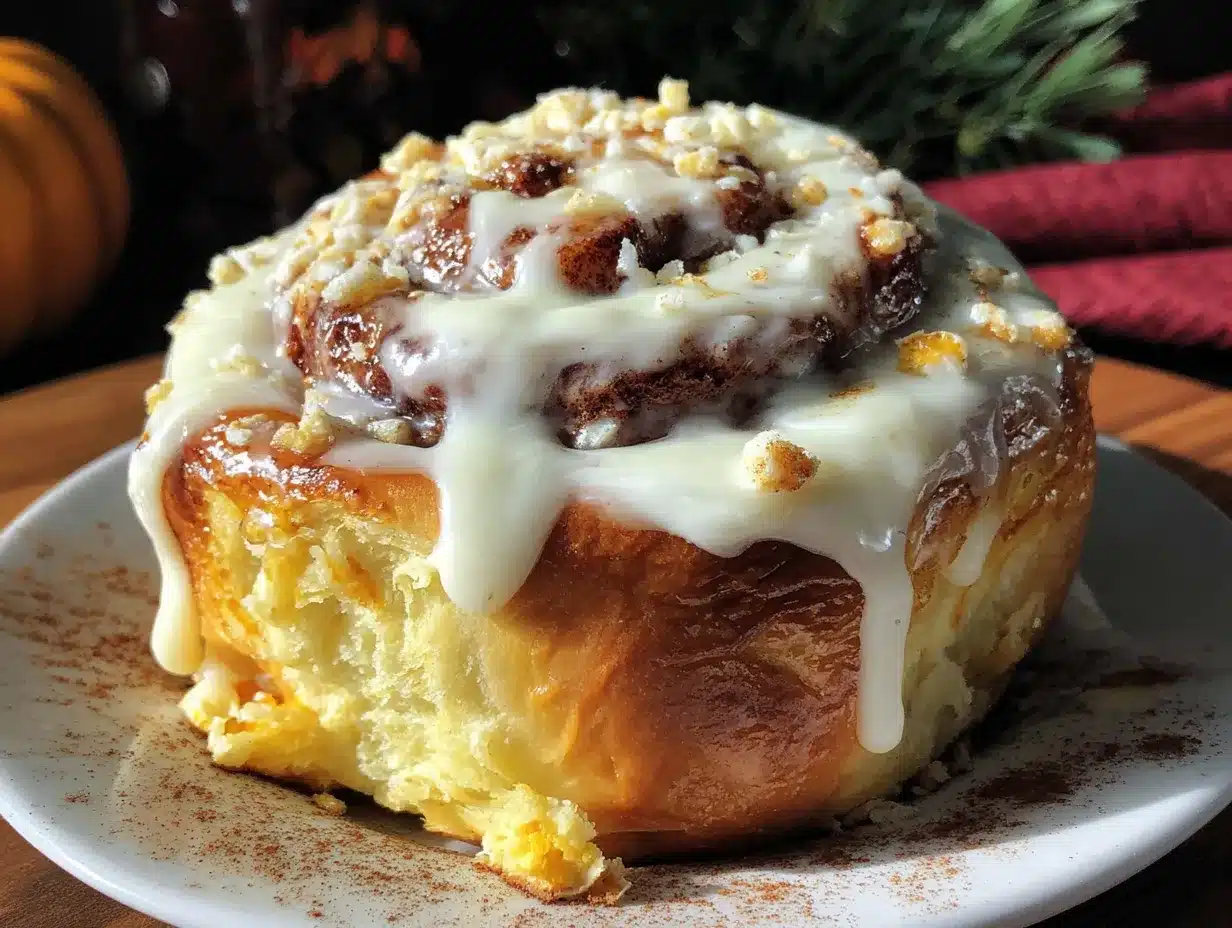
I’ve made a lot of cinnamon rolls over the years. The kind that take all afternoon, the kind that call for a trip to the store for heavy cream you forgot. But these pumpkin cinnamon rolls? They’re different. They’re the ones I keep coming back to when I want the house to smell like someone actually lives here—warm, a little messy, full of good things. The dough gets this soft, pillowy texture from the pumpkin puree (honestly, it’s like working with a cloud), and the maple icing on top is the kind of sweet that doesn’t shout at you.
I remember pulling the first batch out of the oven and just standing there, fork in hand, not even bothering with a plate. The rolls were still steaming, the icing melting into all the little swirls. It was one of those quiet kitchen moments where you realize you accidentally made something you’ll make for years. These rolls are that. They’re the ones you’ll text your friends about, the ones you’ll make for Thanksgiving morning when everyone’s still in pajamas. Trust me on this.
Why You’ll Love This Recipe
I’ve tested this recipe more times than I care to count—through doughs that wouldn’t rise, icings that separated, and one particularly sad batch where I forgot the sugar entirely. So when I tell you these are the ultimate pumpkin cinnamon rolls, I mean it. Here’s what makes them worth your time:
- Soft, Bakery-Style Texture: The pumpkin puree keeps these rolls incredibly moist and tender for days. No dry, crumbly edges here.
- Real Pumpkin Flavor: Not just a sprinkle of cinnamon—actual pumpkin in the dough and the filling gives these rolls that deep, earthy sweetness you want in fall baking.
- Easy Maple Icing That Steals the Show: Real maple syrup mixed into a cream cheese base. It’s not too sweet, not too thin—just right.
- Make-Ahead Friendly: You can prep these the night before and bake them fresh in the morning. Perfect for holiday mornings without the 6 AM chaos.
- No Fancy Equipment Needed: A stand mixer helps, but you can absolutely do this by hand. I’ve done both.
- Always Impresses: Every time I bring these to a gathering, people ask for the recipe. They look complicated but come together easier than you’d think.
These rolls aren’t just another fall recipe. They’re the kind of thing you’ll find yourself making in November, then again in December, and then maybe just because it’s Tuesday. The maple icing alone—smooth, rich, with that slight woodsy note from real maple syrup—is worth the effort. If you’ve ever made my perfect small batch chocolate chip cookies, you know I’m all about recipes that deliver without the fuss. These rolls are no different.
What Ingredients You Will Need
This recipe uses simple, everyday ingredients, but a few key choices make all the difference. I’ve tested this with different brands and substitutions, so I’ll share what works best.
For the Dough
- 1 cup whole milk, warmed to about 110°F (adds richness; 2% works too but rolls won’t be as tender)
- 1 packet active dry yeast (2 ¼ teaspoons; I prefer Red Star or SAF for consistent results)
- ½ cup granulated sugar
- ½ cup pumpkin puree (not pumpkin pie filling—look for 100% pure pumpkin; Libby’s is my go-to)
- 1 large egg, room temperature
- 2 tablespoons unsalted butter, melted and slightly cooled
- 1 teaspoon vanilla extract
- 3 ½ cups all-purpose flour, plus more for dusting (bread flour works but makes denser rolls)
- 1 teaspoon salt
- ½ teaspoon ground cinnamon
- ¼ teaspoon ground nutmeg
- ¼ teaspoon ground ginger
For the Filling
- ½ cup unsalted butter, very soft but not melted
- ¾ cup packed brown sugar (light or dark—dark gives deeper flavor)
- 2 tablespoons pumpkin puree
- 1 tablespoon ground cinnamon
- ½ teaspoon ground nutmeg
- ¼ teaspoon ground cloves
- Pinch of salt
For the Maple Icing
- 4 ounces cream cheese, softened (full-fat gives best texture; Neufchâtel works too)
- 3 tablespoons unsalted butter, softened
- ¼ cup pure maple syrup (Grade A dark amber is my preference—strong maple flavor)
- 1 cup powdered sugar, sifted
- ½ teaspoon vanilla extract
- Pinch of salt
If you’re looking for a dairy-free option, you can swap the whole milk for oat milk and use vegan butter in the dough and icing. The texture will be slightly less rich, but still delicious. For a gluten-free version, use a 1:1 gluten-free baking flour blend—just know the dough will be a bit stickier and harder to roll.
Equipment Needed
You don’t need a professional bakery setup for these rolls, but a few key tools make the process smoother:
- Stand mixer with dough hook (optional but saves elbow grease; I use my KitchenAid Artisan)
- Large mixing bowl (glass or stainless steel works well)
- 9×13-inch baking dish (glass lets you see the browning on the bottom)
- Rolling pin (a French-style tapered pin gives better control)
- Sharp knife or bench scraper (for clean cuts—dental floss works in a pinch!)
- Kitchen thermometer (for checking milk temperature; instant-read is fine)
- Parchment paper (for easy cleanup and lifting rolls out)
- Cooling rack (so the bottoms don’t get soggy)
If you don’t have a stand mixer, you can absolutely knead this dough by hand. It takes about 8-10 minutes of steady work, but there’s something satisfying about feeling the dough come together under your palms. Just be prepared for a little arm workout.
Preparation Method
Let’s get into the actual making of these rolls. I’ve broken everything down so you know exactly what to look for at each stage.
Step 1: Activate the Yeast
Warm your milk to about 110°F—warm but not hot, like bathwater. Pour it into the bowl of your stand mixer (or a large bowl if mixing by hand). Sprinkle the yeast and 1 tablespoon of the sugar over the milk. Let it sit for 5-7 minutes until it gets foamy and smells like bread. If it doesn’t foam, your yeast might be dead—start over with fresh yeast.
Step 2: Make the Dough
Add the remaining sugar, pumpkin puree, egg, melted butter, and vanilla to the yeast mixture. Whisk gently to combine. In a separate bowl, whisk together the flour, salt, cinnamon, nutmeg, and ginger. Add the dry ingredients to the wet mixture, about 1 cup at a time, mixing on low speed with the dough hook.
The dough will look shaggy at first—don’t panic. After about 3-4 minutes of mixing, it should come together into a soft, slightly sticky ball. If it’s too sticky to handle, add flour 1 tablespoon at a time. If it’s too dry, add milk 1 teaspoon at a time. You want it tacky but not gluey.
Step 3: Knead and Rise
Knead the dough on medium-low speed for 6-7 minutes, or by hand on a floured surface for 8-10 minutes. It should feel smooth and elastic, and spring back when you poke it. Shape it into a ball, place it in a lightly greased bowl, and cover with plastic wrap or a clean kitchen towel.
Let it rise in a warm spot for 1-2 hours, until doubled in size. I usually put mine in the microwave with a cup of hot water—it creates the perfect warm, humid environment. The dough should feel puffy and airy when you gently press it.
Step 4: Make the Filling
While the dough rises, make the filling. Beat the soft butter, brown sugar, pumpkin puree, cinnamon, nutmeg, cloves, and salt together until smooth and spreadable. Set it aside at room temperature.
Step 5: Roll and Fill
Punch down the risen dough and turn it out onto a lightly floured surface. Roll it into a 12×18-inch rectangle—about ¼-inch thick. Don’t stress about perfect edges; rustic is fine.
Spread the filling evenly over the dough, leaving a ½-inch border on the long edge farthest from you. Starting from the long edge closest to you, roll the dough tightly into a log. Pinch the seam to seal.
Step 6: Cut and Arrange
Using a sharp knife or unflavored dental floss, cut the log into 12 equal rolls (about 1 ½ inches each). Place them in a greased 9×13-inch baking dish, cut side up, spacing them about ½ inch apart. They’ll expand as they rise and bake.
Step 7: Second Rise
Cover the dish with plastic wrap and let the rolls rise for another 45-60 minutes, until they’re puffy and touching each other. If you’re making these ahead, you can refrigerate them at this point for up to 12 hours—just bring them to room temperature for 30 minutes before baking.
Step 8: Bake
Preheat your oven to 350°F. Bake the rolls for 22-28 minutes, until golden brown on top and the center rolls are cooked through. If the tops are browning too quickly, tent with foil for the last 5 minutes. Let them cool in the pan for 10 minutes before icing.
Step 9: Make the Icing
While the rolls cool, beat the cream cheese and butter until smooth. Add the maple syrup, powdered sugar, vanilla, and salt, and beat until silky. If it’s too thick, add a splash of milk. Spread it generously over the warm rolls—the icing will melt slightly into all the nooks and crannies.
Cooking Tips & Techniques
I’ve made enough mistakes with cinnamon rolls to fill a cookbook. Here’s what I’ve learned so you don’t have to repeat my errors.
Don’t overheat your milk. If the milk is too hot (above 120°F), it will kill the yeast and your dough won’t rise. I’ve done this twice and both times ended up with dense, sad bricks. Use a thermometer—it’s worth it.
Let the dough rest if it fights you. If the dough keeps snapping back when you try to roll it out, cover it with a towel and let it rest for 10 minutes. The gluten relaxes, and suddenly it rolls like a dream.
Use dental floss for clean cuts. Slide a piece of unflavored floss under the log, cross the ends over the top, and pull. You get perfect, round rolls without squishing them. A sharp knife works too, but floss is my secret weapon.
Don’t overbake. Pull the rolls when they’re just golden—overbaking dries them out. The internal temperature should be around 190°F if you want to be precise.
Ice them warm. The icing spreads better and seeps into the rolls when they’re still slightly warm. Wait until they’re cool enough to touch, but still warm to the center.
Variations & Adaptations
These rolls are endlessly adaptable. Here are some variations I’ve tried and loved:
- Pumpkin Pecan Rolls: Sprinkle ½ cup chopped pecans over the filling before rolling. The nuts get toasty and add crunch.
- Dairy-Free Version: Use oat milk, vegan butter, and dairy-free cream cheese. The texture is slightly less tender but still delicious—I’ve made this for friends with allergies and they loved it.
- Extra Spiced: Add ¼ teaspoon cardamom and a pinch of white pepper to the filling for a more complex, chai-like flavor.
- Maple-Bourbon Icing: Replace 1 tablespoon of maple syrup with bourbon for an adult twist. It’s fantastic with coffee on a chilly morning.
- Mini Rolls: Cut the log into 18-20 smaller rolls and bake in two 8-inch pans for 18-20 minutes. Perfect for brunch gatherings.
If you’re in the mood for more fall flavors, try pairing these with my easy copycat Starbucks pumpkin cream cold brew—it’s the perfect drink to wash down a warm roll.
Serving & Storage Suggestions
These rolls are best served warm, straight from the oven, with the icing still gooey. I like to put the whole dish on the table with a stack of napkins and let everyone dig in. They’re perfect for Thanksgiving morning, Christmas brunch, or any lazy weekend when you want the house to smell amazing.
For storage, keep leftover rolls in an airtight container at room temperature for up to 2 days. After that, refrigerate them for up to 5 days. The pumpkin puree keeps them moist longer than regular cinnamon rolls.
To reheat, microwave a single roll for 15-20 seconds, or pop the whole dish in a 300°F oven for 8-10 minutes. The icing will melt again and the rolls will taste almost fresh-baked. You can also freeze unbaked rolls—just assemble them in the dish, cover tightly, and freeze for up to 3 months. Thaw overnight in the fridge, then let them rise at room temperature for 30 minutes before baking.
The flavors actually deepen after a day or two. I sometimes make these on purpose just to have them for breakfast the next morning—the spices meld together and the rolls get even softer.
Nutritional Information & Benefits
These are definitely a treat, but they’re not without some redeeming qualities. Per roll (with icing), here’s the approximate breakdown:
- Calories: 385
- Fat: 16g
- Carbohydrates: 55g
- Protein: 6g
- Fiber: 2g
- Sugar: 32g
The pumpkin puree adds vitamin A and fiber, plus it keeps the rolls moist without needing extra butter. Real maple syrup contains antioxidants and minerals like zinc and manganese—though let’s be honest, we’re eating these for the joy, not the health benefits.
If you’re watching your sugar intake, you can reduce the sugar in the dough to ¼ cup and cut the powdered sugar in the icing by half. The rolls will be less sweet but still deliciously spiced.
These rolls are also a great option for holiday mornings when you want something special but don’t want to spend hours in the kitchen. They pair beautifully with a side of scrambled eggs or fresh fruit to balance the sweetness.
Conclusion
These ultimate pumpkin cinnamon rolls with maple icing are the kind of recipe that becomes part of your fall tradition. They’re soft, spiced, and topped with the kind of icing that makes you close your eyes after the first bite. I’ve made them for Thanksgiving, for lazy Sunday mornings, and for no reason at all except that I wanted the house to smell like October.
What I love most about this recipe is how forgiving it is. The dough is soft and easy to work with, the filling comes together in minutes, and the icing is practically foolproof. Even if you’ve never made cinnamon rolls from scratch, you can absolutely nail these.
I’d love to hear how yours turn out. Did you add pecans? Try the bourbon icing? Make them for a holiday brunch? Drop a comment below and let me know—and if you’re looking for more fall baking inspiration, don’t miss my best pumpkin pie cheesecake bars with pecan crust or this no-bake pumpkin pie with gingersnap crust. Happy baking, friends!
Frequently Asked Questions
Can I use canned pumpkin pie filling instead of pure pumpkin puree?
No, I don’t recommend it. Pumpkin pie filling is already sweetened and spiced, which will throw off the balance of the dough and filling. Stick with 100% pure pumpkin puree for the best results. If you only have pumpkin pie filling, reduce the sugar in the dough by half and skip the spices in the filling—but honestly, puree is better.
Why didn’t my rolls rise?
Several things could be at play. Your yeast might be expired—check the date and make sure it foams when activated. The milk might have been too hot (above 120°F kills yeast) or too cold (below 100°F slows it down). Also, make sure your kitchen isn’t drafty; yeast loves a warm, humid environment. I always test my yeast first to avoid disappointment.
Can I make these rolls without a stand mixer?
Absolutely. Mix the dough with a wooden spoon until it comes together, then knead by hand on a floured surface for 8-10 minutes. It’s a little more work, but honestly, there’s something meditative about hand-kneading. Just be patient and add flour sparingly—you want the dough soft, not stiff.
How do I know when the rolls are fully baked?
The tops should be golden brown and the center rolls should feel set when gently pressed. If you have an instant-read thermometer, the internal temperature should be around 190°F. Another test: pull two rolls apart slightly—if the dough in the middle looks raw, give them another 3-5 minutes.
Can I freeze the baked rolls with icing?
Yes, but I recommend freezing them without the icing. Bake and cool the rolls completely, wrap them tightly in plastic wrap and foil, and freeze for up to 3 months. When you’re ready to serve, thaw them in the fridge overnight, reheat in a 300°F oven for 10 minutes, then add fresh icing. The rolls stay soft and the icing tastes much better made fresh.
Pin This Recipe!
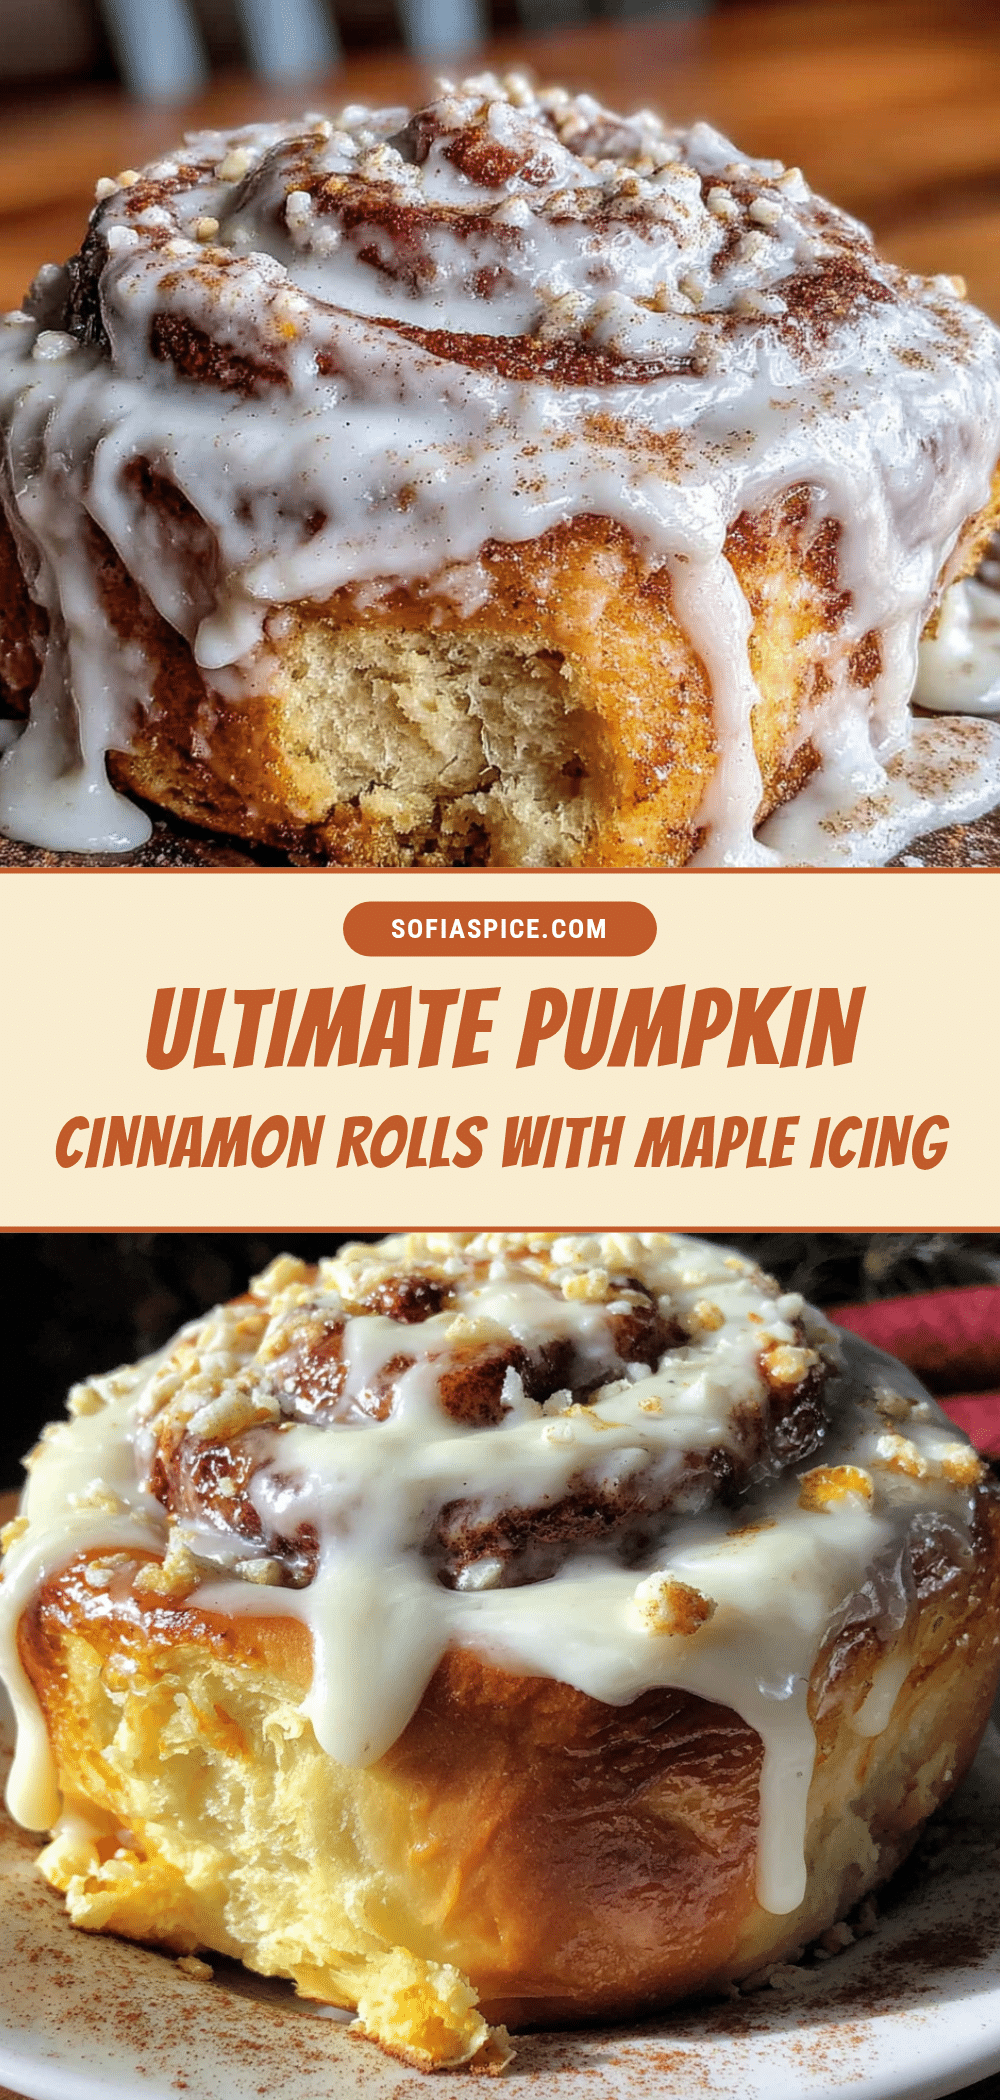
Ultimate Pumpkin Cinnamon Rolls with Easy Maple Icing
Soft, pillowy pumpkin cinnamon rolls with a rich maple cream cheese icing. Perfect for fall mornings, holiday brunches, or any time you want the house to smell like October.
- Prep Time: 30 minutes
- Cook Time: 25 minutes
- Total Time: 3 hours 30 minutes (includes rising time)
- Yield: 12 servings 1x
- Category: Breakfast, Brunch, Dessert
- Cuisine: American
Ingredients
- 1 cup whole milk, warmed to about 110°F
- 1 packet active dry yeast (2 ¼ teaspoons)
- ½ cup granulated sugar
- ½ cup pumpkin puree (not pumpkin pie filling)
- 1 large egg, room temperature
- 2 tablespoons unsalted butter, melted and slightly cooled
- 1 teaspoon vanilla extract
- 3 ½ cups all-purpose flour, plus more for dusting
- 1 teaspoon salt
- ½ teaspoon ground cinnamon
- ¼ teaspoon ground nutmeg
- ¼ teaspoon ground ginger
- ½ cup unsalted butter, very soft but not melted
- ¾ cup packed brown sugar (light or dark)
- 2 tablespoons pumpkin puree
- 1 tablespoon ground cinnamon
- ½ teaspoon ground nutmeg
- ¼ teaspoon ground cloves
- Pinch of salt
- 4 ounces cream cheese, softened
- 3 tablespoons unsalted butter, softened
- ¼ cup pure maple syrup (Grade A dark amber preferred)
- 1 cup powdered sugar, sifted
- ½ teaspoon vanilla extract
- Pinch of salt
Instructions
- Warm milk to about 110°F. Pour into the bowl of a stand mixer (or large bowl). Sprinkle yeast and 1 tablespoon sugar over milk. Let sit 5-7 minutes until foamy.
- Add remaining sugar, pumpkin puree, egg, melted butter, and vanilla to yeast mixture. Whisk gently to combine.
- In a separate bowl, whisk together flour, salt, cinnamon, nutmeg, and ginger. Add dry ingredients to wet mixture, about 1 cup at a time, mixing on low speed with dough hook until a soft, slightly sticky ball forms.
- Knead dough on medium-low speed for 6-7 minutes (or by hand for 8-10 minutes) until smooth and elastic. Shape into a ball, place in a lightly greased bowl, cover, and let rise in a warm spot for 1-2 hours until doubled in size.
- While dough rises, make filling: Beat soft butter, brown sugar, 2 tablespoons pumpkin puree, cinnamon, nutmeg, cloves, and salt together until smooth and spreadable. Set aside at room temperature.
- Punch down risen dough and turn onto a lightly floured surface. Roll into a 12×18-inch rectangle, about ¼-inch thick.
- Spread filling evenly over dough, leaving a ½-inch border on the long edge farthest from you. Starting from the long edge closest to you, roll dough tightly into a log. Pinch seam to seal.
- Cut log into 12 equal rolls (about 1 ½ inches each) using a sharp knife or unflavored dental floss. Place in a greased 9×13-inch baking dish, cut side up, spacing about ½ inch apart.
- Cover dish with plastic wrap and let rolls rise for 45-60 minutes until puffy and touching each other.
- Preheat oven to 350°F. Bake rolls for 22-28 minutes until golden brown on top and center rolls are cooked through. Let cool in pan for 10 minutes.
- While rolls cool, make icing: Beat cream cheese and butter until smooth. Add maple syrup, powdered sugar, vanilla, and salt, and beat until silky. Spread generously over warm rolls.
Notes
For make-ahead: After step 9, refrigerate rolls for up to 12 hours. Bring to room temperature for 30 minutes before baking. For dairy-free: Use oat milk and vegan butter. For gluten-free: Use 1:1 gluten-free baking flour blend (dough will be stickier). Don’t overbake—pull rolls when just golden. Ice while still warm for best results.
Nutrition
- Serving Size: 1 roll with icing
- Calories: 385
- Sugar: 32
- Sodium: 320
- Fat: 16
- Saturated Fat: 9
- Carbohydrates: 55
- Fiber: 2
- Protein: 6
Keywords: pumpkin cinnamon rolls, maple icing, fall baking, Thanksgiving breakfast, pumpkin rolls, cinnamon rolls with maple glaze


