The jar was empty by Tuesday. I hadn’t even thought to make a second batch.
Monday morning, I’d thrown together a quick mix of oats, peanut butter, and chocolate chips—the kind of thing you make when you’re staring at a hungry toddler and a half-empty pantry. No recipe, no plan, just a desperate hope that something edible would come together. By Tuesday afternoon, my husband had texted me from work: “Did you hide those protein balls somewhere?”
That’s the thing about these Easy No-Bake Protein Energy Balls. They don’t look like much sitting in a container in the fridge. They’re a little lumpy, a little rustic, and honestly, I almost didn’t photograph them for the blog. But the way they disappear? That’s the part that got me.
I’ve made a lot of snacks over the years. Some were complicated. Some required ingredients I had to order online. But these energy balls? They’re the ones I keep coming back to, week after week. Not because they’re fancy—they’re not—but because they actually work. They fill you up, they taste like a treat, and they take about five minutes to throw together.
There’s something grounding about a recipe that requires no oven, no mixer, and no special skills. You just mix, roll, and eat. And somehow, that simplicity makes them taste even better.
Why You’ll Love This Recipe
Let me tell you why these protein energy balls have become my most-requested snack recipe. I’ve tested about a dozen versions over the years, and this one wins every single time.
- No baking required. None. Zero. Your oven can stay off, and you’ll still have a snack in under ten minutes.
- Five minutes of active time. I’m not exaggerating. If you can stir, you can make these.
- Pantry-friendly ingredients. Chances are, you already have everything you need. No weird superfood powders or expensive add-ins.
- Perfect for busy mornings. Grab one on your way out the door, and you’re set until lunch.
- Kid-approved. My niece calls them “cookie balls,” and honestly, she’s not wrong.
- Meal-prep dream. Make a batch on Sunday, and you’ve got snacks for the whole week.
What makes these different from every other energy ball recipe out there? It’s the texture. So many recipes turn out dry or crumbly, but this one stays perfectly soft and chewy. The secret is a little extra peanut butter and a splash of honey—just enough to hold everything together without making them sticky. I’ve ruined more batches than I’d like to admit trying to skip the honey. Don’t be like me.
These energy balls are the kind of snack that makes you feel like you’ve got your life together. You know? Like you actually planned ahead. And honestly, in a world where we’re all just trying to survive until nap time, that feeling is worth a lot.
What Ingredients You Will Need
This recipe uses simple, wholesome ingredients to deliver a satisfying snack without the fuss. Most of these are probably already sitting in your pantry right now.
- Old-fashioned rolled oats – 1 cup (90g). Don’t use quick oats here; they’ll turn the texture mushy. I prefer Bob’s Red Mill for consistent results.
- Creamy peanut butter – ½ cup (130g). Natural peanut butter works, but you’ll need to stir it really well. The kind with added sugar and oil actually holds together better. Crazy, right?
- Honey – ⅓ cup (110g). Maple syrup works too, but honey gives a better bind. Use local honey if you can—it’s worth the splurge.
- Chocolate chips – ⅓ cup (60g). Semi-sweet is my go-to, but dark chocolate or milk chocolate both work. Mini chips distribute more evenly.
- Ground flaxseed – 2 tablespoons (14g). This is optional but adds fiber and helps with binding. You won’t taste it, I promise.
- Vanilla extract – 1 teaspoon. Pure vanilla makes a difference, but imitation works in a pinch.
- Pinch of salt – Just a pinch. If your peanut butter is salted, you can skip this.
A few notes on ingredient choices. For the peanut butter, I’ve tested this with almond butter and sunflower seed butter, and both work—though sunflower butter turns the balls a weird green color (totally safe, just not pretty). If you’re making these for a nut-free lunchbox, sunbutter and jelly lunch box bites are another great option.
For the chocolate chips, I like to use a mix of mini and regular-sized. The mini ones distribute more evenly, while the regular ones give you those satisfying little chunks. If you’re watching your sugar intake, Lily’s stevia-sweetened chips work beautifully.
The flaxseed is my little secret weapon. It adds a nutritional boost without changing the flavor, and it helps the balls hold their shape. I keep a bag of ground flaxseed in my freezer so it stays fresh longer.
Equipment Needed
You won’t need much for this recipe. That’s part of the beauty.
- Large mixing bowl – Any bowl will do, but a wide one makes mixing easier.
- Measuring cups and spoons – For accuracy. I’ve eyeballed it before, and the results were… inconsistent.
- Rubber spatula or wooden spoon – Something sturdy enough to stir thick dough.
- Cookie scoop (optional but helpful) – A 1-tablespoon scoop gives you perfectly uniform balls. I use my OXO scoop for everything.
- Parchment paper or wax paper – For rolling and storing. Silicone mats work too.
- Air-tight container – For storing in the fridge.
If you don’t have a cookie scoop, just use a regular spoon. The balls don’t need to be perfect—mine never are. I’ve also used my hands to shape them, which works fine, just make sure they’re slightly damp so the dough doesn’t stick to you.
Preparation Method
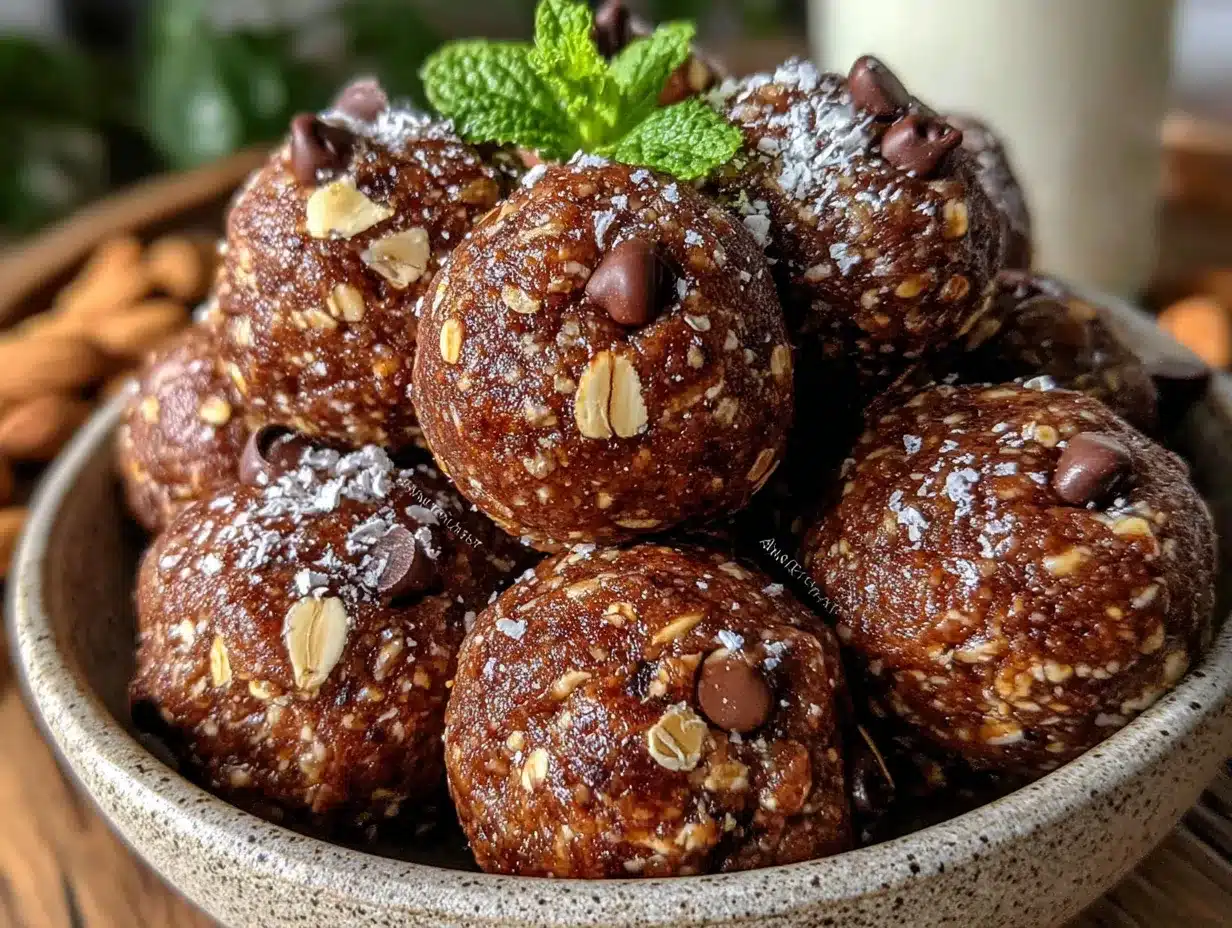
This is where the magic happens. Follow these steps, and you’ll have energy balls in less time than it takes to watch one episode of your favorite show.
- Combine the dry ingredients. In a large mixing bowl, add the rolled oats, ground flaxseed, and a pinch of salt. Give them a quick stir with your spatula. This just ensures everything is evenly distributed before the wet ingredients go in.
- Add the wet ingredients. Spoon in the peanut butter, drizzle in the honey, and add the vanilla extract. Don’t worry if it looks messy at this point—it’s supposed to.
- Mix thoroughly. Stir everything together with your rubber spatula or wooden spoon. This will take a minute or two. The mixture will start off looking dry and crumbly, but keep going. As you stir, the peanut butter and honey will coat the oats, and the dough will come together. You’re looking for a texture that holds together when you squeeze it in your fist. If it’s too dry, add a teaspoon of honey or a splash of milk. If it’s too sticky, add a tablespoon more oats.
- Fold in the chocolate chips. Once the base dough is well combined, gently fold in the chocolate chips. Make sure they’re evenly distributed, or you’ll end up with some balls that are all oats and no chocolate. Tragic.
- Chill the dough (optional but recommended). Pop the bowl in the fridge for 15-20 minutes. This makes the dough easier to handle and helps the balls hold their shape. If you’re in a hurry, you can skip this step—the balls will just be a little softer.
- Roll into balls. Using your cookie scoop or a spoon, portion out about 1 tablespoon of dough. Roll it between your palms to form a smooth ball. Place each ball on a piece of parchment paper. You should get about 16-18 balls, depending on how generous you are with your portions.
- Press a few extra chocolate chips on top. This is purely aesthetic, but it makes them look prettier. I always do this because, let’s face it, we eat with our eyes first.
- Chill to set. Place the rolled balls in the fridge for at least 30 minutes. This helps them firm up so they hold their shape when you eat them. If you can wait that long.
A few things I’ve learned the hard way. First, if your dough is too sticky to roll, your peanut butter might be too runny. Try adding a tablespoon of oat flour or more oats. Second, if the dough is too dry and crumbly, you might have used natural peanut butter that separated. Add a little more honey or a splash of milk to bring it together.
I once made a batch where I forgot the honey entirely. The balls were dry and fell apart as soon as I touched them. I tried to salvage them by rolling them in cocoa powder, but honestly, they were a lost cause. Learn from my mistakes: don’t skip the honey.
Cooking Tips & Techniques
After making these energy balls more times than I can count, I’ve picked up a few tricks that make the process smoother and the results better.
Use room temperature ingredients. Cold peanut butter is harder to mix. If your peanut butter has been in the fridge, let it sit out for 15 minutes before you start. Same goes for honey—cold honey is thick and stubborn.
Toast your oats first. This is optional, but it adds a nutty depth of flavor that takes these balls to another level. Spread the oats on a baking sheet and toast at 350°F for 8-10 minutes, stirring halfway through. Let them cool completely before using. I do this when I want to impress someone.
Wet your hands slightly. If the dough is sticking to your palms, lightly dampen your hands with water. This prevents the dough from clinging to you and makes rolling much easier. I learned this trick after a particularly frustrating batch where I ended up with more dough on my hands than in the bowl.
Chill between rolling. If you’re making a double batch, the dough will warm up as you work. Pop it back in the fridge for 10 minutes if it starts getting too soft. This keeps the balls uniform and prevents them from flattening out.
Don’t overmix. Once the dough comes together, stop stirring. Overmixing can make the texture dense and heavy. You want them light and chewy, not like hockey pucks.
Use a kitchen scale for accuracy. If you have one, weigh your ingredients. Oats and peanut butter can vary a lot by volume, and a scale gives you consistent results every time. I resisted buying a scale for years, and now I can’t imagine baking without one.
One mistake I made early on: I used natural peanut butter that had separated, and I didn’t stir it well enough. The oil made the dough greasy, and the balls never set properly. Always stir your peanut butter thoroughly before measuring.
Variations & Adaptations
This recipe is endlessly adaptable. Here are some of my favorite variations, all tested and approved by my family.
Chocolate Peanut Butter Bliss. Add 2 tablespoons of cocoa powder to the dry ingredients. Use dark chocolate chips instead of semi-sweet. The result is a rich, fudgy ball that tastes like dessert but counts as a snack. My husband’s personal favorite.
Tropical Coconut. Replace the chocolate chips with ¼ cup of shredded coconut and ¼ cup of dried pineapple or mango, chopped small. Use almond butter instead of peanut butter. This version tastes like a vacation, honestly.
Vegan Version. Substitute the honey with maple syrup or agave nectar. Use dairy-free chocolate chips. The texture will be slightly softer, so you might need to add an extra tablespoon of oats. I’ve made this for vegan friends, and they couldn’t tell the difference.
Nut-Free Option. Use sunflower seed butter or WowButter instead of peanut butter. Note that sunflower butter can react with baking soda (which we’re not using here, thankfully), so it’s safe. These are perfect for school lunchboxes with nut-free policies, much like these DIY lunchable snack boxes.
High-Protein Boost. Add 2 tablespoons of vanilla or chocolate protein powder. You’ll need to increase the liquid slightly—add a tablespoon of milk or extra honey. I use collagen peptides sometimes, which dissolve completely and add protein without changing the flavor.
Seasonal Spice. Add 1 teaspoon of pumpkin pie spice and use white chocolate chips. Perfect for fall. I made these for a Halloween party last year, and they disappeared faster than the candy.
I once tried a version with dried cranberries and white chocolate chips. It was good but a little too sweet for my taste. If you try it, use dark chocolate chips instead to balance the sweetness.
Serving & Storage Suggestions
These energy balls are best served cold, straight from the fridge. The texture is firm but chewy, and the chocolate chips stay snappy. If you leave them out at room temperature for too long, they’ll soften and lose their shape.
For serving, I like to arrange them on a small plate or in a bowl. They’re perfect for:
- Pre-workout fuel (about 30 minutes before exercise)
- Afternoon snack with a cup of coffee or tea
- Lunchbox treat for kids (they won’t make a mess)
- Road trip snack (no crumbs, no sticky fingers)
- Post-dinner dessert when you want something sweet but light
Storage: Keep the energy balls in an airtight container in the refrigerator. They’ll stay fresh for up to two weeks, though they rarely last that long in my house. Layer them between sheets of parchment paper to prevent sticking.
Freezer Instructions: These freeze beautifully. Place the rolled balls on a baking sheet lined with parchment paper and freeze until solid (about 2 hours). Transfer to a freezer-safe bag or container. They’ll keep for up to three months. To thaw, just leave them in the fridge overnight, or eat them straight from the freezer—they’re like little frozen cookie dough bites.
Reheating: Don’t. They’re meant to be eaten cold or at room temperature. If you absolutely want them warm, microwave one for 5-10 seconds, but the texture will be softer.
One thing I’ve noticed: the flavors develop over time. Day-old energy balls taste better than fresh ones. The oats absorb the moisture from the peanut butter and honey, making the texture more uniform. So if you can, make them a day ahead.
Nutritional Information & Benefits
Here’s the approximate nutritional breakdown per ball (based on 16 servings):
| Nutrient | Amount |
|---|---|
| Calories | 145 |
| Protein | 5g |
| Carbohydrates | 18g |
| Fiber | 3g |
| Sugar | 9g |
| Fat | 7g |
| Saturated Fat | 2g |
| Sodium | 85mg |
These numbers will vary based on your specific ingredients, especially the type of peanut butter and chocolate chips you use.
Health Benefits: Oats provide complex carbohydrates for sustained energy, plus beta-glucan, which supports heart health. Peanut butter offers protein and healthy monounsaturated fats. Flaxseed adds omega-3 fatty acids and fiber. And the chocolate chips? Well, dark chocolate contains antioxidants. We’ll call them a functional ingredient.
Dietary Considerations: This recipe is naturally vegetarian and can be made vegan (use maple syrup). For gluten-free, use certified gluten-free oats. For nut-free, substitute with sunflower seed butter. It’s not low-carb, but it’s a great option for active kids and adults who need real food for energy.
Potential Allergens: Peanuts, tree nuts (if using almond butter), gluten (from oats, though certified gluten-free oats are available), and dairy (from chocolate chips). Always check your labels if you’re cooking for someone with allergies.
I’m not a nutritionist, but I’ve done my research. These energy balls are a balanced snack that gives you protein, fiber, and healthy fats without the crash you get from processed snacks. They keep my blood sugar stable between meals, which is huge for me.
Conclusion
These Easy No-Bake Protein Energy Balls have become a staple in my kitchen for a reason. They’re simple, they’re satisfying, and they actually make my life easier. No oven required, no complicated techniques, and no expensive ingredients. Just good, honest food that tastes like a treat.
I love that I can customize them based on what I have in my pantry or what I’m craving. Some weeks it’s chocolate peanut butter, other weeks it’s tropical coconut. The base recipe is forgiving enough that you can experiment without fear of ruining a batch.
If you make these, I’d love to hear how they turn out. Did you add something unexpected? Did your kids gobble them up? Did you find a new favorite variation? Drop a comment below and let me know. And if you’re looking for more easy snack ideas, check out these frozen yogurt-dipped strawberry bites or these no-bake almond butter protein balls for another variation.
Go ahead, make a batch. Your future self—the one who’s hungry and has zero time—will thank you.
Frequently Asked Questions
Can I use quick oats instead of rolled oats?
You can, but the texture will be different. Quick oats are more finely processed, so they absorb moisture faster and create a denser, almost mushy texture. Rolled oats give you that nice chewy bite. If you only have quick oats, reduce the honey slightly and expect a softer ball.
How long do these energy balls last at room temperature?
They’re best kept in the fridge. At room temperature, they’ll soften and can become sticky after a few hours. If you’re taking them on the go, pack them in a cooler or eat them within 2-3 hours. I’ve left them out during a picnic, and they held up fine for about an hour.
Can I make these without peanut butter?
Absolutely. Almond butter, cashew butter, sunflower seed butter, or tahini all work well. Just note that different nut butters have different consistencies. If your alternative butter is runny, you might need to add extra oats. If it’s thick, you might need a splash of milk.
Why are my energy balls too dry?
This usually happens when the peanut butter is too thick or you’ve added too many oats. Try adding a tablespoon of honey or a splash of milk to bring the dough together. Also, make sure you’re measuring your ingredients accurately—packed oats can throw off the ratio.
Can I double this recipe?
Yes, and I often do. Double everything, and you’ll have enough for the whole week. The dough might be harder to mix in a single bowl, so use a larger bowl or split it into two batches. I’ve made quadruple batches for parties, and they always disappear.
Pin This Recipe!
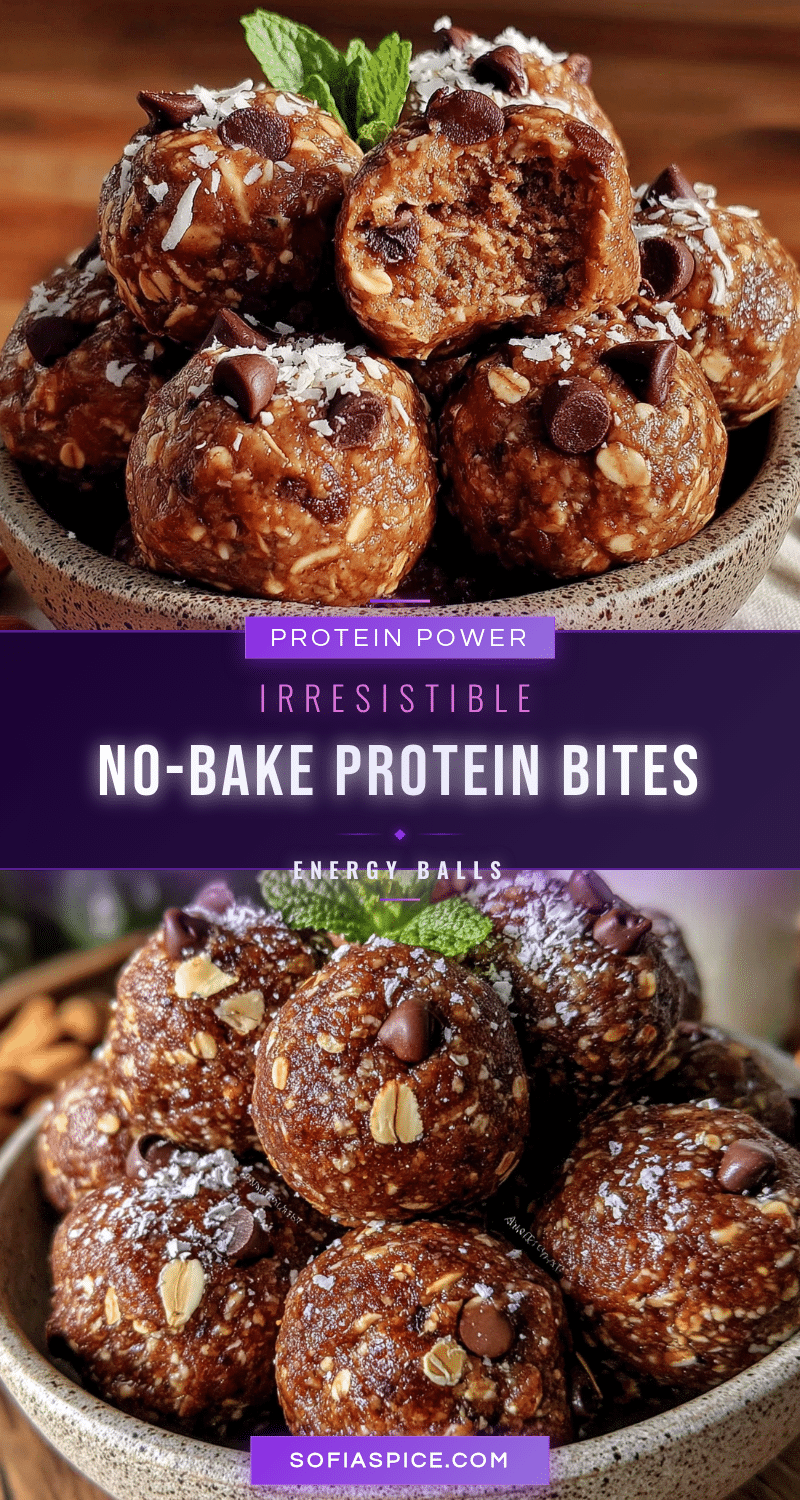
Easy No-Bake Protein Energy Balls: 5-Minute Best Snack

These no-bake protein energy balls are a quick, healthy snack made with oats, peanut butter, and chocolate chips. Ready in just 5 minutes, they’re perfect for busy mornings, meal prep, and kid-approved treats.
- Prep Time: 5 minutes
- Cook Time: 0 minutes
- Total Time: 5 minutes
- Yield: 16-18 balls 1x
- Category: Snack
- Cuisine: American
Ingredients
- 1 cup (90g) old-fashioned rolled oats
- ½ cup (130g) creamy peanut butter
- ⅓ cup (110g) honey
- ⅓ cup (60g) chocolate chips (semi-sweet recommended)
- 2 tablespoons (14g) ground flaxseed (optional)
- 1 teaspoon vanilla extract
- Pinch of salt
Instructions
- In a large mixing bowl, combine the rolled oats, ground flaxseed, and a pinch of salt. Stir to distribute evenly.
- Add the peanut butter, honey, and vanilla extract. Mix thoroughly with a rubber spatula or wooden spoon until the dough comes together. If too dry, add a teaspoon of honey or a splash of milk; if too sticky, add a tablespoon more oats.
- Fold in the chocolate chips until evenly distributed.
- Optional: Chill the dough in the fridge for 15-20 minutes for easier handling.
- Using a cookie scoop or spoon, portion about 1 tablespoon of dough and roll into smooth balls. Place on parchment paper. You should get 16-18 balls.
- Press a few extra chocolate chips on top for appearance (optional).
- Chill the rolled balls in the fridge for at least 30 minutes to set.
Notes
For best texture, use old-fashioned rolled oats, not quick oats. If dough is too sticky, add more oats; if too dry, add more honey or a splash of milk. Chill dough for easier rolling. Store in fridge for up to 2 weeks or freeze for up to 3 months.
Nutrition
- Serving Size: 1 ball
- Calories: 145
- Sugar: 9
- Sodium: 85
- Fat: 7
- Saturated Fat: 2
- Carbohydrates: 18
- Fiber: 3
- Protein: 5
Keywords: energy balls, no-bake, protein balls, healthy snack, peanut butter, oats, chocolate chips, gluten-free option, vegan option


