My friend Jenna swore by browned butter in cookies. I told her she was overcomplicating things. Honestly, I thought it was one of those fussy chef tricks that made no real difference—just another step to dirty a pan for. I stuck to my room-temperature butter routine for years, perfectly happy with my standard chocolate chip recipe. Then I made these brown butter pumpkin snickerdoodles for a fall get-together, mostly to prove a point. The point I proved was that I had been wrong for a very long time.
The first batch came out of the oven, and the kitchen smelled like a candle store had exploded in the best way. The edges were crisp, the centers were pillowy, and that nutty, toasty flavor from the browned butter had woven itself into every single bite. I sat on my counter stool, ate one still warm, and just stared at the cookie. It was the kind of quiet moment where you realize a recipe has officially ruined you for all others. I texted Jenna a photo with zero context. She just replied, “Told you.”
These cookies have become my official fall currency. I bring them to gatherings, I stash them in the freezer for bad days, and I have already made four batches this season. They are not fussy. The brown butter adds a depth that makes people close their eyes when they eat them, and the pumpkin keeps everything soft and tender. It’s the cookie I didn’t know I needed until I actually trusted the process.
So here we are. A recipe born from stubborn skepticism and a very humbling text message. Trust the brown butter on this one.
Why You’ll Love This Recipe
Let me be clear about something right away: these are not your average snickerdoodles. The brown butter changes everything. It adds a warm, nutty richness that plays perfectly with the pumpkin and the cinnamon-sugar coating. You get a cookie that tastes like it came from a bakery, but it comes together in one bowl with simple ingredients.
- One Bowl, No Mixer Required: You can whisk everything by hand. No hauling out the stand mixer for a batch of cookies on a Tuesday night.
- Deep, Complex Flavor: The browned butter gives you that toasty, almost caramel-like note without any extra sugar. It is the secret weapon here.
- Perfectly Soft Centers: The pumpkin puree keeps these cookies incredibly tender. They stay soft for days, which is rare for a snickerdoodle.
- No Chilling Required: You can bake these immediately. No waiting for the dough to firm up in the fridge.
- Fall Vibes Without Being Overpowering: The pumpkin is subtle. It is not a pumpkin spice bomb. It is just enough to make you feel cozy without feeling like you are eating a candle.
This recipe is different because of the technique. Browning the butter might feel like an extra step, but it takes five minutes and it does all the heavy lifting for flavor. I have tested this with regular melted butter, and honestly, it is not the same. The brown butter is non-negotiable if you want that deep, soul-warming taste. These cookies are the kind you make when you want to impress people without breaking a sweat. They look beautiful, they taste even better, and they make your whole house smell like autumn.
What Ingredients You Will Need
This recipe uses simple, everyday ingredients to create something that tastes far more complex than the list suggests. The magic is all in the preparation, not in hard-to-find items.
- Unsalted butter: 1 cup (2 sticks). You will brown this, so do not use salted butter here. The salt content can throw off the browning process and the final flavor. I prefer Kerrygold for its higher fat content, but any good unsalted butter works.
- Granulated sugar: 1 cup. This provides the structure and sweetness. Do not substitute with brown sugar here—the texture will change.
- Pumpkin puree: ½ cup. Make sure you grab pure pumpkin puree, not pumpkin pie filling. The pie filling has added sugar and spices that will mess with the balance. Libby’s is my go-to brand for consistent texture.
- Large egg: 1, at room temperature. A cold egg can seize the browned butter and make the dough stiff. Let it sit on the counter for 15 minutes if you forgot to take it out.
- Vanilla extract: 1 teaspoon. Pure vanilla is best, but imitation works in a pinch. It rounds out the nutty flavor from the butter.
- All-purpose flour: 2 cups. Spoon and level it into your measuring cup. Scooping directly can pack the flour and make the cookies dry.
- Baking soda: 1 teaspoon. This gives the cookies their lift.
- Baking powder: ½ teaspoon. Adds a little extra puffiness.
- Salt: ½ teaspoon. Do not skip this. Salt balances the sweetness and makes the brown butter shine.
- Pumpkin pie spice: 1 teaspoon. You can use store-bought or make your own with cinnamon, nutmeg, ginger, and cloves. It adds that warm fall backbone.
- Cinnamon: ½ teaspoon. Extra warmth in the dough itself.
For the coating:
- Granulated sugar: ¼ cup. For rolling the dough balls.
- Cinnamon: 1 tablespoon. Mixed with the sugar for that classic snickerdoodle crust.
If you want to swap the all-purpose flour for a gluten-free blend, use one that contains xanthan gum. I have tested this with King Arthur Measure for Measure, and it worked beautifully. For a dairy-free version, use a plant-based butter that has a high fat content, like Miyoko’s. It browns surprisingly well.
Equipment Needed
You do not need a fancy kitchen to pull these off. Here is what you will need:
- Large skillet or saucepan: A light-colored pan is best for browning butter. Dark pans make it hard to see the color change, and you risk burning it. I use a stainless steel skillet for this.
- Mixing bowls: One large bowl for the wet ingredients and another for the dry. Or just one bowl if you are mixing the dry separately and adding it in.
- Whisk: For combining the wet ingredients smoothly.
- Rubber spatula: For folding the flour mixture into the wet ingredients. A wooden spoon works too, but a spatula is gentler.
- Measuring cups and spoons: Accurate measurements matter here, especially for the flour and pumpkin.
- Baking sheets: Two standard half-sheet pans. Line them with parchment paper or a silicone baking mat for easy cleanup.
- Cookie scoop: A 1.5-tablespoon scoop makes uniform cookies. If you do not have one, use two spoons to portion the dough.
- Cooling rack: Letting the cookies cool on a rack prevents soggy bottoms.
I have made these with a cheap cookie scoop from the grocery store, and they turned out just fine. Do not overthink the equipment. A good pan and a whisk are really all you need.
Preparation Method
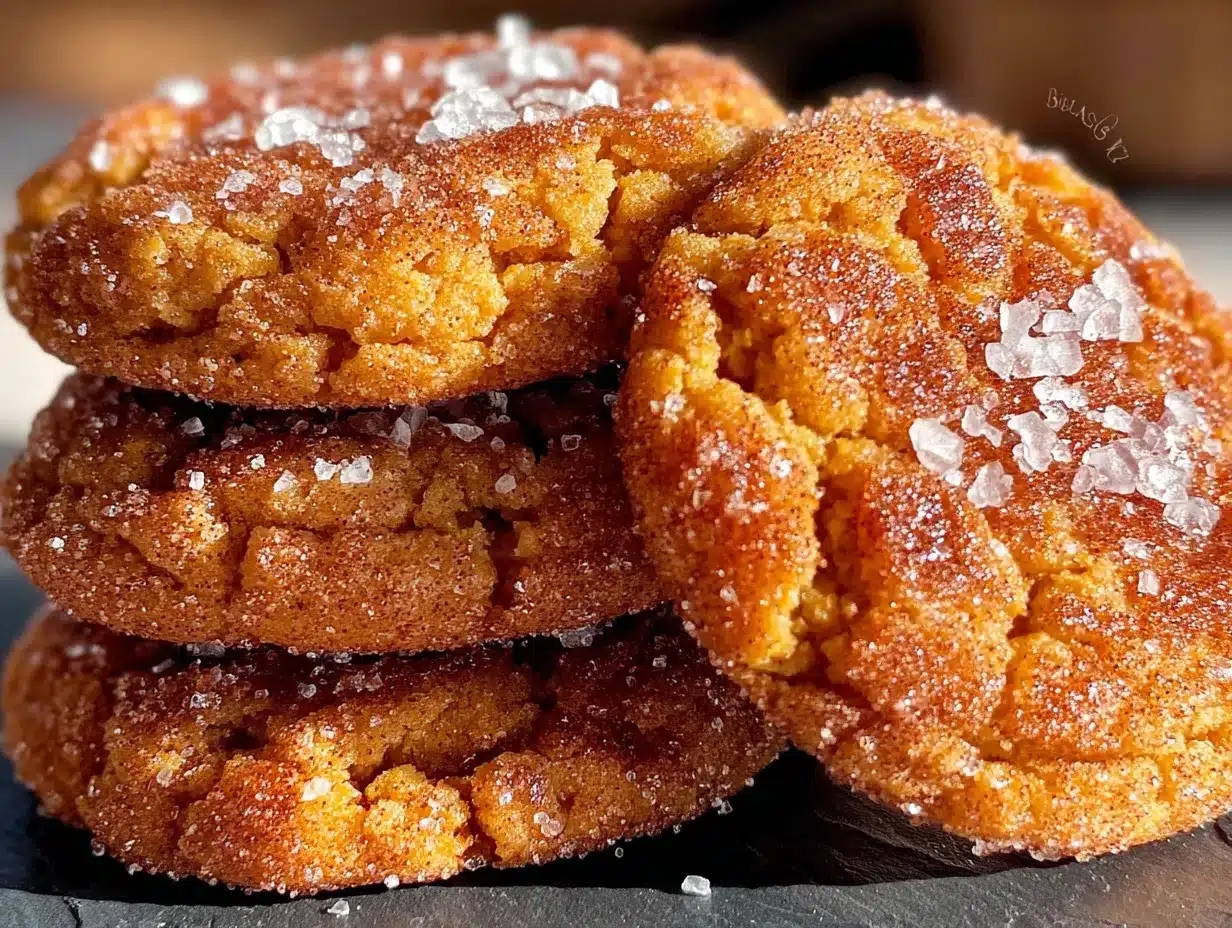
This method is straightforward, but browning the butter requires your full attention for a few minutes. Do not walk away from the stove. Trust me, I have burned butter more times than I care to admit.
- Brown the butter: Cut the 1 cup of unsalted butter into pieces and place them in your skillet over medium heat. Stir constantly with a rubber spatula or wooden spoon. The butter will melt, then foam, then start to crackle and pop. Keep stirring. After about 4-5 minutes, you will see brown specks forming at the bottom of the pan. The butter will smell nutty and toasty. As soon as it turns a golden amber color and the specks are visible, remove it from the heat immediately. Pour it into a heatproof bowl to stop the cooking process. Let it cool for 10 minutes. It should be warm but not hot when you add it to the sugar.
- Mix the wet ingredients: In a large mixing bowl, combine the cooled browned butter with 1 cup of granulated sugar. Whisk until smooth and well combined. It will look a bit grainy at first, but keep whisking. Add the ½ cup of pumpkin puree, 1 large egg, and 1 teaspoon of vanilla extract. Whisk until the mixture is smooth and uniform. It will be thick and glossy.
- Combine the dry ingredients: In a separate medium bowl, whisk together 2 cups of all-purpose flour, 1 teaspoon of baking soda, ½ teaspoon of baking powder, ½ teaspoon of salt, 1 teaspoon of pumpkin pie spice, and ½ teaspoon of cinnamon. Make sure everything is evenly distributed.
- Fold the dry into the wet: Gradually add the dry ingredient mixture to the wet mixture. Use a rubber spatula to fold everything together gently. Stir just until no streaks of flour remain. Overmixing will make the cookies tough. The dough will be soft and slightly sticky—that is normal.
- Preheat the oven: Set your oven to 350°F (175°C). Line two baking sheets with parchment paper.
- Make the coating: In a small bowl, mix ¼ cup of granulated sugar with 1 tablespoon of cinnamon.
- Shape the cookies: Use a 1.5-tablespoon cookie scoop to portion the dough. Roll each portion into a ball between your palms. The dough will be a little sticky, so lightly wet your hands if needed. Drop each ball into the cinnamon-sugar mixture and roll it around until fully coated. Place the balls on the prepared baking sheets, spacing them about 2 inches apart. They will spread a bit.
- Bake: Bake one sheet at a time for 10-12 minutes. The cookies should look puffed and slightly cracked on top. The edges will be set, but the centers will still look soft and a little underdone. That is exactly what you want. Do not overbake them, or they will lose their soft texture.
- Cool: Let the cookies rest on the baking sheet for 5 minutes. They will continue to set as they cool. Then transfer them to a wire rack to cool completely. If you eat one warm, the center will be incredibly tender and almost gooey. It is a beautiful thing.
A quick note on timing: If you are baking both sheets at once, rotate them halfway through and swap the racks. Every oven runs a little differently, so check the cookies at the 10-minute mark. You want golden edges, not brown edges.
Cooking Tips & Techniques
I have made these cookies at least a dozen times now, and I have learned a few things the hard way. Let me save you the trouble.
Watch the butter like a hawk. The first time I browned butter, I got distracted by a text message and ended up with black specks and a burnt smell. It was a disaster. The butter goes from perfect to ruined in about 30 seconds. Swirl the pan constantly and pay attention to the color. When it looks like light amber and smells like toasted nuts, pull it off the heat immediately. Pouring it into a separate bowl stops the cooking, so do not skip that step.
Do not overmix the dough. I know it is tempting to keep stirring until everything looks perfectly smooth, but that develops the gluten and makes the cookies dense. Stop as soon as the flour disappears. A few streaks are fine. The dough will be soft and a little sticky, which is exactly what you want for a tender cookie.
Use a cookie scoop for even sizing. Uniform cookies bake evenly. If you have some balls that are bigger than others, the small ones will burn and the big ones will be underdone. A simple scoop fixes that problem instantly.
Chill the dough if you have time. I said no chilling was required, and that is true. But if you let the dough rest in the fridge for 30 minutes, the cookies will be slightly thicker and chewier. The flavors also meld together more. It is optional, but worth mentioning if you plan ahead.
Do not flatten the dough balls. Let them bake as rounded balls. They will spread naturally in the oven. Flattening them makes the cookies too thin and they lose that soft, puffy center.
Variations & Adaptations
One of the best things about this recipe is how flexible it is. I have tweaked it for different occasions and dietary needs, and it always delivers.
- Add white chocolate chips: Fold in ½ cup of white chocolate chips with the flour. The sweetness of the white chocolate pairs beautifully with the brown butter and pumpkin. I did this for a holiday cookie exchange, and they were gone in ten minutes.
- Spice it up: If you want a more intense pumpkin spice flavor, add an extra teaspoon of pumpkin pie spice to the dough. You can also add a pinch of ground cloves or cardamom for a more complex warmth.
- Make them dairy-free: Use a high-quality plant-based butter for browning. I have had success with Miyoko’s European Style Cultured Vegan Butter. It browns well and gives a similar nutty flavor. The texture of the cookies will be slightly different—a bit more delicate—but they are still delicious.
- Go gluten-free: Substitute the all-purpose flour with a 1:1 gluten-free baking blend that contains xanthan gum. I have tested this with King Arthur Measure for Measure, and the cookies came out soft and tender. Do not use almond flour or coconut flour as a direct swap; the texture will be off.
- Make them smaller for snacking: Use a smaller scoop (about 1 tablespoon) and bake for 8-9 minutes. You will get more cookies, and they are perfect for lunchboxes. Speaking of which, these cookies pair wonderfully with a DIY lunchable snack box for a fun fall treat.
I have also tried rolling the dough in a mix of cinnamon and brown sugar instead of granulated sugar. It gives the cookies a slightly deeper, molasses-like sweetness. It is a small change, but it makes a noticeable difference.
Serving & Storage Suggestions
These cookies are best served slightly warm, when the centers are still soft and the edges have that slight crunch. Let them cool for about 5 minutes on the baking sheet, then transfer them to a plate and serve immediately. A glass of cold milk is the classic pairing, but I also love them with a hot cup of coffee or a pumpkin spice cold foam iced coffee for the ultimate fall experience.
For storage, keep the cookies in an airtight container at room temperature. They will stay soft and fresh for up to 4 days. Place a slice of bread in the container to help maintain moisture—the bread absorbs excess air and keeps the cookies from drying out. Just replace the bread slice every other day.
These cookies freeze beautifully. Place the baked and cooled cookies in a single layer on a baking sheet and freeze for 1 hour. Then transfer them to a freezer-safe bag or container. They will keep for up to 3 months. To thaw, let them sit at room temperature for about 15 minutes, or pop them in a 300°F oven for 5 minutes to warm them up. The texture comes back perfectly.
I have also frozen the unbaked dough balls. Roll them, coat them in the cinnamon sugar, and place them on a parchment-lined baking sheet. Freeze until solid, then transfer to a freezer bag. You can bake them directly from frozen—just add 2-3 minutes to the baking time. It is a great trick for having fresh cookies on demand.
Nutritional Information & Benefits
Let us be real: these are cookies, not health food. But they are made with simple, recognizable ingredients, and there are a few bright spots worth mentioning.
Per cookie (based on 24 cookies):
- Calories: 165
- Fat: 9g
- Carbohydrates: 21g
- Protein: 2g
- Fiber: 1g
- Sugar: 11g
The pumpkin puree adds a small amount of vitamin A and fiber, which is more than most cookies can claim. The brown butter, while indulgent, provides a rich flavor that allows you to use less sugar overall compared to some other cookie recipes. These are a treat, and they should be enjoyed as such. I make them for the comfort and the joy they bring, not for any nutritional benefit. But it is nice to know they are not entirely empty calories.
If you are watching your sugar intake, you can reduce the sugar in the dough to ¾ cup without a major texture change. The cookies will be slightly less sweet, but the brown butter flavor will shine even more.
Conclusion
These brown butter pumpkin snickerdoodles have become my most-requested fall recipe. They are the cookie I bring to every gathering, the one I make when I need a little comfort, and the one that finally proved my friend Jenna right. The browned butter adds a depth of flavor that makes these feel special without requiring any complicated techniques. The pumpkin keeps them soft, the cinnamon sugar gives them that classic snickerdoodle crunch, and the whole process takes less than 30 minutes from start to finish.
I want you to try these and make them your own. Add chocolate chips if that is your thing. Double the spice. Roll them in brown sugar. The base recipe is solid, but it welcomes your personal touch. That is the beauty of a good cookie recipe—it becomes yours the moment you bake it.
If you make these, come back and tell me how they turned out. Leave a comment below, share a photo, or tag me on social media. I genuinely love hearing about your baking wins. And if you are looking for more cozy fall treats to fill your kitchen with, check out these pumpkin chocolate chip cookies with sea salt flakes or these pumpkin cinnamon rolls with brown butter frosting. Your kitchen is about to smell incredible.
Happy baking, friends. Go brown that butter.
Frequently Asked Questions
Can I use pumpkin pie filling instead of pumpkin puree?
No, please do not. Pumpkin pie filling has added sugar, spices, and stabilizers that will throw off the texture and sweetness of these cookies. Stick with 100% pure pumpkin puree. Libby’s is the most reliable brand I have found.
Why did my cookies turn out flat?
Flat cookies usually mean the butter was too warm when you mixed the dough, or the dough was not chilled before baking. Make sure your browned butter has cooled to room temperature before adding it to the sugar. If your kitchen is warm, pop the dough in the fridge for 20 minutes before scooping and baking.
Can I make these cookies without browning the butter?
You can, but they will not taste the same. The browned butter is what gives these cookies their deep, nutty, almost caramel-like flavor. If you use melted butter without browning it, you will end up with a standard pumpkin snickerdoodle that lacks that special something. It is worth the extra 5 minutes.
How do I store these cookies to keep them soft?
Keep them in an airtight container at room temperature. Add a slice of bread to the container to absorb excess air and maintain moisture. Change the bread slice every other day. They will stay soft for up to 4 days. Do not refrigerate them, as the cold air will dry them out.
Can I freeze the dough for later?
Absolutely. Roll the dough into balls, coat them in the cinnamon sugar, and place them on a parchment-lined baking sheet. Freeze until solid, then transfer to a freezer bag. Bake directly from frozen at 350°F for 12-14 minutes. You will have fresh cookies whenever the craving hits.
Pin This Recipe!
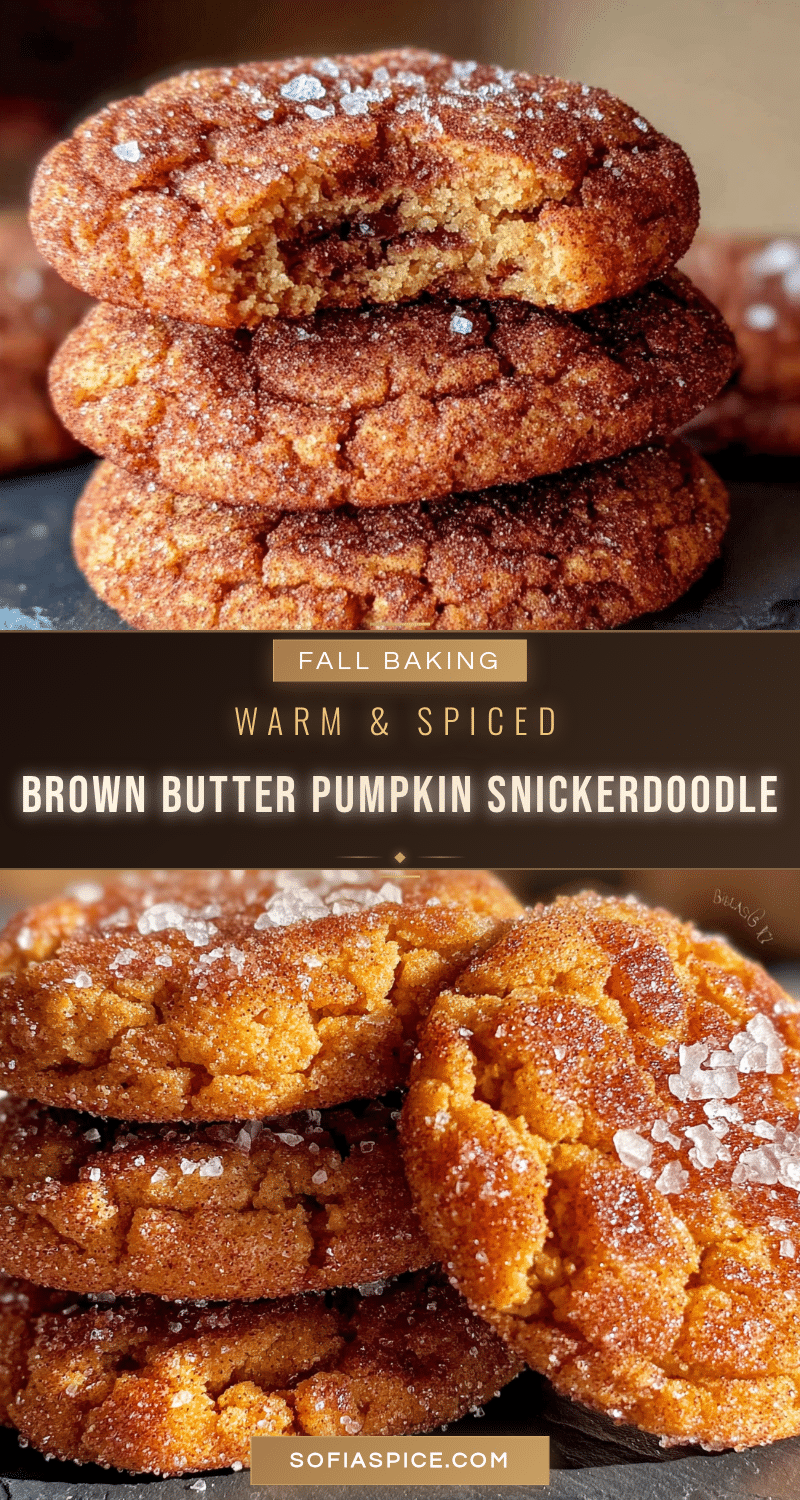
Cozy Brown Butter Pumpkin Snickerdoodle Cookies Easy Recipe
These brown butter pumpkin snickerdoodle cookies are soft, tender, and packed with nutty, toasty flavor from browned butter. They come together in one bowl with no mixer required and are perfect for fall gatherings or a cozy treat.
- Prep Time: 15 minutes
- Cook Time: 12 minutes
- Total Time: 27 minutes
- Yield: 24 servings 1x
- Category: Dessert
- Cuisine: American
Ingredients
- 1 cup (2 sticks) unsalted butter
- 1 cup granulated sugar
- ½ cup pumpkin puree (not pumpkin pie filling)
- 1 large egg, at room temperature
- 1 teaspoon vanilla extract
- 2 cups all-purpose flour
- 1 teaspoon baking soda
- ½ teaspoon baking powder
- ½ teaspoon salt
- 1 teaspoon pumpkin pie spice
- ½ teaspoon cinnamon
- For the coating:
- ¼ cup granulated sugar
- 1 tablespoon cinnamon
Instructions
- Brown the butter: Cut 1 cup unsalted butter into pieces and place in a skillet over medium heat. Stir constantly until butter melts, foams, and turns golden amber with brown specks (about 4-5 minutes). Remove from heat immediately and pour into a heatproof bowl. Let cool for 10 minutes.
- Mix the wet ingredients: In a large bowl, combine cooled browned butter with 1 cup granulated sugar. Whisk until smooth. Add ½ cup pumpkin puree, 1 large egg, and 1 teaspoon vanilla extract. Whisk until smooth and glossy.
- Combine the dry ingredients: In a separate bowl, whisk together 2 cups all-purpose flour, 1 teaspoon baking soda, ½ teaspoon baking powder, ½ teaspoon salt, 1 teaspoon pumpkin pie spice, and ½ teaspoon cinnamon.
- Fold the dry into the wet: Gradually add dry ingredients to wet mixture, folding with a rubber spatula until just combined. Do not overmix. Dough will be soft and slightly sticky.
- Preheat oven to 350°F (175°C). Line two baking sheets with parchment paper.
- Make the coating: In a small bowl, mix ¼ cup granulated sugar with 1 tablespoon cinnamon.
- Shape the cookies: Using a 1.5-tablespoon cookie scoop, portion dough and roll into balls. Roll each ball in cinnamon-sugar mixture until fully coated. Place on prepared baking sheets, spacing 2 inches apart.
- Bake: Bake one sheet at a time for 10-12 minutes, until edges are set and tops are puffed and slightly cracked. Centers should still look soft.
- Cool: Let cookies rest on baking sheet for 5 minutes, then transfer to a wire rack to cool completely.
Notes
Watch the butter carefully to avoid burning. Do not overmix the dough. For thicker cookies, chill dough for 30 minutes. Do not flatten dough balls before baking. Store in an airtight container at room temperature for up to 4 days; add a slice of bread to maintain moisture. Freeze baked cookies for up to 3 months or unbaked dough balls for up to 3 months.
Nutrition
- Serving Size: 1 cookie
- Calories: 165
- Sugar: 11
- Sodium: 120
- Fat: 9
- Saturated Fat: 5
- Carbohydrates: 21
- Fiber: 1
- Protein: 2
Keywords: brown butter, pumpkin, snickerdoodle, cookies, fall, easy, one bowl, no mixer


