Fourth time in two weeks and I finally stopped adding extra chipotle. That was the thing — I kept thinking it needed more heat, more smoke, more something to make it taste like the kind of chili you’d fight over at a Super Bowl party. But the fourth batch? That one taught me something. The lean ground turkey doesn’t need to be bullied into flavor. It just needs the right company. And honestly, the first three versions weren’t bad. They were just trying too hard, like me wearing a jersey for a team I don’t even follow. This healthy turkey chili for game day finally clicked when I stopped treating it like a compromise and started treating it like the main event. It’s the kind of bowl that makes you forget the score for a minute.
I’m not a nutritionist or a personal chef. I’m just someone who got tired of watching friends pick at sad veggie trays during the big game while the wings disappeared. So I started messing around in my kitchen on random Sunday afternoons, trying to build a chili that felt indulgent but didn’t leave you in a food coma by the third quarter. The result is this pot of deeply savory, slightly smoky, protein-packed chili that actually gets better as the game goes on. It’s the dish I now bring to every watch party, and people always ask for the recipe before the halftime show even starts.
So here it is. No weird ingredients. No three-hour simmer. Just a straightforward, crowd-pleasing bowl of chili that happens to be good for you. And honestly, that’s the best kind of game day food.
Why You’ll Love This Recipe
This isn’t your average diet chili that tastes like punishment. This is the kind of recipe that makes you forget it’s healthy because you’re too busy going back for another ladleful. I’ve tested this on friends who swear they “don’t like turkey” and watched them eat two bowls. It’s that convincing.
- Quick & Easy: From fridge to table in about 45 minutes. No all-day simmering required, though it does taste even better the next day. Perfect for when you realize kickoff is in an hour and you have nothing prepared.
- Simple Ingredients: Everything comes from a regular grocery store. No specialty health food aisle hunting. You probably have half these ingredients in your pantry right now.
- Perfect for Game Day: It feeds a crowd, stays warm in a slow cooker for hours, and pairs beautifully with all the classic toppings. Plus, it won’t weigh anyone down for the second half.
- Crowd-Pleaser: I’ve served this to meat lovers, vegetarians (with toppings), kids, and picky eaters. The response is always the same — silence followed by “wait, this is turkey?”
- Unbelievably Delicious: The secret is building layers of flavor without relying on tons of fat. Smoked paprika, a touch of cocoa powder, and a splash of Worcestershire sauce create a depth that tastes like it simmered all day.
What makes this different from other healthy chili recipes is the technique. Most recipes just dump everything in a pot and hope for the best. I take a few extra minutes to really brown the turkey and bloom the spices in the rendered fat. It makes a massive difference. You get that deep, caramelized flavor without needing hours of cooking time. It’s the difference between good chili and “I need this recipe” chili.
This is the kind of meal that makes game day feel special without derailing your week. It’s comfort food that actually fuels you for the fourth quarter.
What Ingredients You Will Need
This recipe uses simple, wholesome ingredients that work together to create a deeply satisfying bowl of chili. No complicated spice blends or hard-to-find items. Just real food that tastes incredible.
For the Base
- Lean ground turkey (93/7) — 1.5 pounds. I recommend using 93% lean for the best balance of flavor and moisture. Too lean (99%) and the chili can taste dry and grainy. I personally prefer Jennie-O or Shady Brook Farms for consistent quality.
- Yellow onion, diced — 1 large. Adds sweetness and savory depth. Red onion works too, but yellow gives the most classic chili flavor.
- Garlic cloves, minced — 4 large. Don’t skimp here. Garlic is the backbone of this dish.
- Red bell pepper, diced — 1 medium. Adds color, sweetness, and a boost of vitamin C. Green bell pepper works but has a sharper taste.
- Jalapeño, seeded and minced — 1 small. For gentle heat. Leave the seeds in if you want more kick, or omit entirely for a mild chili.
For the Spice Blend
- Chili powder — 3 tablespoons. Use a good quality blend. I like McCormick or a Mexican brand like Badia. This is not the time for old spices — fresh chili powder makes a huge difference.
- Ground cumin — 2 teaspoons. Warm and earthy. Toast it in the pan for 30 seconds before adding liquid for maximum flavor.
- Smoked paprika — 1 tablespoon. This is non-negotiable in my opinion. It gives the chili that deep, campfire-like smokiness that tricks people into thinking it cooked for hours.
- Dried oregano — 1 teaspoon. Adds a subtle herbal note. Mexican oregano is ideal if you have it.
- Unsweetened cocoa powder — 1 teaspoon. Trust me on this. It doesn’t make the chili taste like chocolate. It adds a rich, dark undertone that rounds out the acidity of the tomatoes.
- Salt and black pepper — to taste. Go easy on the salt early and adjust at the end.
For the Liquid & Body
- Crushed tomatoes (fire-roasted preferred) — 1 can (28 ounces). Fire-roasted adds a subtle smoky sweetness. Regular crushed tomatoes work fine too. I like Muir Glen or Cento brands.
- Tomato paste — 2 tablespoons. Adds concentrated tomato flavor and helps thicken the chili. Double-concentrated in a tube is my go-to.
- Low-sodium chicken or turkey broth — 1 cup. Use low-sodium so you control the salt level. Vegetable broth works too.
- Canned kidney beans, drained and rinsed — 1 can (15 ounces). Dark red kidney beans are classic. Black beans or pinto beans make great substitutes.
- Canned black beans, drained and rinsed — 1 can (15 ounces). I love the texture contrast between kidney and black beans. If you’re not a bean person, double the meat instead.
- Worcestershire sauce — 1 tablespoon. Adds umami and depth. It’s a small amount but makes a noticeable difference. Use vegan Worcestershire if needed.
- Bay leaf — 1. For subtle aromatic flavor during simmering. Remove before serving.
For Toppings (Optional but Highly Recommended)
- Shredded sharp cheddar cheese
- Sour cream or plain Greek yogurt
- Fresh cilantro, chopped
- Diced avocado
- Pickled jalapeños
- Crushed tortilla chips or Fritos
- Lime wedges
Ingredient Selection Tip: When buying ground turkey, look for packages that feel cold and have no liquid pooling. Fresh turkey should have a mild, clean smell. If it smells funky, don’t use it. For the beans, I prefer low-sodium canned versions so I can control the salt. Rinsing them also removes that metallic can taste and reduces the gas-causing compounds.
Substitution Guidance: To make this dairy-free, simply skip the cheese and sour cream toppings. For a gluten-free version, double-check your Worcestershire sauce (Lea & Perrins is gluten-free). If you want a vegetarian version, replace the turkey with two cans of extra beans or a plant-based ground meat substitute.
Equipment Needed
You don’t need a fancy kitchen to make this chili. Here’s what I use:
- Large Dutch oven or heavy-bottomed pot (5-6 quart) — My Le Creuset is my go-to, but a Lodge enameled cast iron or even a stainless steel stockpot works perfectly. The heavy bottom helps with even browning and prevents scorching.
- Sharp chef’s knife — 8-inch is ideal. A dull knife makes dicing onions and peppers frustrating and dangerous.
- Cutting board — I prefer wood or bamboo, but plastic is fine.
- Wooden spoon or silicone spatula — For stirring and breaking up the turkey as it browns.
- Measuring spoons — For the spice blend. I like magnetic ones that stick together for easy storage.
- Can opener — A good one saves frustration. I use a safety-edge OXO model.
- Colander — For rinsing the beans.
- Ladle — For serving. A 6-ounce ladle is the perfect size for bowls.
If you don’t have a Dutch oven, a large deep skillet with a lid will work in a pinch. Just make sure it’s at least 4 quarts. I’ve also made this in a slow cooker — just brown the turkey and bloom the spices on the stove first, then transfer everything to the slow cooker and cook on low for 6-8 hours. A simple stainless steel pot from IKEA or Amazon Basics will do the job just fine. You don’t need expensive gear, just something that holds heat well and gives you room to stir without splattering chili all over your stove.
Preparation Method
- Prep your ingredients first. Dice the onion, bell pepper, and jalapeño. Mince the garlic. Drain and rinse both cans of beans. Measure out all your spices into a small bowl. This isn’t just about being organized — chili comes together fast once you start cooking, and you don’t want to be chopping onions while your turkey is burning. Trust me, I learned this the hard way.
- Heat your pot over medium-high heat. Add 1 tablespoon of olive oil. Let it shimmer for about 30 seconds. Add the ground turkey in an even layer. Let it cook undisturbed for 4-5 minutes until the bottom is deeply browned. Break it up with your spoon and continue cooking for another 3-4 minutes until no pink remains. Don’t stir constantly — let that crust form. That browning is where all the flavor lives.
- Remove the turkey to a bowl with a slotted spoon. Leave about 1 tablespoon of rendered fat in the pot. If there’s too much, pour some off. If there’s not enough, add a splash of olive oil. Now add the diced onion, bell pepper, and jalapeño. Cook over medium heat for 6-7 minutes, stirring occasionally, until the onions are translucent and the peppers have softened. You should see some brown bits forming on the bottom of the pot — that’s flavor gold.
- Add the minced garlic and cook for 30 seconds until fragrant. Then add your entire spice blend — chili powder, cumin, smoked paprika, oregano, cocoa powder, and a pinch of salt. Stir constantly for about 1 minute. This “blooming” step wakes up the spices and makes them exponentially more flavorful. Your kitchen will smell incredible right about now.
- Add the tomato paste and stir it into the vegetables for about 1 minute. It will darken and smell almost caramelized. This step removes the raw tomato taste and adds depth. Then pour in the crushed tomatoes, chicken broth, and Worcestershire sauce. Stir well, scraping up all those browned bits from the bottom of the pot. That’s called deglazing and it’s the secret to restaurant-quality depth at home.
- Return the cooked turkey to the pot along with any accumulated juices. Add the drained kidney beans and black beans. Drop in the bay leaf. Stir everything together. Bring the chili to a gentle boil, then reduce the heat to low. Cover with the lid slightly ajar and let it simmer for 25-30 minutes, stirring occasionally. The chili should be bubbling gently, not furiously. Too high a heat will burn the bottom and make the beans mushy.
- After 25 minutes, remove the lid and check the consistency. If it’s too thick, add a splash more broth. If it’s too thin, let it simmer uncovered for another 10 minutes. Remove the bay leaf. Taste and adjust seasonings — you’ll likely need more salt (start with ½ teaspoon) and maybe a pinch more cumin or chili powder. Everyone’s palate is different, so trust your own.
- Let the chili rest off the heat for 10 minutes before serving. This allows the flavors to settle and meld together. It also cools it to a safe eating temperature so nobody burns their mouth on game day. Serve hot with all your favorite toppings.
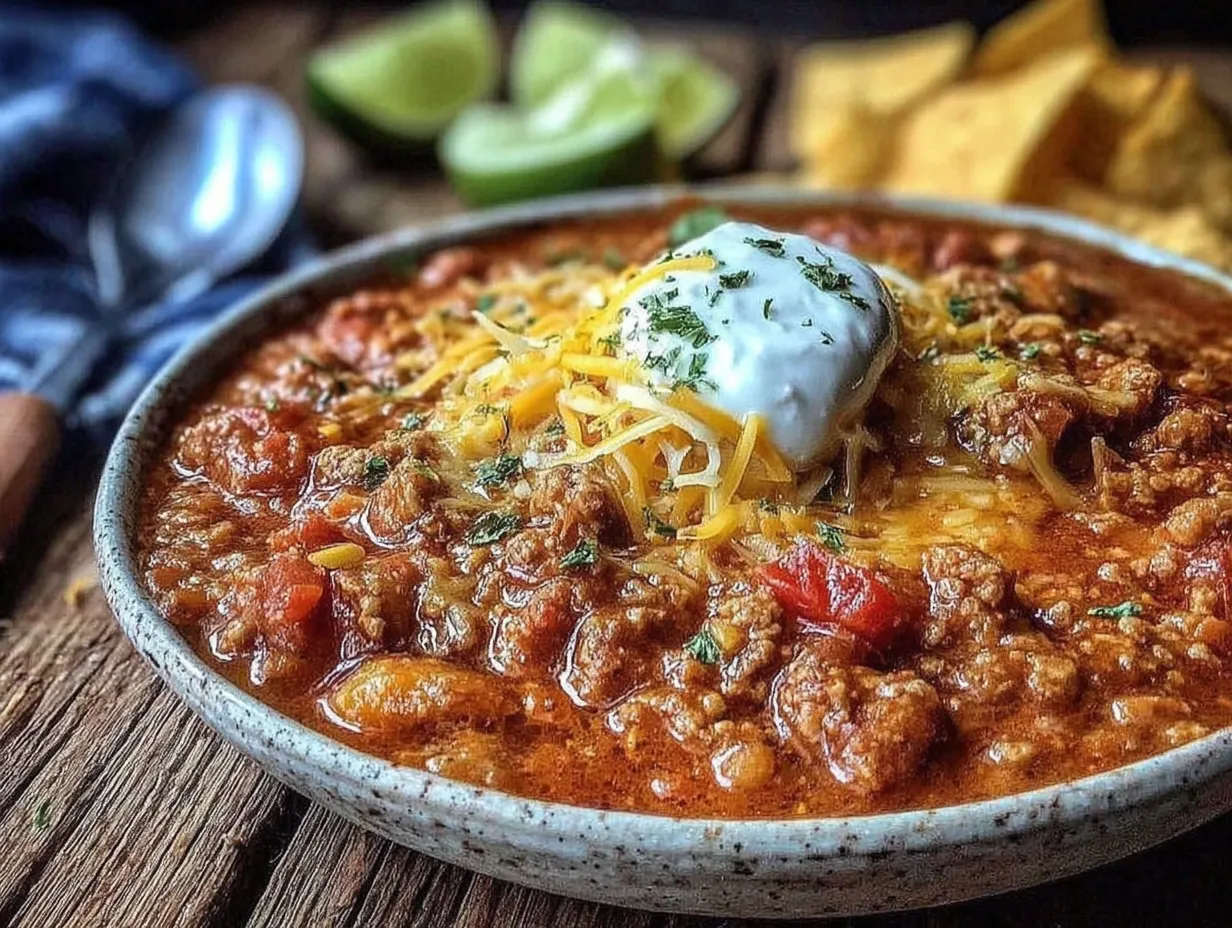
Visual Cues: The chili is ready when it’s thick enough to coat the back of a spoon but still has a slight sheen of liquid. The beans should be tender but not falling apart. The meat should be tender and evenly distributed. If you see pools of orange fat on the surface, you can skim it off with a spoon.
Cooking Tips & Techniques
I’ve made this chili at least a dozen times, and I’ve made every mistake you can imagine. Here’s what I’ve learned so you don’t have to repeat my errors.
Don’t rush the browning. This is the single most important step. If you crowd the pan or stir too often, the turkey steams instead of searing. You want deep brown crust on the meat. That crust is pure umami. I once made this chili in a rush and just broke up the turkey without letting it brown. The result was edible but boring. Take the extra 5 minutes — it matters.
Toast your spices. Adding dry spices to hot fat and stirring for a minute transforms them. The heat releases their essential oils and makes them more aromatic and complex. I learned this trick from watching my grandmother cook. She never measured anything, but she always let her spices “wake up” in the pan before adding liquid.
Layer your salt. Don’t add all the salt at once. Season the turkey lightly, season the vegetables lightly, then adjust at the end. Different brands of broth and canned tomatoes have varying sodium levels. Tasting and adjusting at the end prevents an overly salty pot of chili that you can’t fix.
Make it ahead. This chili is actually better the next day. The flavors continue to develop and meld overnight in the fridge. I often make this on Saturday for Sunday game day. Just reheat it gently on the stove, adding a splash of broth if it’s too thick. The texture actually improves — the beans absorb more flavor and the spices settle into a more harmonious blend.
Use the freezer trick. If you’re making a double batch, freeze half in a zip-top bag laid flat. It takes up less space and thaws faster. Just squeeze out all the air before sealing. Frozen chili keeps for up to 3 months. I always keep a bag in the freezer for emergency game days or lazy weeknights.
Watch the acidity. Sometimes canned tomatoes can make chili taste overly acidic. If yours tastes sharp, stir in ½ teaspoon of sugar or a splash of balsamic vinegar. The sugar balances the acid, and the vinegar adds complexity. Don’t skip tasting before serving — every can of tomatoes is different.
Variations & Adaptations
One of the best things about chili is how flexible it is. Here are some ways I’ve adapted this recipe depending on who I’m cooking for:
Spicy Version: Add 2 diced chipotle peppers in adobo sauce along with the tomatoes. This gives a smoky, deep heat that lingers beautifully. I also like to add a splash of the adobo sauce for extra richness. If you really want to turn up the heat, stir in a minced habanero with the vegetables — but wear gloves and don’t touch your eyes.
White Turkey Chili: Swap the crushed tomatoes for an extra cup of broth, use white beans (cannellini or great northern), and add a can of diced green chiles. Replace the chili powder with extra cumin and oregano. Top with shredded Monterey Jack and fresh cilantro. It’s a completely different dish but just as comforting.
Low-Carb/Keto Version: Skip the beans entirely and double the ground turkey to 2 pounds. Add an extra bell pepper and a diced zucchini for bulk. The chili will be thicker and meatier, with fewer carbs. I’ve served this to keto friends who said it was the best chili they’d had in years.
Smoky Chipotle Version: Add 2-3 chipotle peppers in adobo, minced, and ½ teaspoon of liquid smoke. This creates an almost barbecue-like depth that’s incredible with sharp cheddar and crunchy tortilla chips. It’s my personal favorite variation for fall game days.
Vegetarian Adaptation: Replace the turkey with 2 more cans of beans (try chickpeas for texture) or 12 ounces of crumbled firm tofu browned in oil. Use vegetable broth instead of chicken broth. The spice blend works beautifully with vegetables. I’ve also used frozen meatless crumbles in a pinch — just add them with the beans so they don’t overcook.
Slow Cooker Method: Brown the turkey and bloom the spices on the stove as directed. Transfer everything to a slow cooker. Cook on low for 6-8 hours or high for 3-4 hours. Add the beans in the last 30 minutes to prevent them from turning to mush. This is perfect for setting up before the game starts.
Serving & Storage Suggestions
This chili is incredibly versatile when it comes to serving. Here’s how I like to set it up for game day:
Serving Temperature: Serve piping hot straight from the pot or keep it warm in a slow cooker set to “warm” for the duration of the game. If using a slow cooker, stir occasionally to prevent the bottom from scorching. The chili will thicken as it sits, so keep a little extra broth on hand to thin it out if needed.
Topping Bar: Set up a DIY chili bar with bowls of shredded cheddar, sour cream, diced avocado, fresh cilantro, pickled jalapeños, sliced green onions, and crushed tortilla chips. Let everyone build their own bowl. It’s interactive and fun, and guests love customizing their portions. For a healthier twist, offer plain Greek yogurt instead of sour cream — most people can’t tell the difference.
What to Serve With It: Cornbread is the classic pairing, and I love it with a side of honey butter. A simple green salad with a tangy vinaigrette cuts through the richness. For game day, I also like to serve it with crispy garlic parmesan chicken thighs on the side for guests who want extra protein. And if you’re feeding kids, the chili pairs perfectly with easy thermos mac and cheese — a little spoonful of chili on top of mac is a game changer.
Storage: Let the chili cool completely before storing. Transfer to an airtight container and refrigerate for up to 5 days. The flavor actually improves after day one. I like to portion it into individual containers for easy lunches throughout the week. For a quick meal prep idea, I’ll pair a bowl of this chili with easy turkey and cheese pinwheel roll-ups for a satisfying lunch combo.
Freezing: Chili freezes beautifully. Portion into freezer-safe containers or zip-top bags. Leave about an inch of headspace for expansion. Freeze for up to 3 months. Thaw overnight in the refrigerator. Reheat gently on the stove or in the microwave, adding a splash of broth if needed.
Reheating: The best way to reheat chili is in a pot on the stove over medium-low heat, stirring occasionally. Add a tablespoon of water or broth per cup of chili to restore the original consistency. In the microwave, heat in 30-second bursts, stirring between each, until steaming. Don’t rush it — gentle reheating prevents the meat from becoming tough.
Flavor Development: This chili is one of those rare dishes that genuinely tastes better the next day. The spices mellow and meld, the beans absorb the surrounding flavors, and the whole thing becomes more cohesive. I often make it a day ahead specifically for this reason.
Nutritional Information & Benefits
Here’s the approximate nutritional breakdown per serving (about 1.5 cups, without toppings):
- Calories: 385
- Protein: 35g
- Fat: 12g
- Carbohydrates: 35g
- Fiber: 12g
- Sugar: 8g
- Sodium: 680mg (varies based on broth and added salt)
Health Benefits: Lean ground turkey is an excellent source of high-quality protein and is lower in saturated fat than beef. The beans provide a double dose of fiber and plant-based protein, which helps keep you full and supports digestive health. Red bell peppers are loaded with vitamin C — more than an orange per cup. The chili powder and cumin contain antioxidants and anti-inflammatory compounds. And that little bit of cocoa powder? It’s rich in flavonoids that support heart health.
Dietary Considerations: This recipe is naturally gluten-free (check your Worcestershire sauce). It’s dairy-free if you skip the cheese and sour cream toppings. It’s high in fiber and protein, making it a great option for anyone watching their blood sugar or trying to stay full longer. The lean protein and vegetable content make it a smart choice for post-workout recovery or a filling dinner that won’t derail your nutrition goals.
Allergen Note: This recipe contains no common allergens in the base itself, but toppings like cheese and sour cream contain dairy. The Worcestershire sauce sometimes contains anchovies, so if you have a fish allergy, look for a vegan version.
Frequently Asked Questions
Can I make this turkey chili in a slow cooker?
Absolutely. Brown the turkey and bloom the spices on the stove first — this step is non-negotiable for flavor. Then transfer everything to the slow cooker. Cook on low for 6-8 hours or high for 3-4 hours. Add the beans during the last 30 minutes so they don’t turn to mush.
How can I make this chili thicker?
If your chili is too thin, simmer it uncovered for an extra 10-15 minutes to let some liquid evaporate. You can also mash a few of the beans against the side of the pot with a spoon — they’ll release starches that naturally thicken the chili. Another trick is to stir in a tablespoon of cornmeal or masa harina mixed with an equal amount of cold water.
Can I use ground beef instead of turkey?
Yes, absolutely. Use 85/15 or 90/10 ground beef for the best results. The cooking method stays the same, though you’ll want to drain off excess fat after browning the beef. The spice blend works beautifully with beef too. This is a great option if you’re cooking for people who prefer beef but want a lighter meal.
How do I prevent the chili from being bland?
Bland chili is almost always a result of under-seasoning or skipping the browning steps. Make sure you’re using fresh spices (older than 6 months lose potency), properly browning the turkey, blooming the spices in hot oil, and seasoning with salt at the end. Don’t be shy with the salt — it’s what makes all the other flavors pop. Taste and adjust before serving.
Can I double this recipe for a crowd?
Yes, and I do it all the time. Double everything and use a larger pot (8-10 quarts). You may need to brown the turkey in two batches to avoid overcrowding. The cooking time stays roughly the same since you’re simmering, not baking. Leftovers freeze beautifully, so don’t worry if you have extra.
Conclusion
This healthy turkey chili has become my go-to for every game day gathering, and I honestly think it’s because it doesn’t try to be something it’s not. It’s not pretending to be the greasy, heavy chili from your favorite dive bar. It’s something better — a bowl of food that actually makes you feel good while you’re eating it, without sacrificing any of the comfort or satisfaction you crave on game day.
I love this recipe because it’s forgiving. You can tweak the heat, swap the beans, add extra vegetables, or change the toppings based on what you have in the fridge. It’s the kind of dish that rewards experimentation but also delivers consistently when you follow it exactly. And every time I bring it to a party, someone asks for the recipe. That never gets old.
So give it a try. Make it for the big game, make it for a cozy Sunday dinner, or make it just because you want a pot of something warm and delicious on the stove. Customize it however you like — add more spice, load it with toppings, or keep it simple. And when you do, come back and tell me how it turned out. Drop a comment below, share your favorite topping combo, or tag me in your chili photos. I genuinely love hearing about your versions.
Here’s to good food, good company, and a fourth quarter worth staying awake for.
Pin This Recipe!

Healthy Turkey Chili: Easy Game Day Recipe

A deeply savory, slightly smoky, protein-packed turkey chili that’s perfect for game day. Made with lean ground turkey, beans, and a rich spice blend, this crowd-pleasing chili is ready in about 45 minutes and tastes even better the next day.
- Prep Time: 15 minutes
- Cook Time: 30 minutes
- Total Time: 45 minutes
- Yield: 6 servings 1x
- Category: Main Course
- Cuisine: American
Ingredients
- 1.5 pounds lean ground turkey (93/7)
- 1 large yellow onion, diced
- 4 large garlic cloves, minced
- 1 medium red bell pepper, diced
- 1 small jalapeño, seeded and minced
- 3 tablespoons chili powder
- 2 teaspoons ground cumin
- 1 tablespoon smoked paprika
- 1 teaspoon dried oregano
- 1 teaspoon unsweetened cocoa powder
- Salt and black pepper to taste
- 1 can (28 ounces) fire-roasted crushed tomatoes
- 2 tablespoons tomato paste
- 1 cup low-sodium chicken or turkey broth
- 1 can (15 ounces) kidney beans, drained and rinsed
- 1 can (15 ounces) black beans, drained and rinsed
- 1 tablespoon Worcestershire sauce
- 1 bay leaf
- 1 tablespoon olive oil
- For toppings: shredded sharp cheddar cheese, sour cream or plain Greek yogurt, fresh cilantro, diced avocado, pickled jalapeños, crushed tortilla chips, lime wedges
Instructions
- Prep your ingredients first. Dice the onion, bell pepper, and jalapeño. Mince the garlic. Drain and rinse both cans of beans. Measure out all your spices into a small bowl.
- Heat your pot over medium-high heat. Add 1 tablespoon of olive oil. Let it shimmer for about 30 seconds. Add the ground turkey in an even layer. Let it cook undisturbed for 4-5 minutes until the bottom is deeply browned. Break it up with your spoon and continue cooking for another 3-4 minutes until no pink remains.
- Remove the turkey to a bowl with a slotted spoon. Leave about 1 tablespoon of rendered fat in the pot. Add the diced onion, bell pepper, and jalapeño. Cook over medium heat for 6-7 minutes, stirring occasionally, until the onions are translucent and the peppers have softened.
- Add the minced garlic and cook for 30 seconds until fragrant. Then add your entire spice blend — chili powder, cumin, smoked paprika, oregano, cocoa powder, and a pinch of salt. Stir constantly for about 1 minute to bloom the spices.
- Add the tomato paste and stir it into the vegetables for about 1 minute. Then pour in the crushed tomatoes, chicken broth, and Worcestershire sauce. Stir well, scraping up all the browned bits from the bottom of the pot.
- Return the cooked turkey to the pot along with any accumulated juices. Add the drained kidney beans and black beans. Drop in the bay leaf. Stir everything together. Bring the chili to a gentle boil, then reduce the heat to low. Cover with the lid slightly ajar and let it simmer for 25-30 minutes, stirring occasionally.
- After 25 minutes, remove the lid and check the consistency. If it’s too thick, add a splash more broth. If it’s too thin, let it simmer uncovered for another 10 minutes. Remove the bay leaf. Taste and adjust seasonings — you’ll likely need more salt (start with ½ teaspoon) and maybe a pinch more cumin or chili powder.
- Let the chili rest off the heat for 10 minutes before serving. Serve hot with all your favorite toppings.
Notes
Don’t rush the browning of the turkey — it’s the most important step for flavor. Toast your spices in hot oil to release their essential oils. Layer your salt throughout cooking and adjust at the end. This chili is actually better the next day as flavors meld. For a thicker chili, simmer uncovered or mash some beans against the pot. For a spicier version, add chipotle peppers in adobo. To freeze, portion into zip-top bags laid flat and keep for up to 3 months.
Nutrition
- Serving Size: 1.5 cups
- Calories: 385
- Sugar: 8
- Sodium: 680
- Fat: 12
- Saturated Fat: 3
- Carbohydrates: 35
- Fiber: 12
- Protein: 35
Keywords: healthy turkey chili, game day chili, easy chili recipe, lean ground turkey chili, crowd-pleasing chili, gluten-free chili, high protein chili


