Third batch in four days and I finally figured out the salt-to-sweet ratio. The first tray was too salty—like, licking-a-pretzel-stick-level salty. The second was so sweet it could’ve passed for dessert. But this one? This one hits that weirdly specific spot where your brain goes, wait, is this healthy or not? (Spoiler: it’s not, but it feels like it should be.)
I wasn’t even trying to make a game day snack. I was just standing in my kitchen at 10 p.m., staring at a bag of pretzels and a jar of peanut butter, and my hands started moving before my brain caught up. No oven. No mixer. No patience for a three-step process that involves parchment paper and a rolling pin. Just me, a bowl, and a stubborn refusal to turn on the oven in September when it’s still 85 degrees outside.
These bars are the kind of thing you make when you want to impress people but also want to stay in your sweatpants. They’re salty, they’re sweet, they’re crunchy, and they’re creamy—all at the same time. And honestly? They’re the best thing I’ve made all month. Not because they’re complicated, but because they’re exactly what you want to eat when the game is on and you don’t want to miss a single play.
Let’s just say these bars earned a permanent spot in my snack rotation. No oven required.
Why You’ll Love This Recipe
I’ve tested this recipe five times in two weeks—yes, five times—and I can tell you with absolute certainty that these bars are foolproof. Here’s why they work:
- No baking required: Zero oven time. None. You don’t even have to turn it on. This is the kind of recipe you make when it’s hot outside or when you just don’t feel like dealing with preheating.
- Simple pantry ingredients: You probably already have peanut butter, pretzels, butter, and powdered sugar in your kitchen. If you don’t, a quick trip to the store will set you up for less than $10.
- Perfect for game day: These bars are sturdy enough to pack in a cooler, easy to slice into squares, and they don’t get soggy. They’re basically the MVP of snack spreads.
- Crowd-pleaser: I brought a tray to a friend’s house for a football game and they were gone before halftime. One guy asked for the recipe before he even finished his first square.
- Unbelievably addictive: The combination of crunchy pretzels, creamy peanut butter, and a chocolatey top layer is dangerous. I’m not kidding—you will eat three before you realize what happened.
What makes these bars different from every other no-bake recipe out there? It’s the texture. Most no-bake bars are either too soft or too crumbly. These hold their shape perfectly because of the pretzel layer—it gives them structure without making them hard to bite into. Plus, I use a trick with the chocolate topping that keeps it from getting too thick or too thin. It’s the Goldilocks of chocolate layers.
These bars aren’t just good—they’re the kind of snack that makes you close your eyes after the first bite. It’s comfort food, but without the stress of baking. Perfect for impressing guests without breaking a sweat.
What Ingredients You Will Need
This recipe uses simple, straightforward ingredients that work together to create something way better than the sum of their parts. Here’s what you’ll need:
- Pretzels: 3 cups of mini pretzels or pretzel twists, crushed into coarse pieces. I prefer mini pretzels because they break evenly, but any kind works. (Pro tip: crush them in a zip-top bag with a rolling pin—way less mess.)
- Peanut butter: 1 cup of creamy peanut butter. I use Jif or Skippy for the best texture, but natural peanut butter works too—just stir it well first. Don’t use the kind with oil separation unless you want a greasy bar.
- Butter: 1/2 cup of unsalted butter, melted. Salted butter works too, but cut back on the added salt. I’ve made it both ways, and unsalted gives you more control.
- Powdered sugar: 1 1/2 cups of powdered sugar. This sweetens the peanut butter layer and helps it set. No substitutes here—granulated sugar won’t dissolve properly.
- Vanilla extract: 1 teaspoon of pure vanilla extract. Adds warmth and depth to the peanut butter layer. Imitation vanilla works in a pinch, but pure is better.
- Chocolate chips: 1 1/2 cups of semi-sweet chocolate chips. I recommend Ghirardelli or Guittard for the smoothest melt. Milk chocolate makes it too sweet, and dark chocolate can be bitter—semi-sweet is the sweet spot.
- Coconut oil: 1 tablespoon of coconut oil (or vegetable shortening). This helps the chocolate melt smoothly and gives it that glossy finish. Don’t skip it—it makes a difference.
- Flaky sea salt: Optional but highly recommended. A sprinkle on top before the chocolate sets takes these bars from good to great.
Ingredient selection tips: For the best texture, use pretzels that are fresh—stale pretzels will make the bars taste flat. And if you’re using natural peanut butter, make sure it’s well-stirred and not too oily. I’ve made this with almond butter too, and it works, but the flavor is milder.
Equipment Needed
You don’t need fancy equipment for this recipe. Here’s what you’ll need:
- 8×8-inch baking pan: This is the perfect size for these bars. If you only have a 9×9, the bars will be slightly thinner, but they’ll still work.
- Parchment paper: Line the pan with parchment paper, leaving an overhang on two sides. This makes lifting the bars out so much easier—trust me, I learned the hard way.
- Mixing bowls: One large bowl for the peanut butter mixture and one small microwave-safe bowl for the chocolate.
- Spatula or wooden spoon: For mixing the peanut butter layer. A silicone spatula works best because it doesn’t stick.
- Rolling pin or food processor: To crush the pretzels. A rolling pin and a zip-top bag work perfectly if you don’t have a food processor.
- Microwave or double boiler: For melting the chocolate. I use the microwave in 30-second bursts, stirring in between. A double boiler works too if you prefer stovetop.
- Refrigerator: You’ll need at least 2 hours of chill time. Overnight is even better.
Budget-friendly tip: If you don’t have an 8×8 pan, use a 9×9 and adjust the chill time slightly. And if you don’t have parchment paper, greasing the pan with butter works—just be careful when removing the bars.
Preparation Method
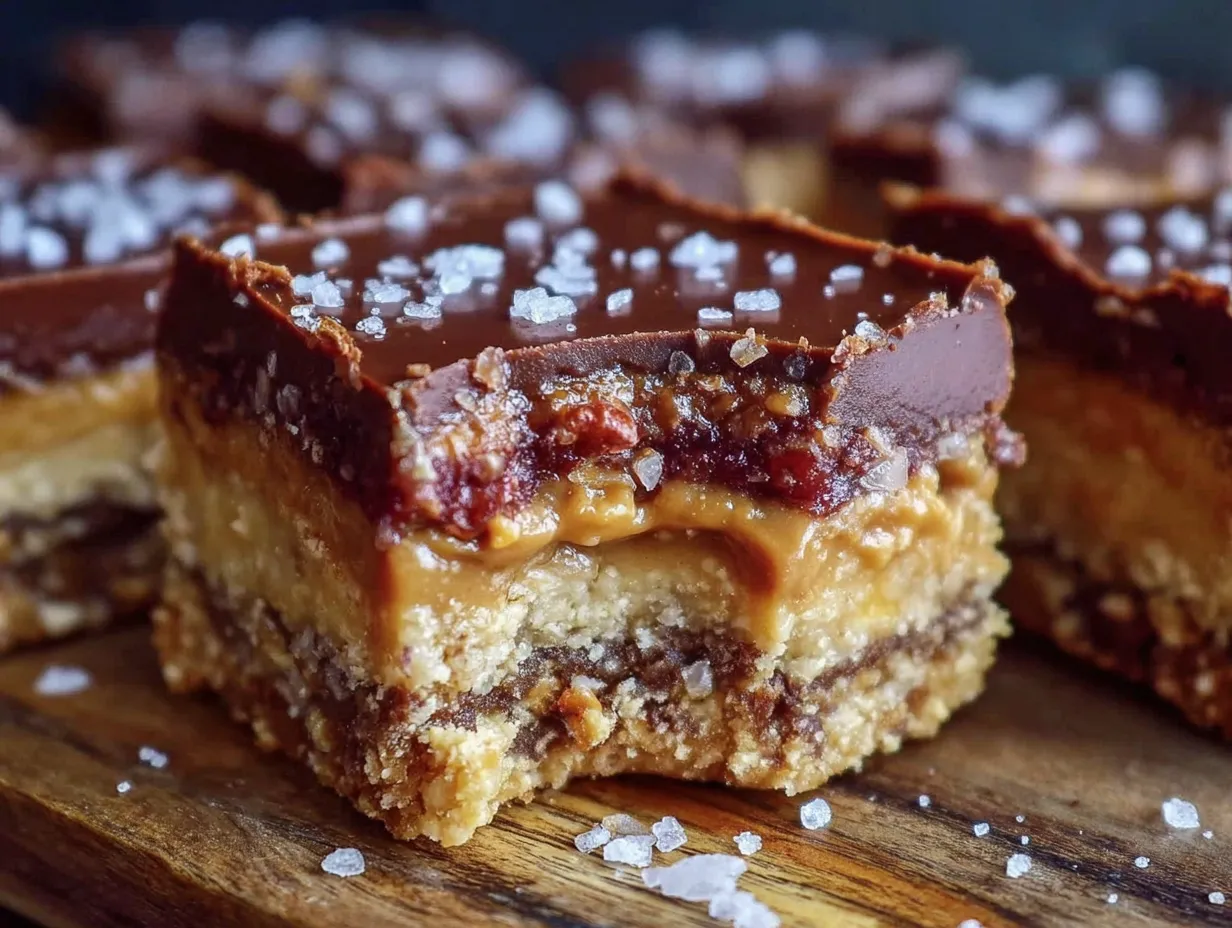
Let’s get into the actual process. I’ve broken it down step by step so you don’t miss anything.
Step 1: Prepare the pan. Line an 8×8-inch baking pan with parchment paper, leaving an overhang on two opposite sides. This will help you lift the bars out later. Set it aside.
Step 2: Crush the pretzels. Place 3 cups of mini pretzels in a zip-top bag and seal it. Use a rolling pin to crush them into coarse pieces—you want some small crumbs and some larger chunks for texture. Don’t pulverize them into dust; you want a mix of sizes. (I like to leave a few bigger pieces for crunch.) Transfer the crushed pretzels to a large mixing bowl.
Step 3: Make the peanut butter layer. In a medium microwave-safe bowl, combine 1 cup of creamy peanut butter and 1/2 cup of unsalted butter. Microwave in 30-second bursts, stirring between each, until completely melted and smooth. This usually takes about 1-2 minutes total. Stir in 1 1/2 cups of powdered sugar and 1 teaspoon of vanilla extract until the mixture is thick and smooth. It should look like a stiff cookie dough.
Step 4: Combine with pretzels. Pour the peanut butter mixture over the crushed pretzels and stir until every piece is coated. The mixture will be sticky—that’s normal. Press it evenly into the prepared pan. Use a spatula or your hands (lightly greased with butter) to press it down firmly. The firmer you press, the cleaner your bars will slice later.
Step 5: Make the chocolate topping. In a small microwave-safe bowl, combine 1 1/2 cups of semi-sweet chocolate chips and 1 tablespoon of coconut oil. Microwave in 30-second bursts, stirring after each, until completely melted and smooth. Be careful not to overheat—chocolate can seize up if it gets too hot. Pour the melted chocolate over the peanut butter layer and spread it evenly with a spatula.
Step 6: Add the finishing touch. If you’re using flaky sea salt, sprinkle a pinch over the chocolate while it’s still wet. This step is optional, but it really balances the sweetness. I’ve skipped it before and regretted it—the salt makes a difference.
Step 7: Chill. Place the pan in the refrigerator for at least 2 hours, or until the chocolate is fully set. For the cleanest slices, chill overnight. I know it’s hard to wait, but the bars are much easier to cut when they’re fully firm.
Step 8: Slice and serve. Lift the bars out of the pan using the parchment paper overhang. Place them on a cutting board and slice into 16 squares (or 9 if you want bigger bars). Wipe the knife clean between cuts for the neatest edges. Serve cold or at room temperature—both are delicious.
Cooking Tips & Techniques
Here are some things I learned the hard way so you don’t have to:
- Don’t over-crush the pretzels. I made this mistake on my first batch and ended up with a dense, almost dusty texture. You want a mix of crumbs and chunks for the best bite.
- Press the base firmly. If you don’t press the peanut butter-pretzel mixture down hard enough, the bars will fall apart when you cut them. Use your hands or the bottom of a measuring cup to really compact it.
- Use room-temperature ingredients. Cold peanut butter is harder to mix. Let it sit out for 10 minutes before starting, or microwave it for 10 seconds to soften it.
- Chocolate melting hack: If you don’t have coconut oil, use vegetable shortening or even a teaspoon of butter. The fat helps the chocolate melt smoothly and prevents it from seizing.
- Slice with a hot knife. Run your knife under hot water, dry it, and then slice. This gives you clean, sharp edges. Wipe the knife between cuts for the best results.
- Timing tip: Make these the night before your event. They need at least 2 hours to set, but overnight is better. Plus, it’s one less thing to do on game day.
I’ve had a few failures with this recipe—like the time I used natural peanut butter that wasn’t stirred well, and the bars turned out greasy. Or the time I forgot to press the base firmly and ended up with crumbly squares that looked more like granola than bars. But each mistake taught me something, and now this recipe is bulletproof.
Variations & Adaptations
This recipe is super flexible. Here are some ways to switch it up:
- Chocolate peanut butter swap: Use chocolate peanut butter instead of regular for a double-chocolate version. I tried this once and it was dangerously good.
- Gluten-free option: Use gluten-free pretzels. Most major brands make them, and they work perfectly in this recipe. The texture is identical.
- Add-ins: Toss in 1/2 cup of mini chocolate chips, crushed peanuts, or even shredded coconut into the peanut butter layer before pressing. I added crushed peanuts once and it gave the bars an extra crunch that was amazing.
- Different chocolate: Swap semi-sweet for milk chocolate if you prefer a sweeter bar. Or use white chocolate for a totally different flavor profile. Just note that white chocolate is sweeter, so you might want to skip the sea salt.
- Nut-free version: Use sunflower seed butter or WowButter instead of peanut butter. The texture will be slightly different, but the bars will still set. I’ve tested this with sunflower seed butter and it works—just expect a slightly earthier flavor.
- Keto-friendly adaptation: Use sugar-free peanut butter, powdered erythritol instead of powdered sugar, and sugar-free chocolate chips. The texture won’t be exactly the same, but it’s a decent low-carb option.
My personal favorite variation? Adding a layer of crushed potato chips on top of the pretzel base before adding the chocolate. It sounds weird, but the salty-crunchy combo is next-level. I did this for a Super Bowl party and people couldn’t stop talking about it.
Serving & Storage Suggestions
These bars are best served cold or at room temperature. I prefer them straight out of the fridge because the chocolate is snappy and the peanut butter layer is firm. But if you like a softer texture, let them sit out for 5-10 minutes before serving.
Presentation tip: Arrange the squares on a platter with a sprinkle of flaky sea salt and some extra pretzels on the side. It makes the bars look intentional and fancy, even though they took 15 minutes to make.
What to serve with them: These bars pair beautifully with a cold glass of milk, a hot cup of coffee, or even a scoop of vanilla ice cream for dessert. If you’re serving them for game day, put them next to a bowl of creamy crack dip and some fresh veggies for a balanced snack spread.
Storage instructions: Store the bars in an airtight container in the refrigerator for up to 1 week. They also freeze beautifully—wrap individual squares in plastic wrap, then place them in a freezer bag. They’ll keep for up to 3 months. To thaw, just let them sit at room temperature for 10-15 minutes.
Reheating tip: These are meant to be eaten cold, but if you want a softer texture, microwave a square for 10 seconds. The chocolate will get slightly melty, and the peanut butter layer will soften. It’s a totally different experience—but still delicious.
One thing I’ve noticed: the flavors actually get better after a day in the fridge. The pretzels soften slightly, and the peanut butter and chocolate meld together. So don’t be afraid to make these a day ahead.
Nutritional Information & Benefits
Here’s the nutritional breakdown for one bar (based on 16 servings):
- Calories: 285
- Fat: 18g
- Carbohydrates: 28g
- Protein: 6g
- Sugar: 16g
- Sodium: 210mg
Health benefits: Peanut butter is a good source of protein and healthy fats, which help keep you full and satisfied. Pretzels provide quick energy from carbohydrates—perfect for game day snacking. And dark chocolate (if you use semi-sweet) contains antioxidants and can help improve mood. So while these bars aren’t exactly health food, they’re not empty calories either.
Dietary considerations: This recipe is vegetarian. For a vegan version, use vegan butter and dairy-free chocolate chips. For a gluten-free version, use gluten-free pretzels. And for a lower-sugar version, use sugar-free peanut butter and sugar-free chocolate chips.
Allergen note: This recipe contains peanuts, wheat (pretzels), and dairy (butter, chocolate). If you’re serving a crowd, always label the ingredients clearly. I’ve learned this the hard way at parties.
Conclusion
These Easy No-Bake Peanut Butter Pretzel Game Day Bars are the kind of recipe you’ll come back to again and again. They’re quick, they’re simple, and they deliver on every level—salty, sweet, crunchy, creamy, and totally addictive. Whether you’re hosting a Super Bowl party, packing snacks for a road trip, or just want something sweet without turning on the oven, these bars have you covered.
I love how forgiving this recipe is. You can tweak it, swap ingredients, and it still works. That’s the beauty of no-bake recipes—they’re hard to mess up. And honestly? That’s exactly what I need on a busy weeknight or a lazy Sunday afternoon.
If you make these bars, I’d love to hear how they turned out. Leave a comment below and let me know if you tried any variations—I’m always looking for new ideas. And if you’re looking for more easy snack recipes, check out my no-bake peanut butter oat energy bars or these crispy cheesy quesadilla snack boxes for more game day inspiration.
Happy snacking, friends. And remember—no oven required!
Frequently Asked Questions
Can I use crunchy peanut butter instead of creamy?
Yes, you can. Crunchy peanut butter will add extra texture to the bars. Just keep in mind that the peanut pieces might make the base slightly less uniform. I’ve tried it both ways, and creamy gives a smoother, more cohesive bar, but crunchy works in a pinch.
How long do these bars need to chill?
At least 2 hours in the refrigerator. For the cleanest slices, chill overnight. If you’re in a hurry, you can pop them in the freezer for 45 minutes, but watch them closely—you don’t want the chocolate to get too hard.
Can I make these bars vegan?
Absolutely. Use vegan butter (like Earth Balance) and dairy-free chocolate chips. Most dark chocolate chips are naturally dairy-free, but always check the label. The rest of the ingredients—pretzels, peanut butter, powdered sugar—are already vegan.
Why are my bars crumbly?
This usually happens when the peanut butter layer isn’t pressed firmly enough into the pan. Make sure you really compact the base—use your hands or the bottom of a measuring cup. Also, check that your peanut butter isn’t too thin or oily. If it’s runny, the bars won’t hold together well.
Can I freeze these bars?
Yes, they freeze beautifully. Wrap individual squares in plastic wrap, then place them in a freezer bag. They’ll keep for up to 3 months. Thaw at room temperature for 10-15 minutes, or eat them straight from the freezer if you like a firmer texture.
Pin This Recipe!
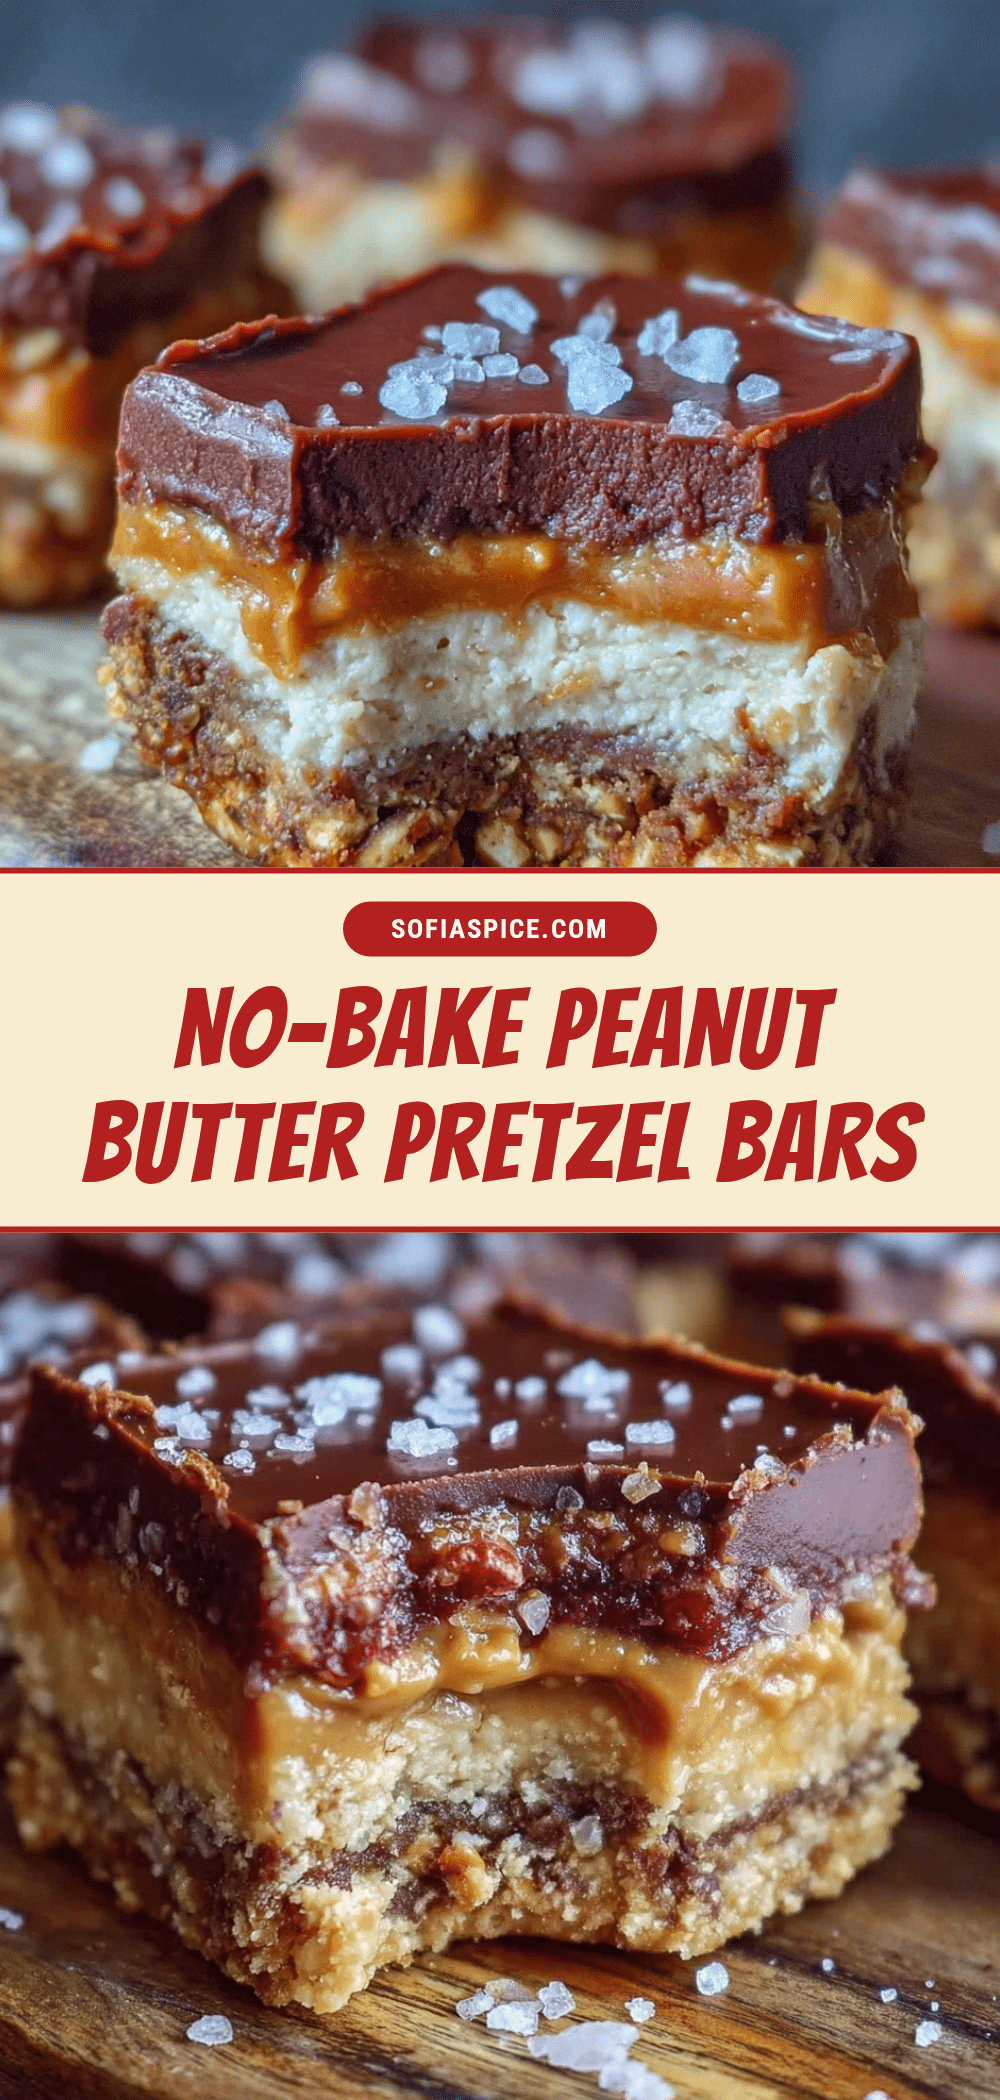
Easy No-Bake Peanut Butter Pretzel Bars: Best Game Day Snack
These no-bake peanut butter pretzel bars are the perfect game day snack—salty, sweet, crunchy, and creamy all at once. Made with simple pantry ingredients and no oven required, they’re foolproof and addictive.
- Prep Time: 15 minutes
- Cook Time: 0 minutes
- Total Time: 2 hours 15 minutes (includes chilling)
- Yield: 16 servings 1x
- Category: Snack
- Cuisine: American
Ingredients
- 3 cups mini pretzels or pretzel twists, crushed into coarse pieces
- 1 cup creamy peanut butter (e.g., Jif or Skippy)
- 1/2 cup unsalted butter, melted
- 1 1/2 cups powdered sugar
- 1 teaspoon pure vanilla extract
- 1 1/2 cups semi-sweet chocolate chips
- 1 tablespoon coconut oil (or vegetable shortening)
- Flaky sea salt (optional, for topping)
Instructions
- Line an 8×8-inch baking pan with parchment paper, leaving an overhang on two opposite sides. Set aside.
- Place 3 cups of mini pretzels in a zip-top bag and crush them into coarse pieces using a rolling pin. Transfer to a large mixing bowl.
- In a medium microwave-safe bowl, combine 1 cup creamy peanut butter and 1/2 cup unsalted butter. Microwave in 30-second bursts, stirring between each, until completely melted and smooth (about 1-2 minutes total). Stir in 1 1/2 cups powdered sugar and 1 teaspoon vanilla extract until thick and smooth.
- Pour the peanut butter mixture over the crushed pretzels and stir until every piece is coated. Press the mixture evenly into the prepared pan, using a spatula or greased hands to compact it firmly.
- In a small microwave-safe bowl, combine 1 1/2 cups semi-sweet chocolate chips and 1 tablespoon coconut oil. Microwave in 30-second bursts, stirring after each, until melted and smooth. Pour over the peanut butter layer and spread evenly.
- If using, sprinkle flaky sea salt over the wet chocolate.
- Refrigerate for at least 2 hours, or until the chocolate is fully set. For cleanest slices, chill overnight.
- Lift the bars out using the parchment overhang, place on a cutting board, and slice into 16 squares. Serve cold or at room temperature.
Notes
For the best texture, use fresh pretzels and well-stirred peanut butter. Press the base firmly to prevent crumbling. Chill overnight for cleanest slices. Store in an airtight container in the refrigerator for up to 1 week, or freeze for up to 3 months.
Nutrition
- Serving Size: 1 bar
- Calories: 285
- Sugar: 16
- Sodium: 210
- Fat: 18
- Saturated Fat: 8
- Carbohydrates: 28
- Fiber: 2
- Protein: 6
Keywords: no-bake, peanut butter, pretzel, bars, game day, snack, easy, chocolate


